I made this tutorial because there are some issues for pal users even Kazade could get it working 😀 His tutorial “Quote Kazade’s”
But for PAL, it gets even more complicated. Generally PAL modems are classed as Model B modems – they require a line voltage. However, I found that not many PAL users had had much luck getting connected, and when I tried, it didn’t work for me either, even with a line voltage inducer!
Here is a quick Tutorial to flash DreamPi on OSX
Things needed:
Get (DreamPi 1.7 Image) from the Kazade’s page: Or Download here!
Extract .7z using unarchiver or any extractor that can extract 7Z
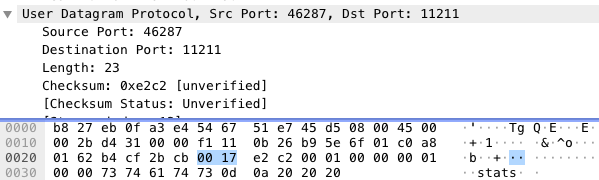
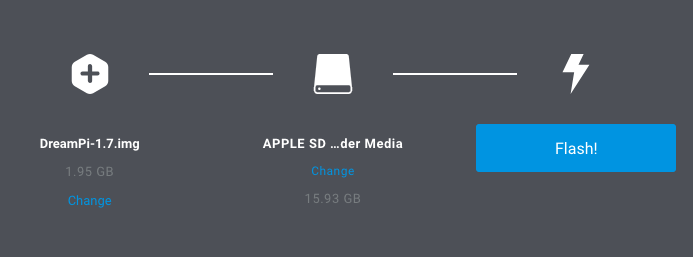
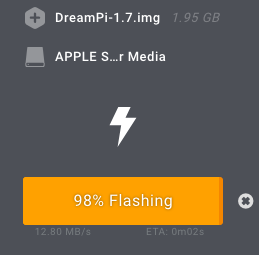
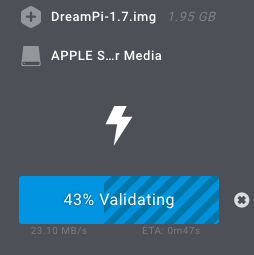
Open Etcher: Load DreamPi-1.7.img If you inserted your SD check if it selected and press flash!: Wait until Flashed and Validating are done!
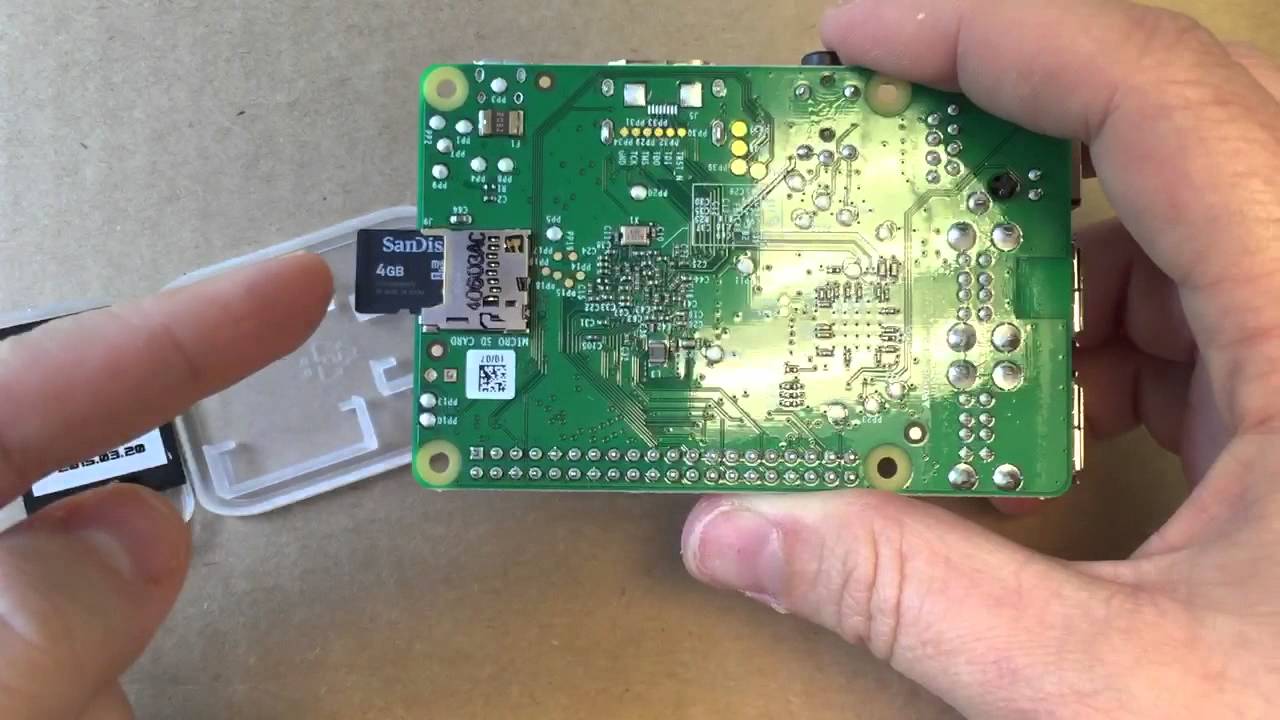
After write and check insert into Raspberry PI and give your PI power. (Don’t connect the modem!!)
DreamPi will start up on boot.
This is all you need todo if you want to boot in you Pi you can do it like this:
Not my picture
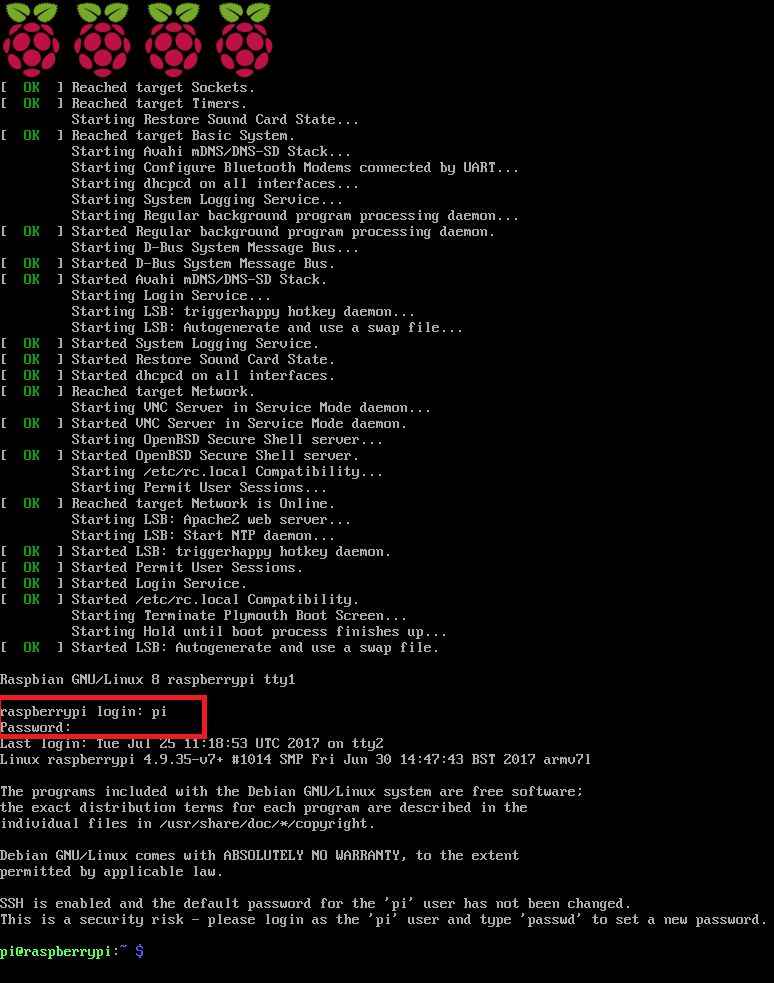
Once you booted your will be prompt a Login screen.
Not my picture
Login: pi
Password: raspberry
you can change the password: passwd
Extra info for Pal users:
I found that there is a strict boot sequence I need to follow.
If I do every thing in sequence it works every time.
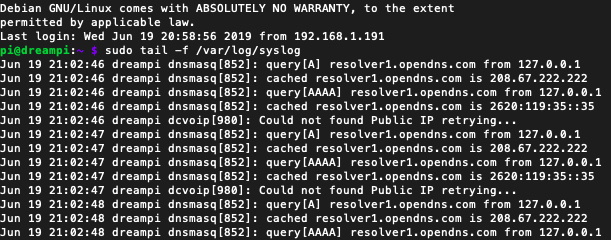
I recommend to login SSH or via HDMI composted what ever monitor the log after boot!
using this command:
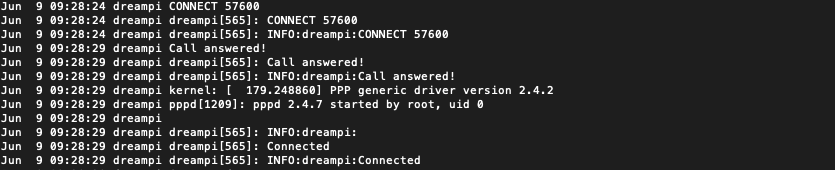
sudo tail -f /var/log/syslog
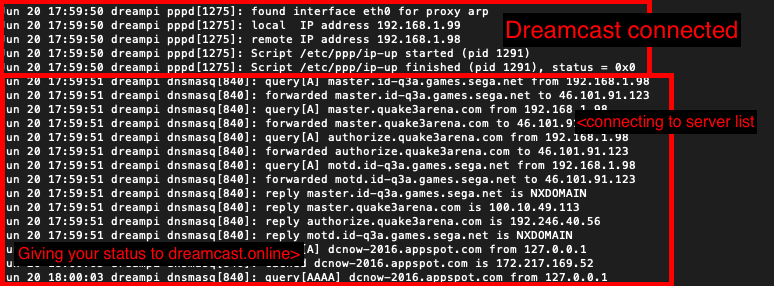
This is how you can follow the activity of your DreamPi: At this point the Pi is resolving domains. Good point to connect the modem: Reason for not connecting modem not at boot is because modem would not get found in DreamPI script.
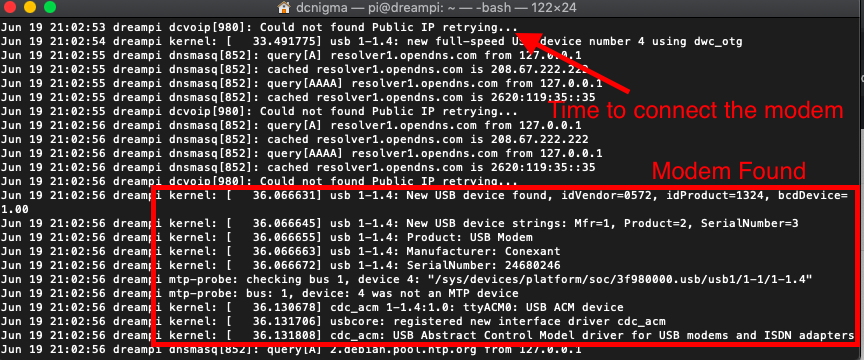
If you wait until boot it works every time.
Now you wait until you see that DreamPi is ready for a connect from your Dreamcast:
At this point Dreampi is starting up:
Here is it starting Up your modem. Keep on waiting….
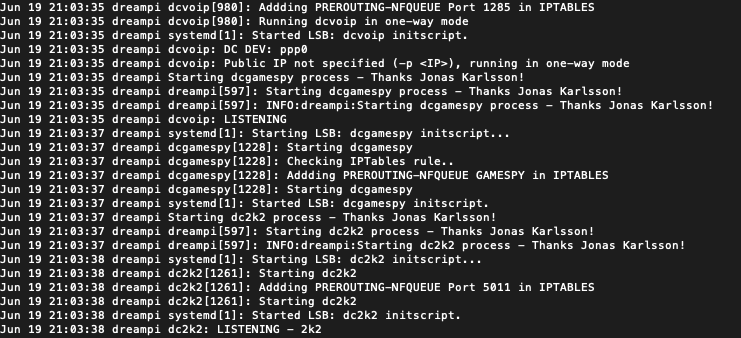
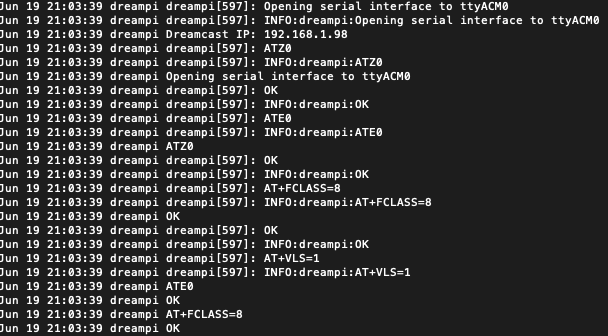
Here you can find your Dreamcast IP : default 192.168.x.98 if free (replace x with your mine 1)
And the OK gives you the signal to connect the Line Inducer for the extra 18V. Other wise you will get Line buzzy error
At this point your done on your Pi takes like 2 – 5 min I guess at the most.
After that I found out I could reconnect change games etc without any problems.
Leaving it connect for longer than a day I never got this to work. I have a feeling DreamPi crashes at one point.
Need to consult te logs for that….
OK lets continue with the tutorial.
Open the ports for your dreamcast so login to your router.
The easy way out is just open your Dreamcast ip 192.168.x.98 in your router using DMZ: Otherwise you need to port forward all ports needed for the different games
[spoiler title=’Portforwards’ style=’default’ collapse_link=’true’]Alien Front Online: UDP 7980 ChuChu Rocket!: UDP 9789 NBA/NFL/NCAA 2K Series: UDP 5502 | UDP 5503 | UDP 5656 | TCP 5011 | TCP 6666 The Next Tetris: Online Edition: TCP/UDP 3512 Ooga Booga: UDP 6001 PBA Tour Bowling 2001: TCP/UDP 2300-2400 | UDP 6500 | TCP/UDP 47624 | UDP 13139 Planet Ring: UDP 7648 | UDP 1285 | UDP 1028 Starlancer: TCP/UPD 2300-2400 | UDP 6500 | TCP/UDP 47624 World Series Baseball 2K2: UDP 37171 | UDP 13713 Worms World Party: TCP 17219 [/spoiler]
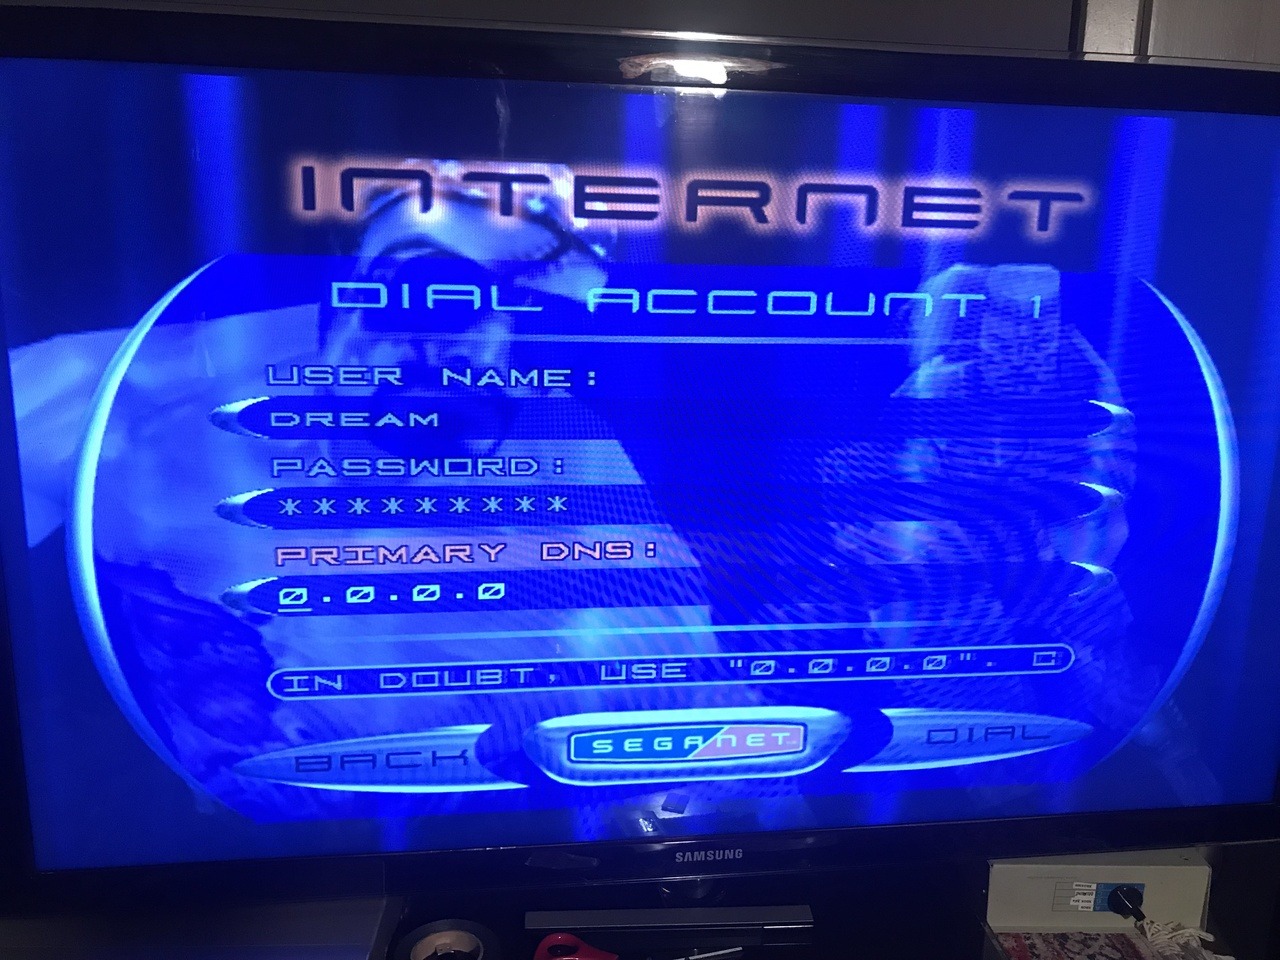
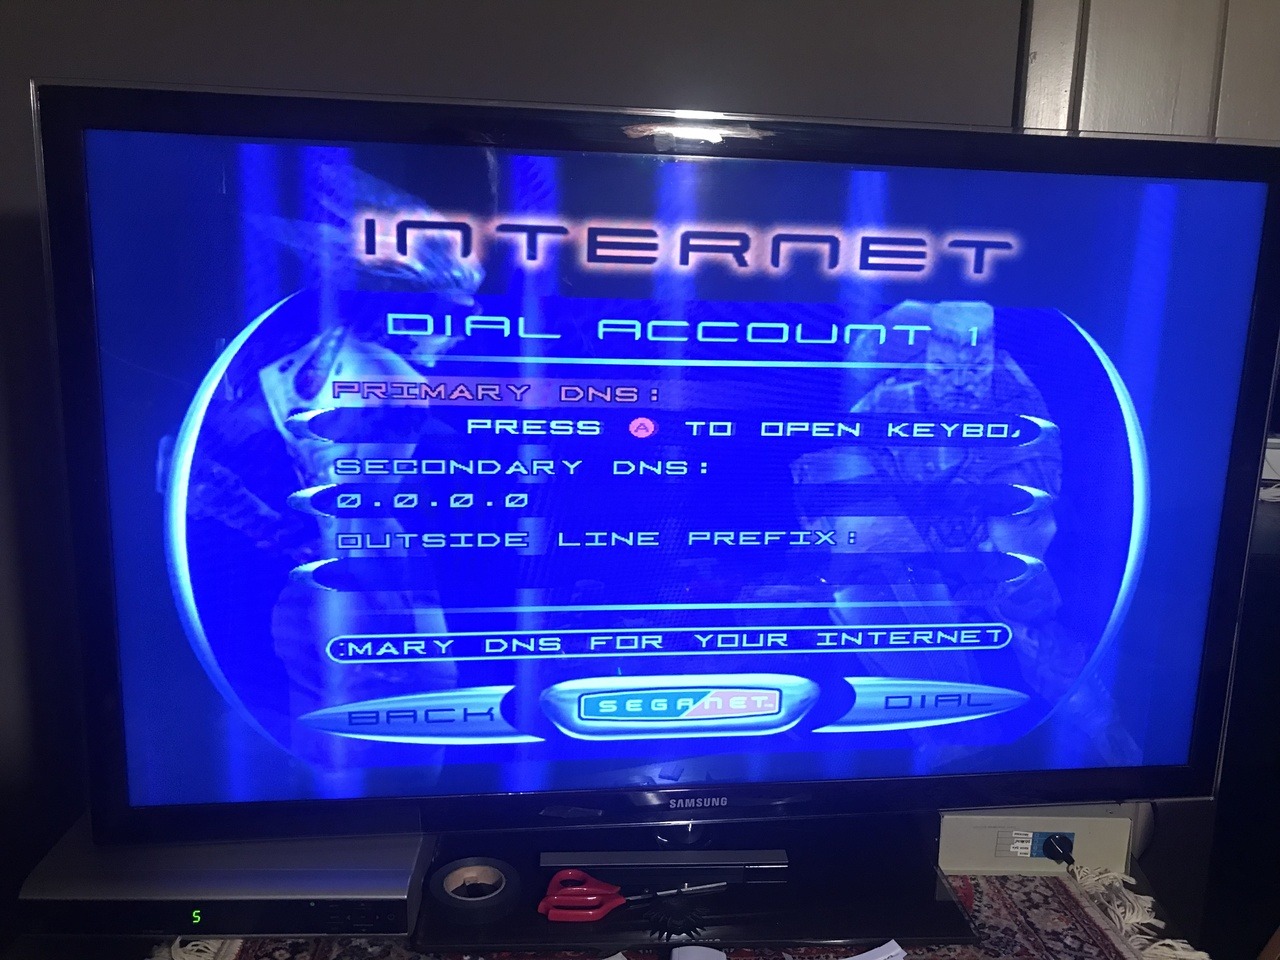
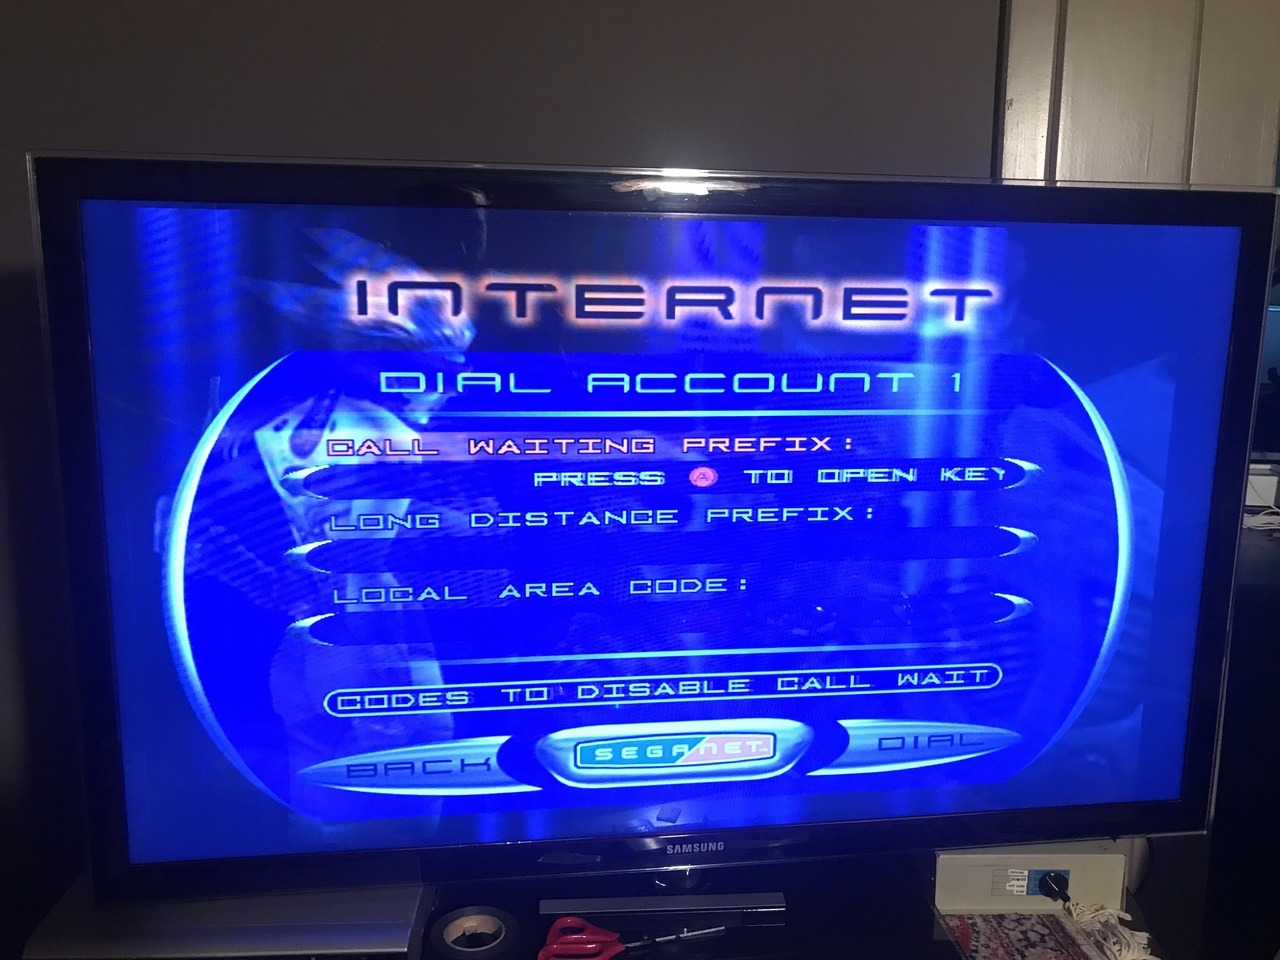
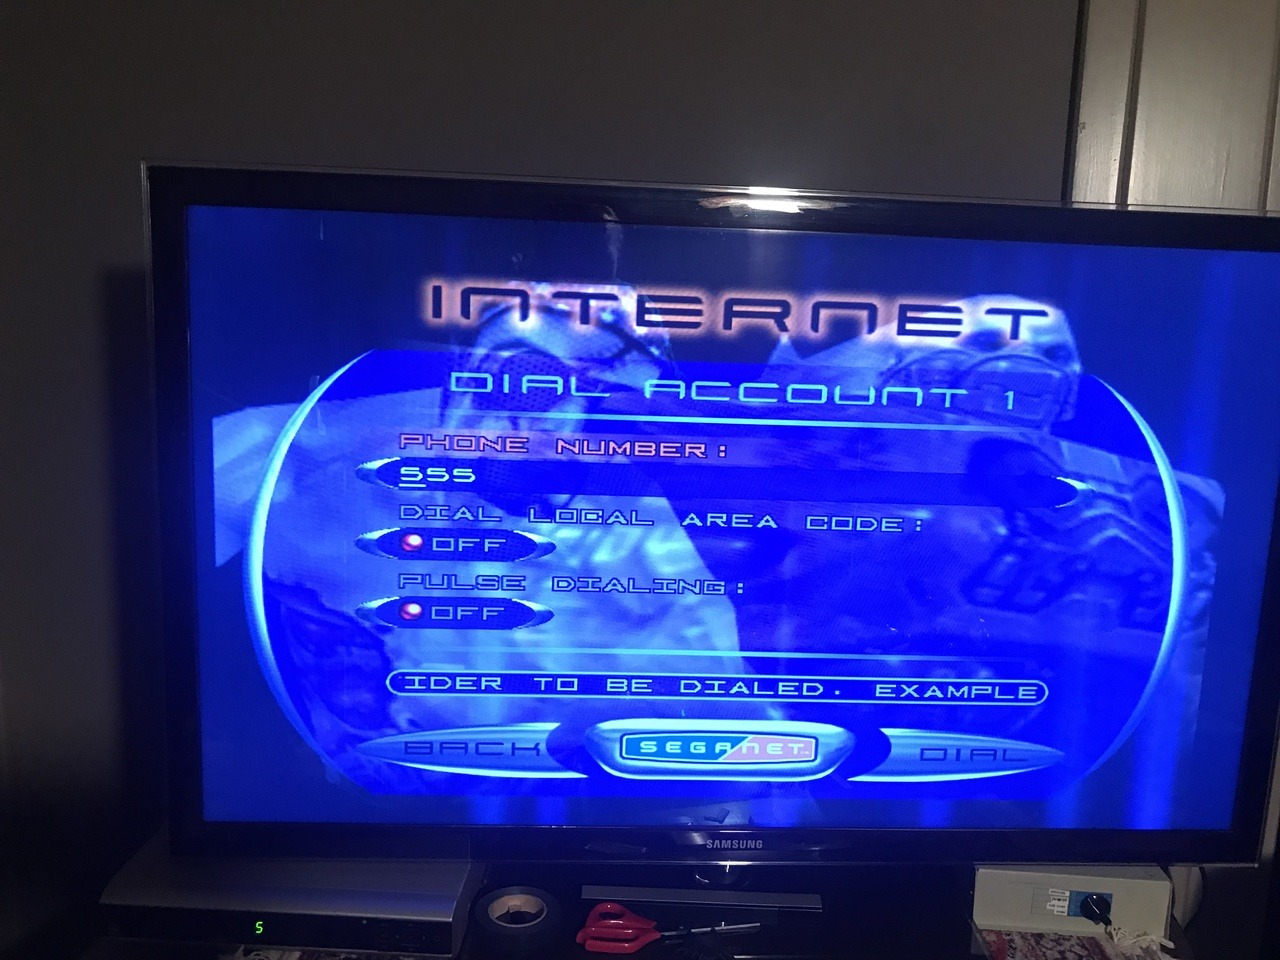
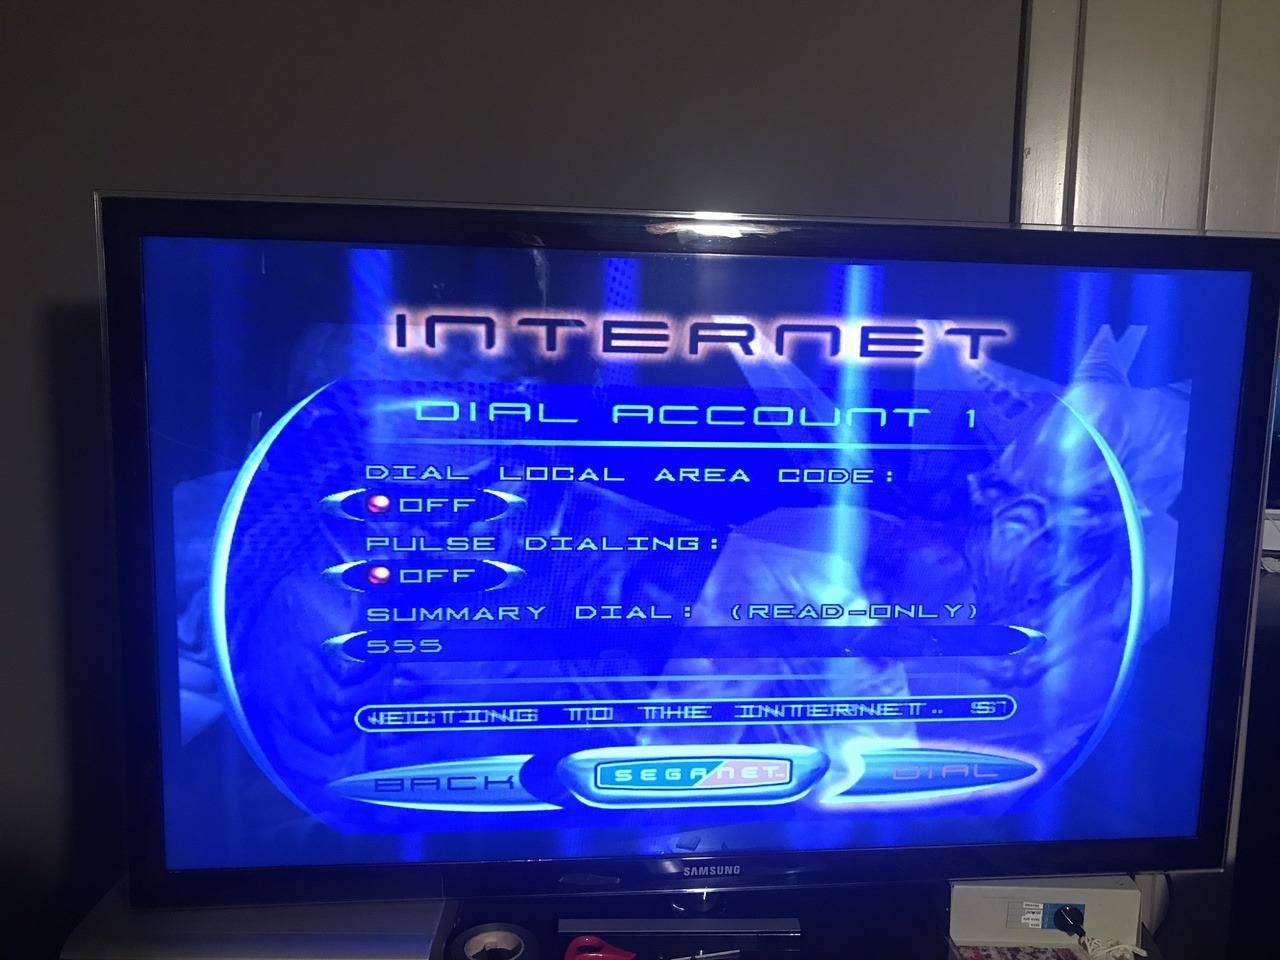
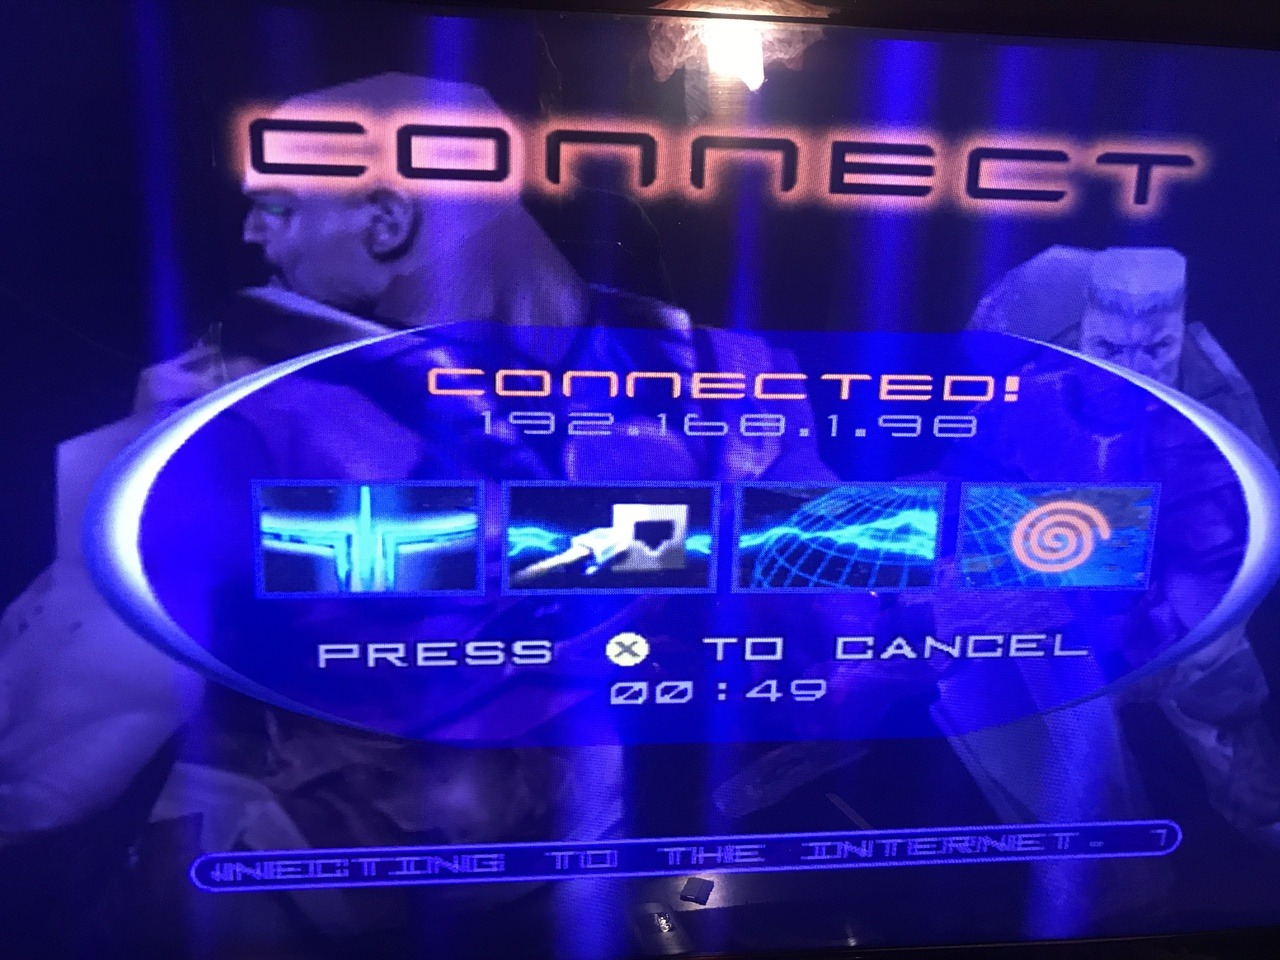
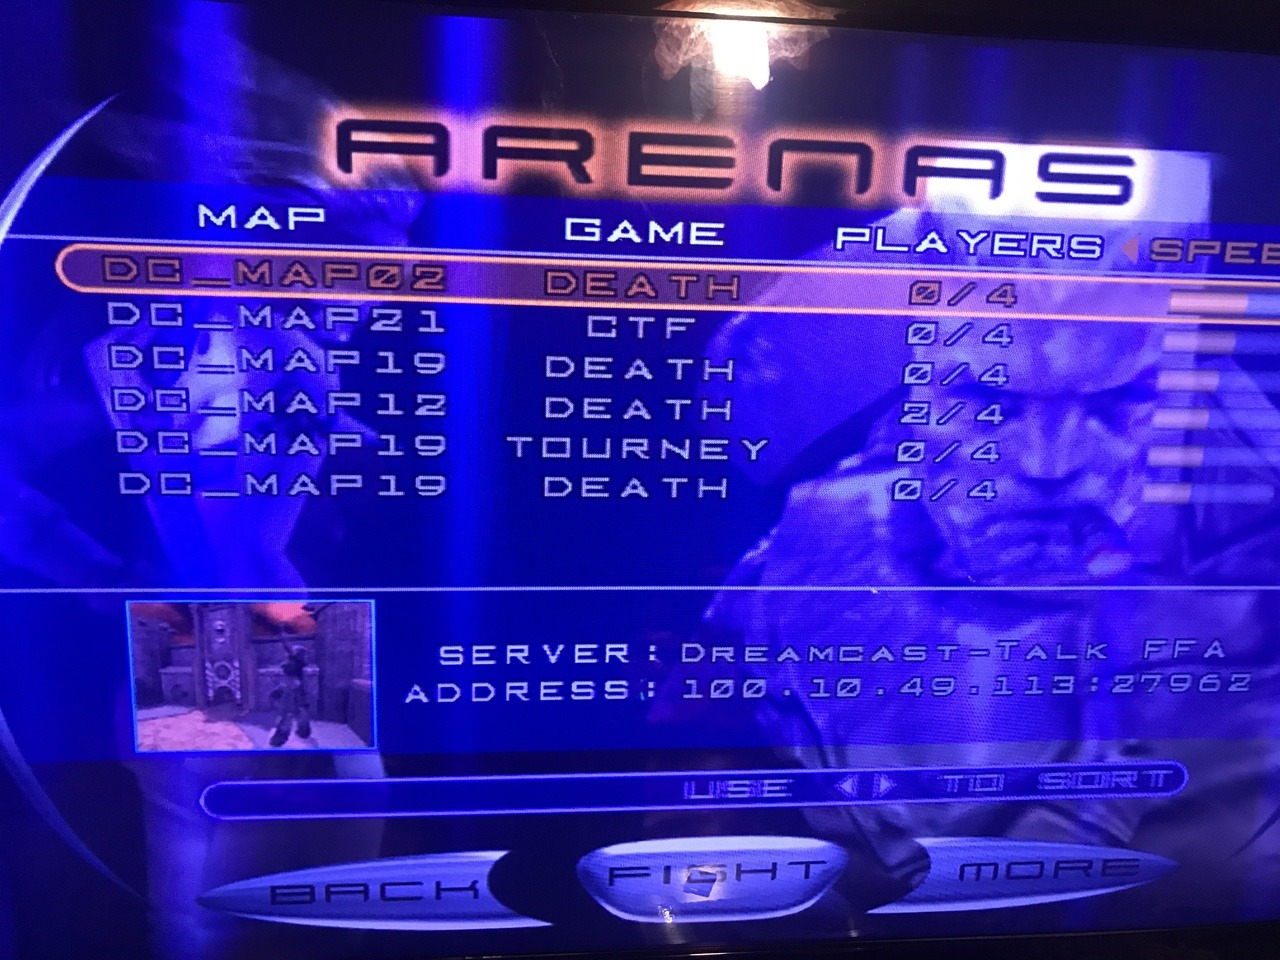
After this your done boot up your dreamcast and Quake 3 or Web browser to config your modem:
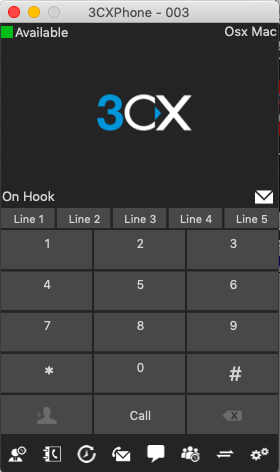
I used Quake this is my setup:
But..
The requirement to dial that specific number was removed pre version 1.0 and now it will answer any number that’s dialed. DreamPi doesn’t require a specific username or password either. But you need to fill it in so go crazy!
Just a log entry when i connect to Quake 3 servers.
Today I finished the install of Xlink Kai on Raspberry Pi.
There were a few things that made the install not that easy.
First of my user name was not ready did’t use the account that much so the email address was not correct.
Apparently it was linkt to my first email address that i own around 1998 till 2003 forgot that I got that 😀
After sorting that out with CrunchBite I could start on this project.
I installed it on my last available Raspberry a first gen. (Raspberry pi 1 B) 😀
So I Downloaded the newest and greatest version.
From the Xlink website.
Or ssh in to your Pi and use curl to download direct to the Pi
Then extract it: tar -zxvf kaiEngine-7.4.33-rev767.headless.ARM.tar.gz
x kaiEngine-7.4.33/
x kaiEngine-7.4.33/runforever.sh
x kaiEngine-7.4.33/kaiengine_arm
x kaiEngine-7.4.33/README
Then a sudo ./kaiengine_arm to test it:
Open a browser and load the ip of your pi + port (http://192.168.1.xxx:34522/)
Then check > Metrics
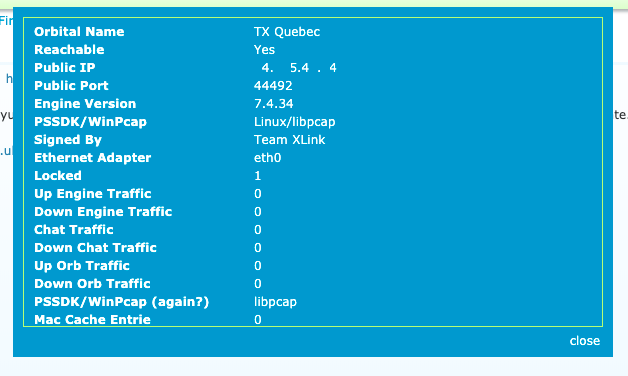
Ok, I lied. I have a beta version (7.4.34)
Remember de Public port (44492) you will need it later.
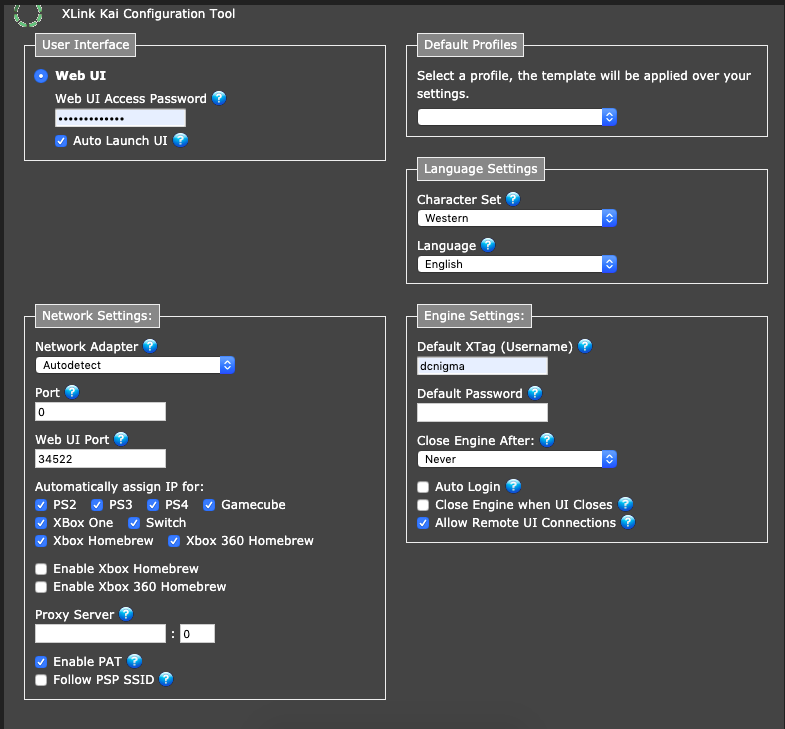
If everything is working like it should you can make it auto boot edit sudo nano /etc/rc.local
and added sudo screen -DmS kaiengine /home/pi/launchkai.sh above the exit line
After this your almost ready, because there needs to be some port forwarding (for me I did and have upnp on) :
When you join a room and nobody got a connection, this is mostly because the port that is need is not open.
the UI is on port 34522 but we don’t need this outside our house.
I did enabled Pat because I have 1 public ip and more xbox’s
Settings of Xlink Kai
but the public port in my case is 44492 (Remember Metrics) so after changing this in my router:
I get everybody connected and see also ping status. 😀
So after that, boot up Halo 2.
And after selecting System Link a got a lot of games to join:
No lets get my ass kick by some PRO halo players 😀
Outcome: Dcnigma 1 other player 20 😛 😛 Omg I need to practice < 🙂
Xlink Kai works perfect and is nice add-on for my xbox’s need to test other consoles later.
Also i found a little bug:
if your password is contains a = symbol this will break auto login.
When you save your password in the config it will cut your password.
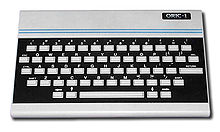
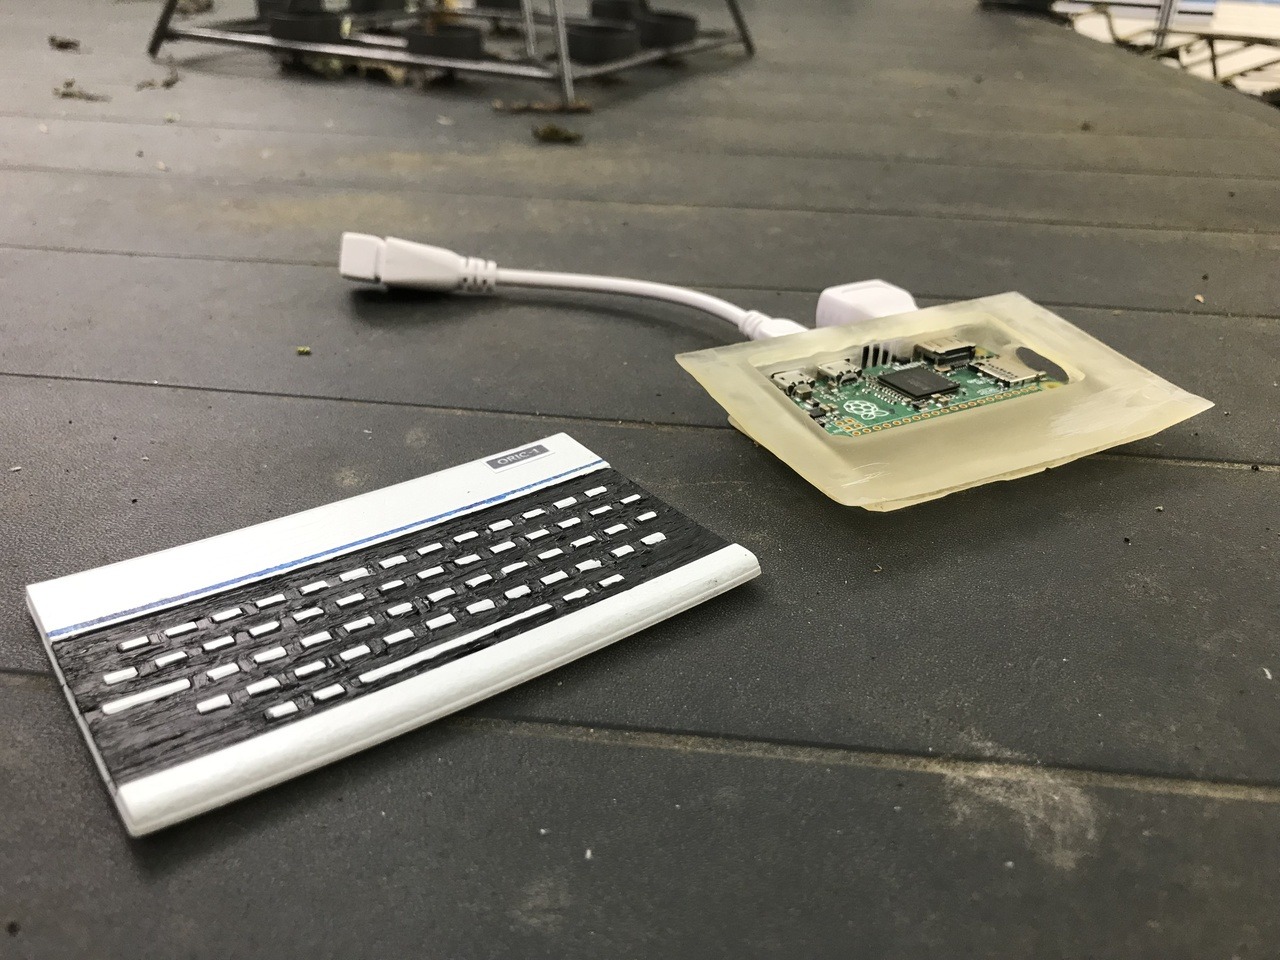
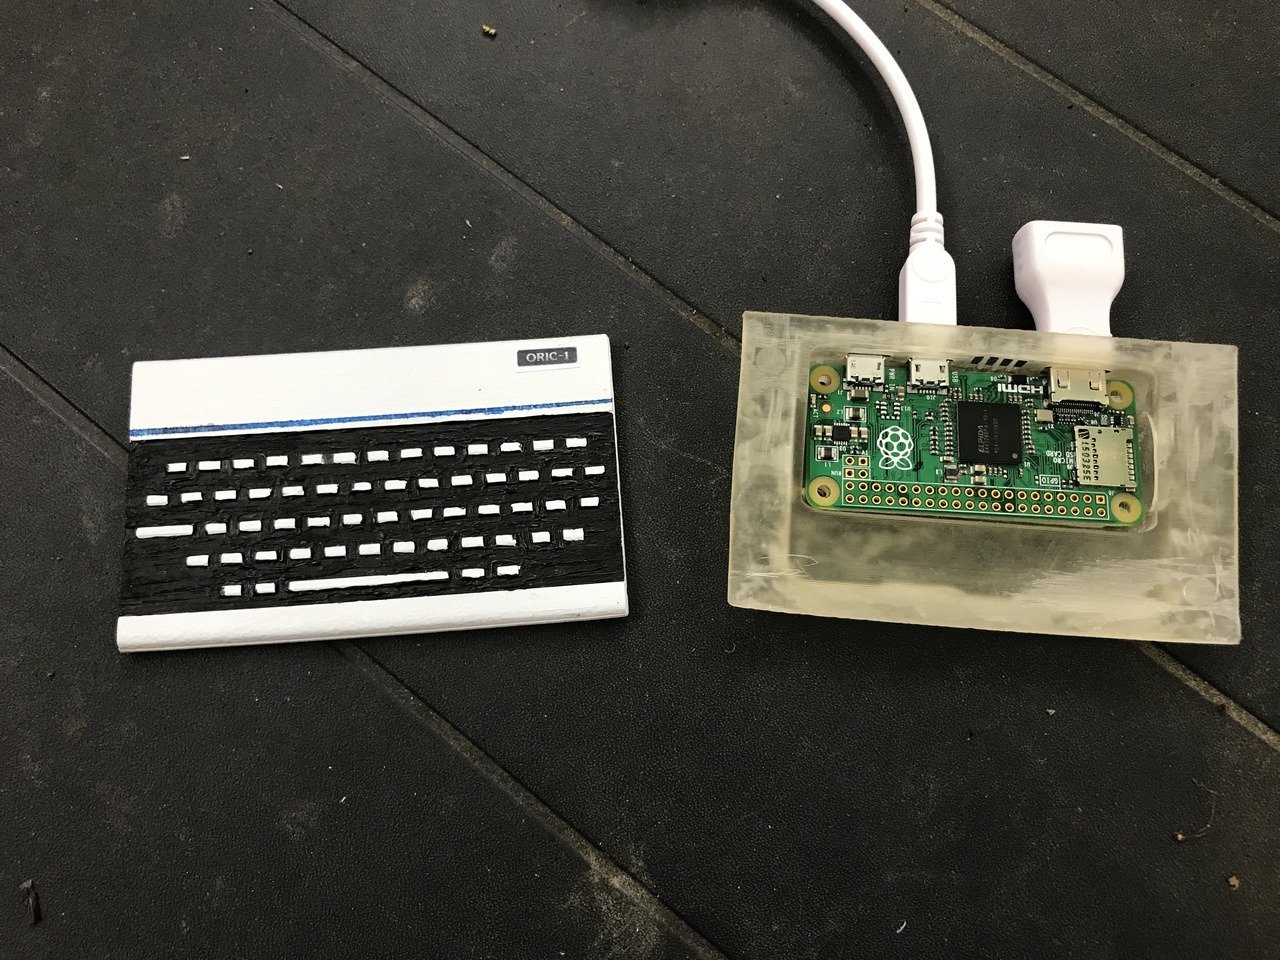
Meet the Oric Atmos 1 Today it was father’s day and I wanted to make something special for my dad.
Back in the 80’s my dad got the Oric II and he still got it (and operational).
So why not give him the Oric 1 mini 😀 the nes mini theme would go good with this in retropie.
It was also my first computer, so after some searching I found a Oric 1 model that I could use for this.
New weekend project that I made:
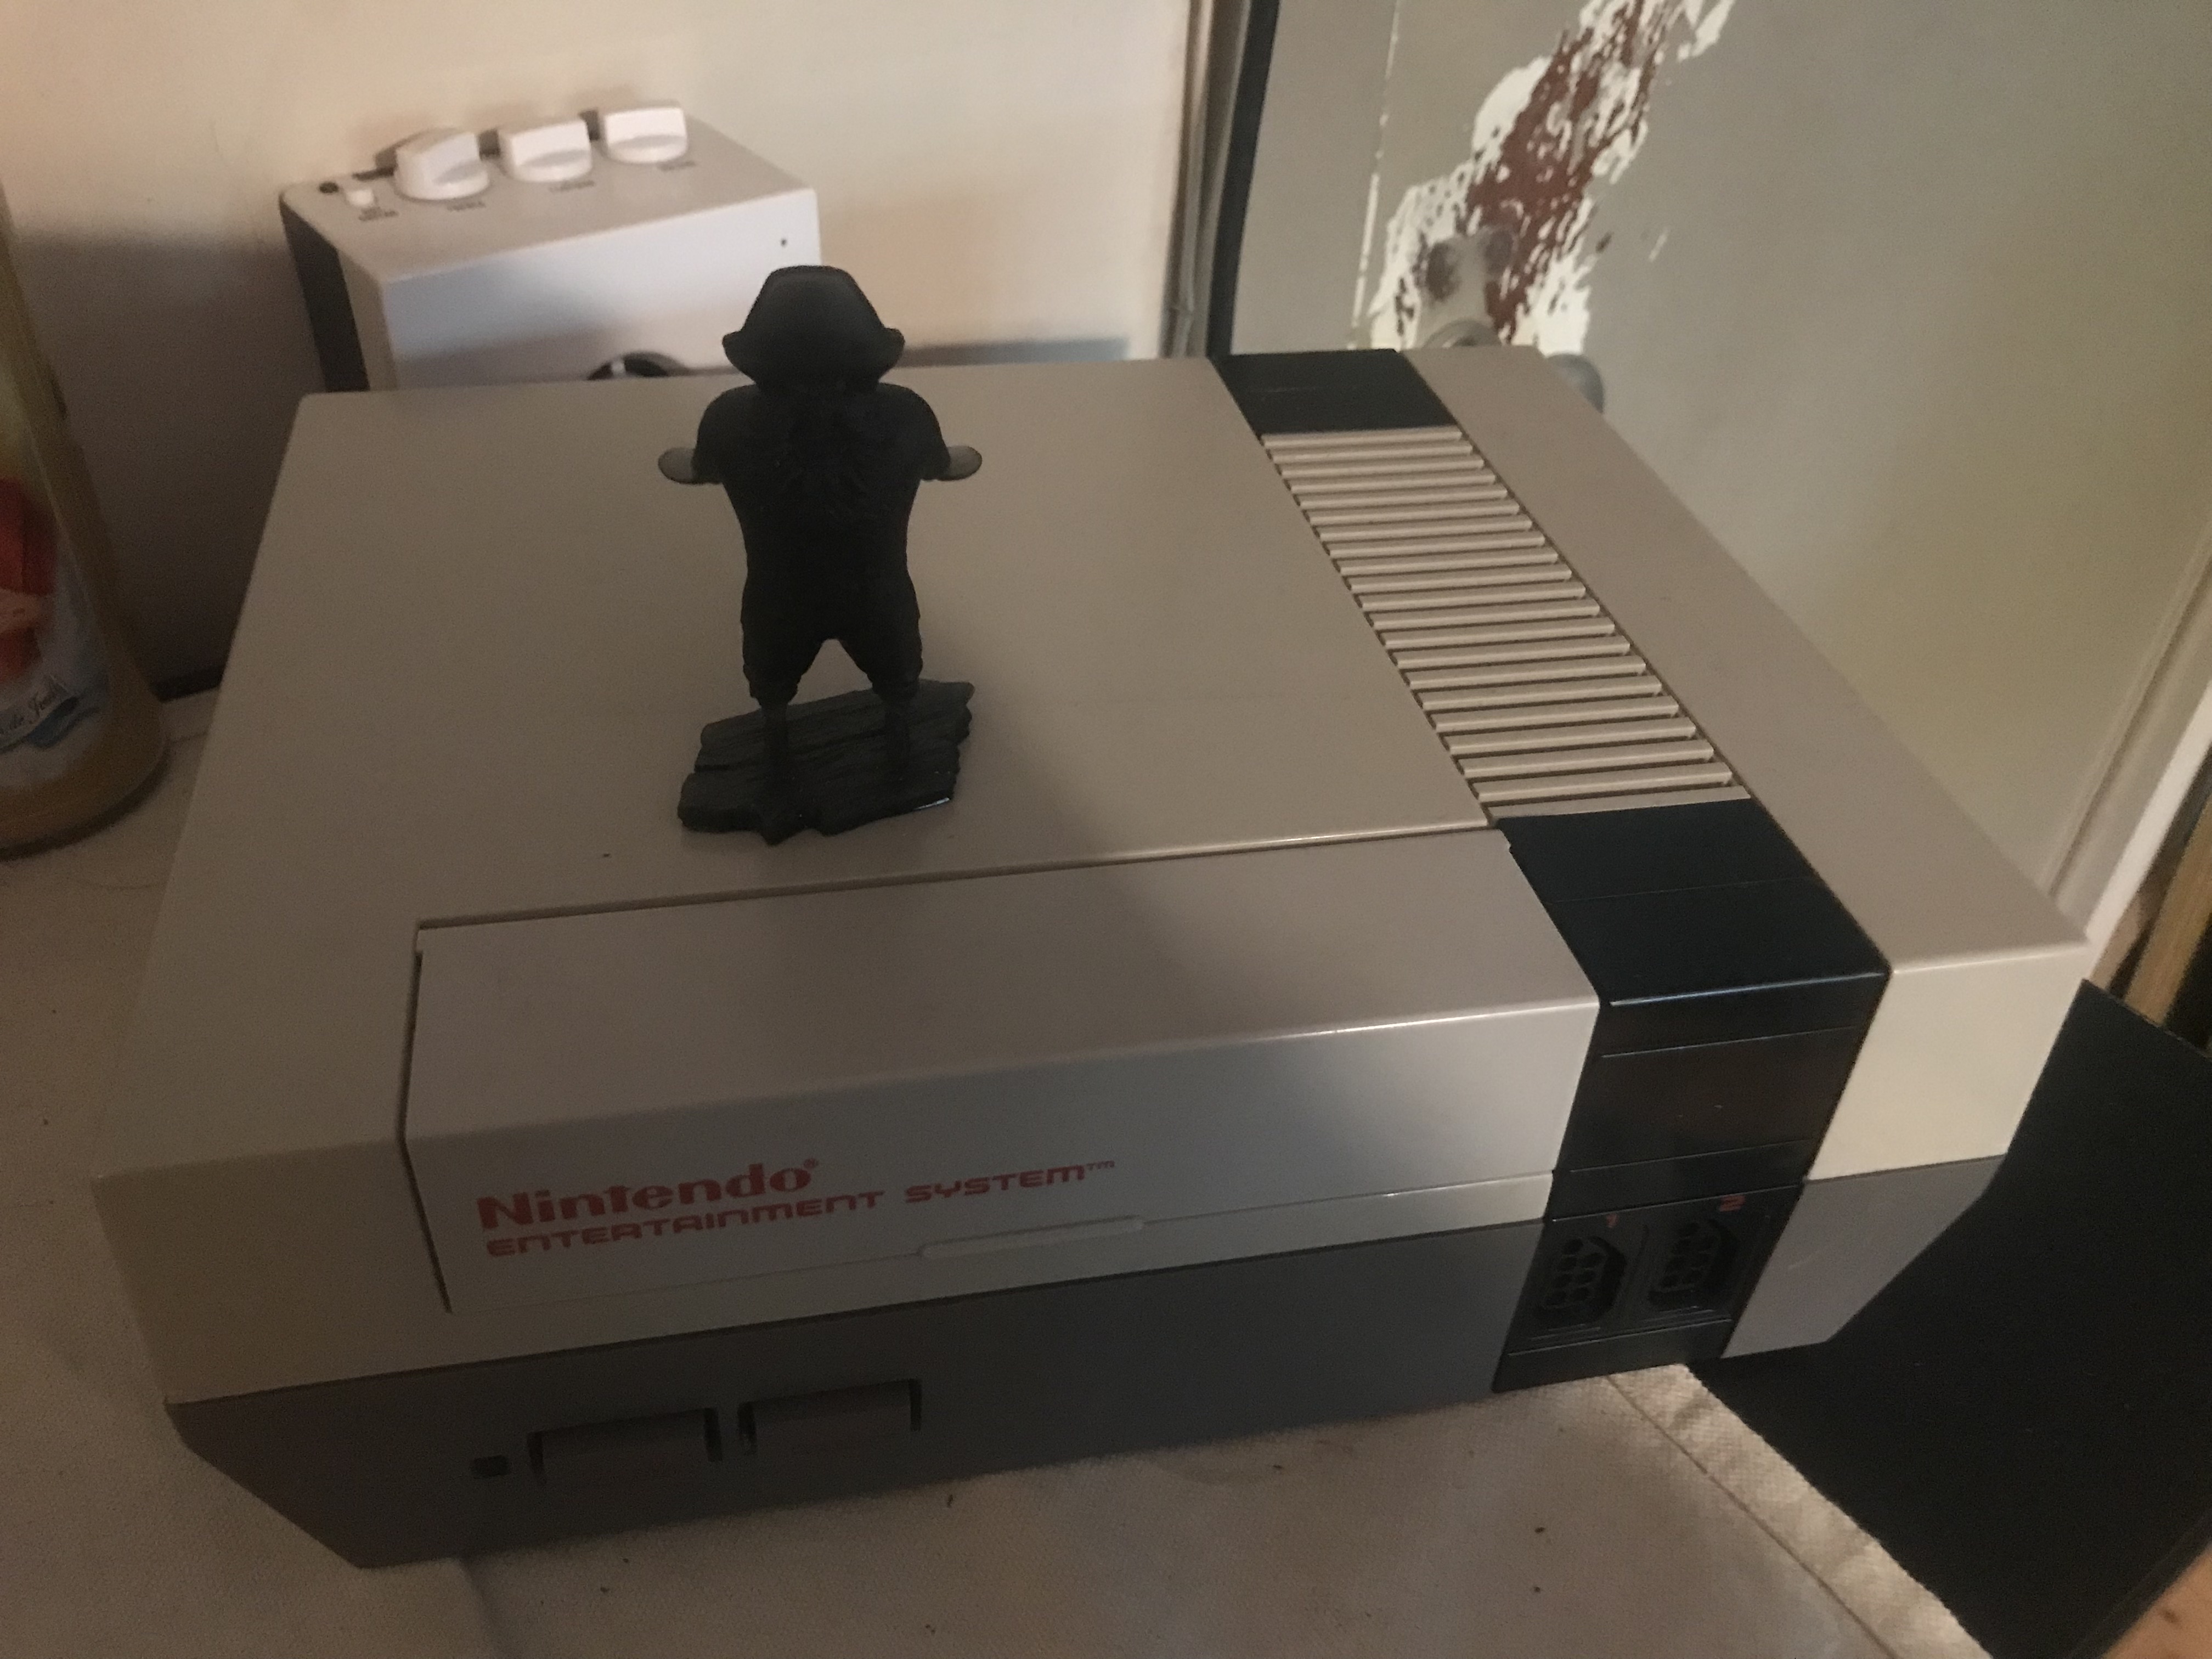
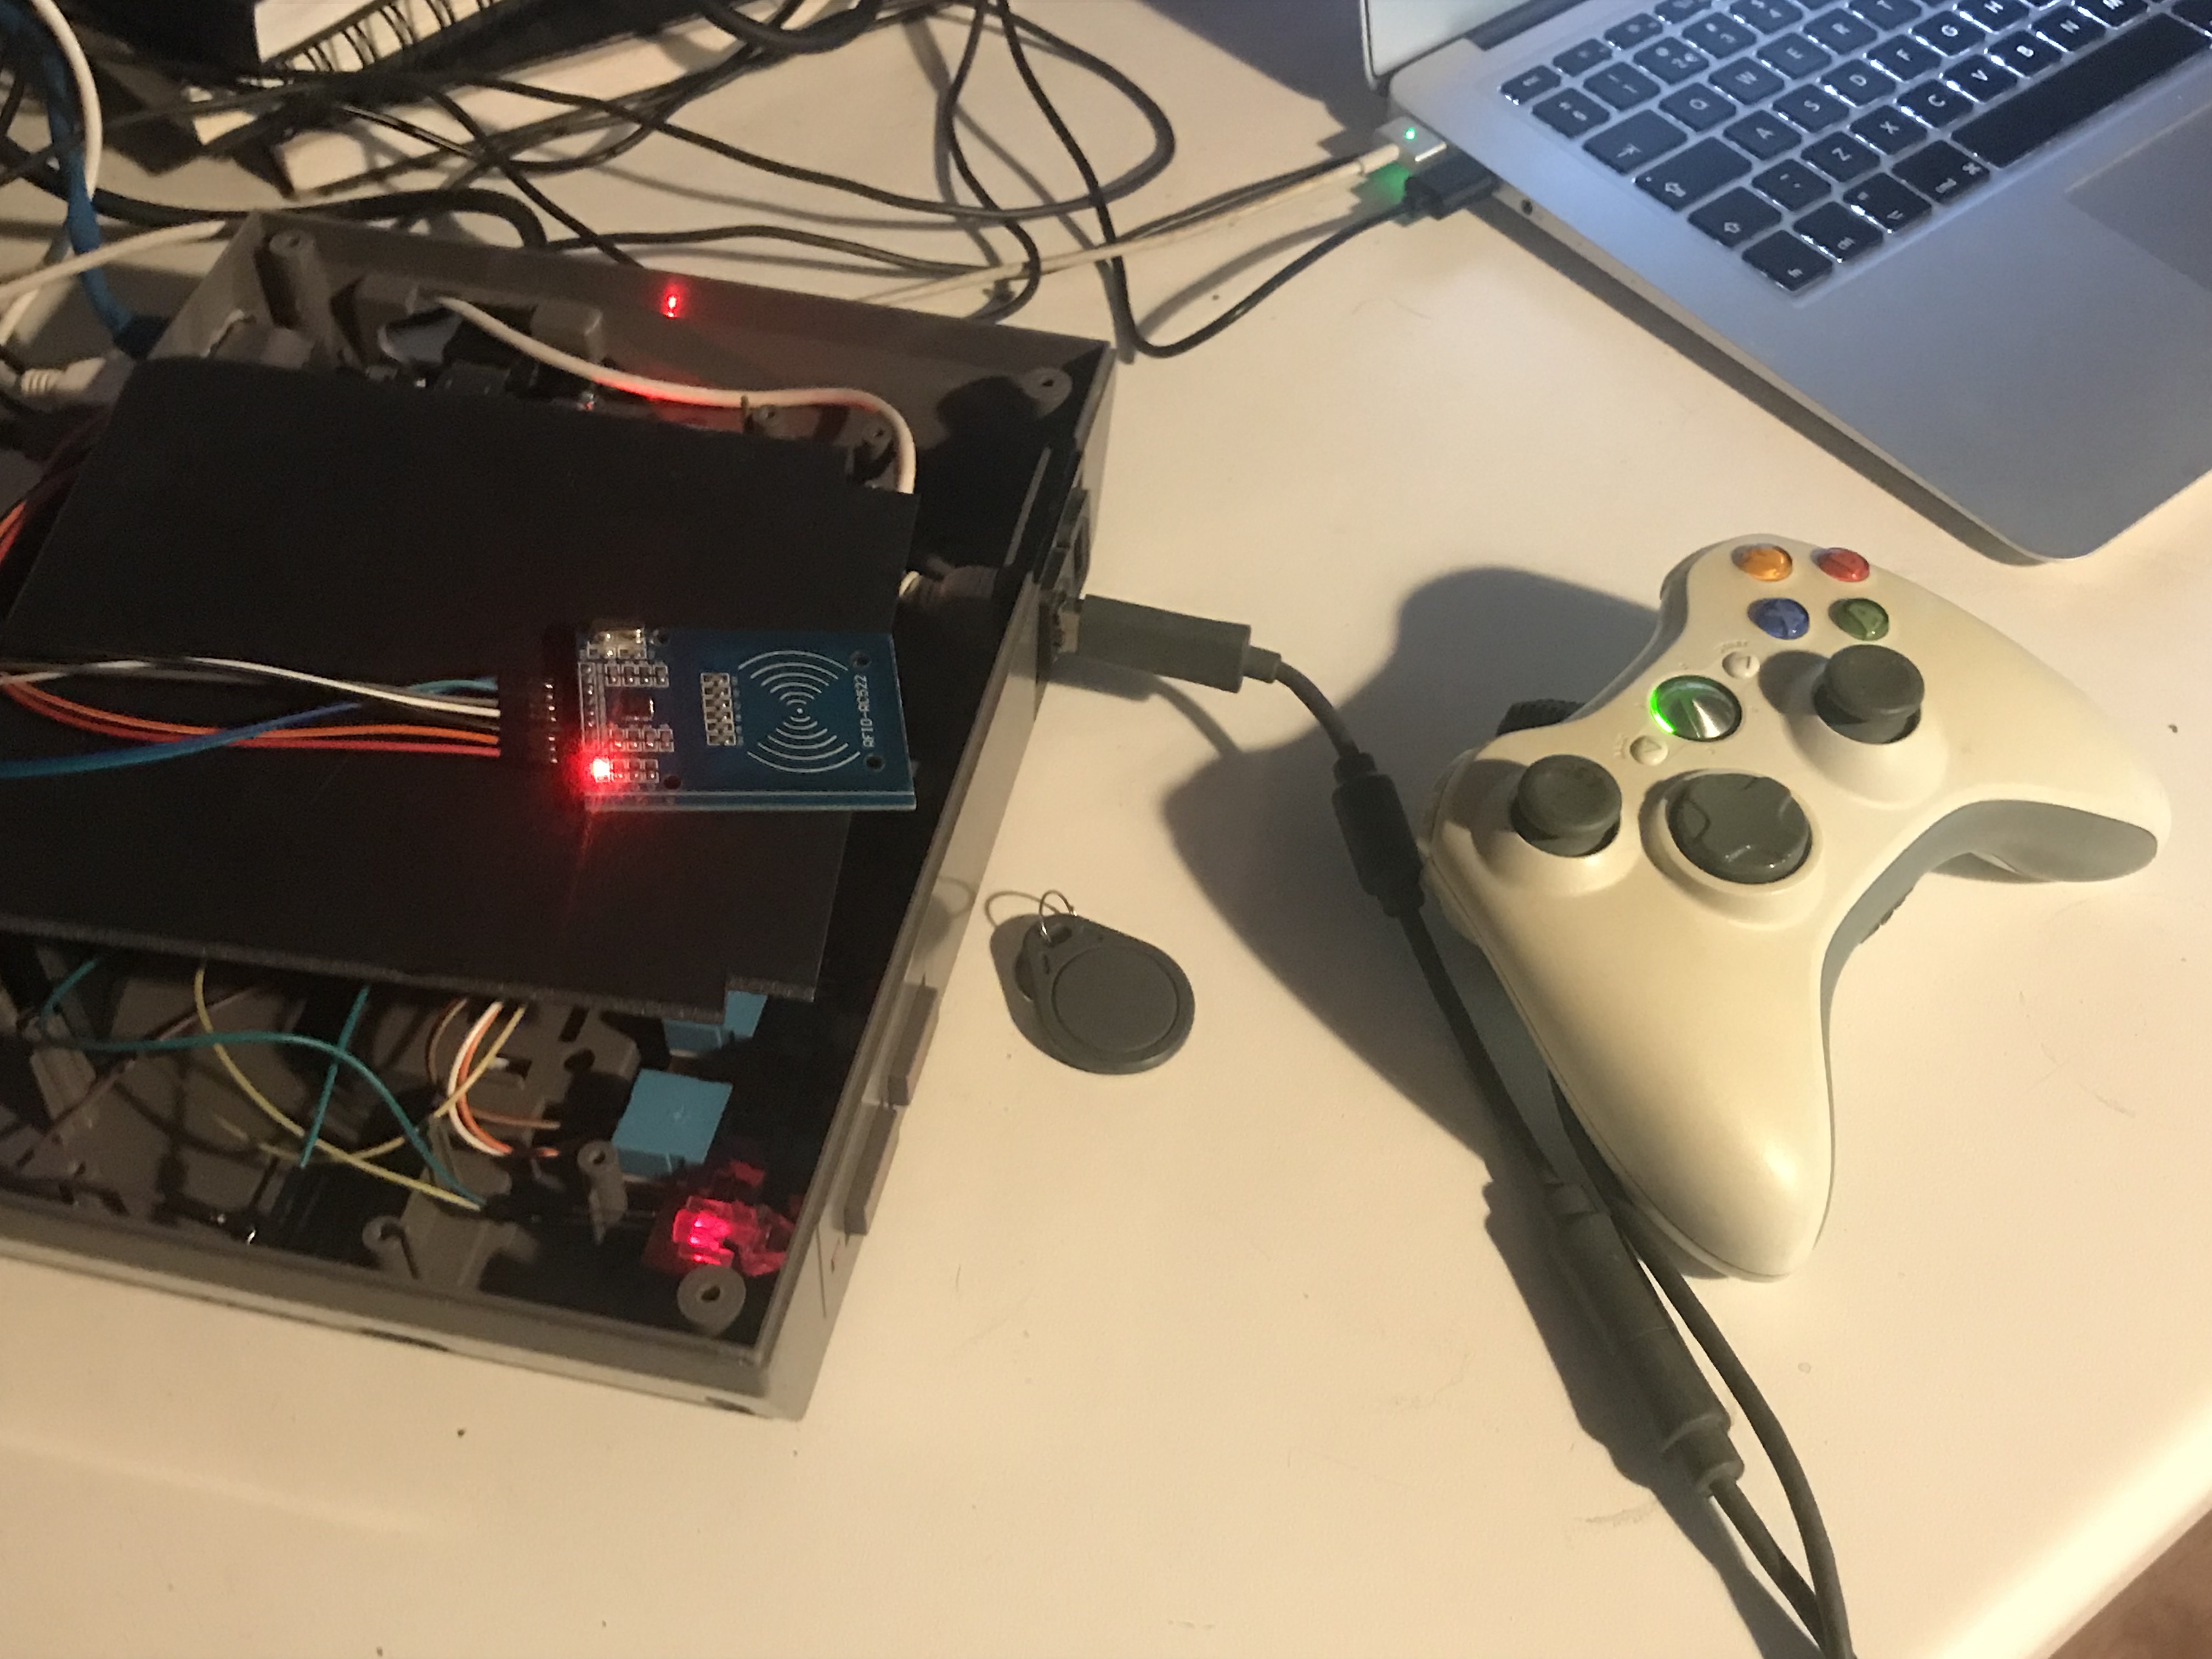
Last year I a got a NES case of a co-worker, I did’t know what to do with it, until now…
Empty case, only the top and bottom and the buttons. perfect for a Raspberry pi project….
The last weekend I started printing heavy on my Anycubric Photon.
And it felt if i was making Amiibo’s
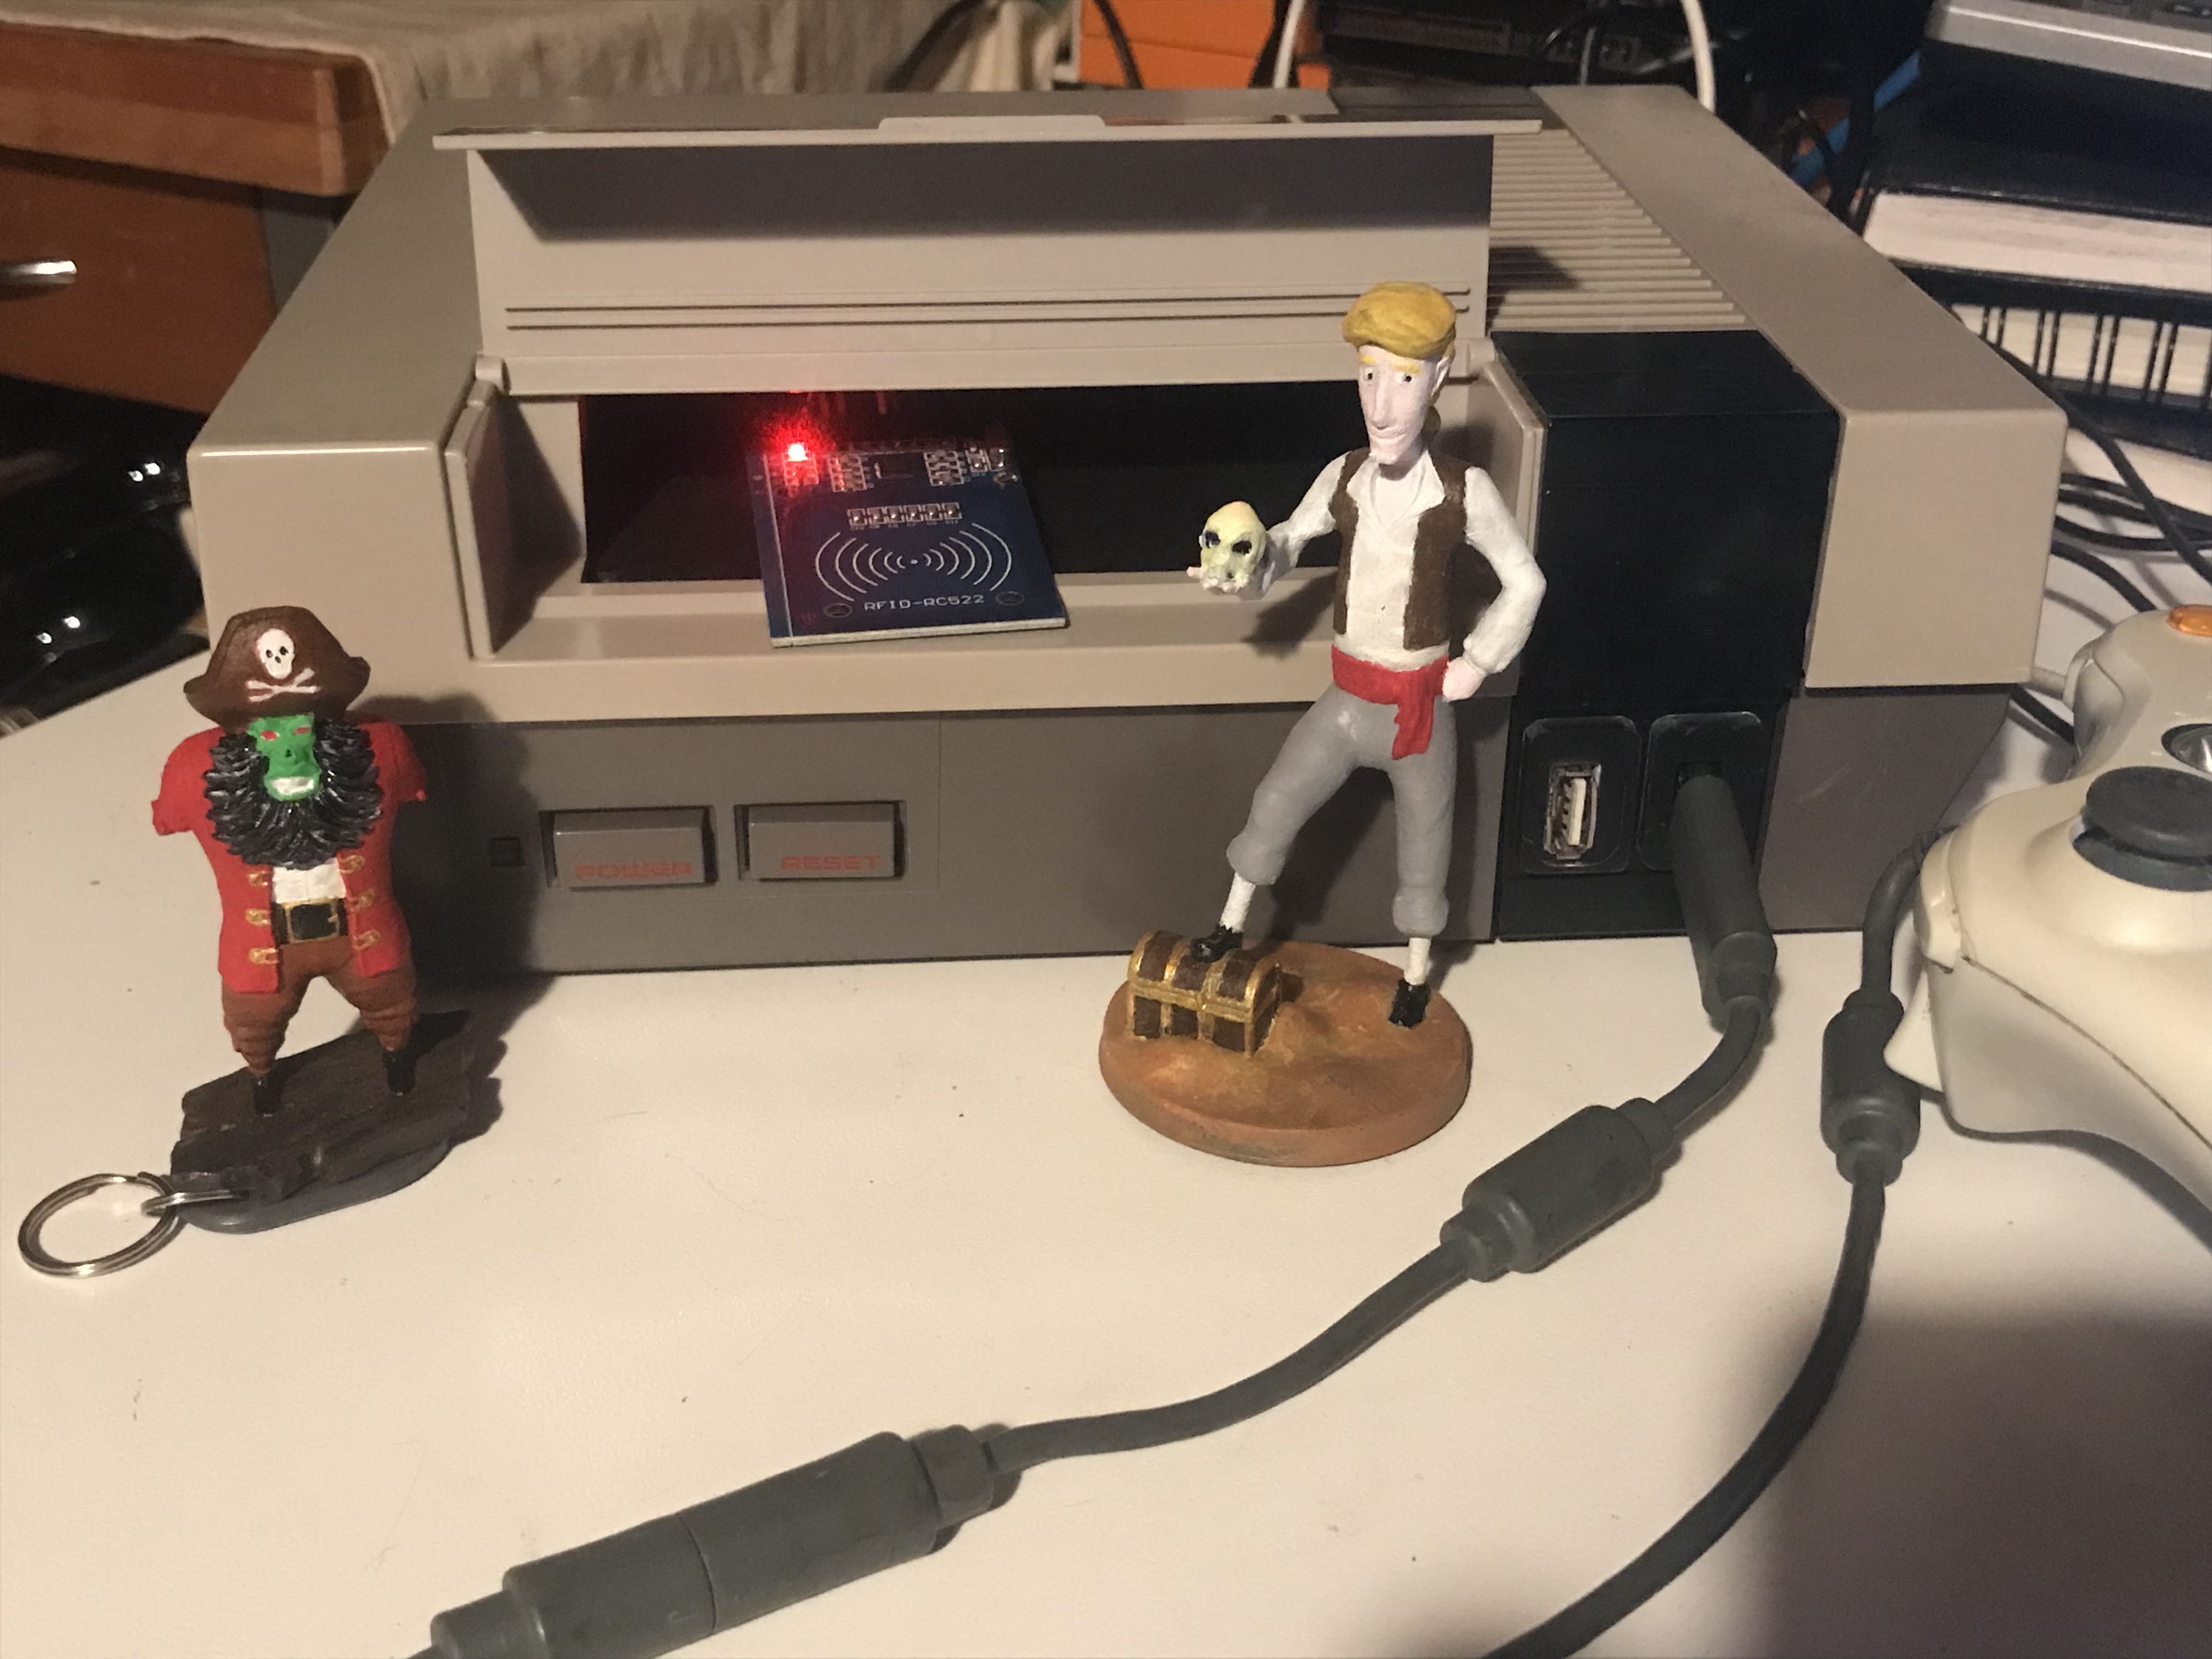
After seeing the second picture above I got inspired to make a new RetroPie console.
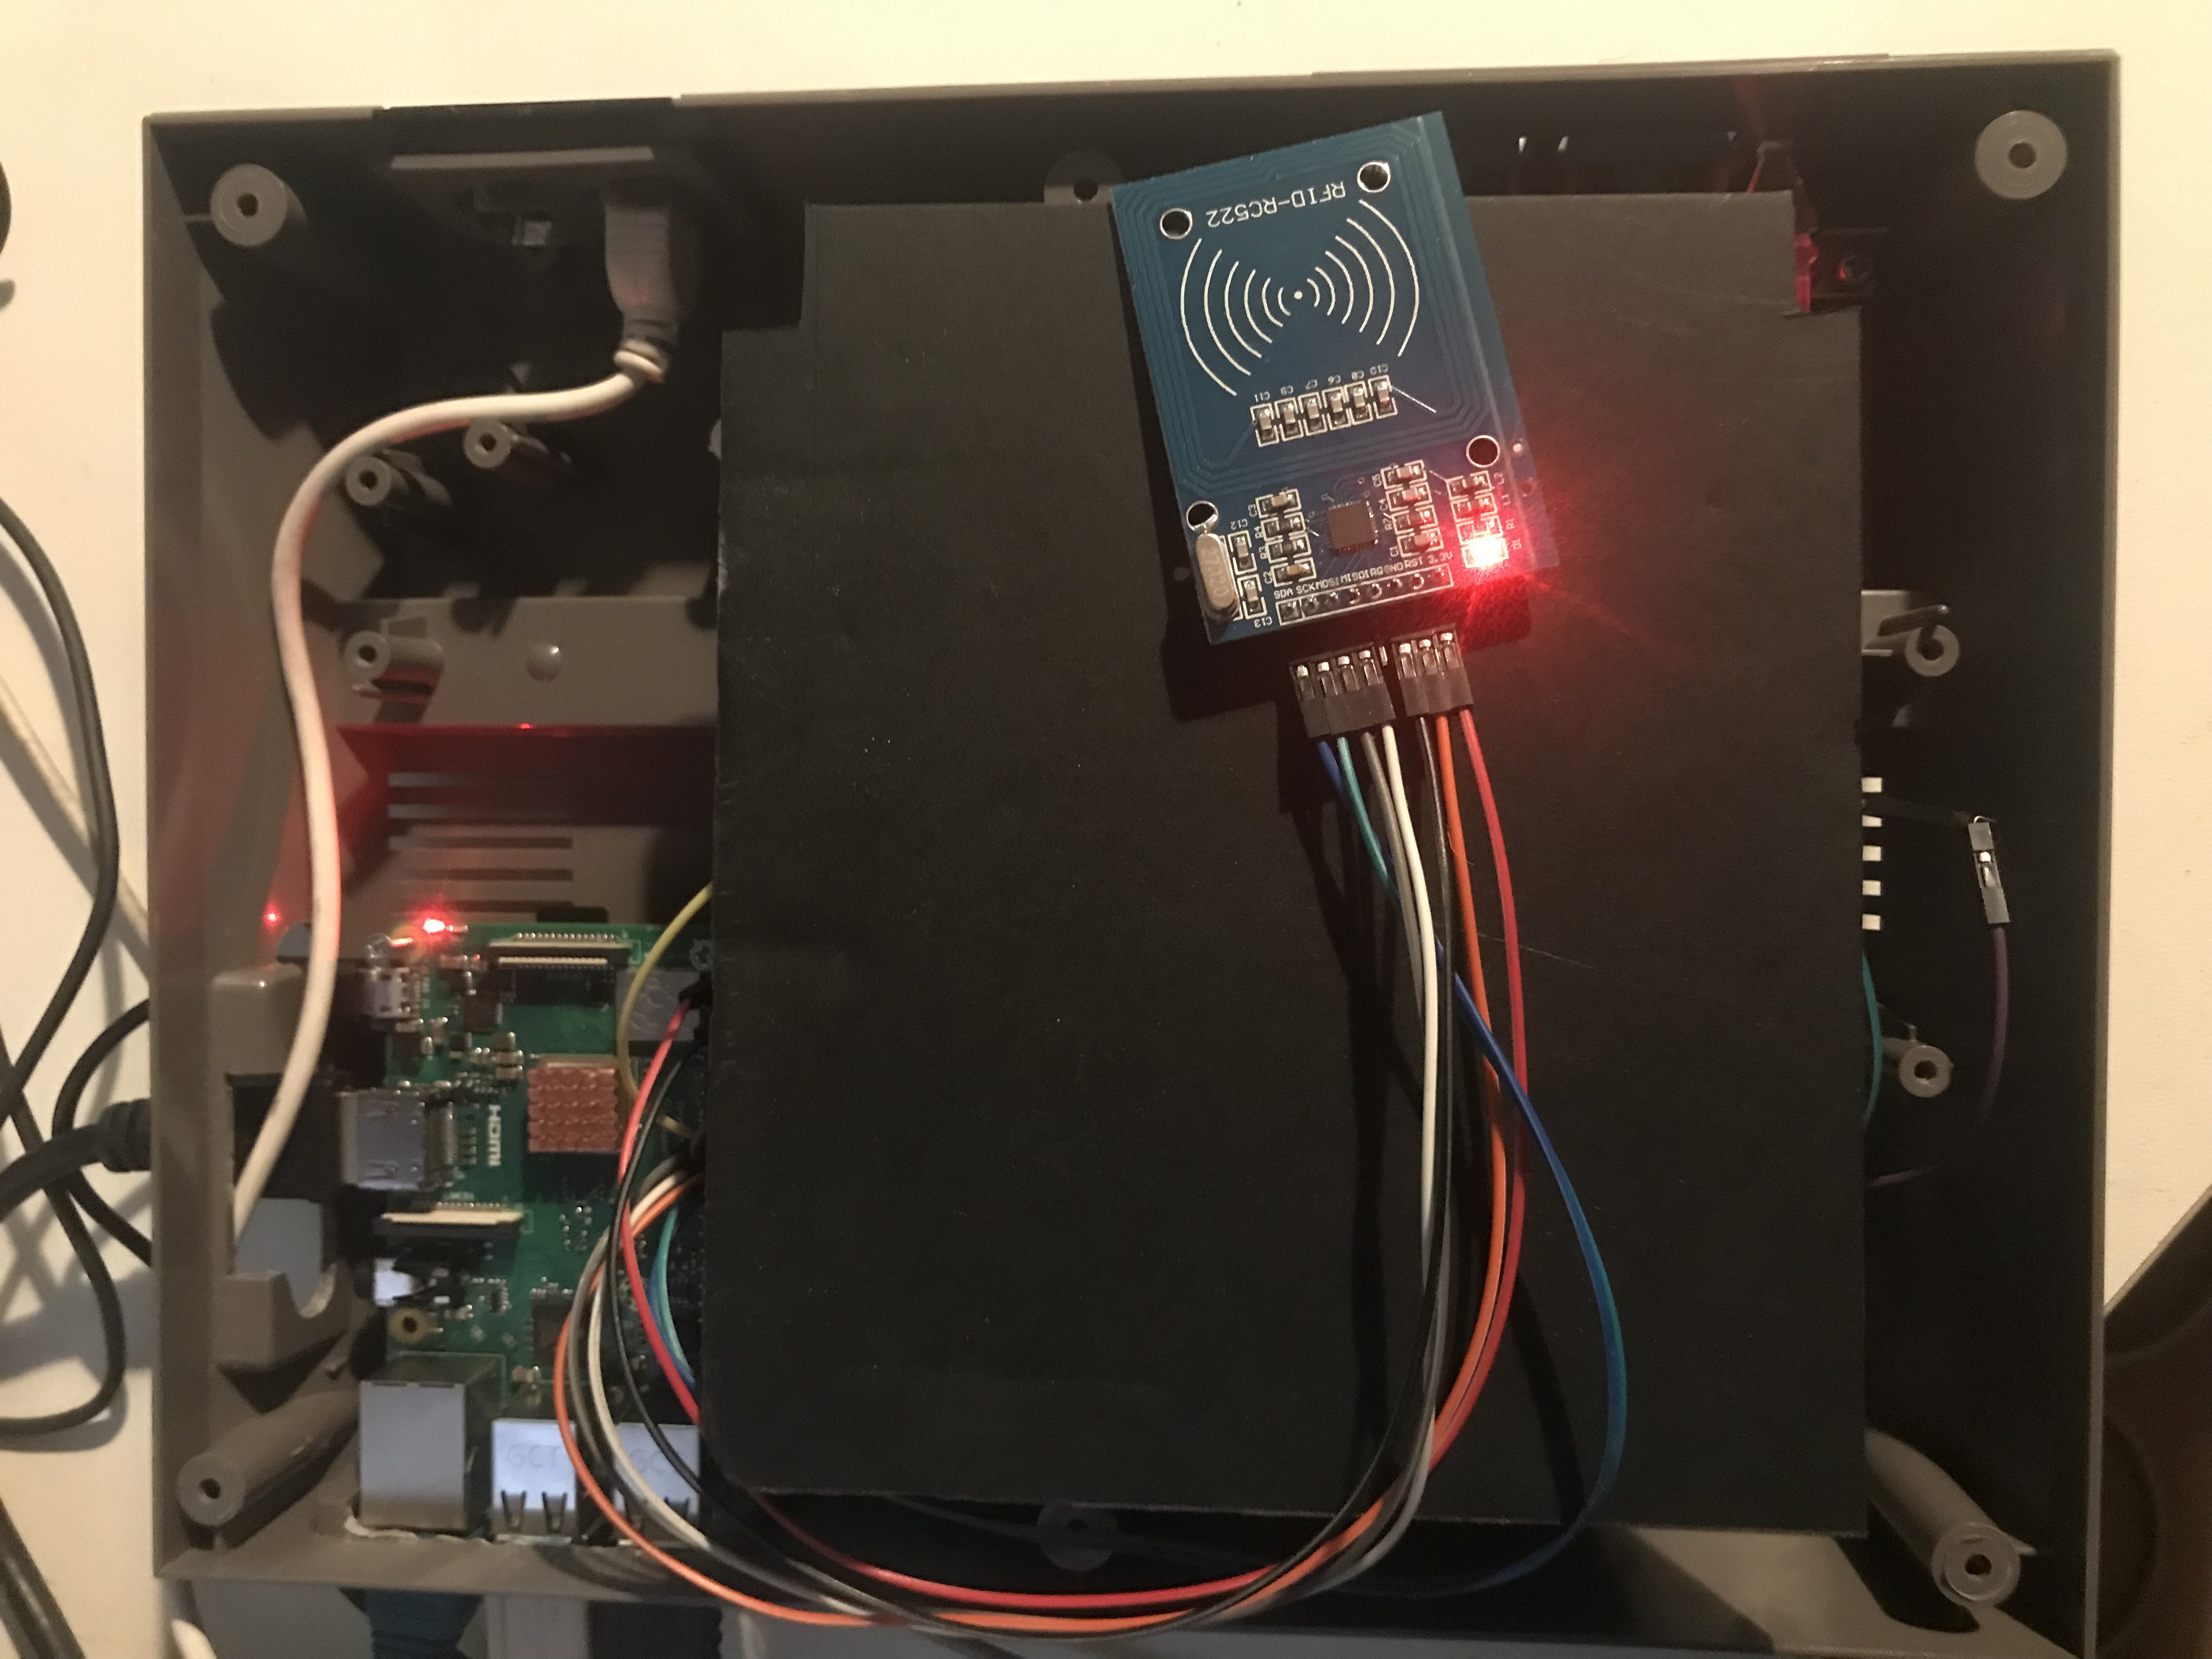
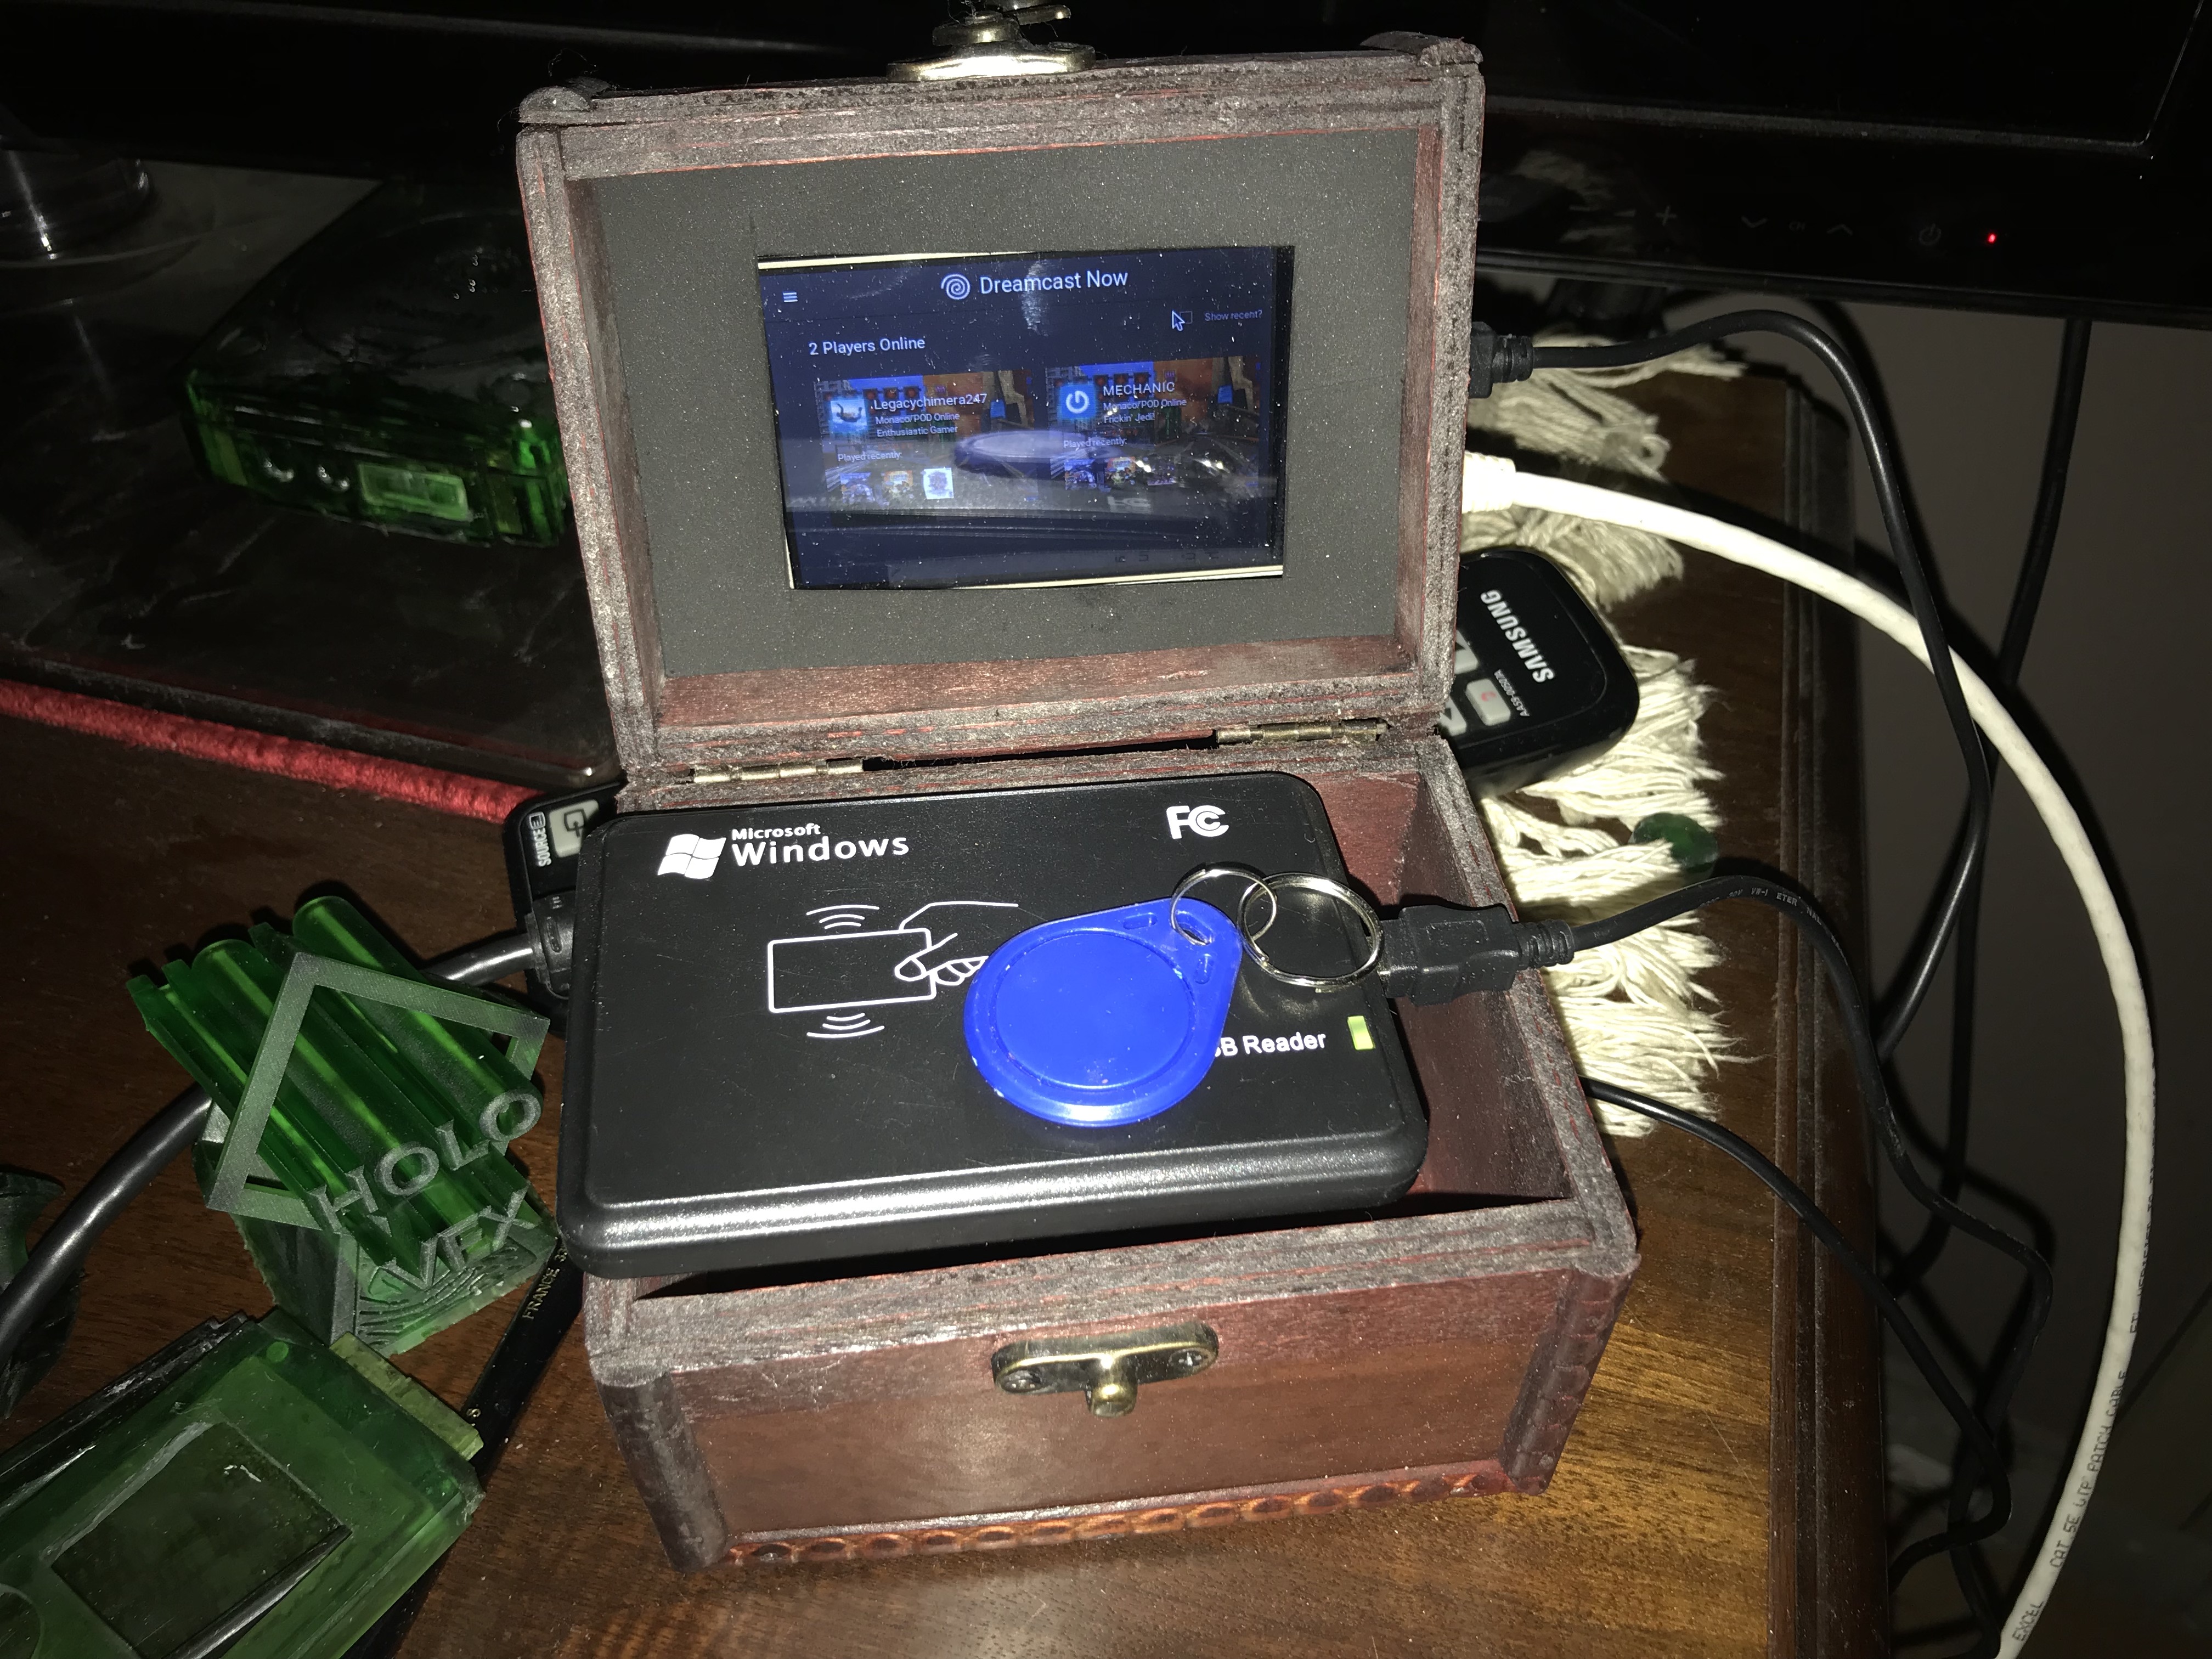
Needed to be RFID and controller…
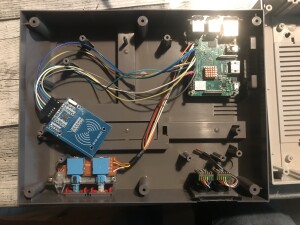
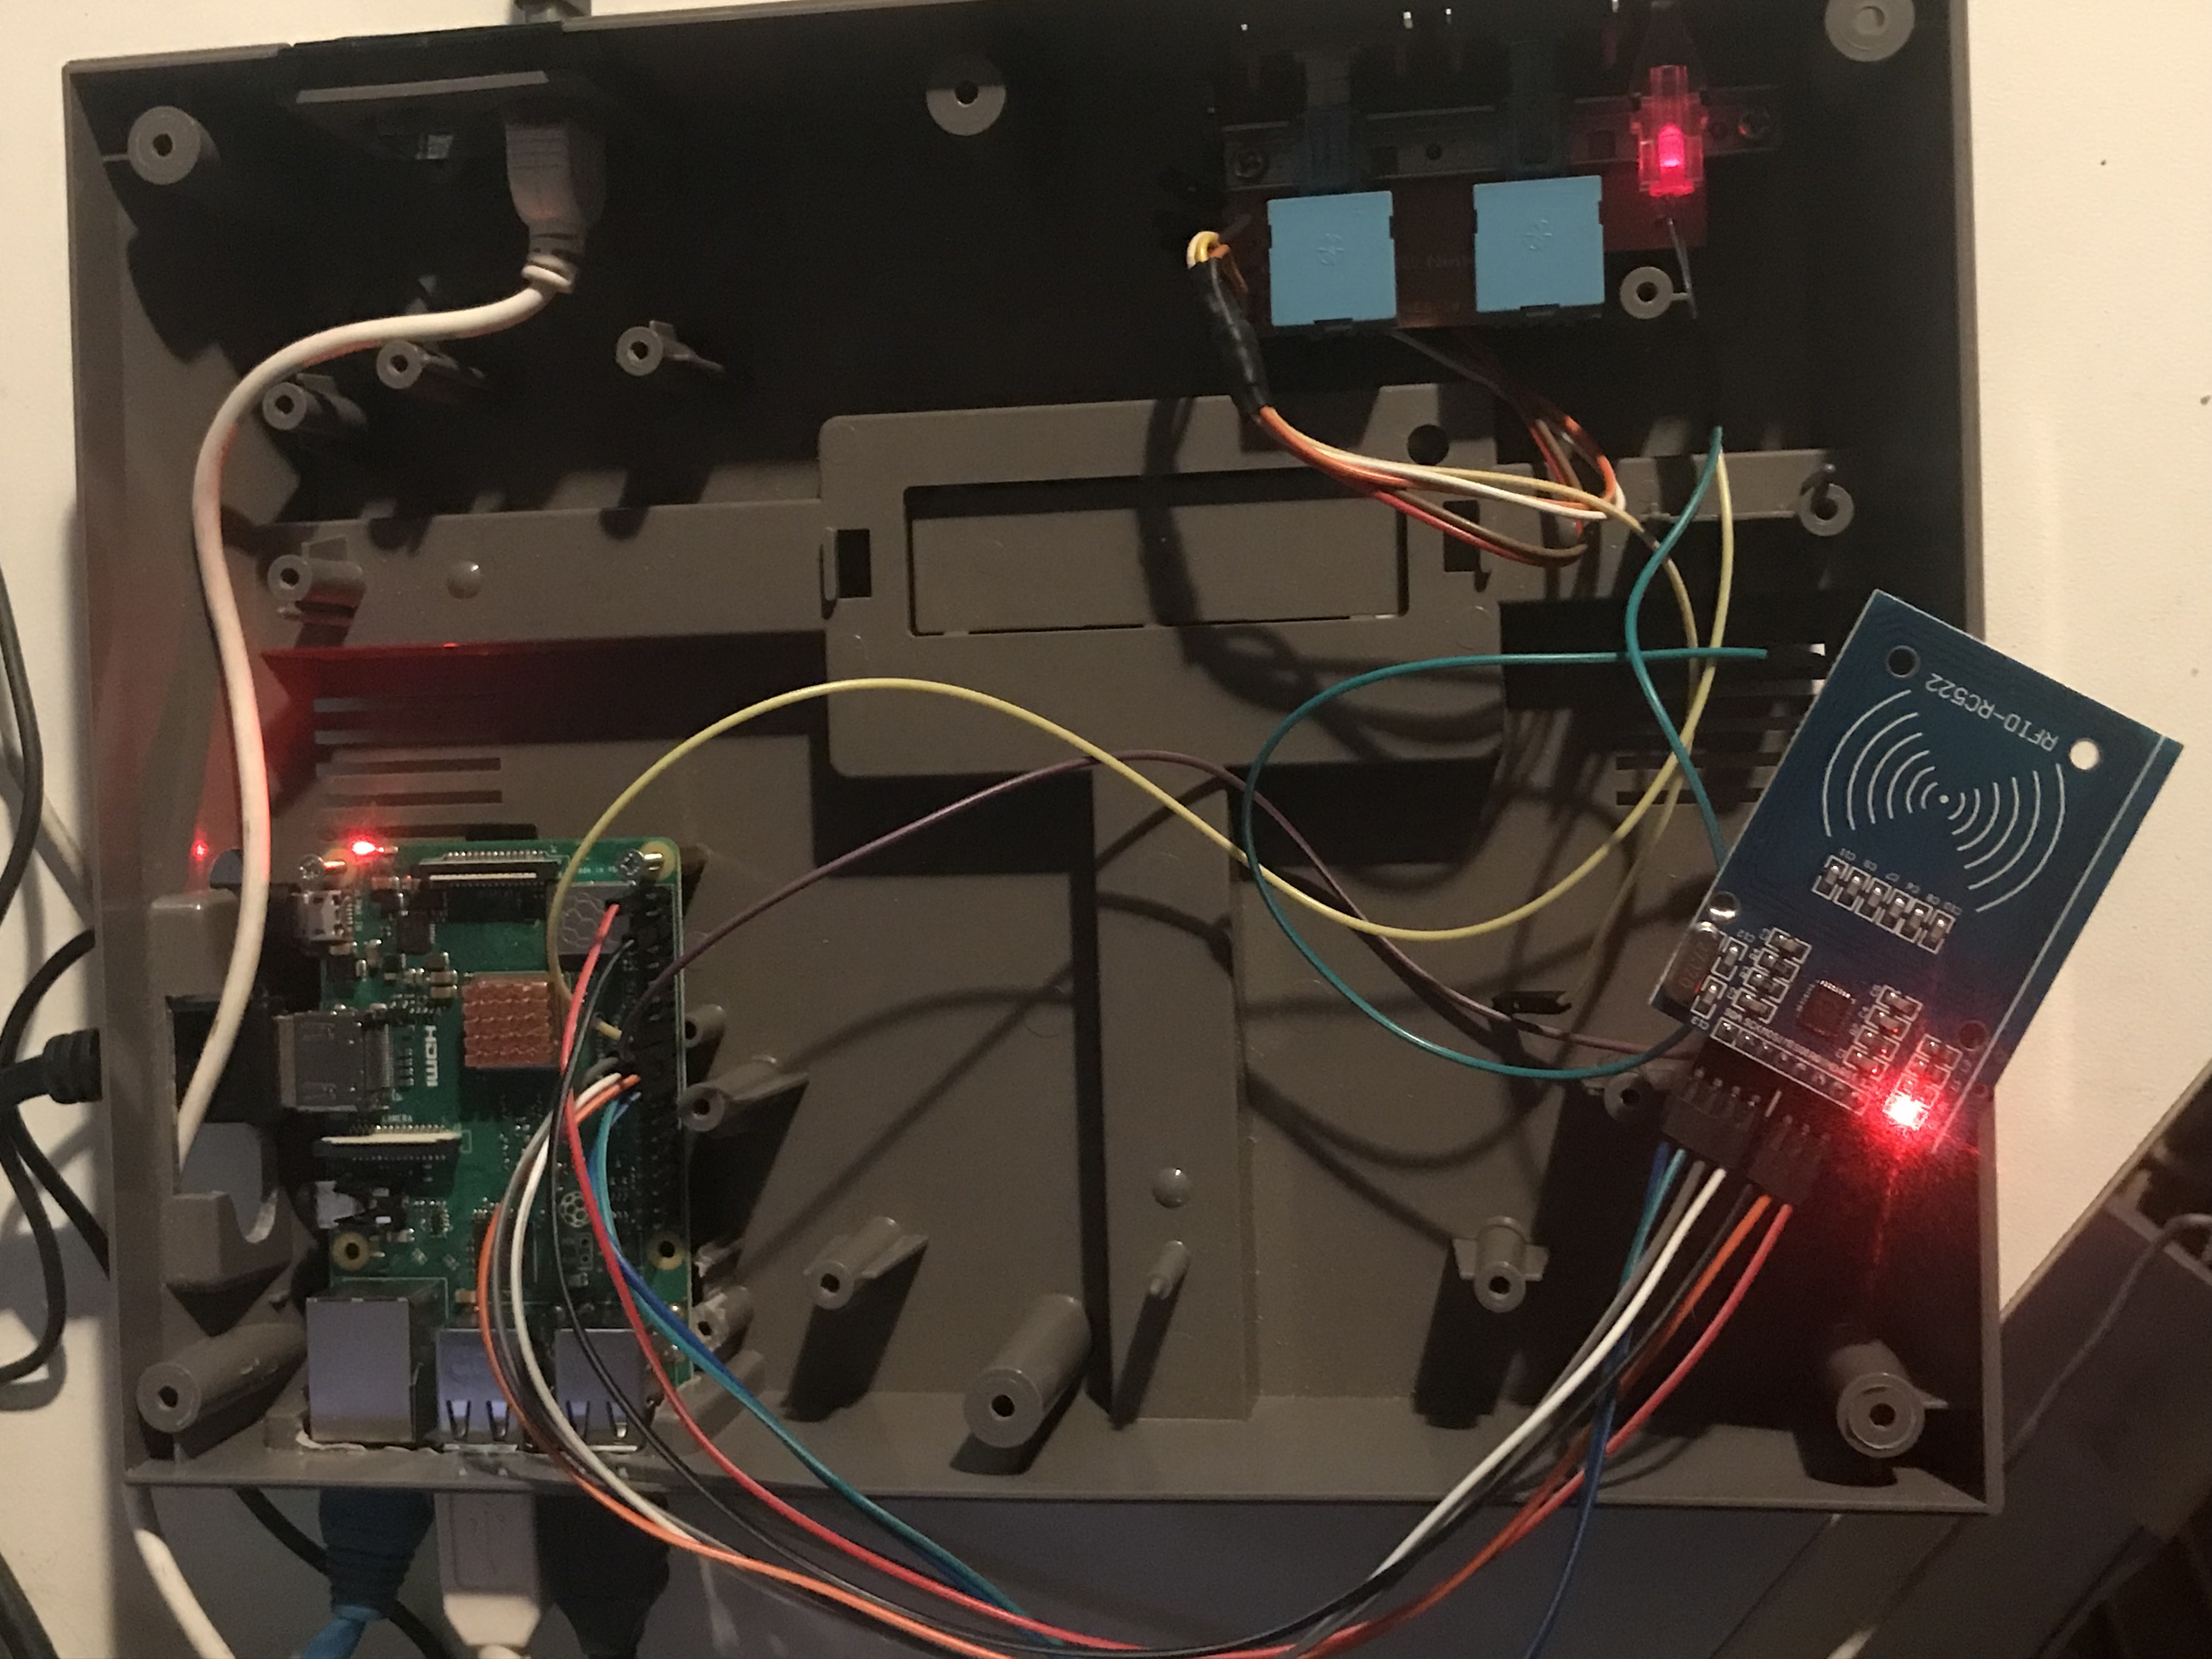
Left the NES case and the semi setup Right a working setup only no working code at that point.
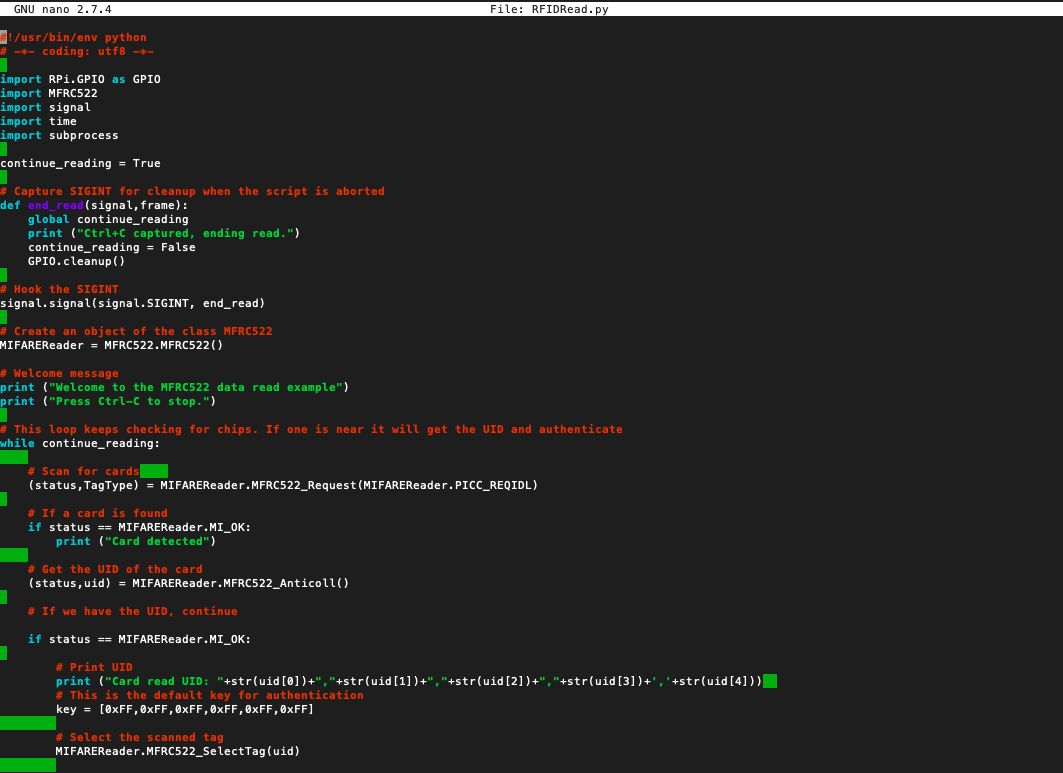
Even the RFID would’t read the cards because of the SPI-PY its sort of broken.
If you do that! Then and only then, you can get the RFID-RC533 working under latest Jessy or RetroPie latest build.
Then you can install the MFRC522 Library and start reading some card data.
To get it working the way I wanted was a pain in the @ss. There is some info on runcommand:
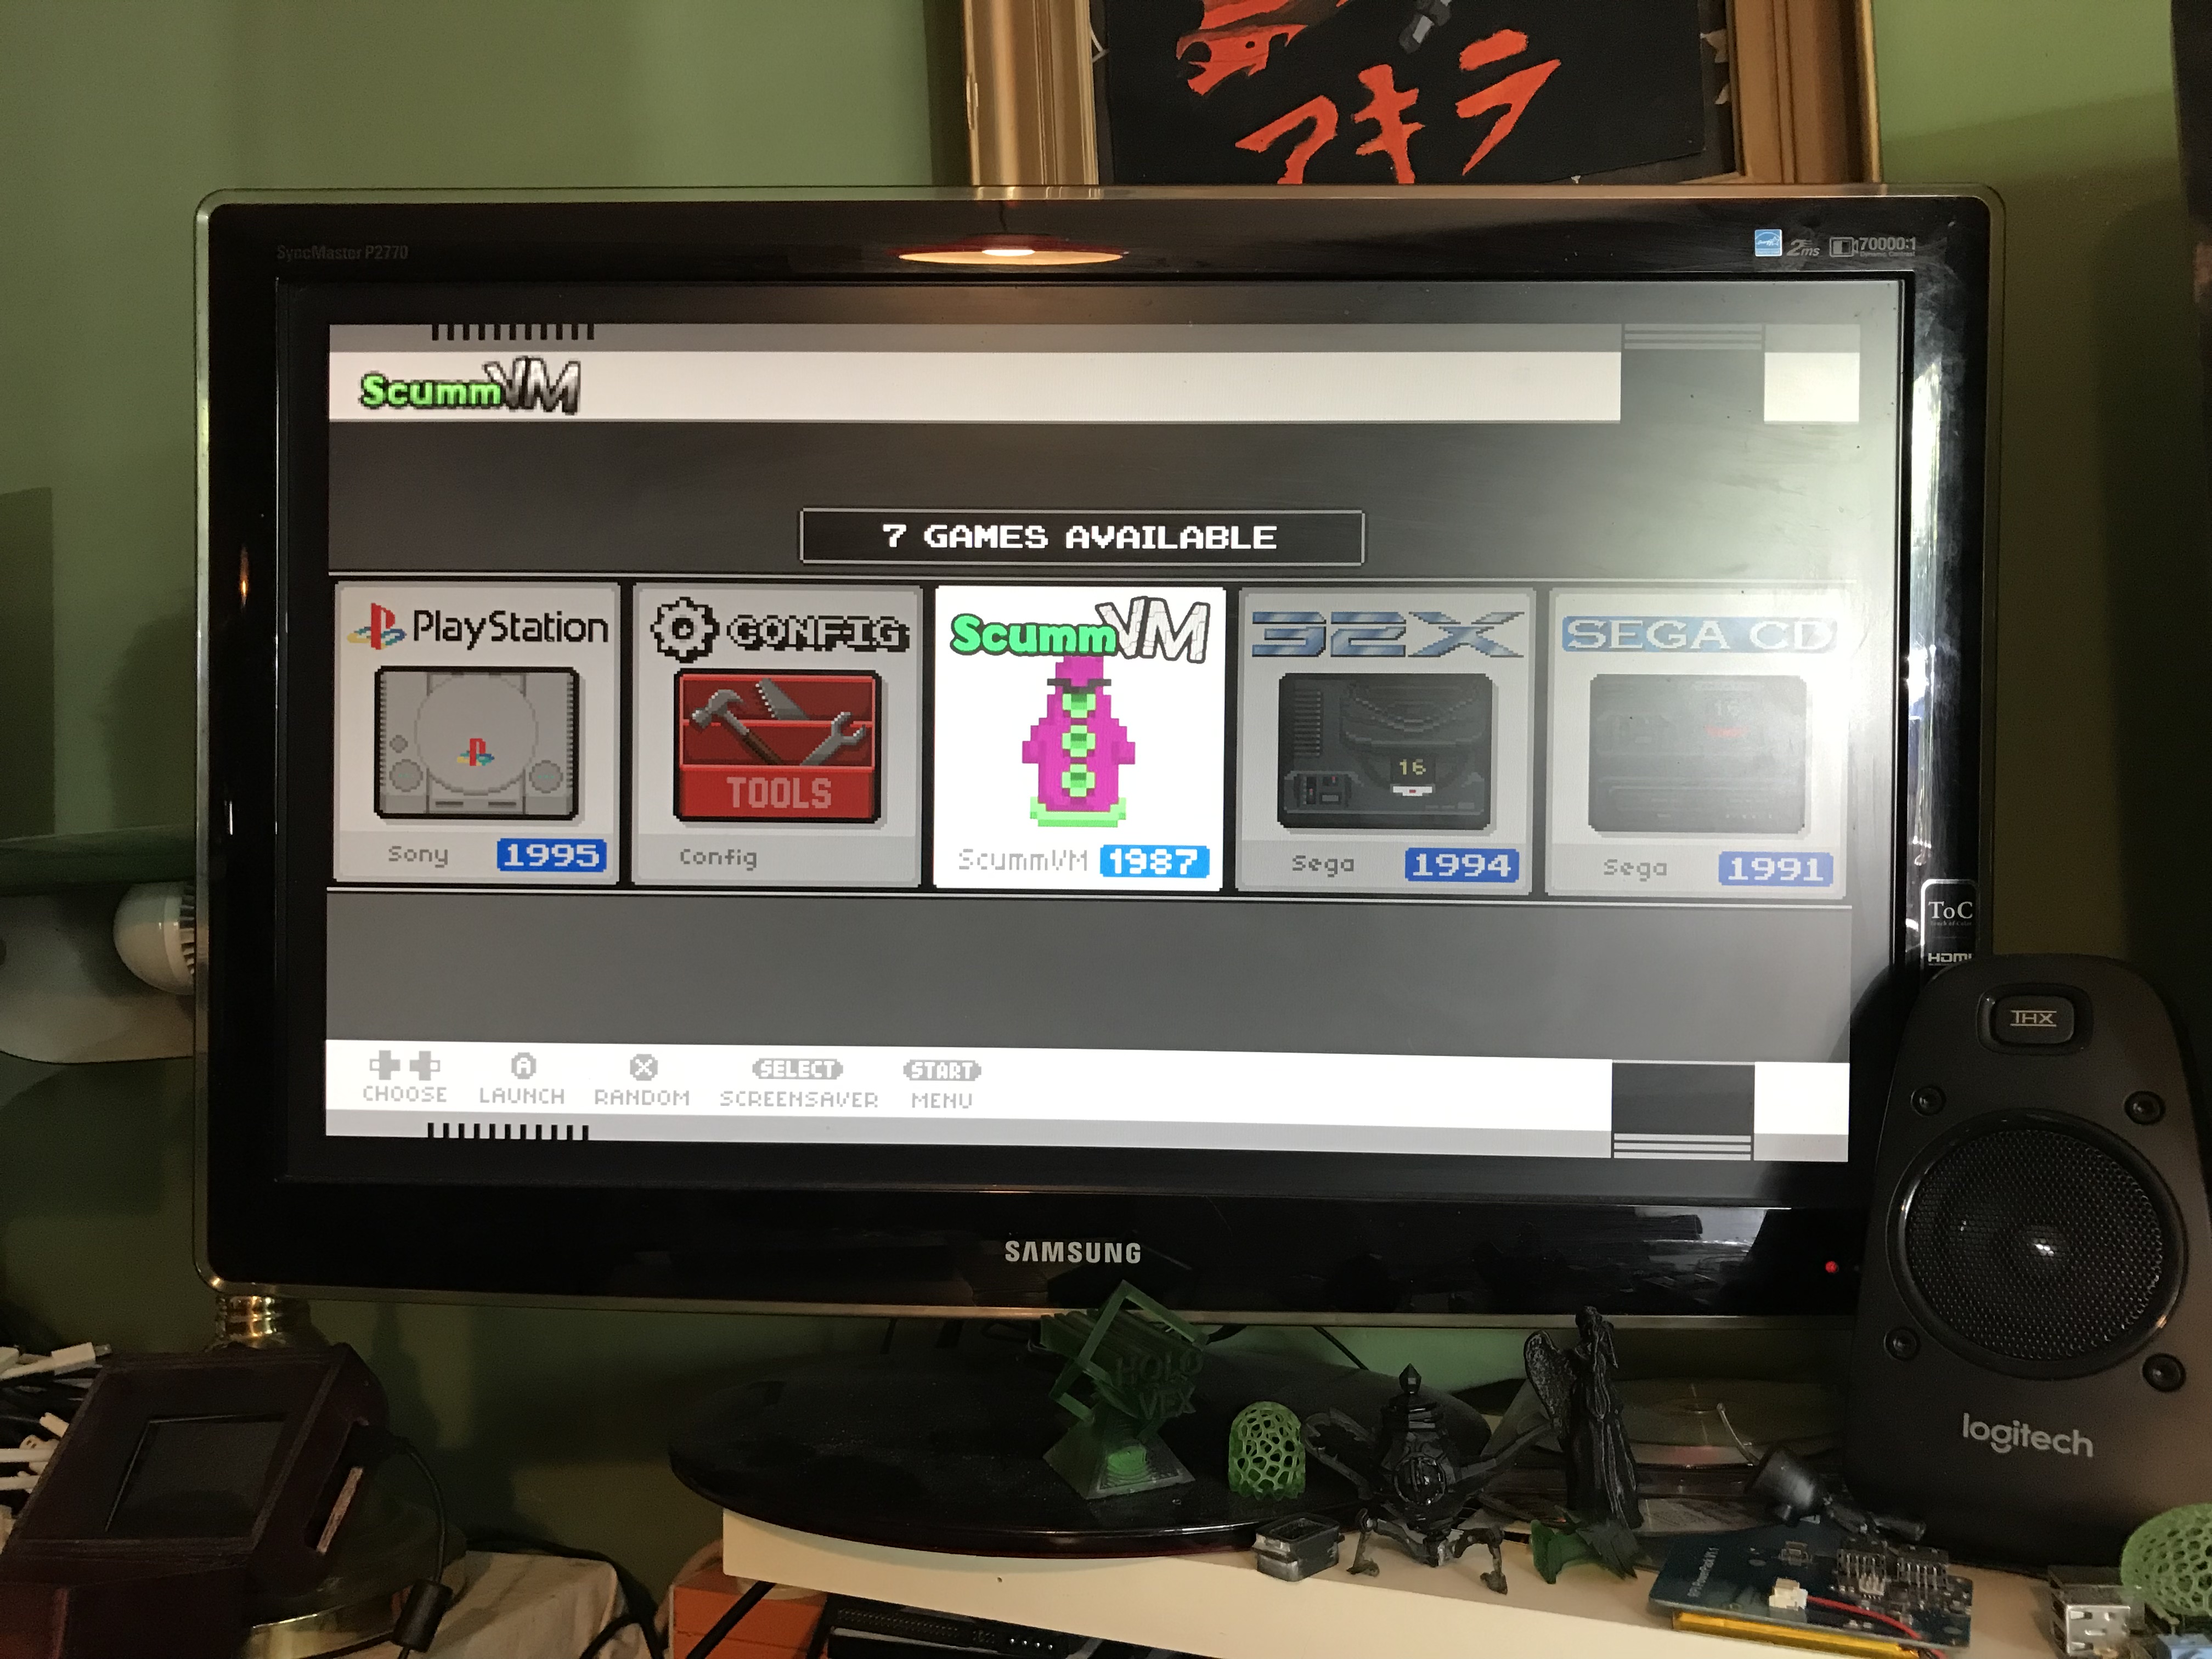
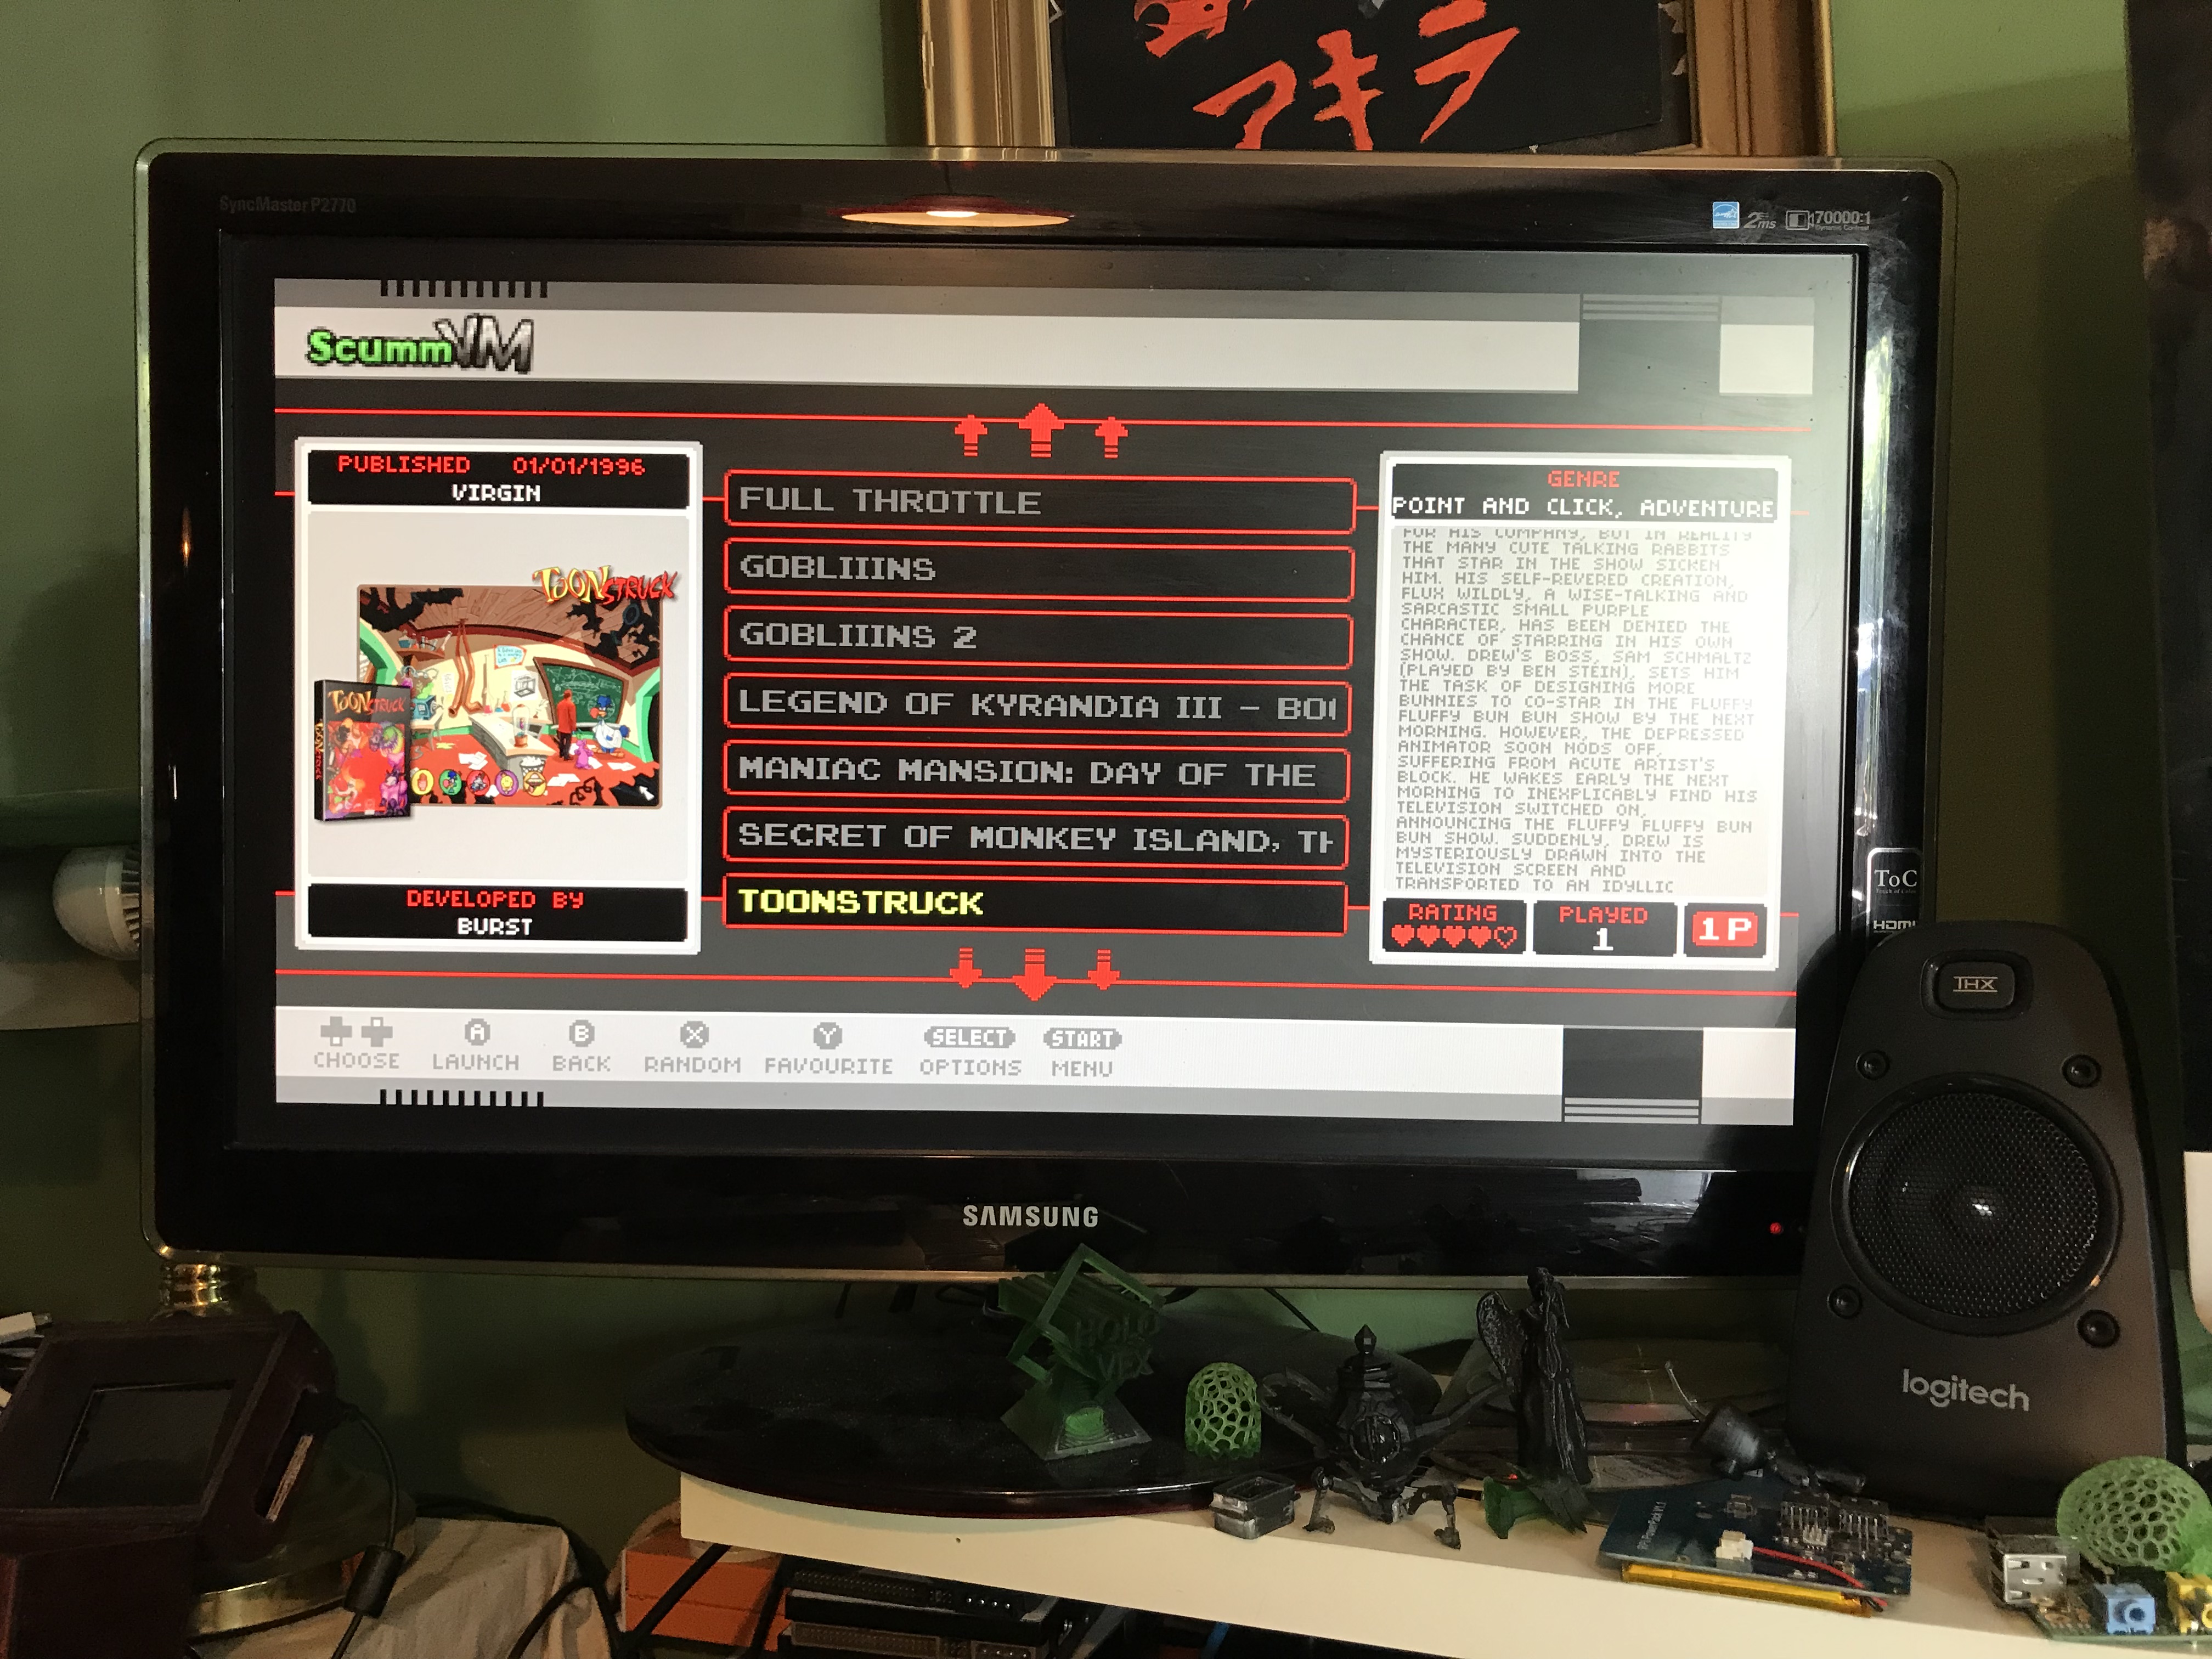
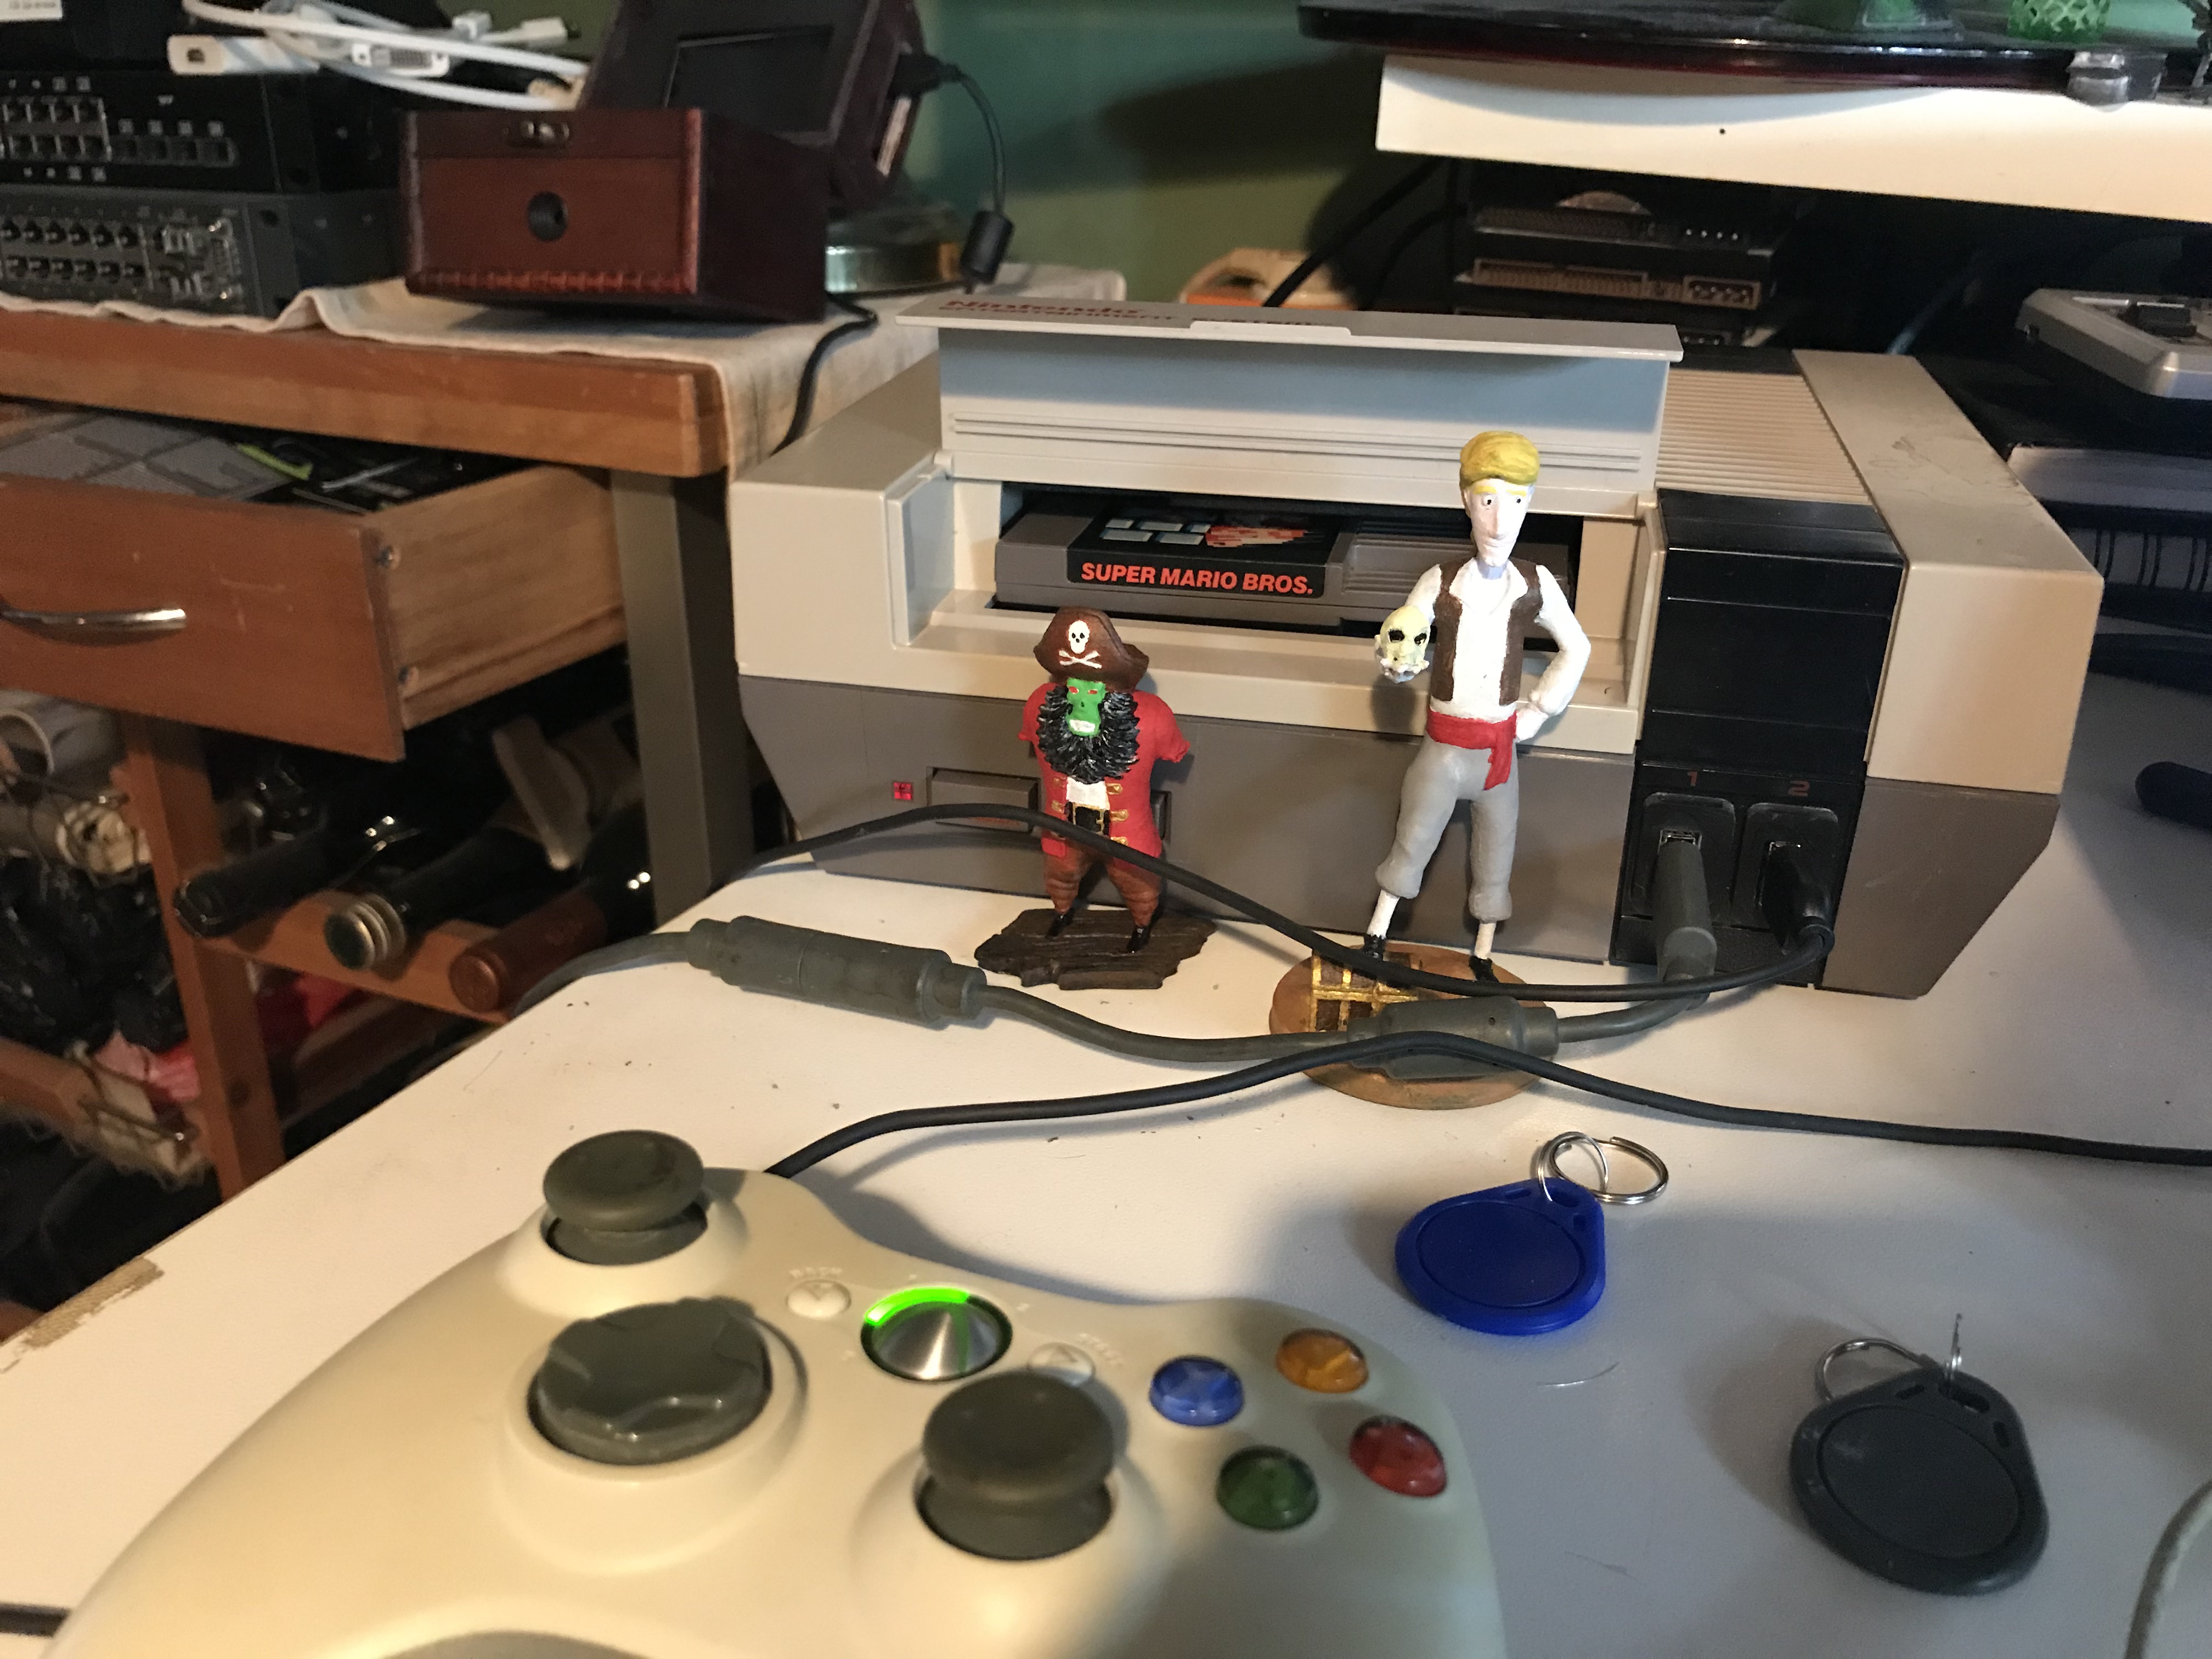
But no info on Scummvm and i wanted to launch Monkey Island 1 SE talkie version I made back in the day.
When the Talkie Mod came out.. Been looking for a console that could play those 2 new Talkie versions.
And ScummVM is vers 2.0 on Raspberry so it would work.
Here is a Video showing off how it works and change between Monkey Island and EmulationStation.
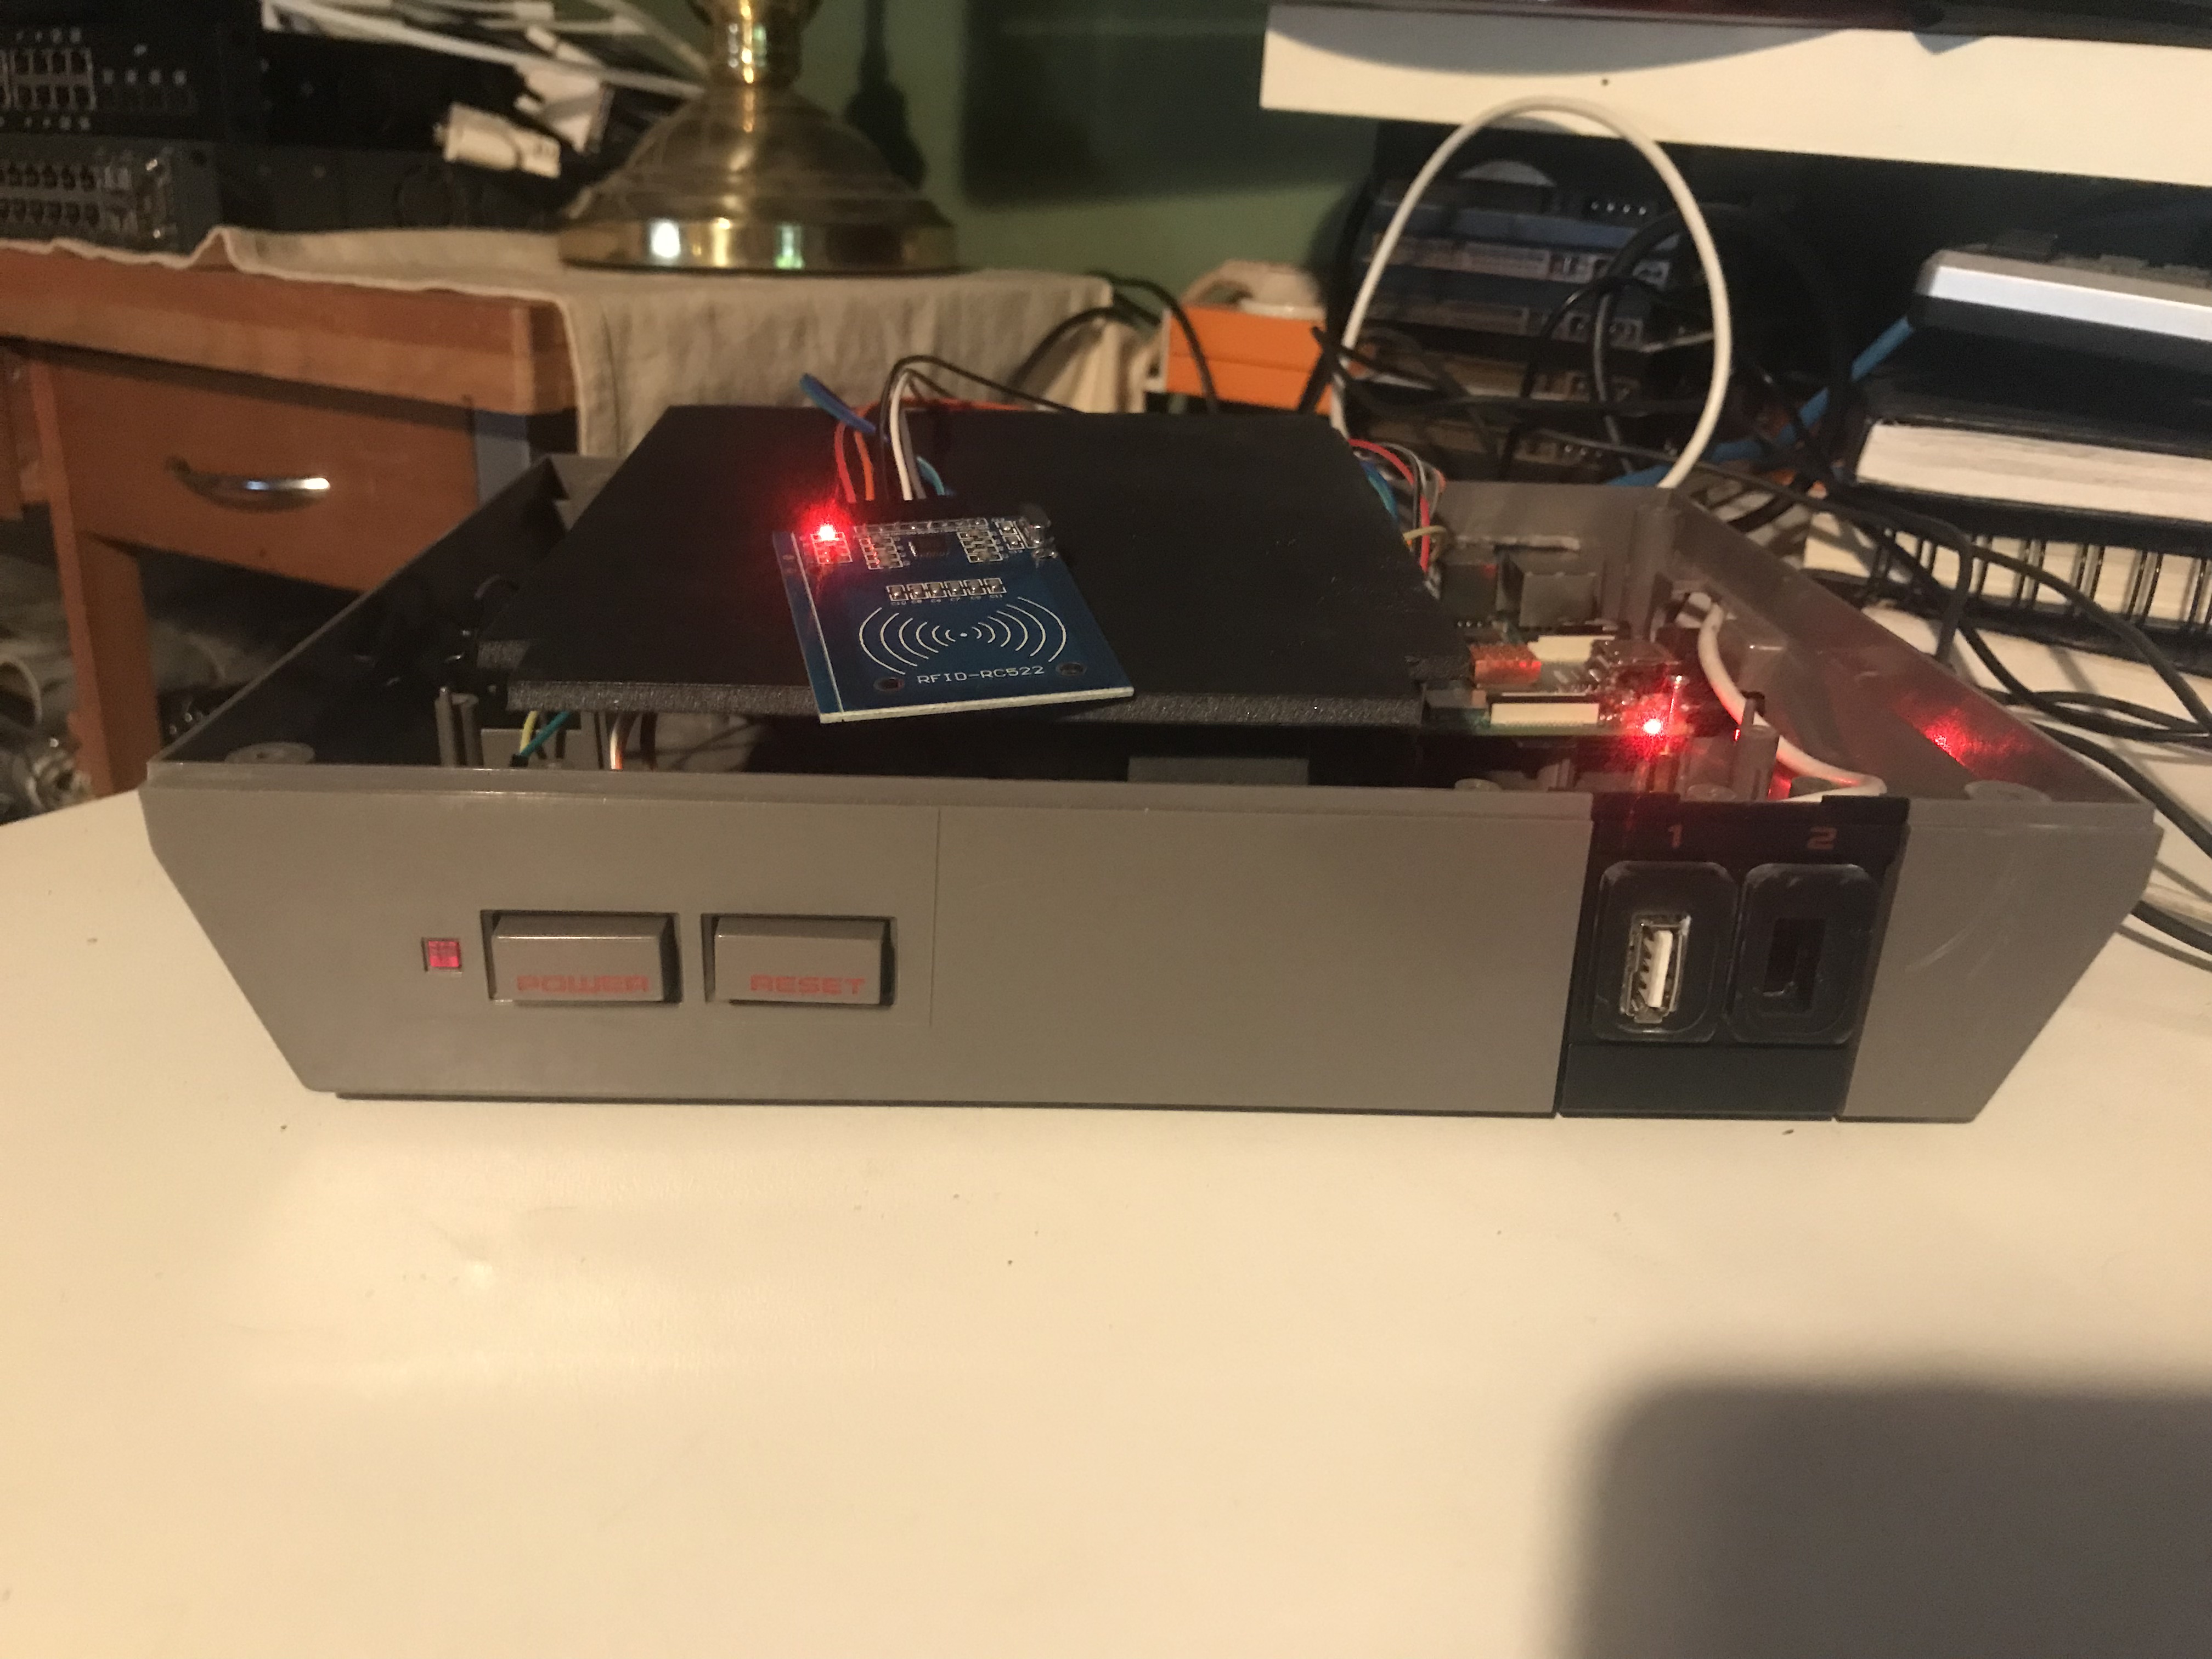
More detailed view of how it works: Look at the LED LOL
Some close up photo’s
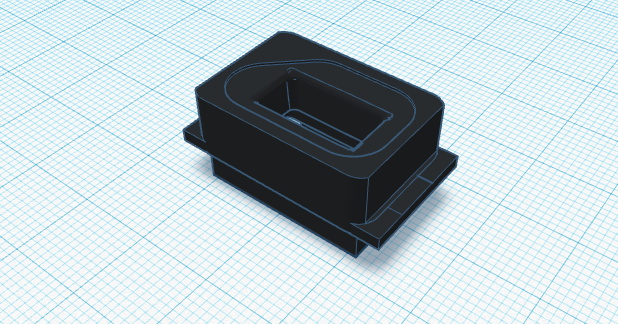
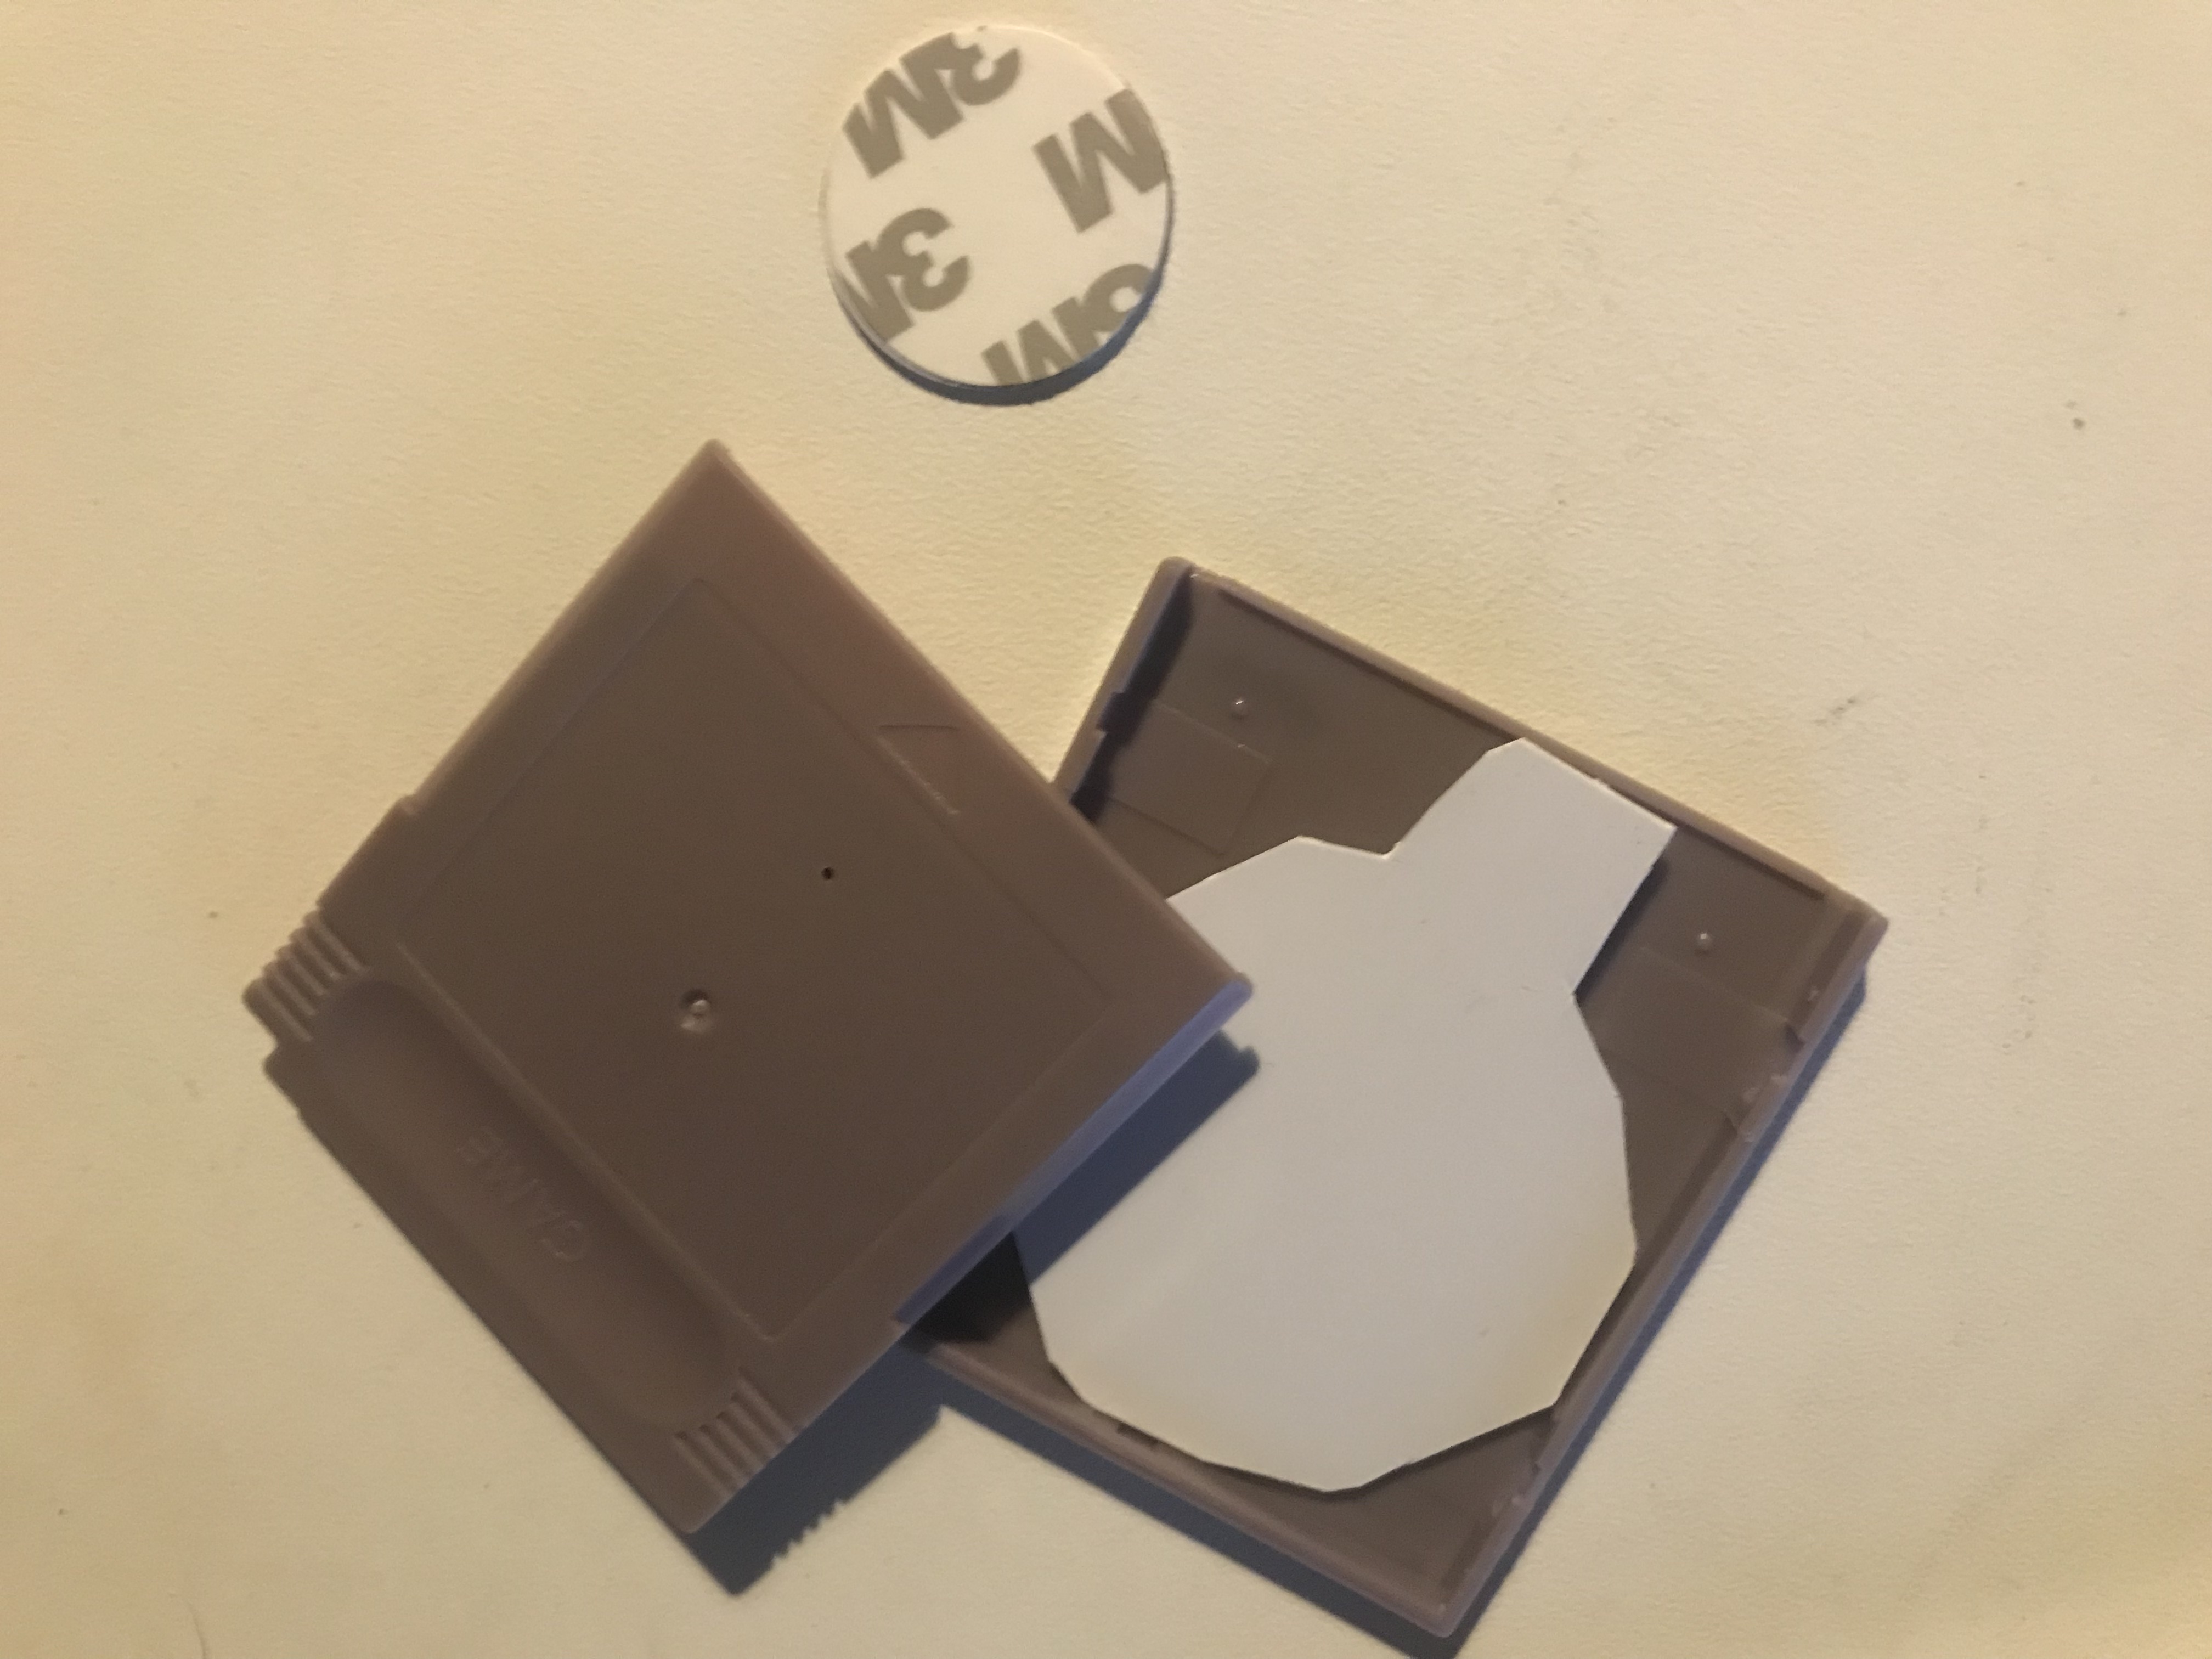
A almost done, want to mount the RFID on top. I want to keep the opening to load maybe custom NES cartridges.
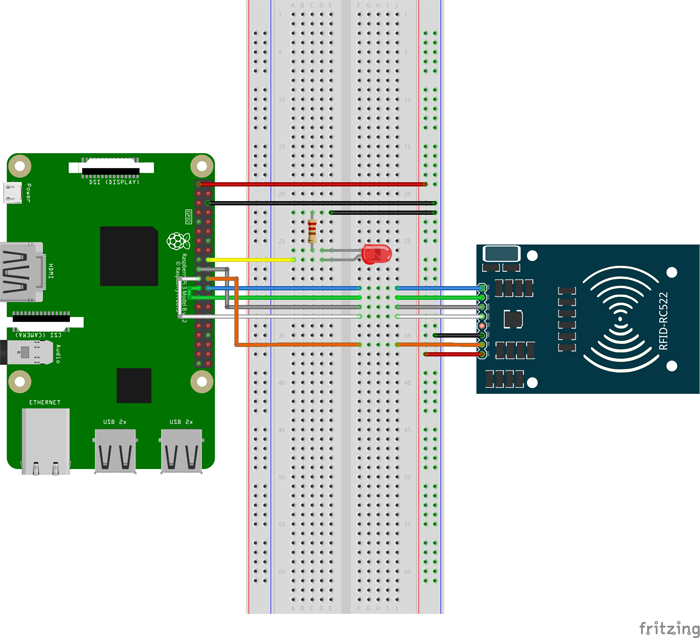
I made 2 bash scripts and 1 pyton script (reworked its the RFID reader):
Only added the import subprocess so i can run shell code.
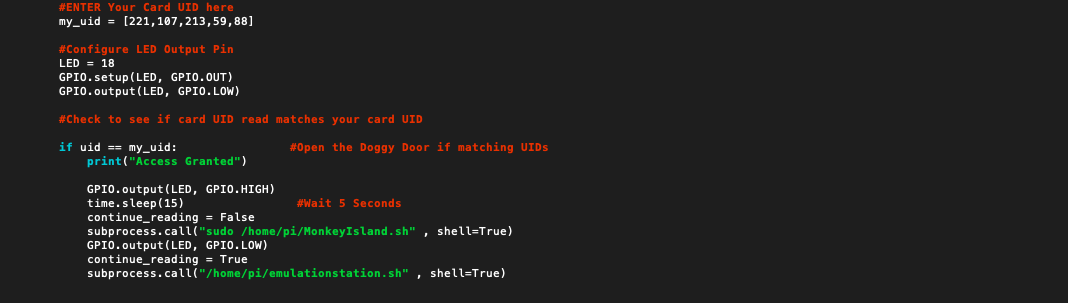
Change your UID to the card you want to use to boot a game. (my card is 221,107,213,59,88)
The Time.sleep(15) needs to be removed to boot the game quicker but left it in because want to try loading splach screen or something. The Led is to indicate if the game is stopt or not. Then it will boot EmulationStation again.
The python program stops but is been rebooted with EmulationStation.
The bash scripts:
This will kill EmulationStation and load the game
This will restart EmulationStation and my Python script will check for a RFID card
And to make it boot at run you need to make this change:
And for the skin i used the NES-Mini theme.
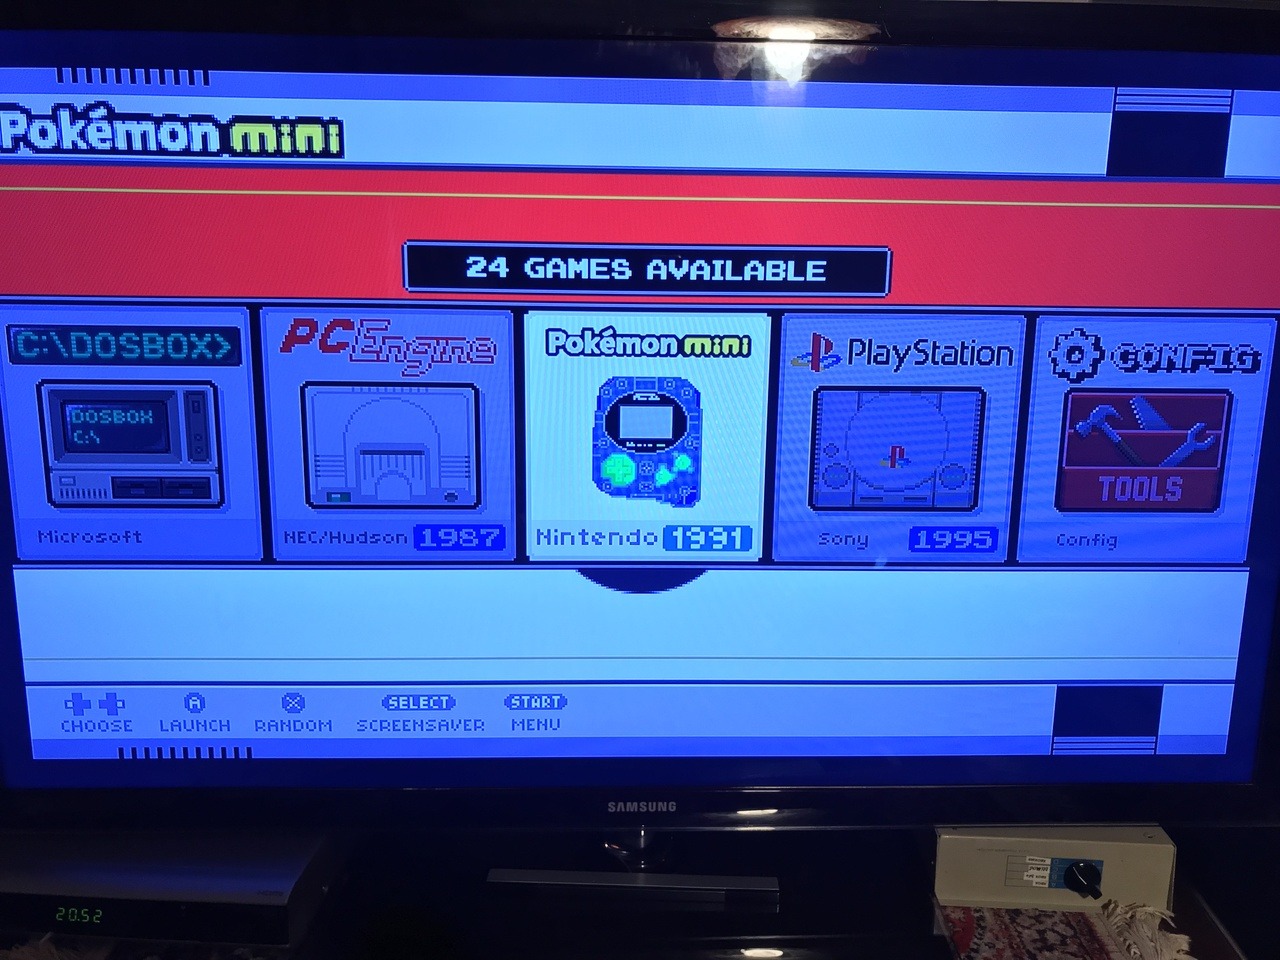
But it was missing 2 themes, i used ScummVM and the Oric emulator on my Pi.
So i made them download link below:
ScummVM:
Download link: ScummVM.
Oric Atmos :
The RFID fits perfect in the box that i made, now i can insert real NES cartridges 😀
So if i buy empty nes cartridges i could insert a rfid tag and load that game
Tried that and works 😉
(cartridges and RFID tag)
Things to do:
Mount RFID on top case, make everything more durable.
Optimise the code, use some sort of database to use more UID’s and game titles.
Get more RFID tag’s, print more modes of old games… (open source Amiibo’s)
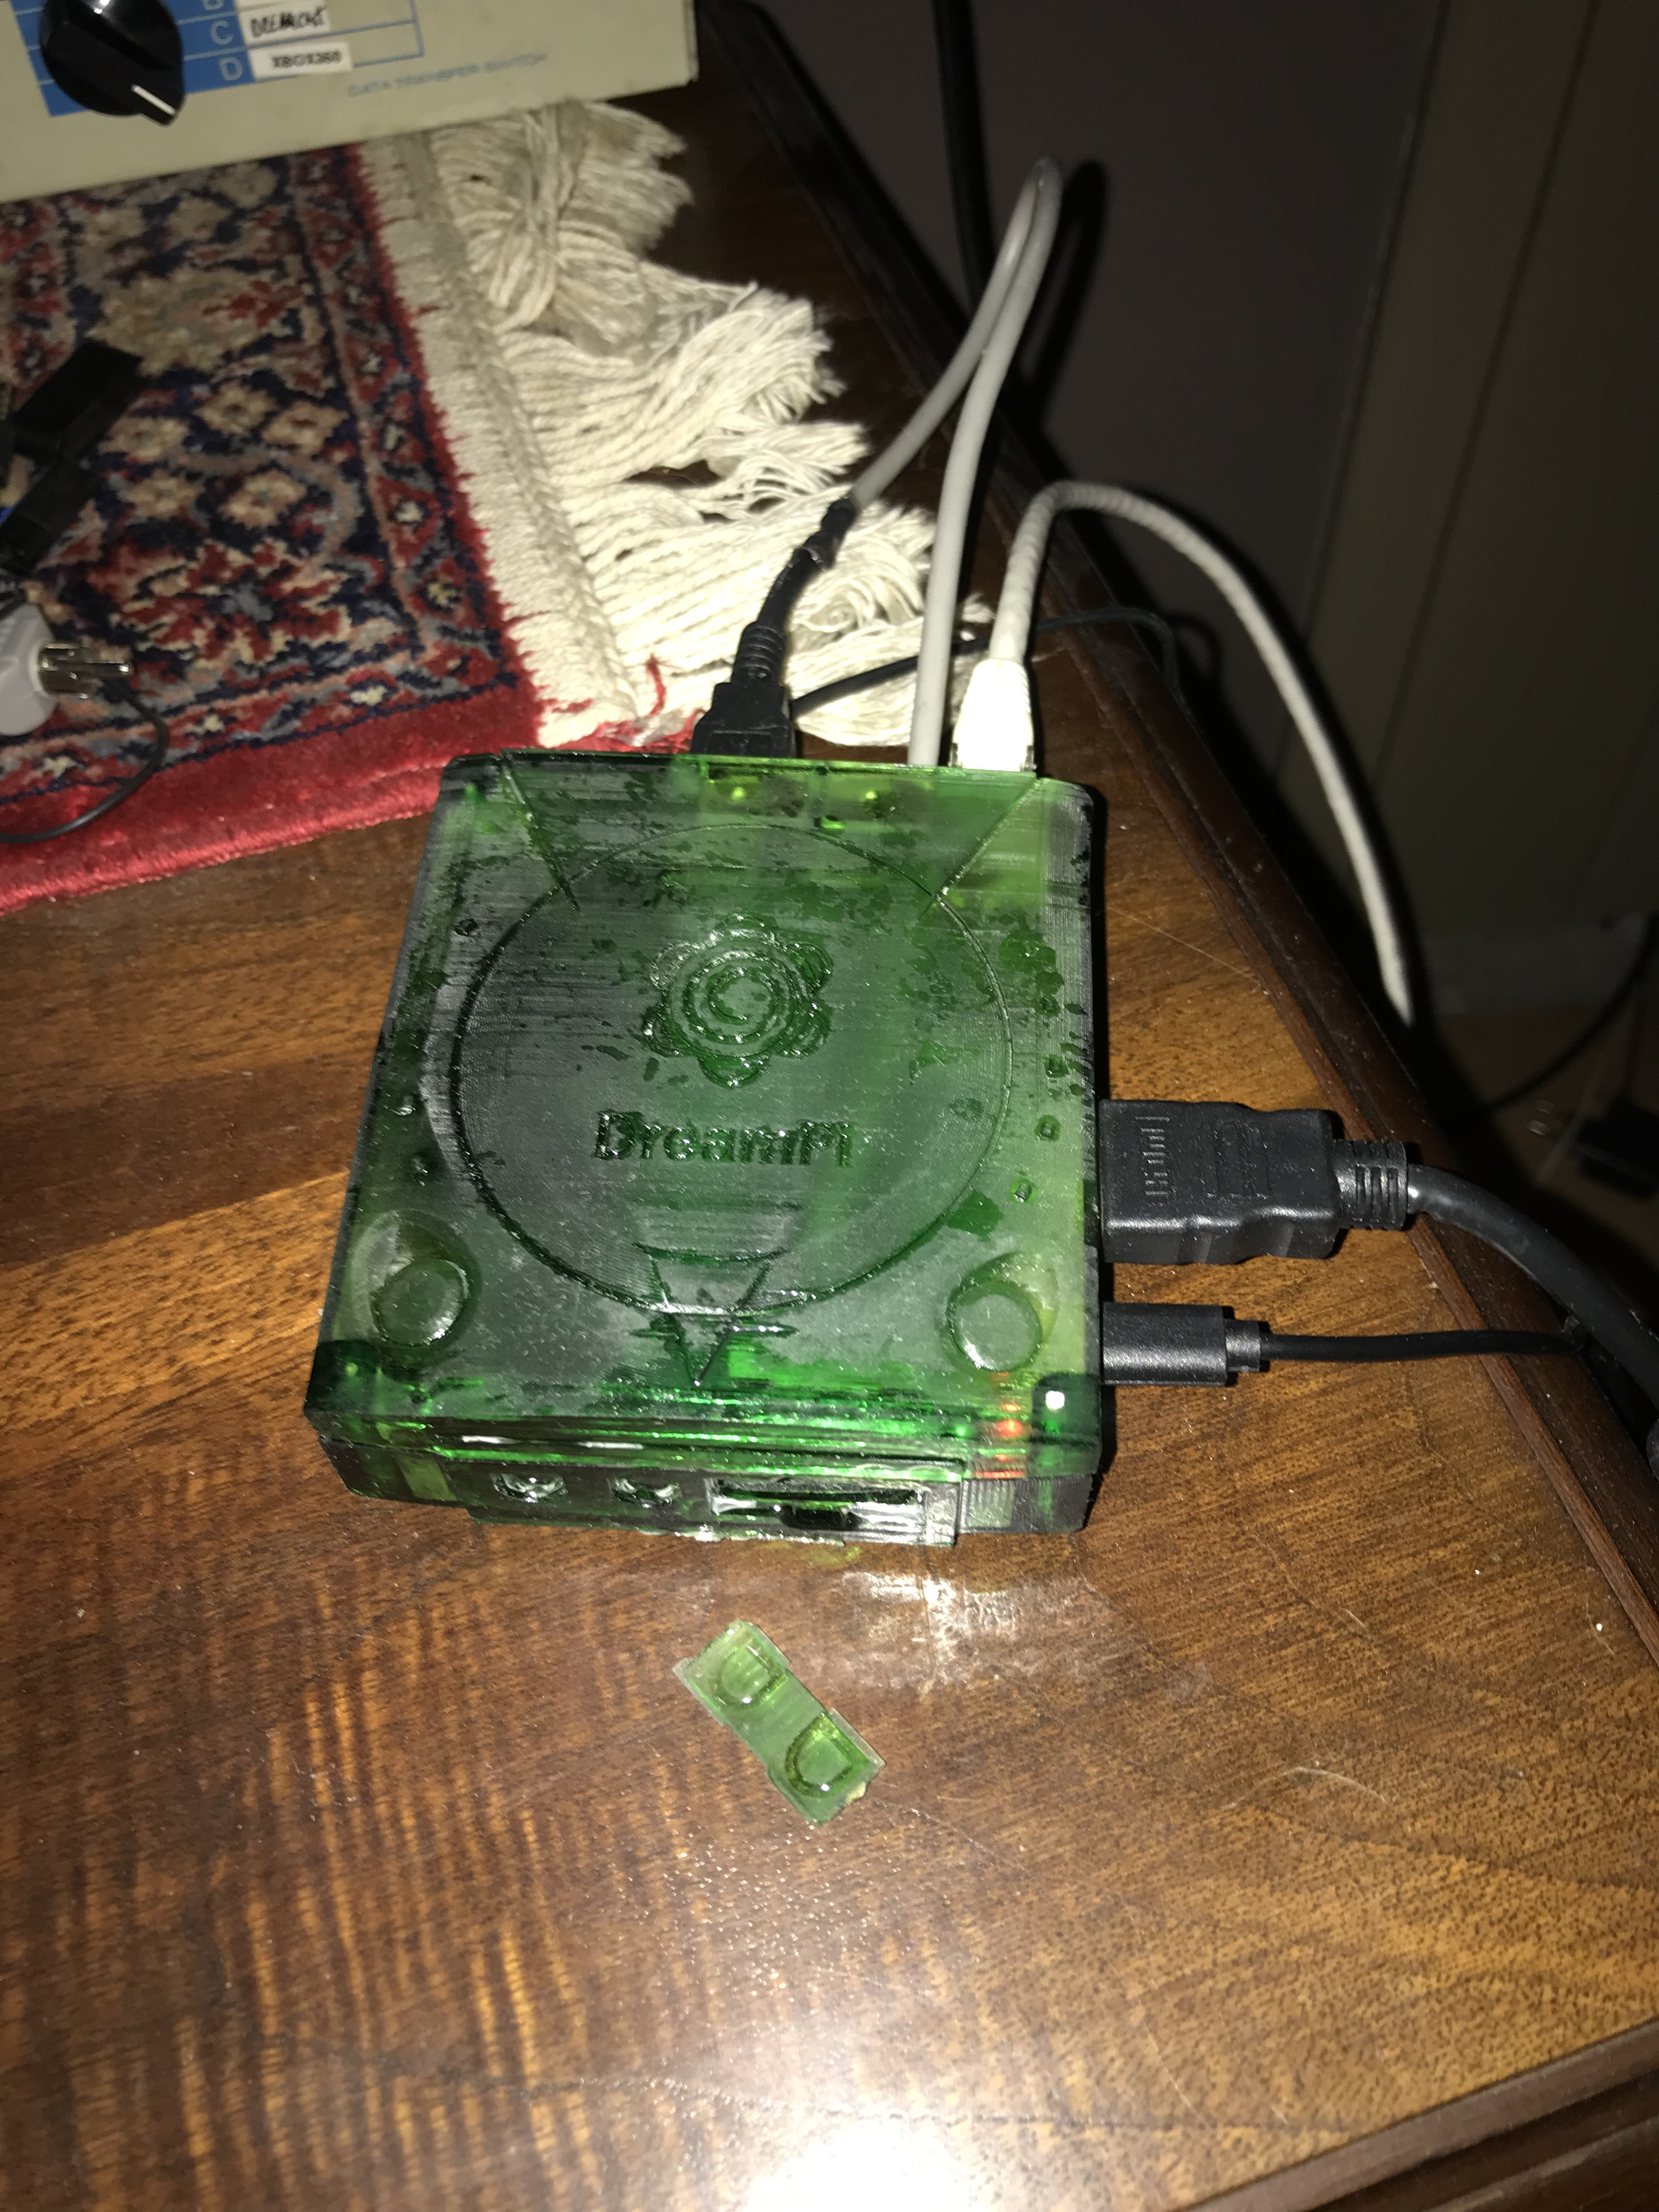
Few weeks ago I installed Dream Pi on one of my Raspberry Pi’s.
After that I could enjoy the Online interner of 1999 😀
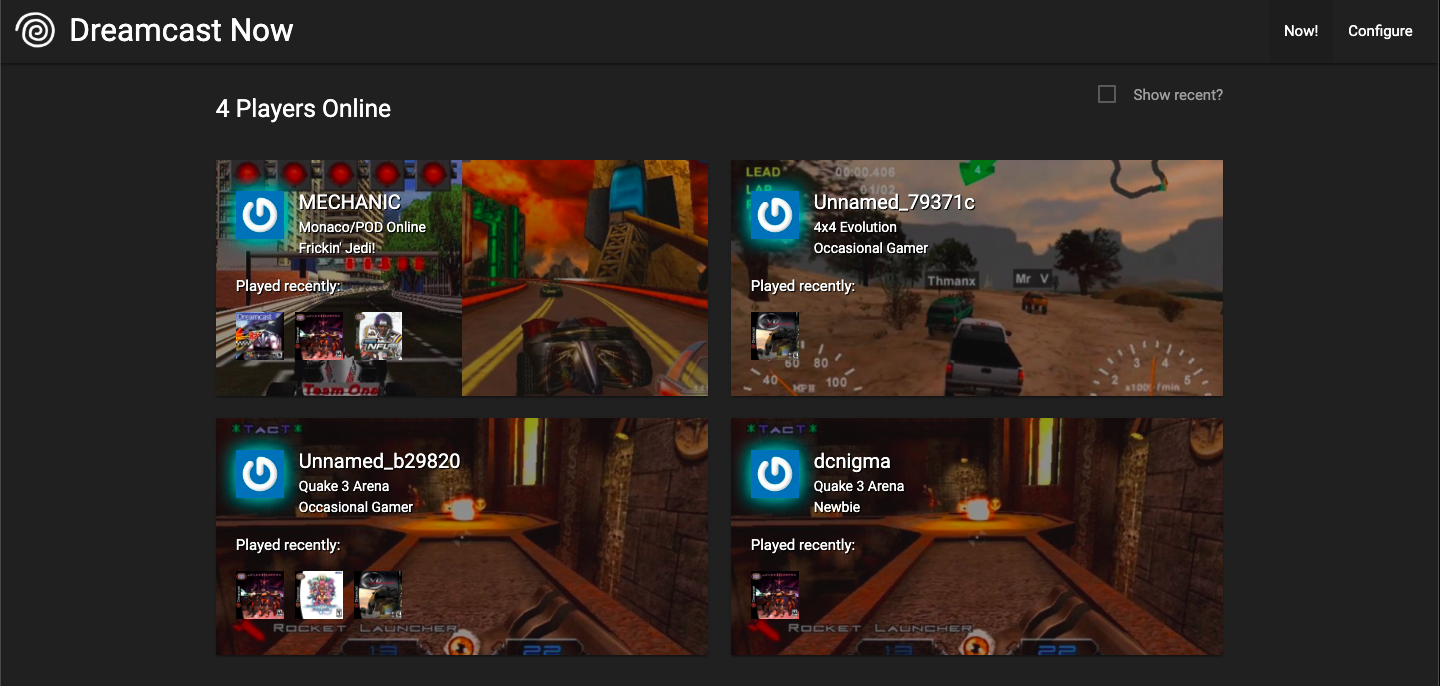
There is also a nice site that keeps track of how is online: dreamcast.online/now
But I din’t have a good case for it so it was laying around.
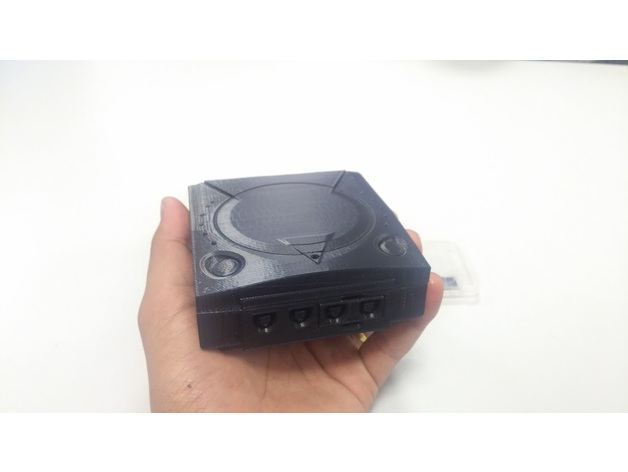
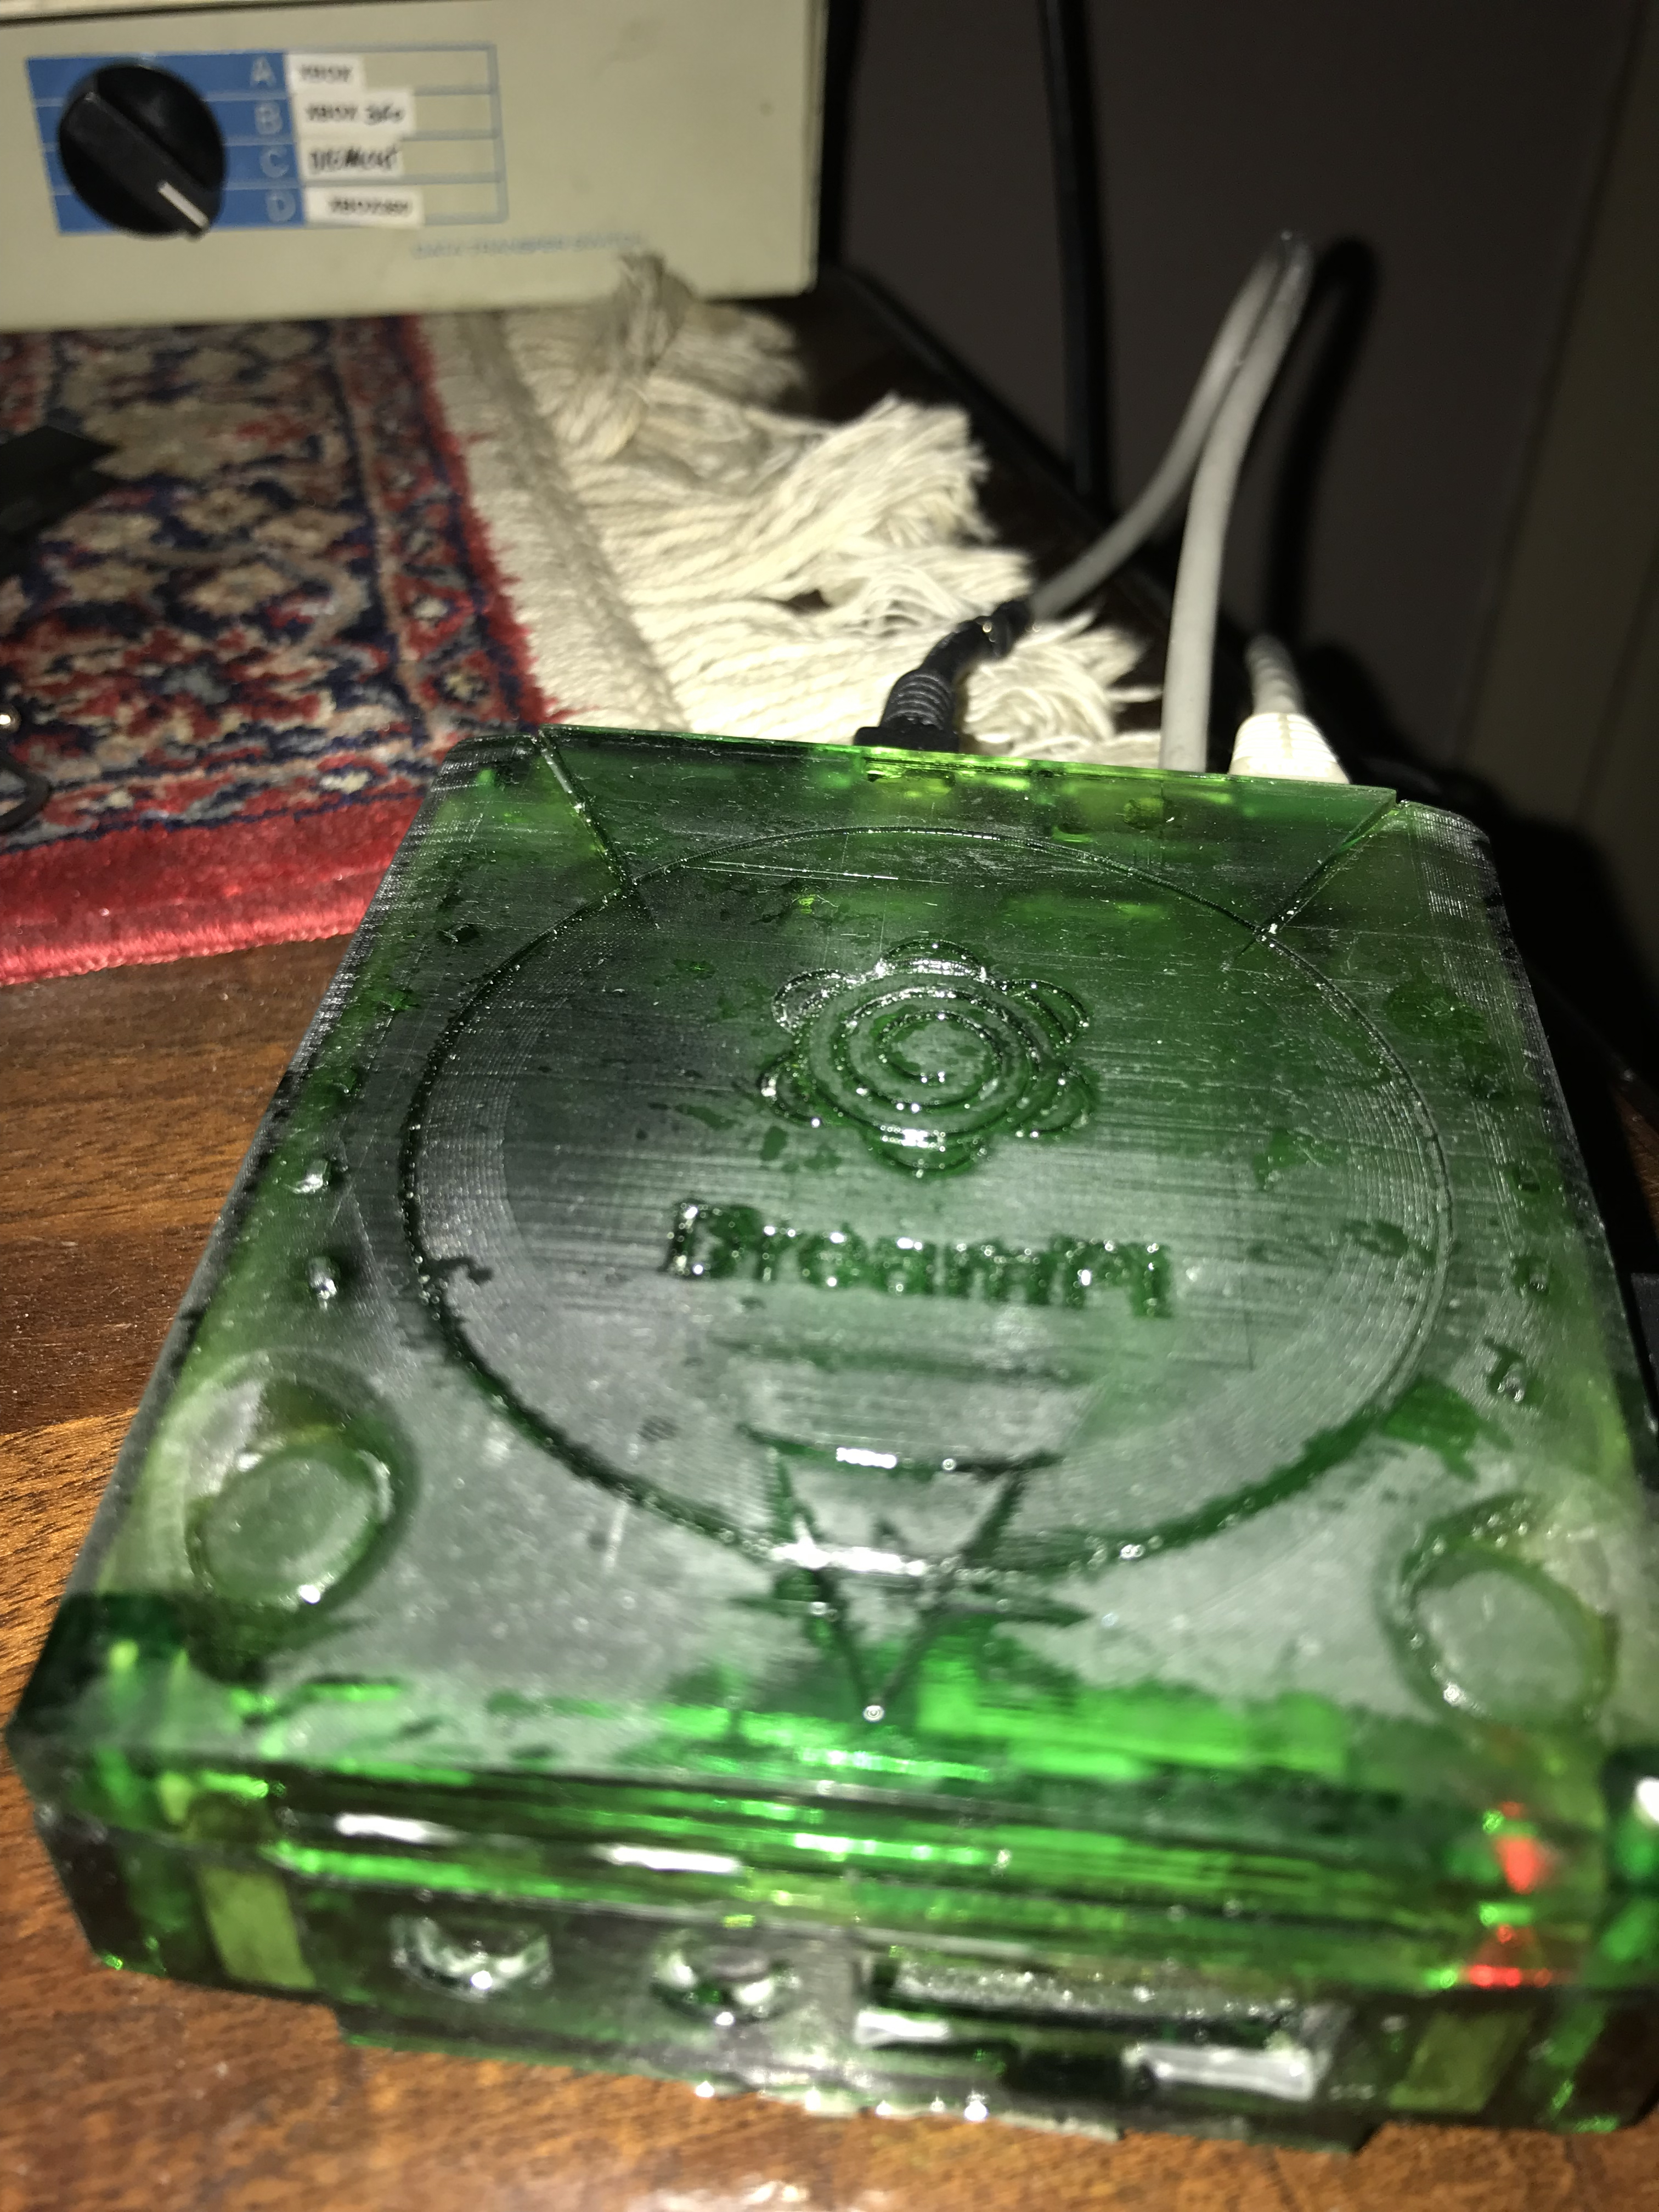
So I wanted to try for my first print on my new Anycubic Photon a Dreamcast Shell that I found on Thingiverse.Just a Video of me trying to connect to DreamPi and Quake 3 DC servers
Quake is my go to game to test my connection…
First print ever on my Anycubic Photon… Not that good result 🙁
Did’t clean it correctly,
I did it in water after print and then let it there for a day, and then let it dry in the sun.
The water made it all defuses ooo well learned something i guess Maybe I can clean it a bit up, but for now the setup looks beter then it looked before.
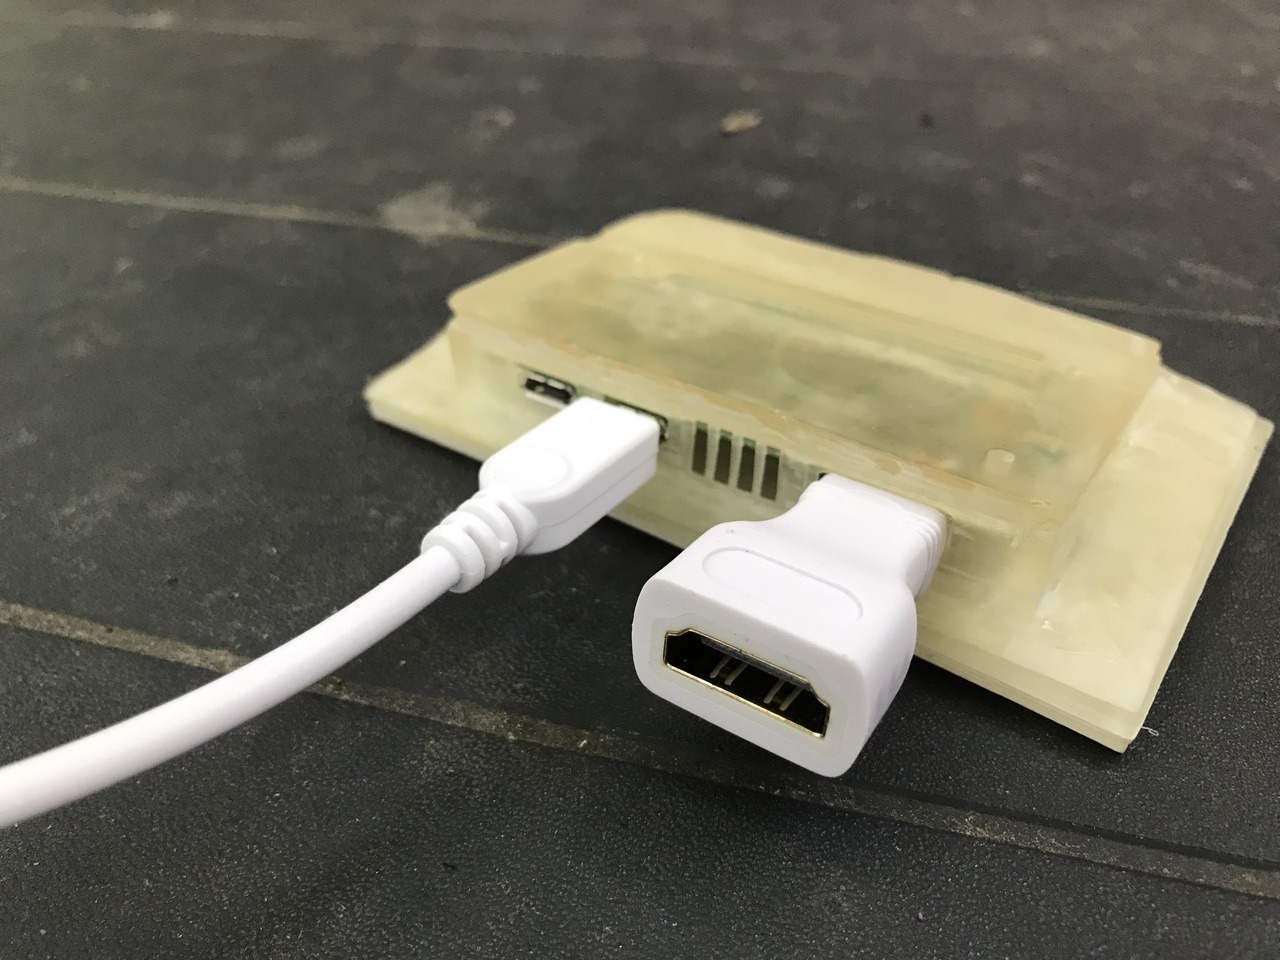
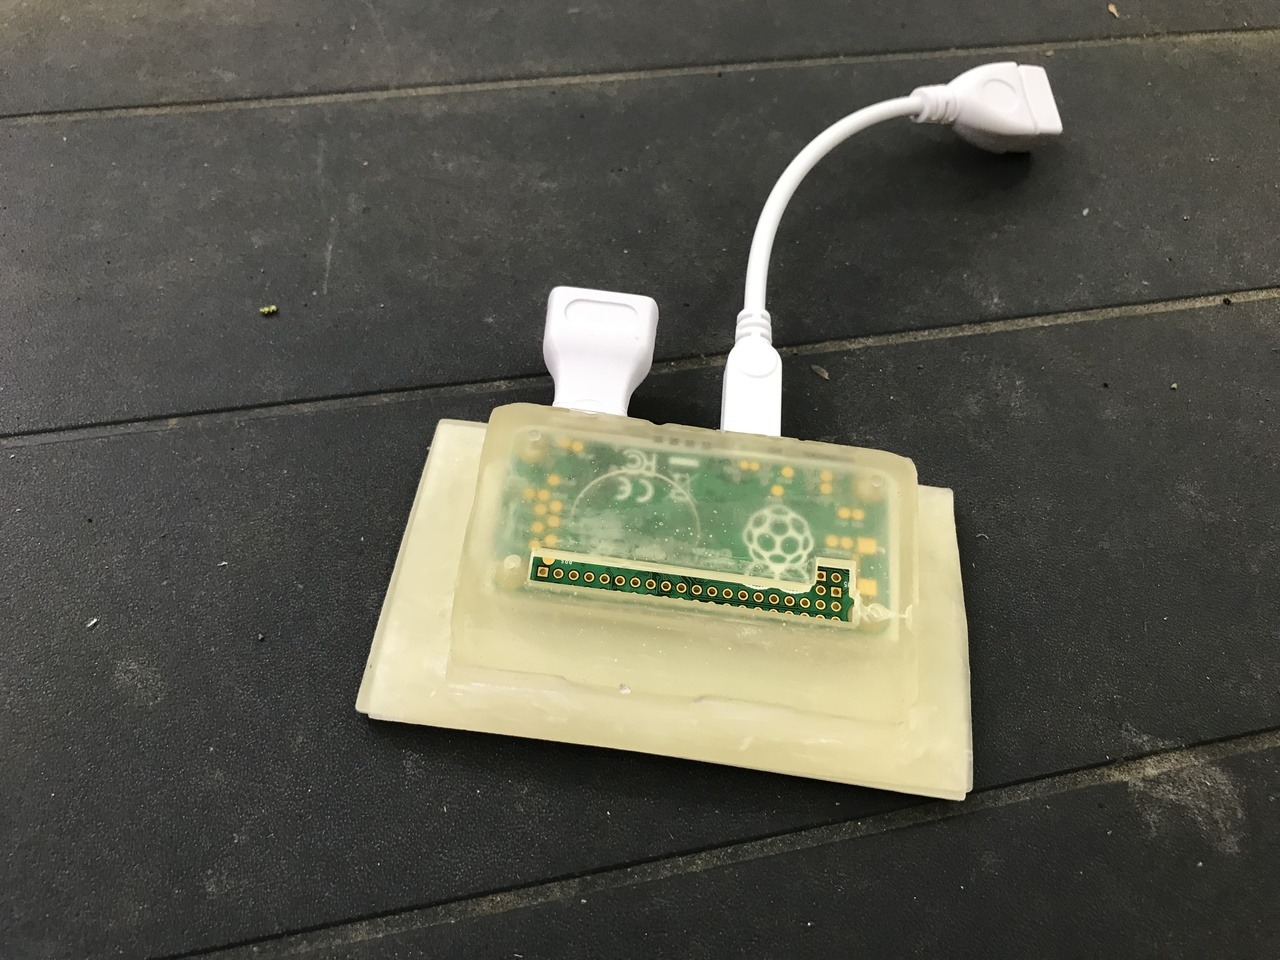
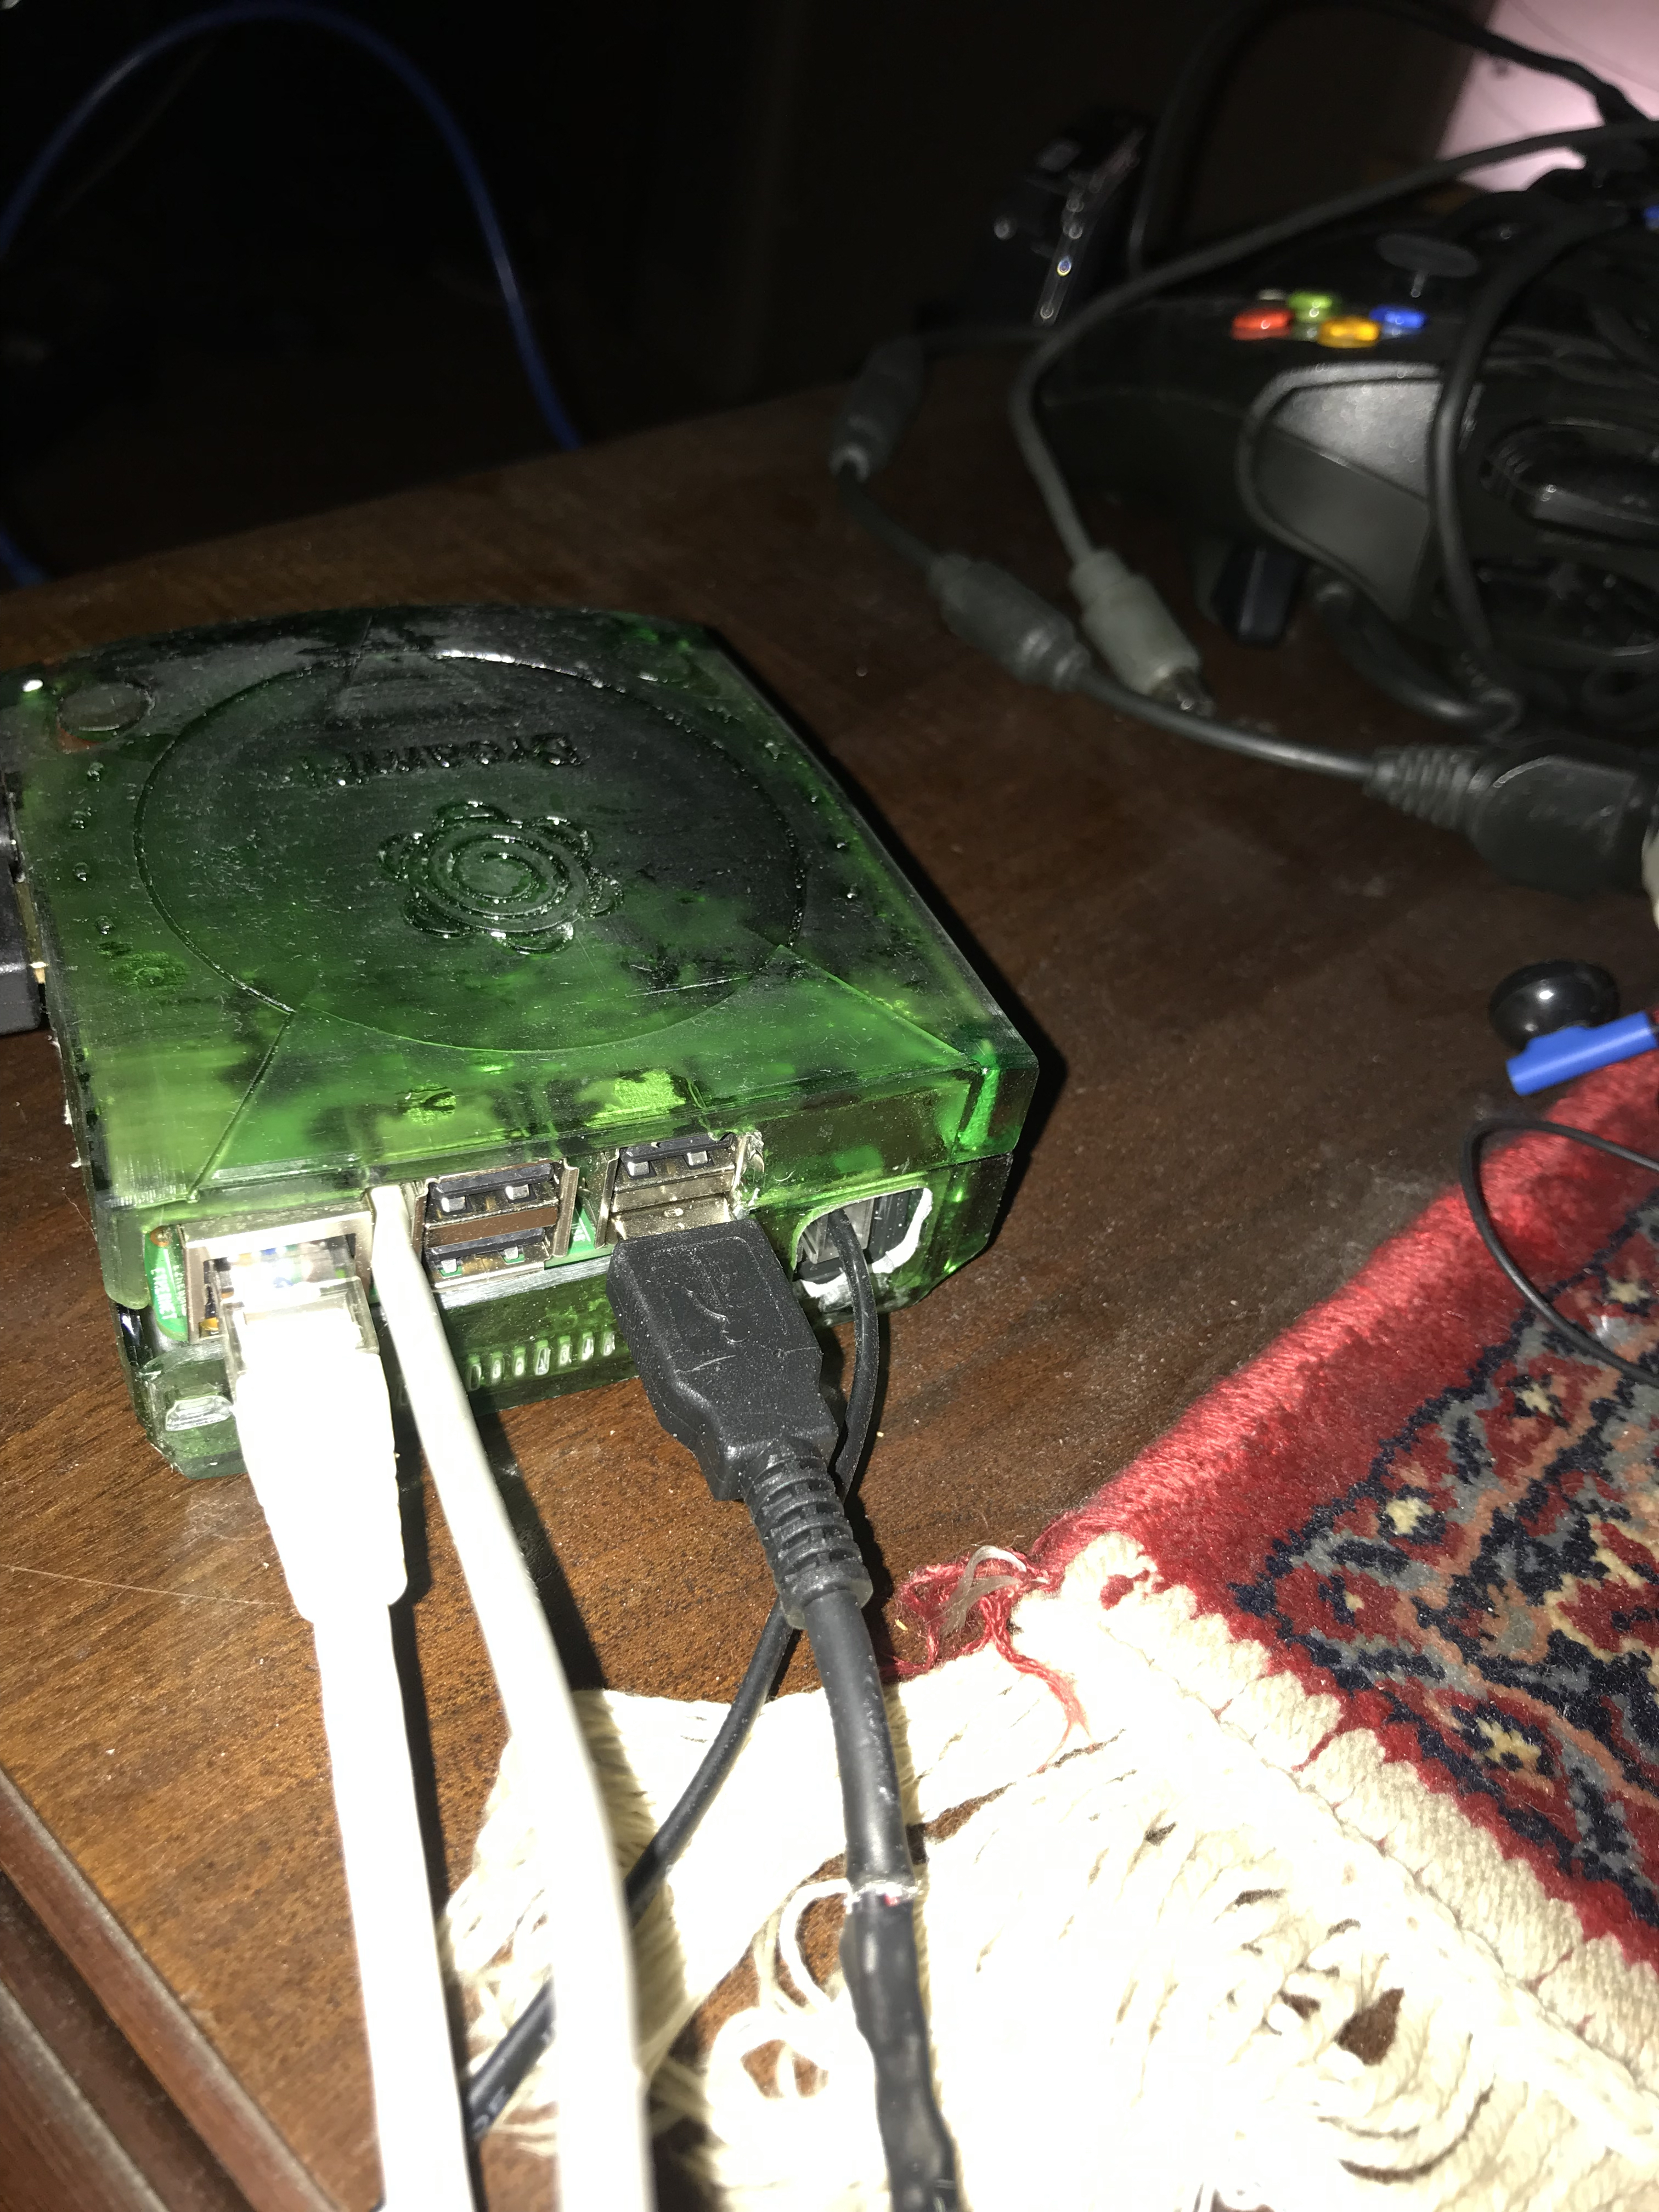
There was room for the USB modem in the shell so i mod it in.
Only needed to extend the USB cable to make it work:
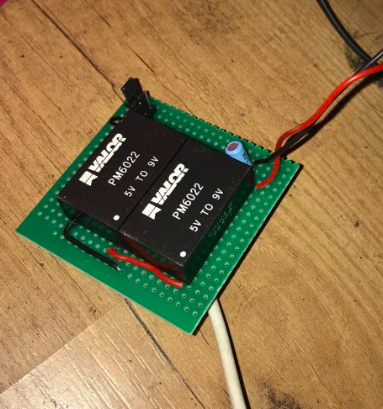
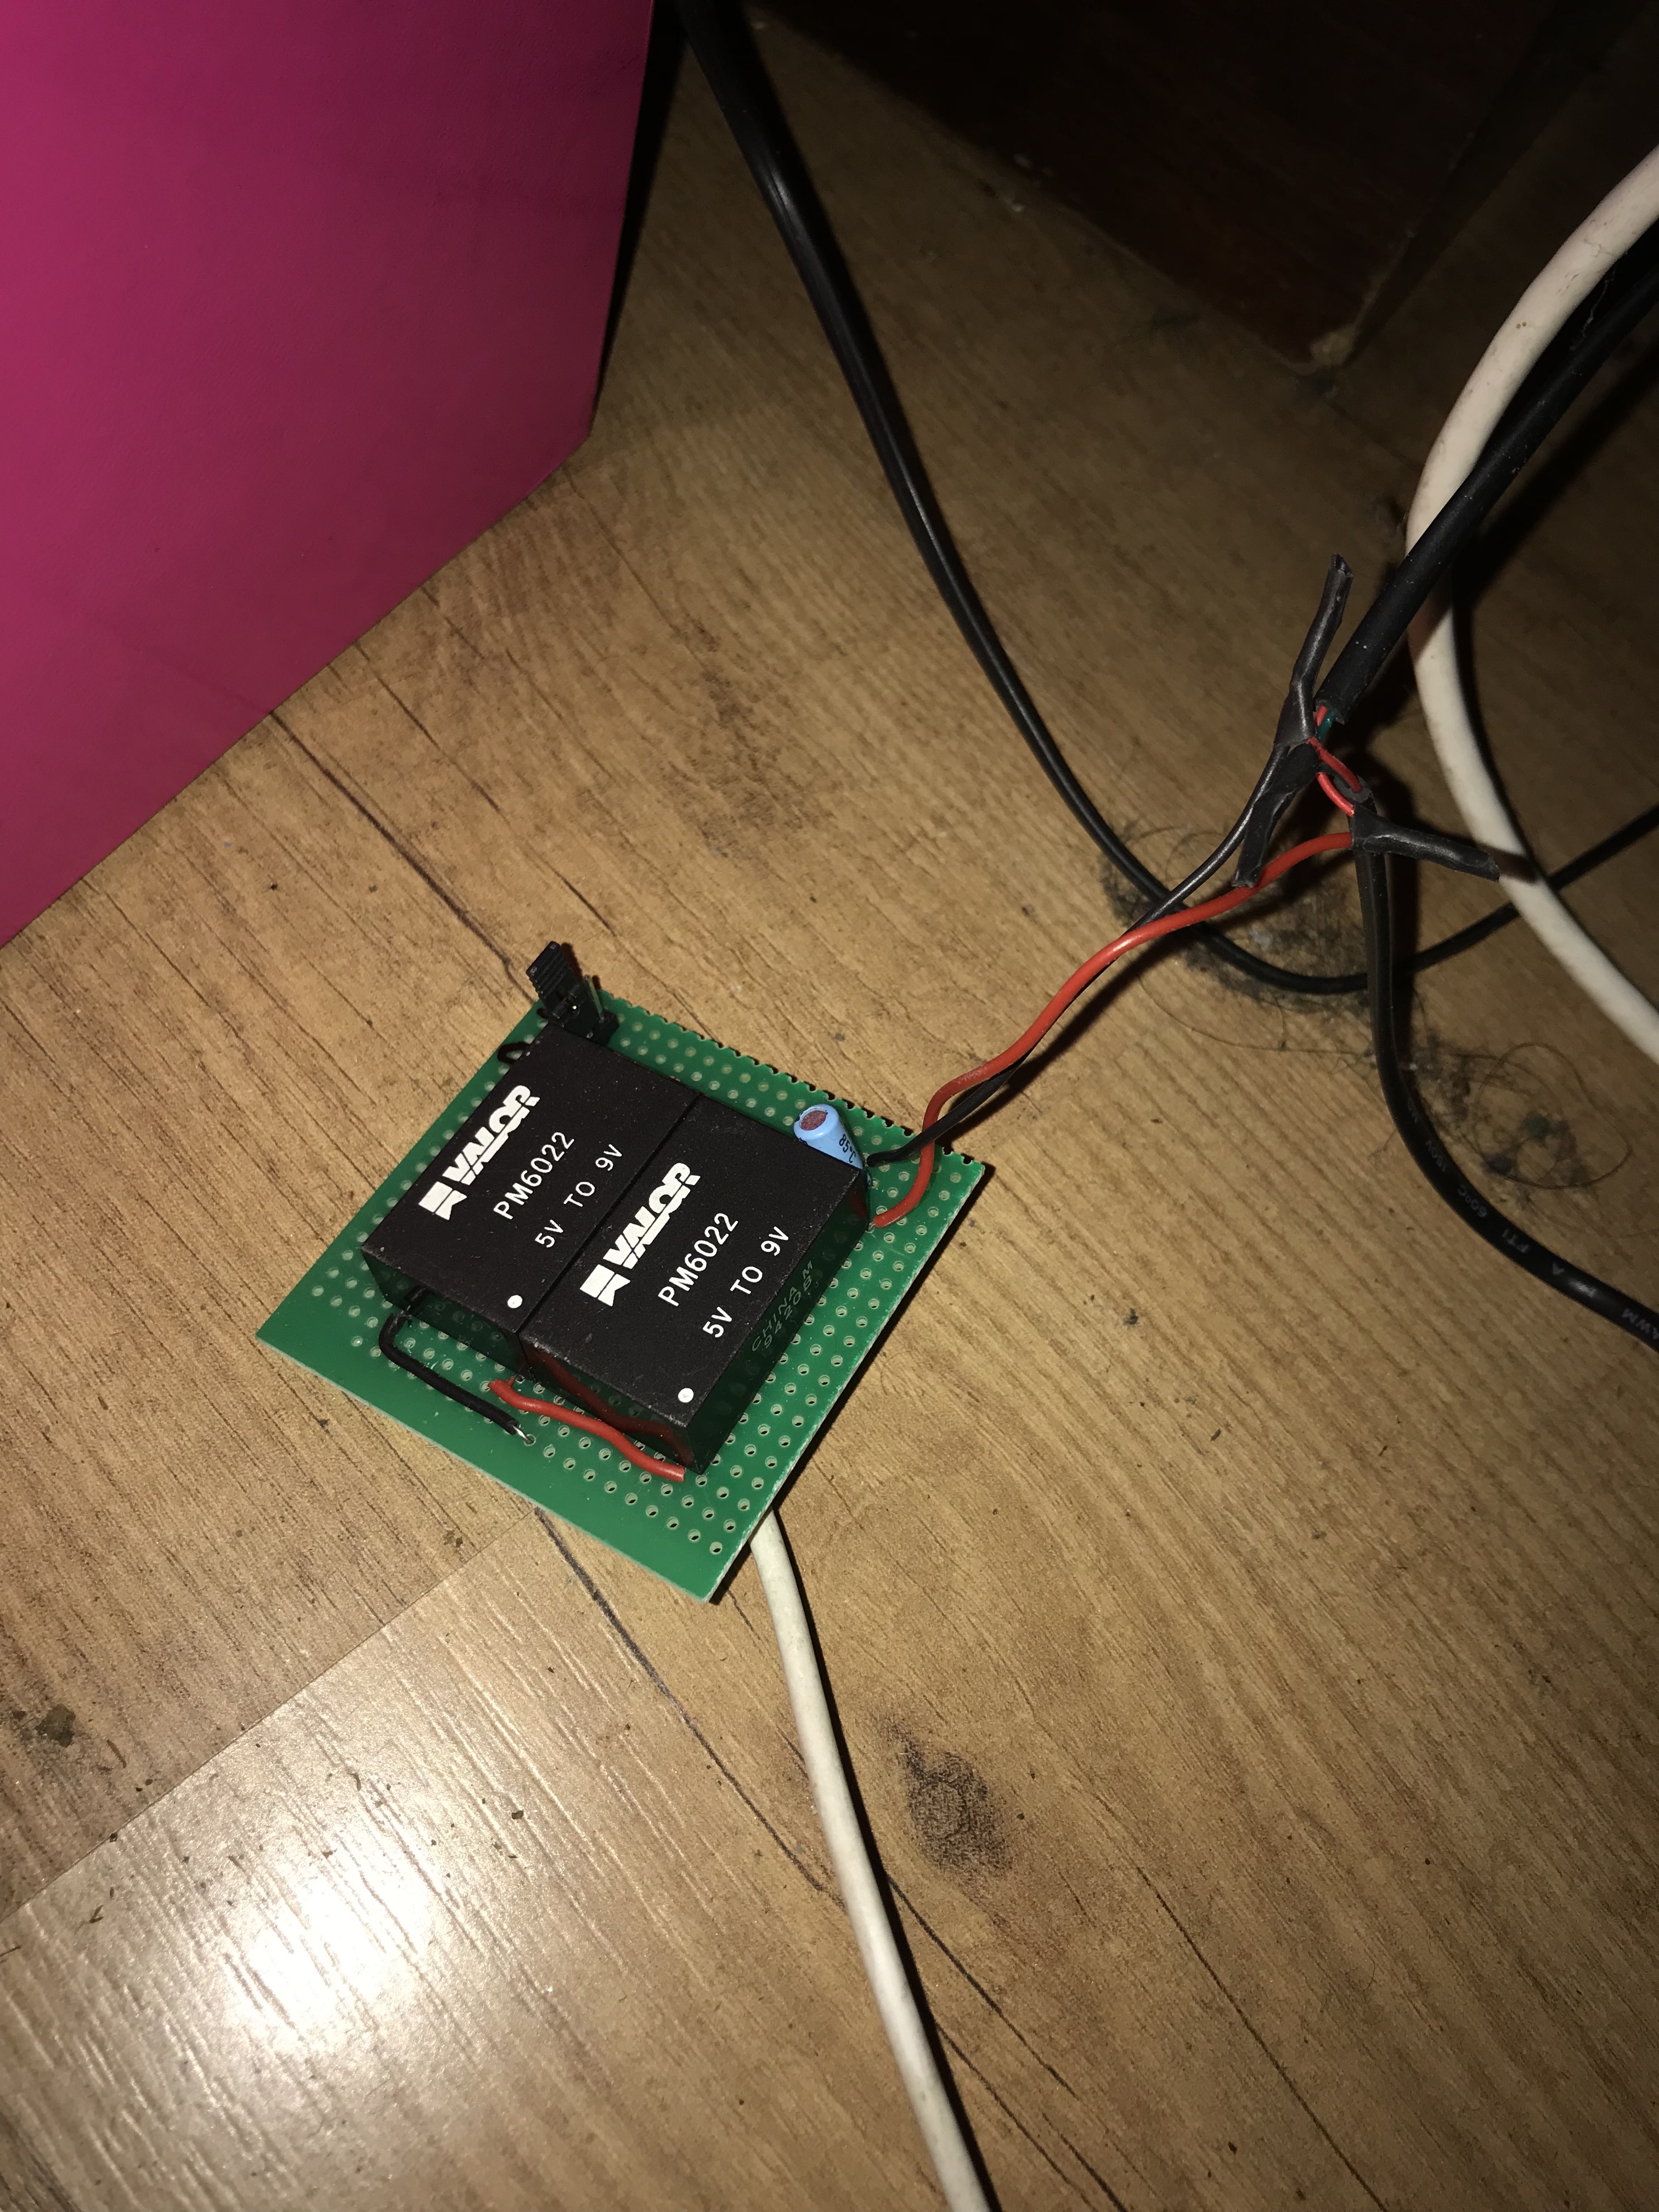
My Voltage Line inducer 2 x 9v because I live in PAL area!
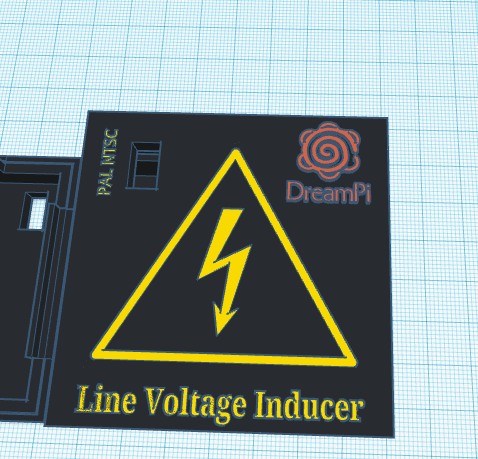
Need to fix me a box or something for this thing…
Made a design
Will not print in color gonna use crayons to fill in the text and logo’s


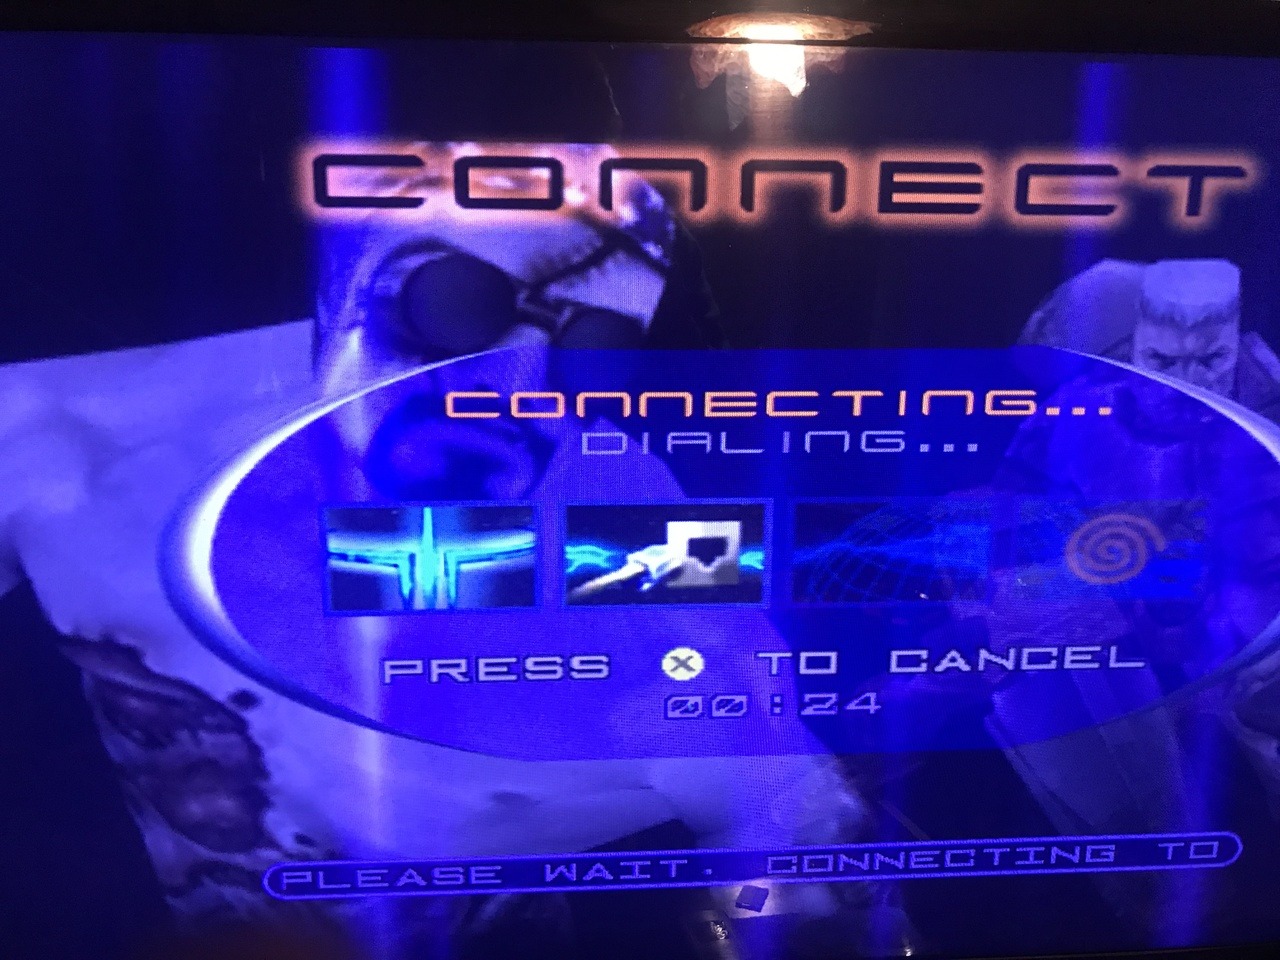


 Just a Video of me trying to connect to DreamPi and Quake 3 DC servers
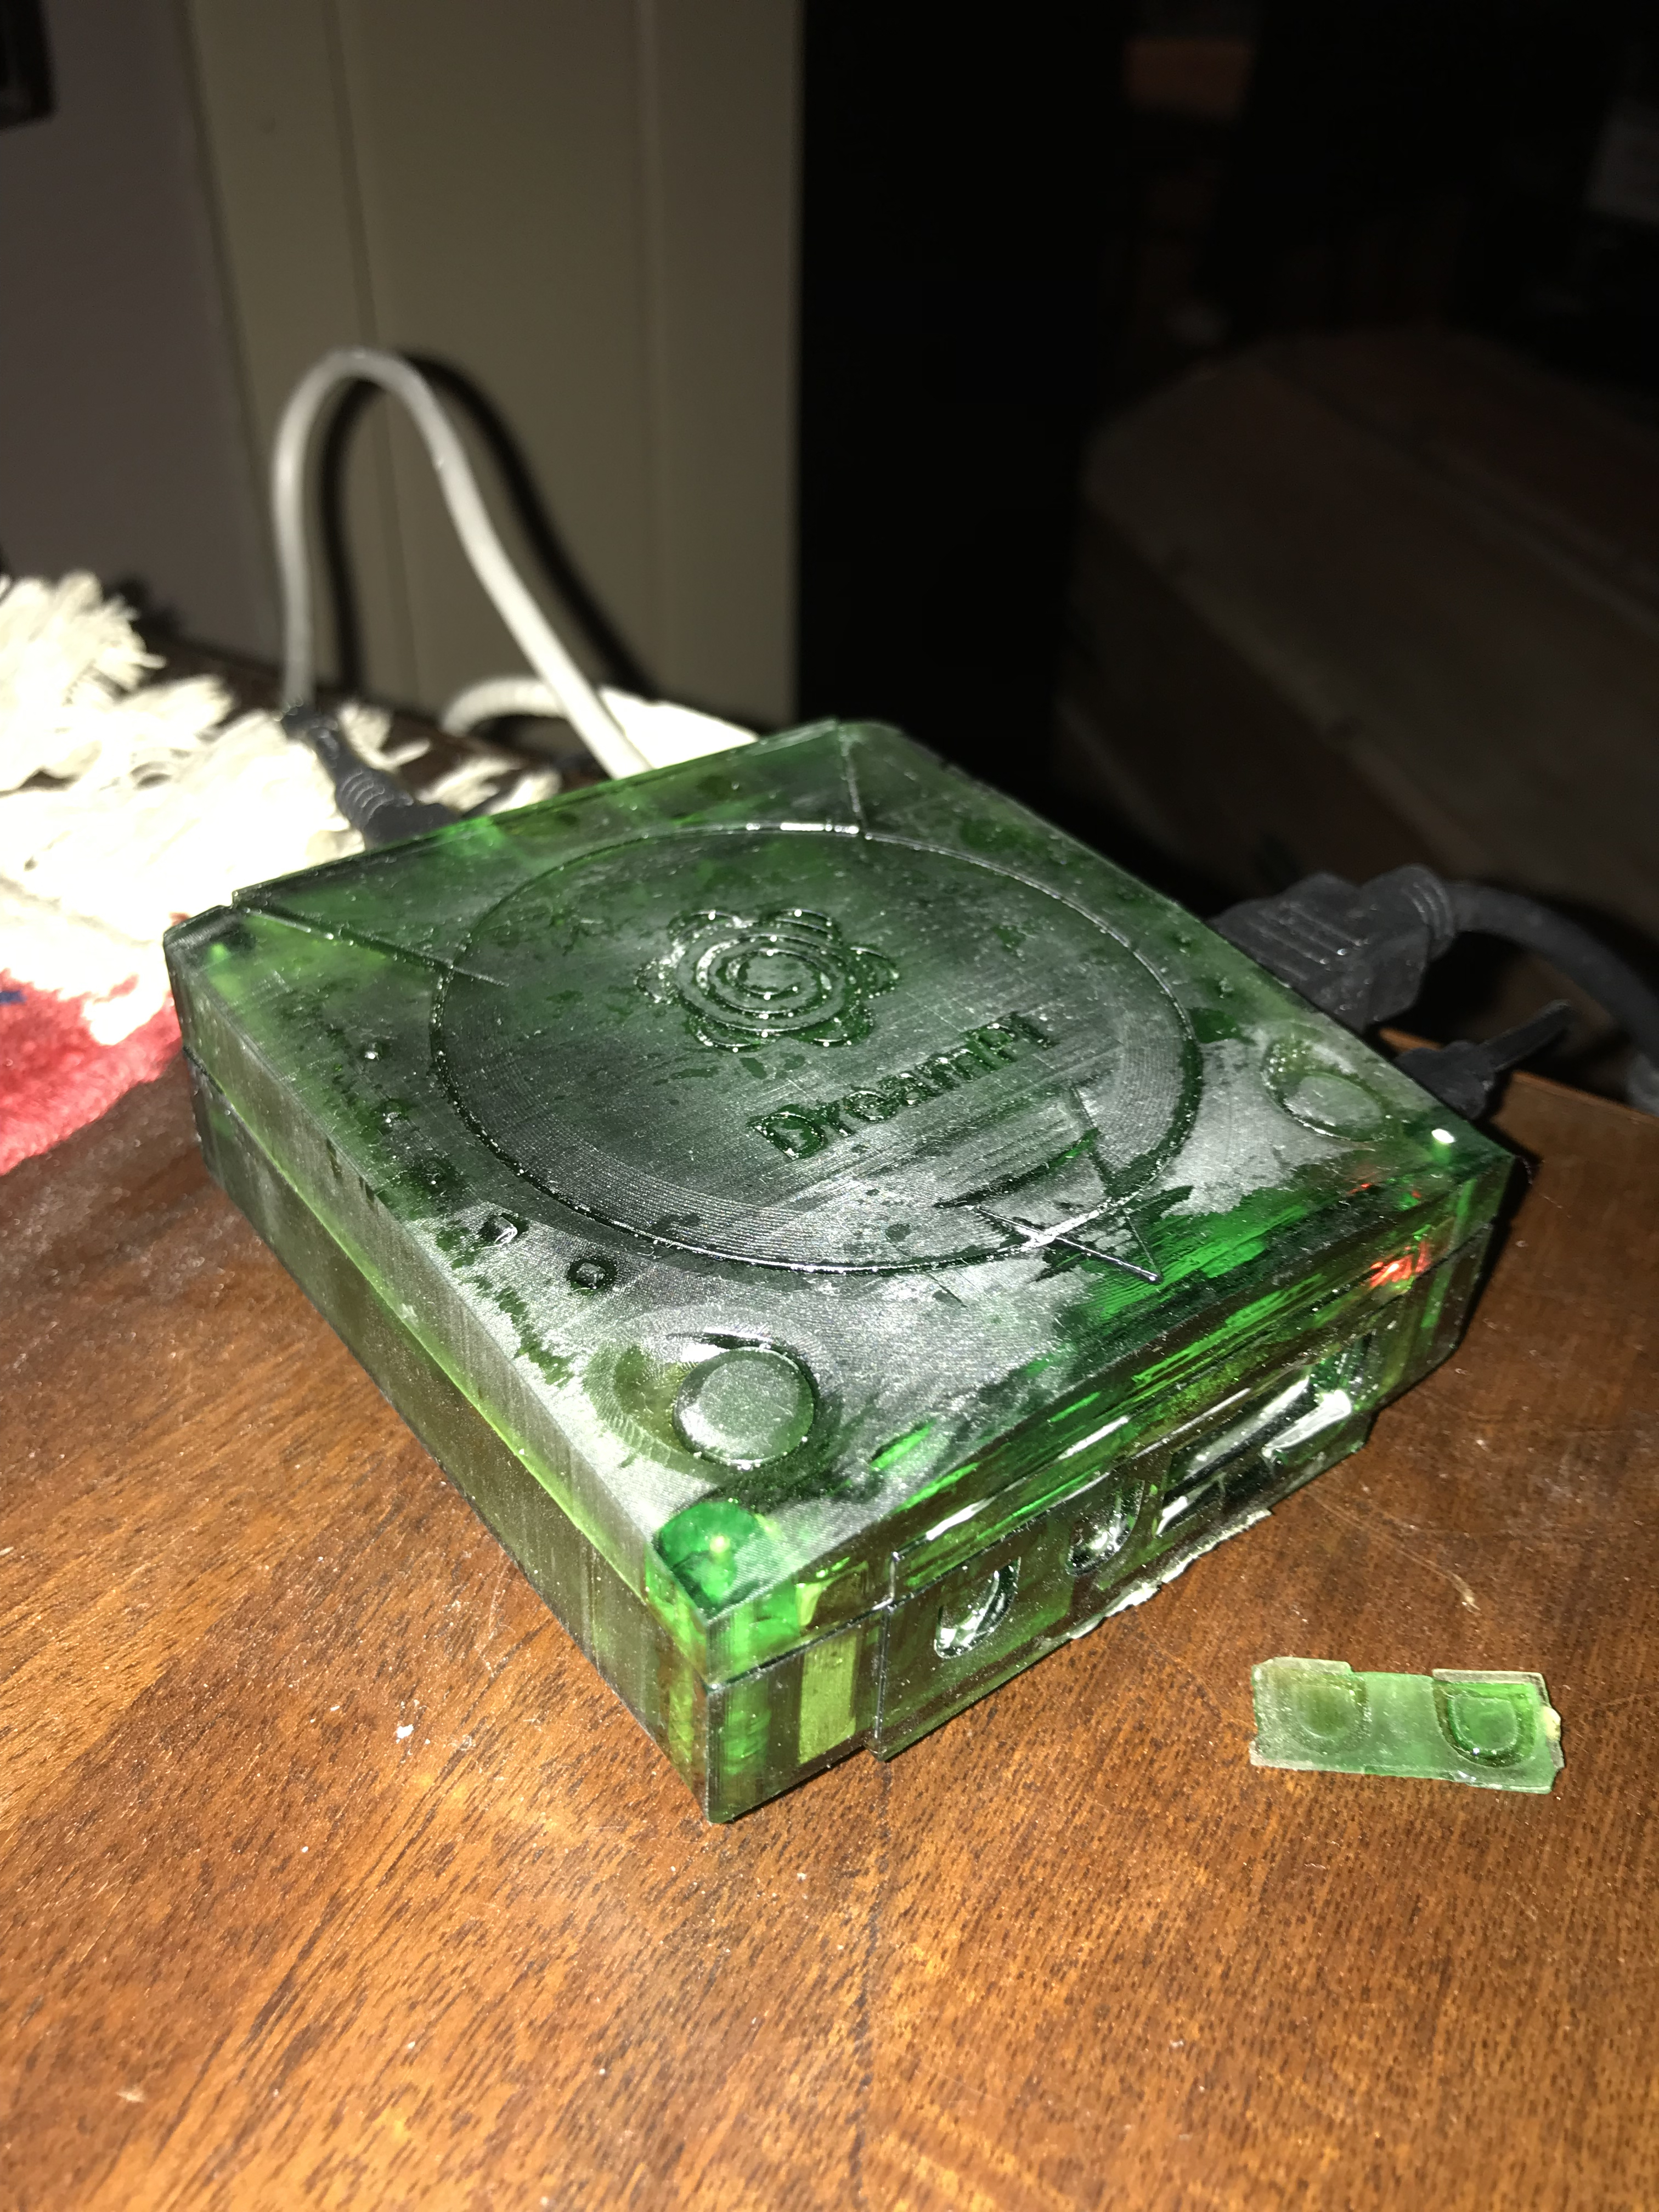
