Made a Pwnagotchi >> M1n1N16m4

(⌐■_■)
PWNAGOTCHI: DEEP REINFORCEMENT LEARNING FOR WIFI PWNING!
Source: https://pwnagotchi.ai/
Here are some pictures of my build/design of the case:
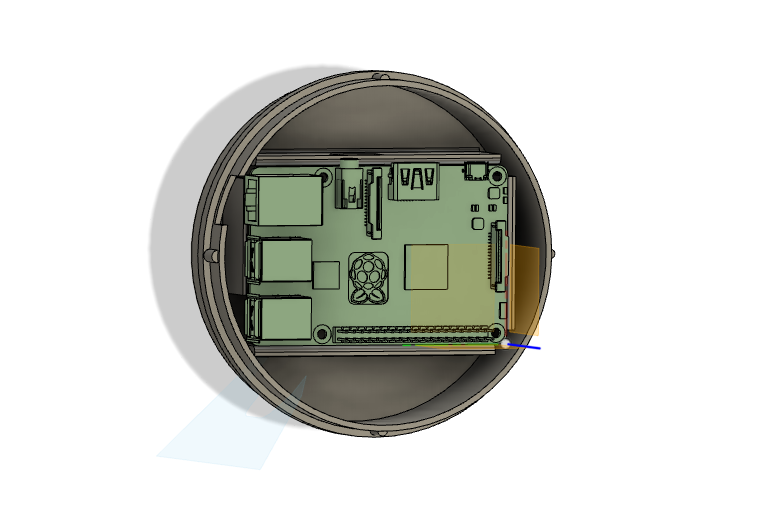
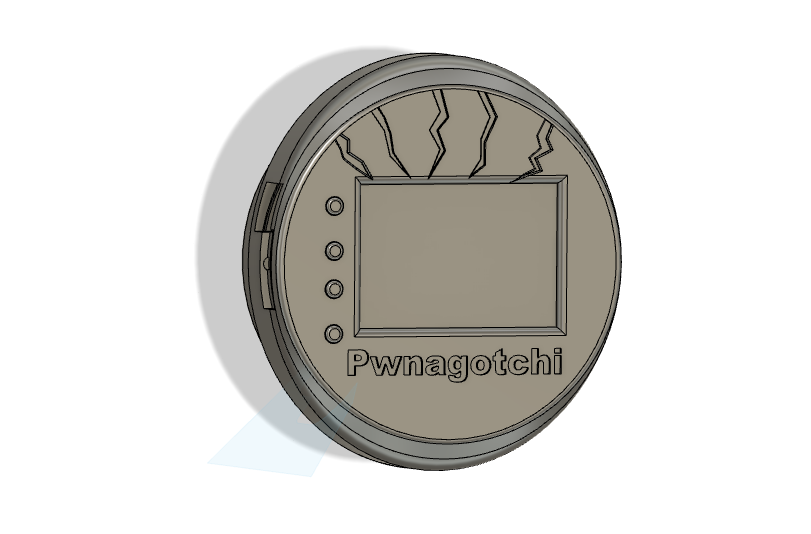
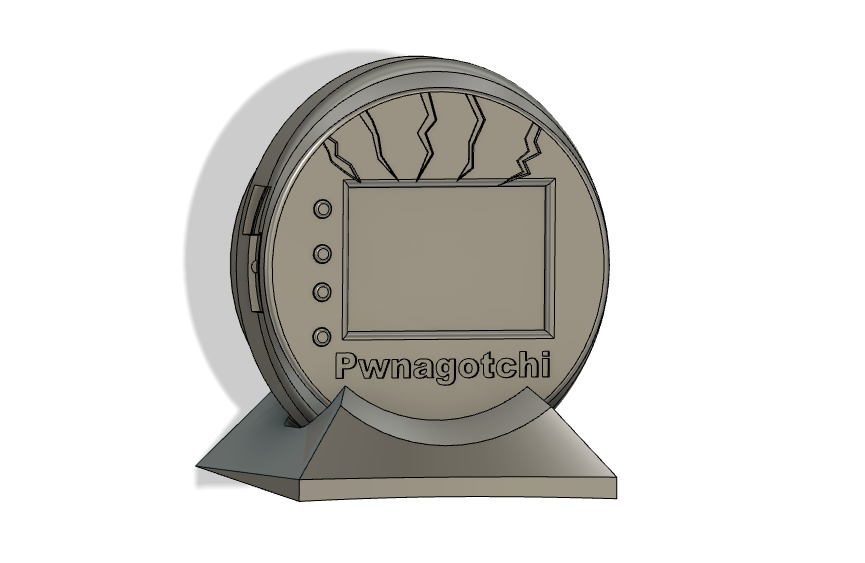
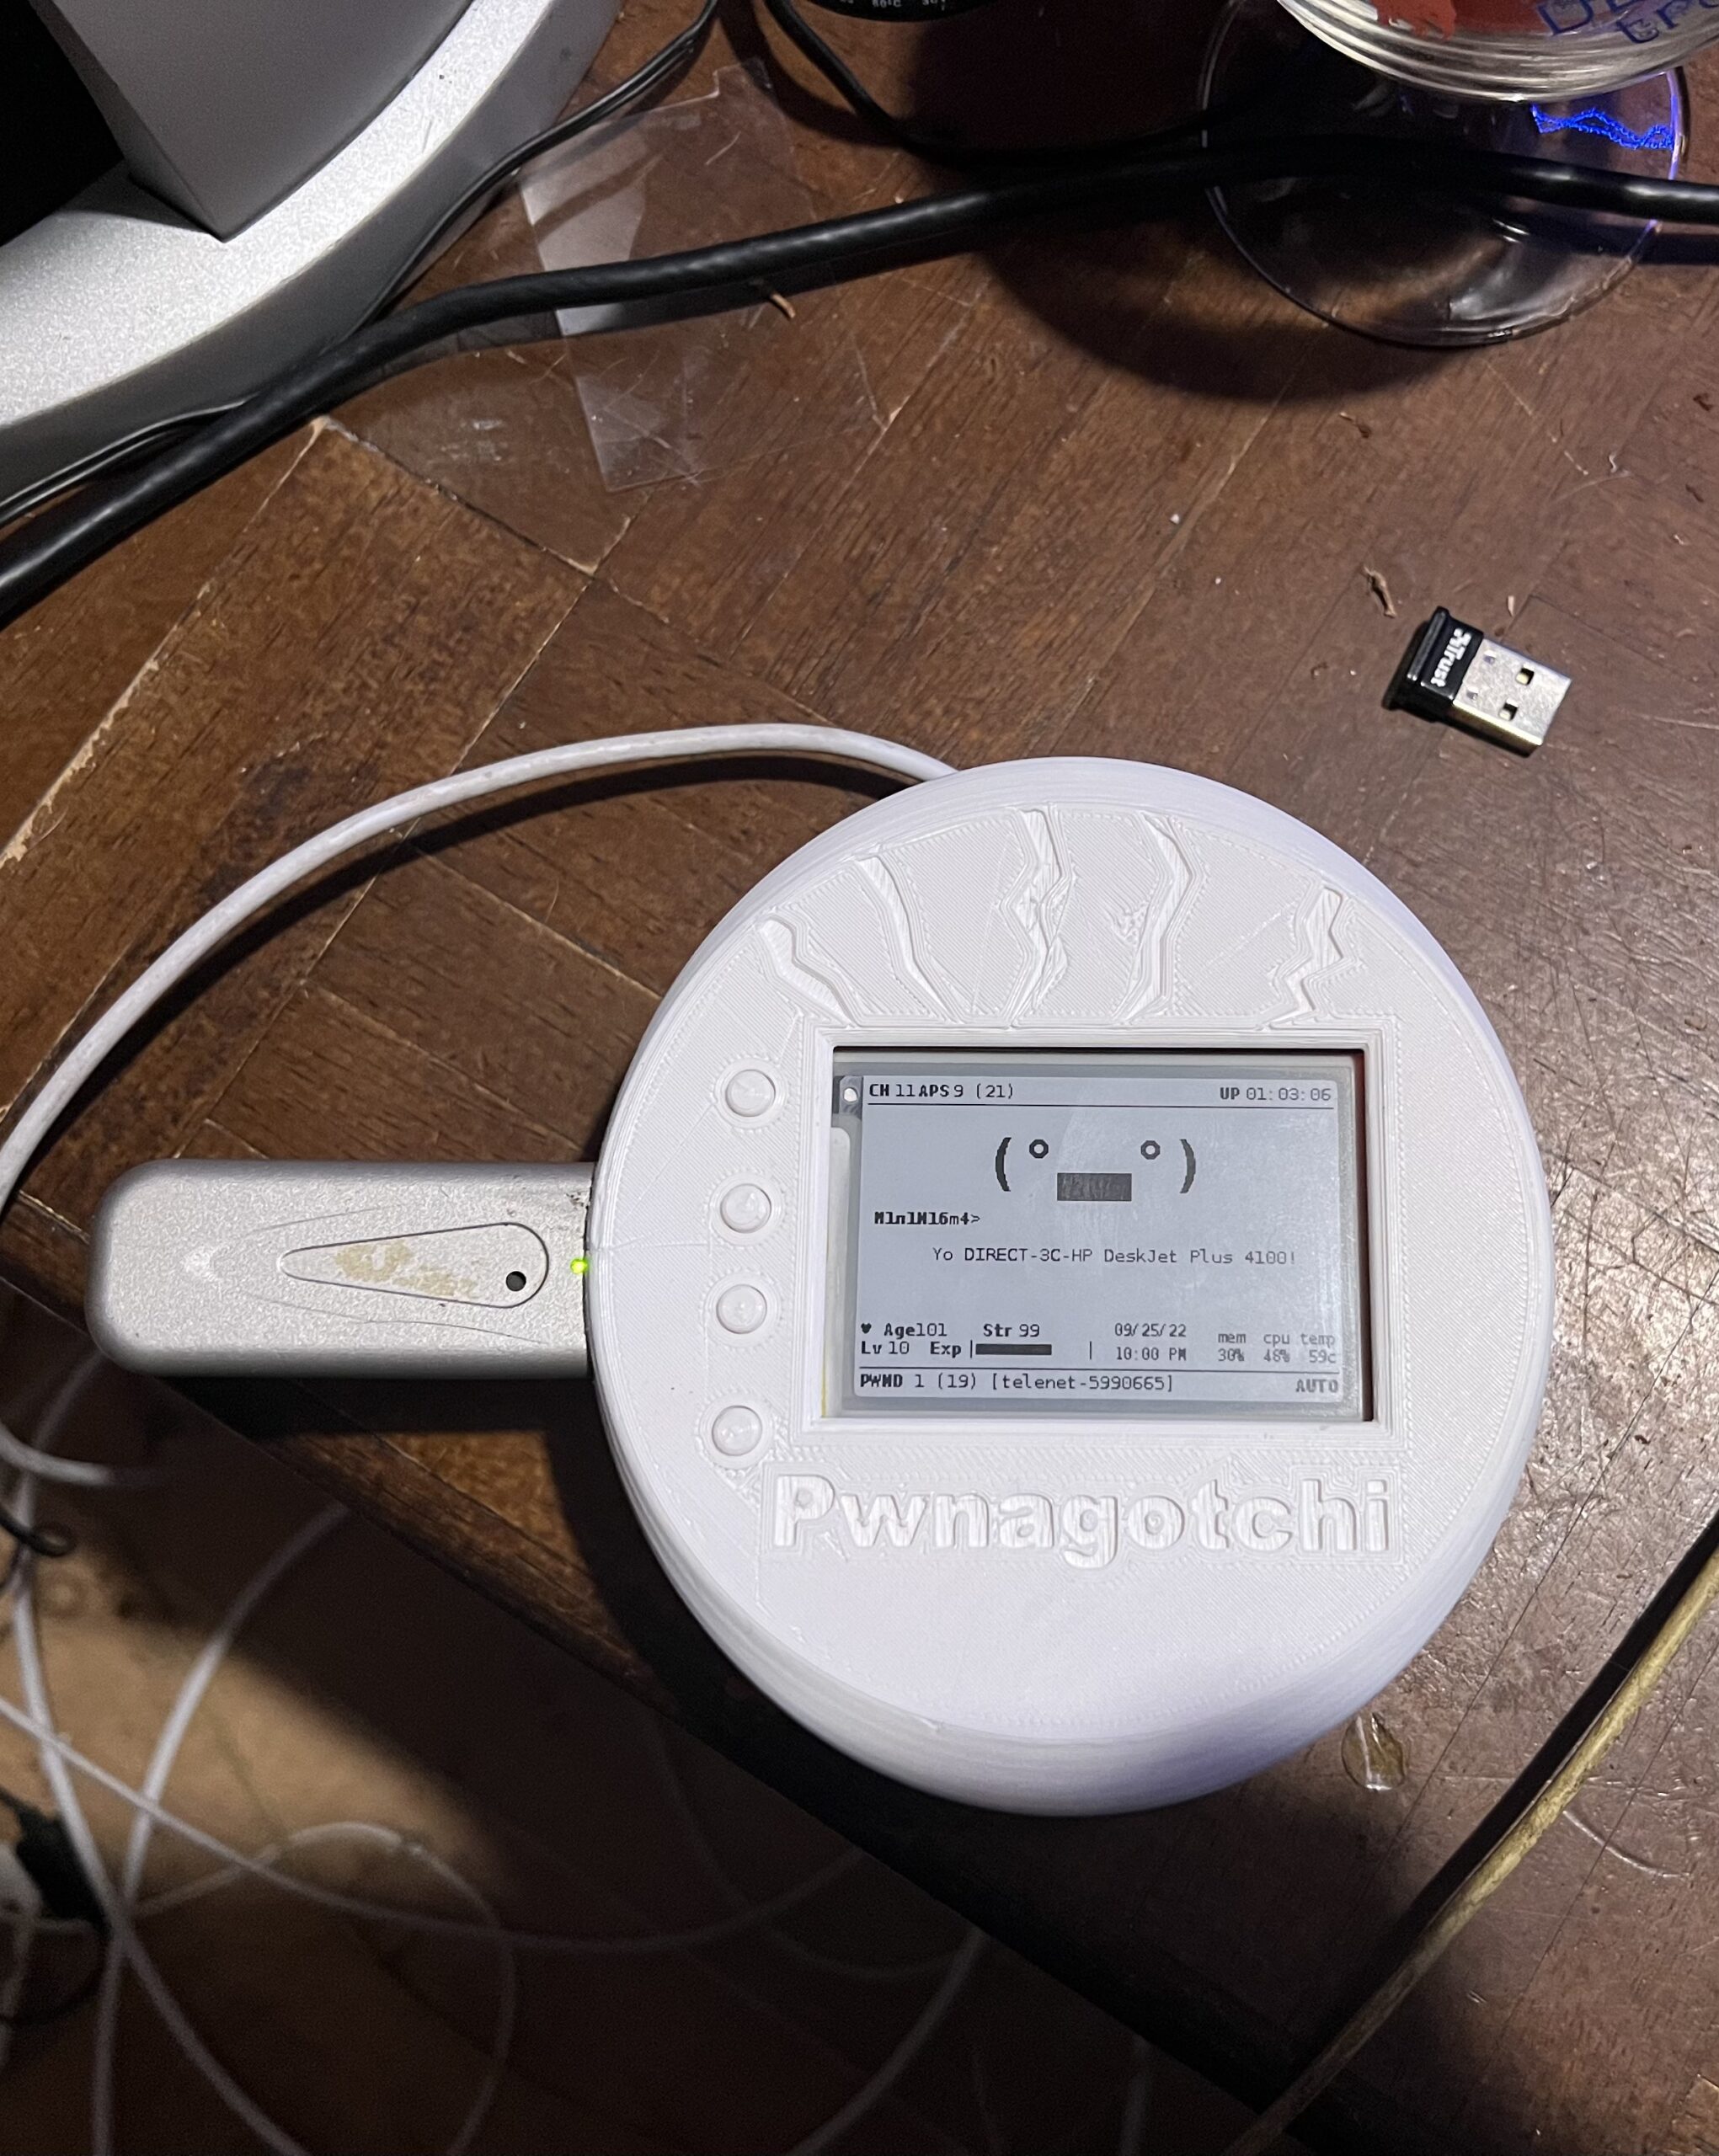
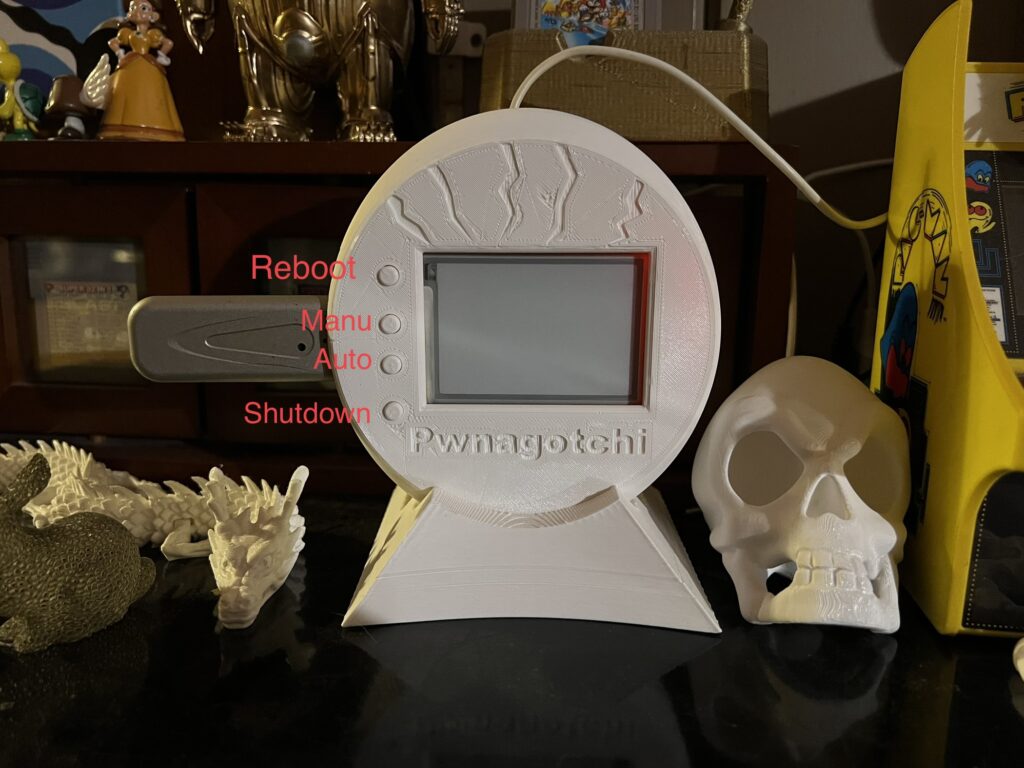
The Case is not perfect, but works 🙂 need some sanding to fit the ports.
STL files will be uploaded to Thingiverse
Specs:
- Raspberry Pi 3b+
- WaveShare 2.7 inch e-Paper HAT
- RPI UPSpack v3
- Sweex WiFi dongle (2.4ghz only (very old but works perfect on raspberry))
- Real-time clock ds3231
TODO: wire UART from ups to raspberry and write a plug-in
Backup and Restore
Backup your SD card using DD (osx)sudo dd bs=4m if=/dev/disk* of=pwnagotchi.img
Restore SD after you F*ck Upsudo dd if=/Path/To/pwnagotci/pwnagotchi.img of=/dev/disk* bs=4mOr use balenaEtcher or any other Img writer
Buttons!
I wanted to make use of the buttons so I made a very simple python script.
But I never learned python so its a bit of hack and slach 😀 If it works it works!
Also Install gpiozero to make it work:
pip3 install gpiozeroimport os
import gpiozero # We are using GPIO pins
import time
button1 = gpiozero.Button(19) # GPIO19 connects to button
button2 = gpiozero.Button(13) # GPIO13 connects to button
button3 = gpiozero.Button(6) # GPIO6 connects to button
button4 = gpiozero.Button(5) # GPIO5 connects to button
while True:
if button1.is_pressed:
print("Button 1 is pressed!")
# os.system("shutdown")
else:
print("")
if button2.is_pressed:
print("Button 2 is pressed!")
os.system("touch /root/.pwnagotchi-auto")
time.sleep(1.1)
os.system("systemctl restart pwnagotchi")
time.sleep(5.5)
else:
print("")
if button3.is_pressed:
print("Button 3 is pressed!")
os.system("touch /root/.pwnagotchi-manu")
time.sleep(1.1)
os.system("systemctl restart pwnagotchi")
time.sleep(5.5)
else:
print("")
if button4.is_pressed:
print("Button 4 is pressed!")
os.system("reboot")
else:
print("")
I made it boot from rc.local
sudo nano /etc/rc.localAdded the location:
sudo python3 /home/pi/4_gpio_buttons.py &But no I will use GPIO Plugin just found out how that works 😀
Extra Plugins I used:
- DiscoHash
- Aircrack-ng
- Clock
- Age
- Exp
- Auto_Backup
- GPIO Plugin
- Pwnagotchi Powerutils Plugin
Some Extra info about the plugins:
Plugin configs:
aircrackonly plugin
sudo pwnagotchi plugins install aircrackonly
sudo nano /etc/pwnagotchi/config.toml
# add the following lines to config.toml:
main.plugins.aircrackonly.enabled = true
main.plugins.aircrackonly.face = "(>.<)"
AGE plugin
sudo nano /etc/pwnagotchi/config.toml
# add the following lines to config.toml:
main.plugins.age.enabled = true
main.plugins.age.age_x_coord = 0
main.plugins.age.age_y_coord = 135
main.plugins.age.str_x_coord = 67
main.plugins.age.str_y_coord = 135
EXP plugin
sudo nano /etc/pwnagotchi/config.toml
# add the following lines to config.toml:
main.plugins.exp.enabled = true
main.plugins.exp.lvl_x_coord = 0
main.plugins.exp.lvl_y_coord = 145
main.plugins.exp.exp_x_coord = 0
main.plugins.exp.exp_y_coord = 145
Clock Plugin
I changed the Waveshare to my version: is_waveshare27inch and changed te pos: to (200, 80)
        if ui.is_waveshare27inch():
            pos = (135, 135) if memenable else (200, 80)
            ui.add_element('clock', LabeledValue(color=BLACK, label='', value='-/-/-\n-:--',
                                                 position=pos,
                                                 label_font=fonts.Small, text_font=fonts.Small))
Auto_Backup Plugin
Here is the UPDATED code you need to add to /root/etc/pwnagotchi/config.toml to make the auto_backup plugin work:
main.plugins.auto_backup.enabled = true
main.plugins.auto_backup.interval = 1 # Every X Days
main.plugins.auto_backup.max_tries = 10
main.plugins.auto_backup.files = [
"/root/brain.nn",
"/root/brain.json",
"/root/.api-report.json",
"/root/handshakes/",
"/root/peers/",
"/etc/pwnagotchi/",
"/var/log/pwnagotchi.log"]
main.plugins.auto_backup.commands = [ "tar czf /root/pwnagotchi-backup$(date +%d-%m-%Y).tar.gz {files}"]
gpio_buttons Plugin
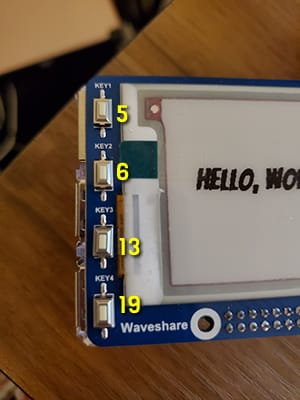
main.plugins.gpio_buttons.enabled = true
main.plugins.gpio_buttons.gpios.5 = "python /home/pi/powerutilscmd.py shutdown"
main.plugins.gpio_buttons.gpios.6 = "python /home/pi/powerutilscmd.py shutdown"
main.plugins.gpio_buttons.gpios.13 = "python /home/pi/powerutilscmd.py shutdown"
main.plugins.gpio_buttons.gpios.19 = "python /home/pi/pwnmenucmd.py close"
Plugins not working (for me):
- Christmas plugin. >> Uses old config.yml file.
(tried fixing it but after I made quick and dirty “fix” Wifi stopt scanning, very strange) - Pwnagotchi Pwnmenu Plugin get error:
[ERROR] Exception on /plugins/toggle [POST]
File "/usr/local/share/pwnagotchi/custom-plugins/pwnmenu.py", line 24, in <module>
    menucommands.append(linelist[1].replace("\n",""))
Here are some guides I found/used
Successful cracked 2 Wifi Passwords
Results of Online Hash Crack


You can contact ( ⚆_⚆)
M1N1N16M4 via PwnMAIL at:
42fc6207fb1302f9d407042099aacb4c6c492794334e01c1613c0db5ed225f5b