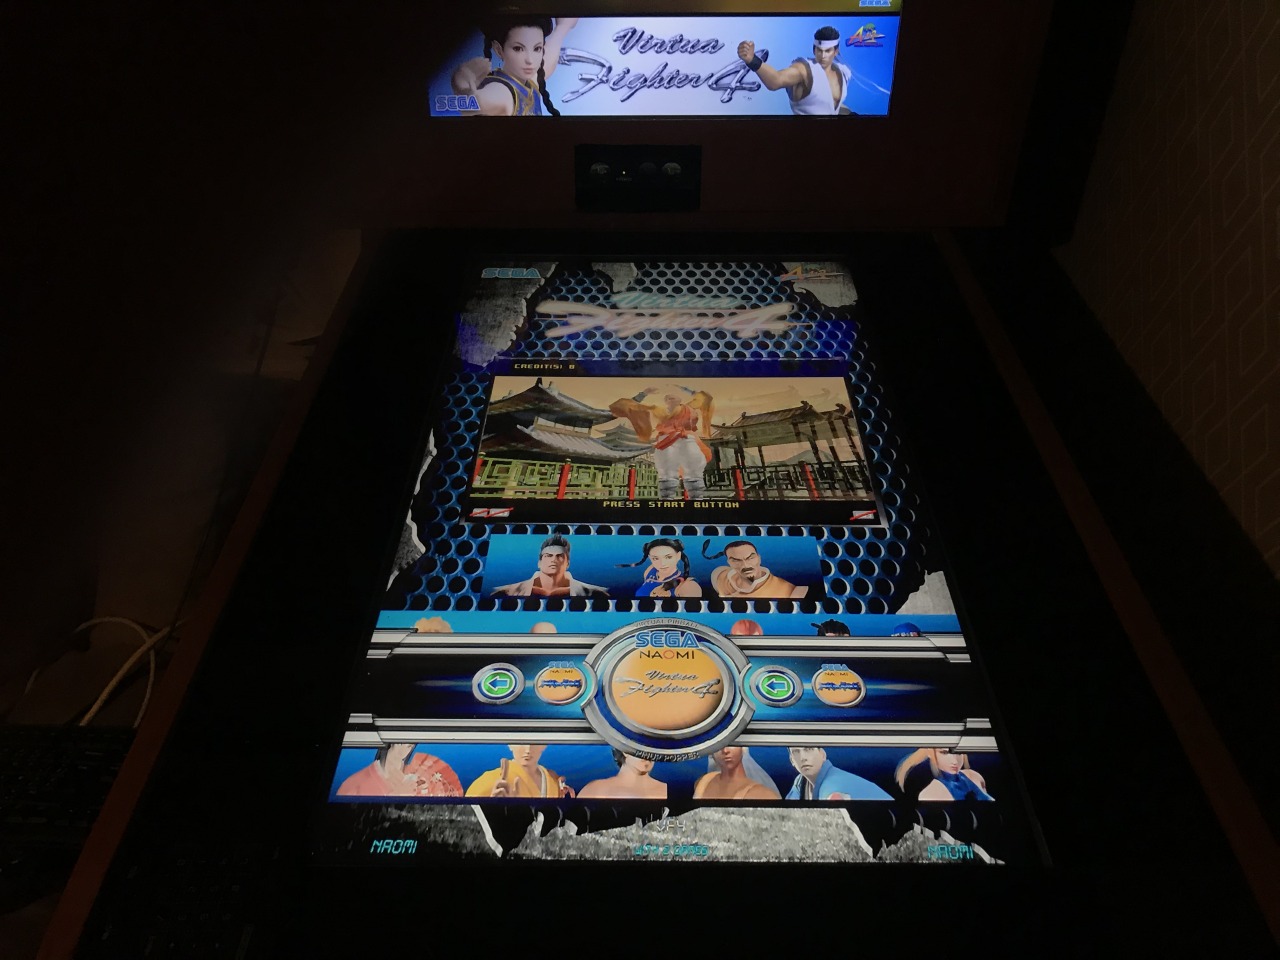
I got MAME running, but I wanted more.. So I tried loading Demul.
This didn’t go like I wanted at first needed to edit the script use a hidden command in pin popper to load the playfield “bezel”
But before I did that I needed to fit it on the screen, I don’t know if I want to play on the playfield like I do now. For now its ok but maybe I will change it in the future. To make it work I needed to install windows app. Found a good one that works, but after running it I found out that I lost focus so I wrote a Autokey script to keep it ontop and press f3 to remove the menu bar in window view.. Script and hidden command for keeping playfield running below. Here is a video how it resizes:
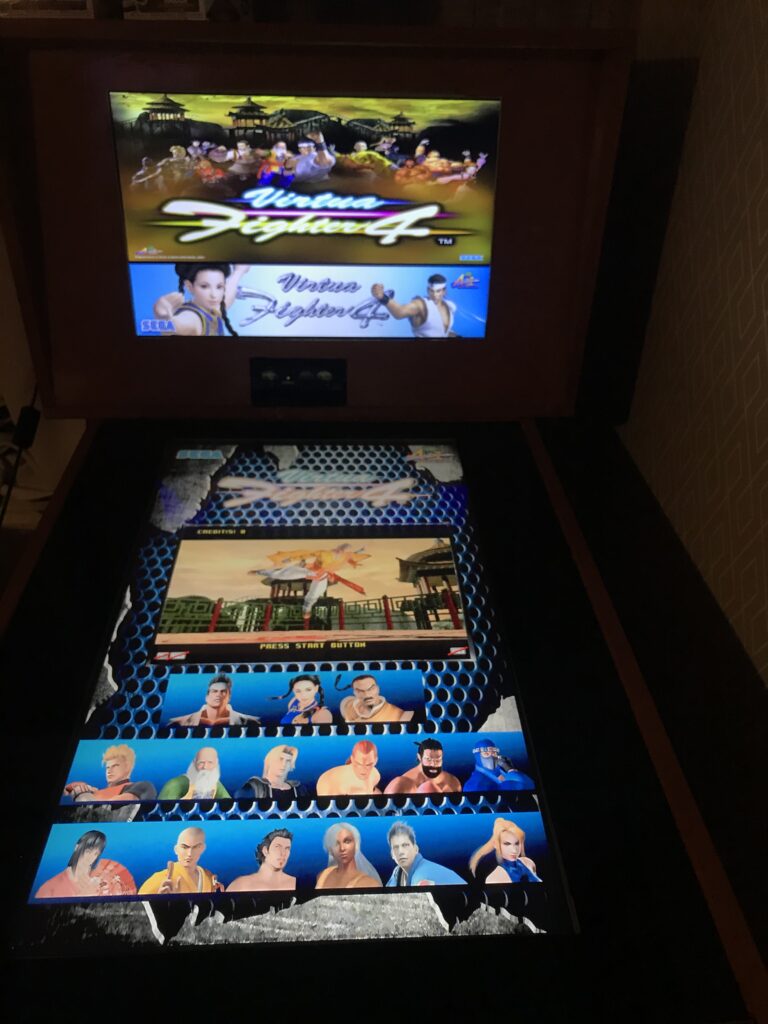
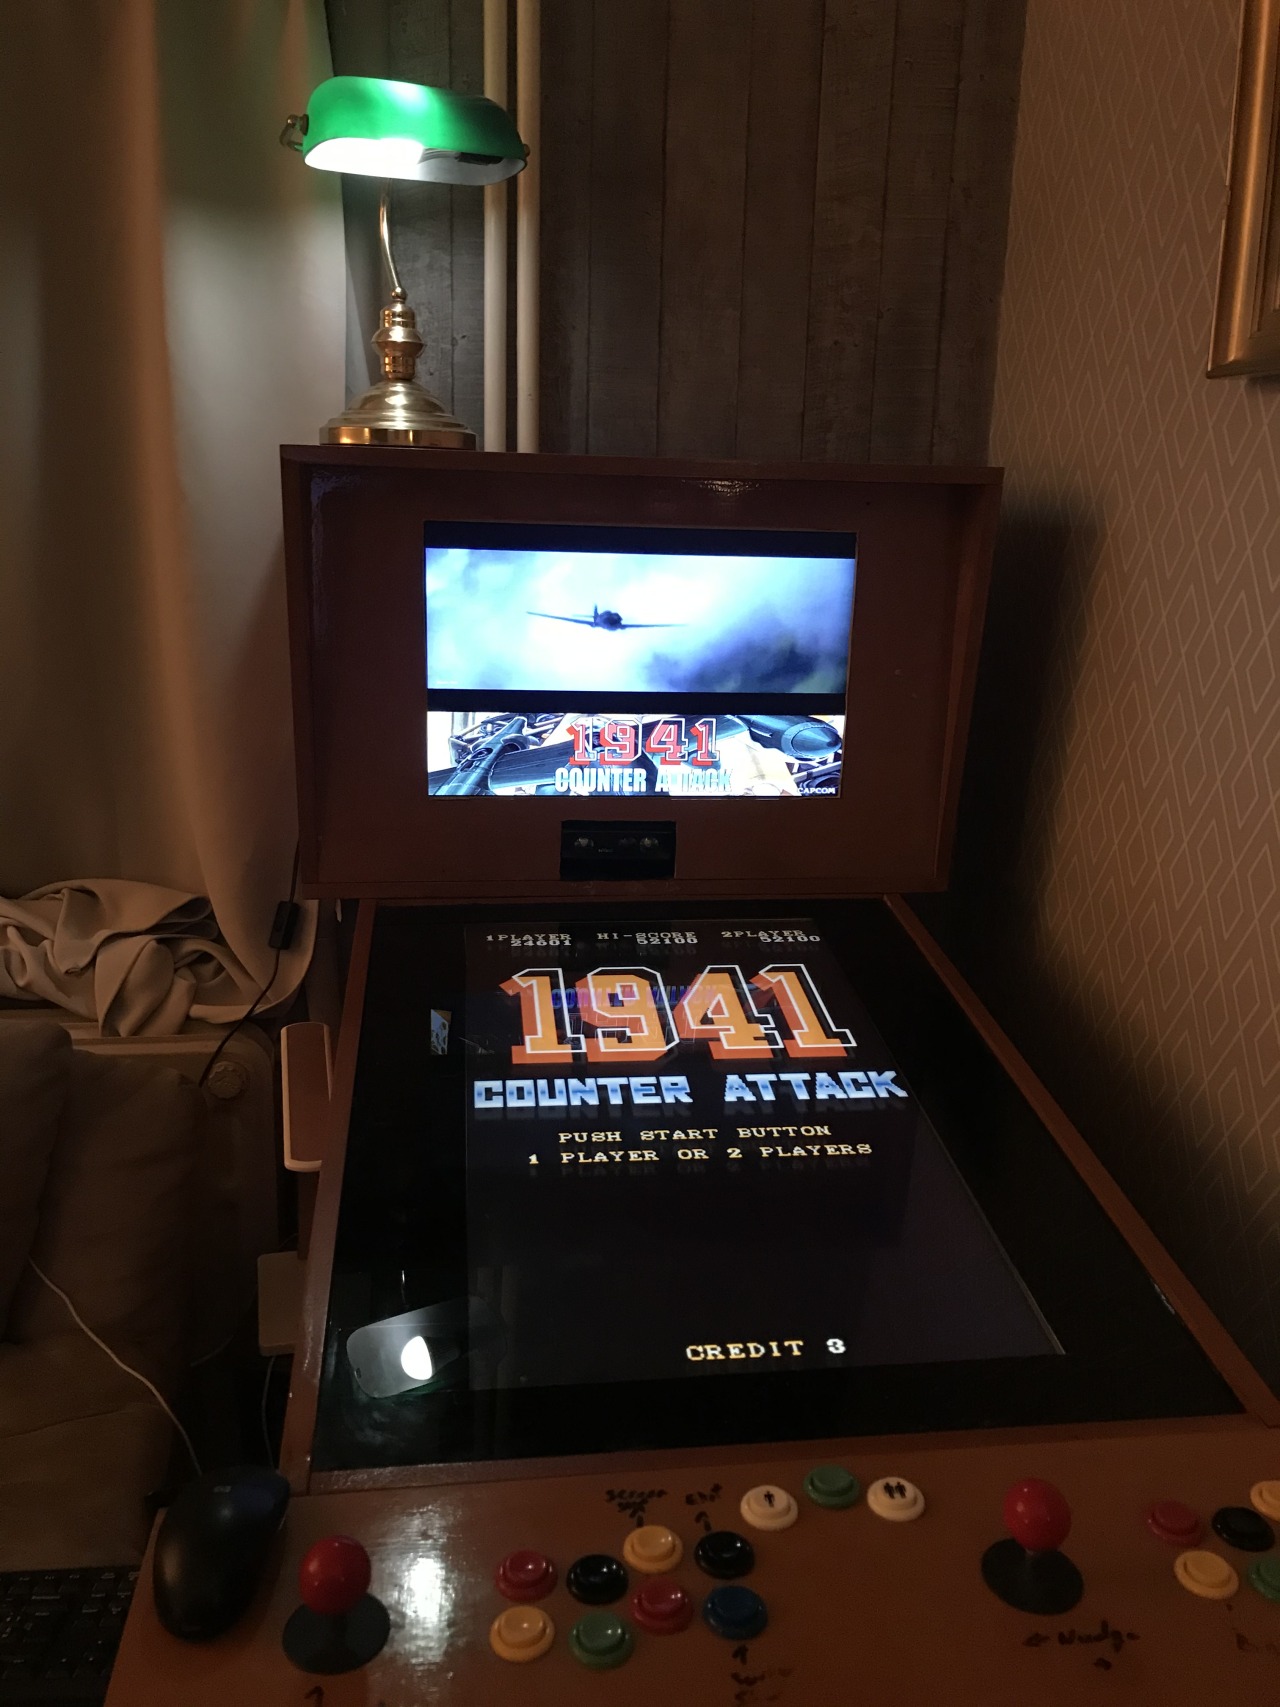
Here are some pictures of the 2 games I have running for now:
Dead or Alive 2 and Virtual Fighter 4
Made some backglasses for them and DMD images.. Wanted to use video, but found nothing fitting…
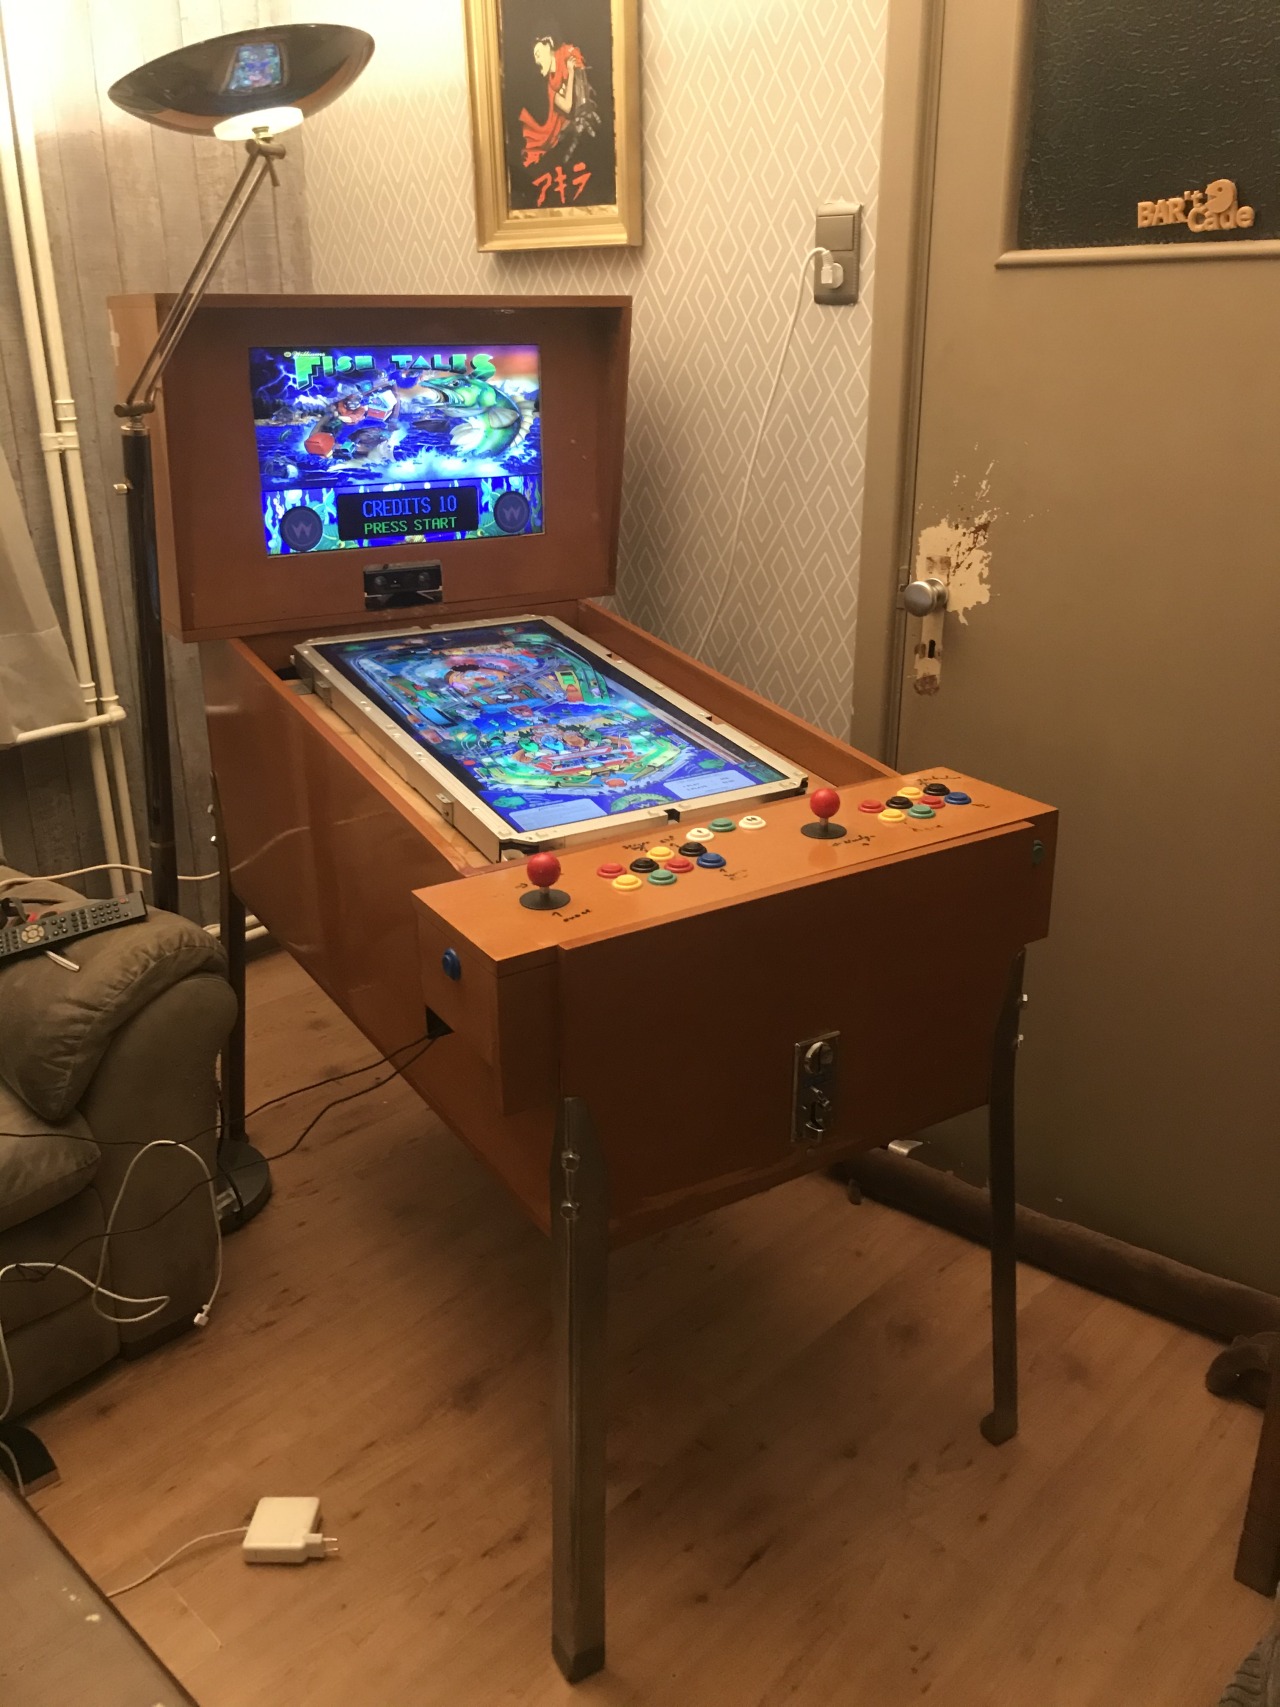
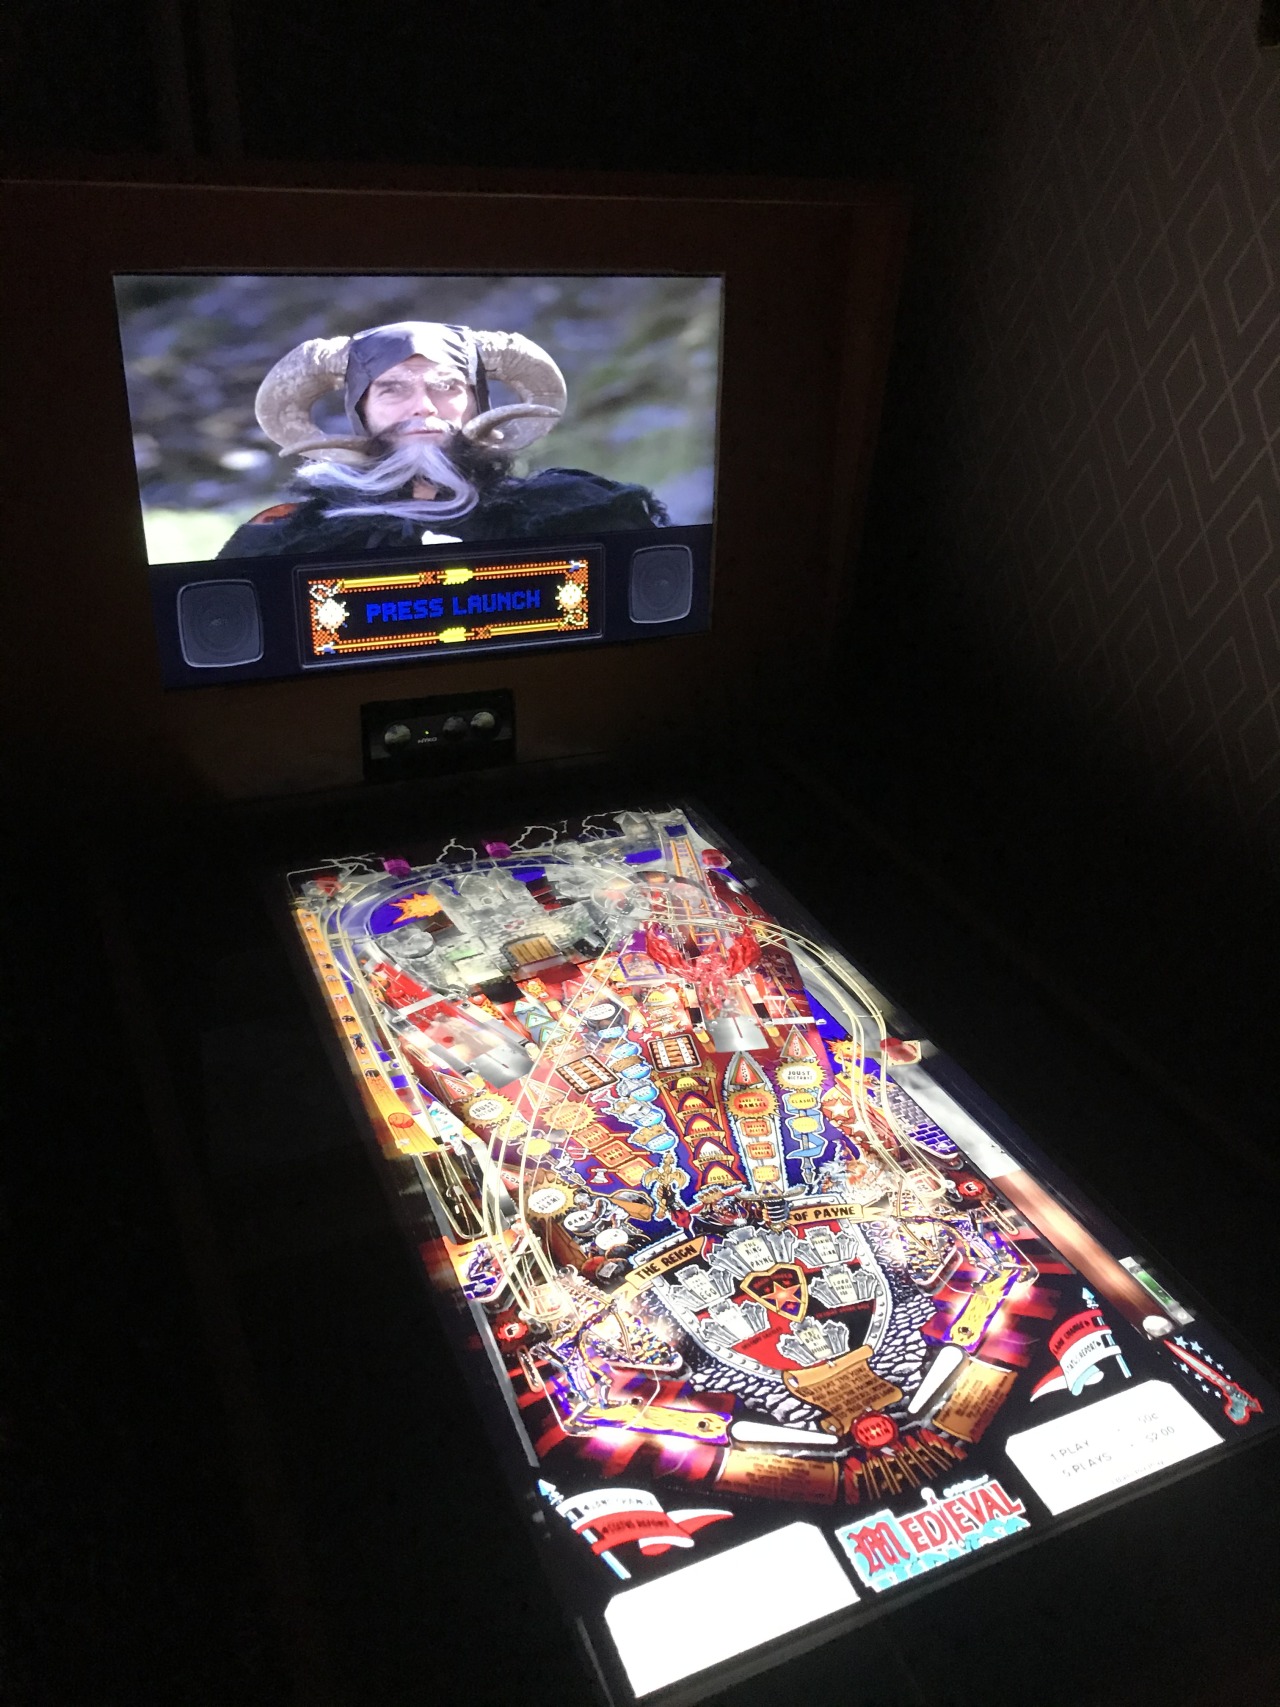
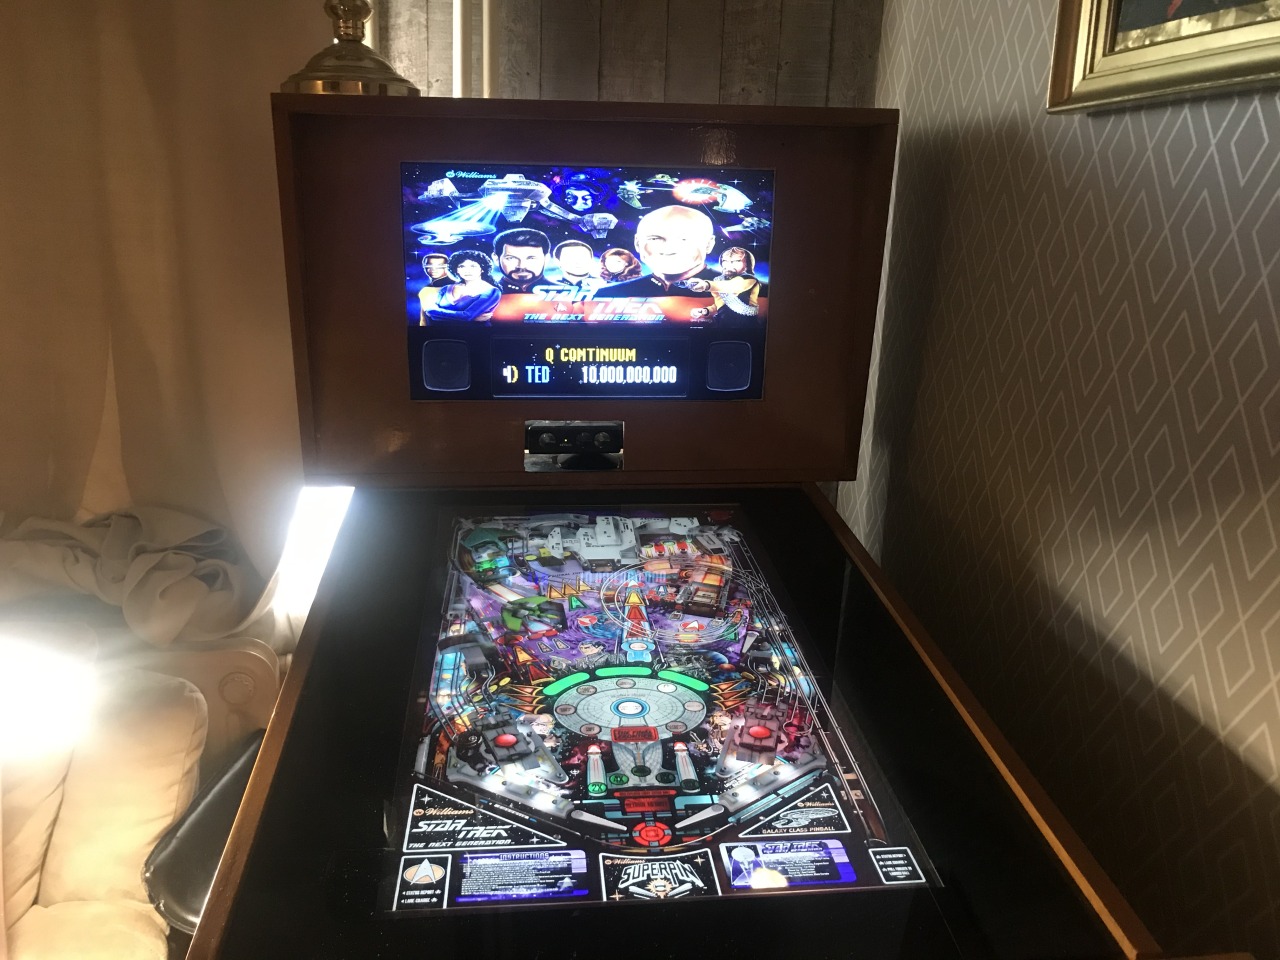
Ok it’s time for a little update on the Pinball Machine.
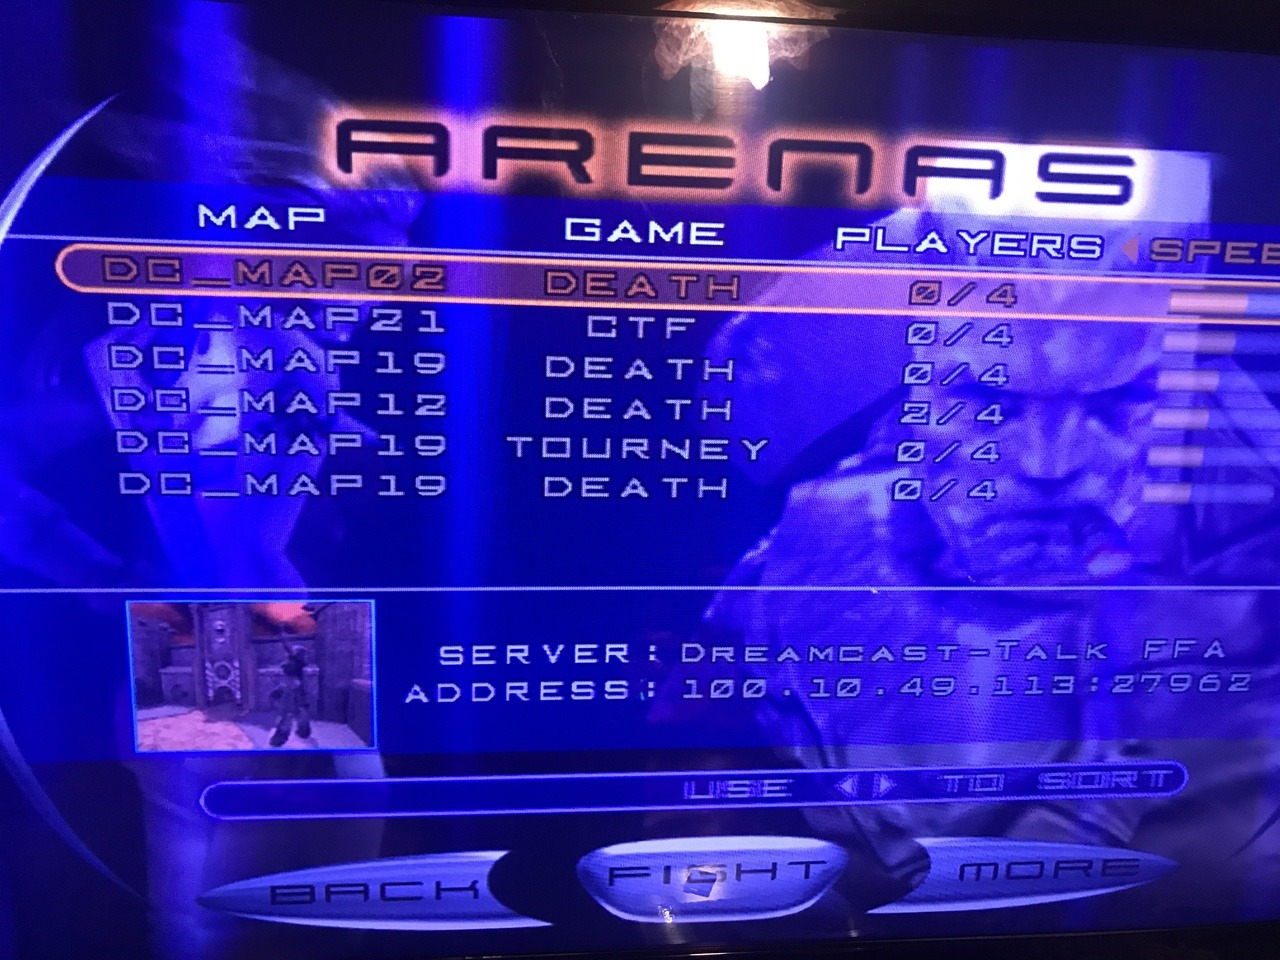
Stopped using Hyperpin and moved over to PinUP popper and PinPlayer.
Its the future for Visual pinball…
After installing a new screen for the backglass I started searching for a new Frontend
After some tweaking I was able to install it and get it running on my Cab.
Here is video of the update.
Some pictures:
– You can find PinUP popper frontend. if you follow the link.
Suggest you read the wiki a few times…- I made me some custom DMD overlays because of my 2 screensetup.
Been using DMDoverlay but need to change the size here and there.
So we made some custom overlays download link below.
– I wanted to add some Mame games.
Looked up some TATE games and now I have about 124 games.
Here is my game list ( Pastbin). PinUP popper got a nice search feature for pinball tables.
But for MAME games it will not work so i made my Wheels, DMD, etc myself.
Used the autorecorder for the playfield recording.
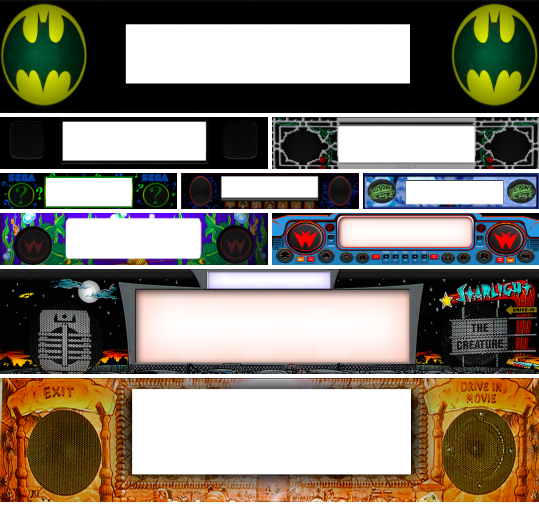
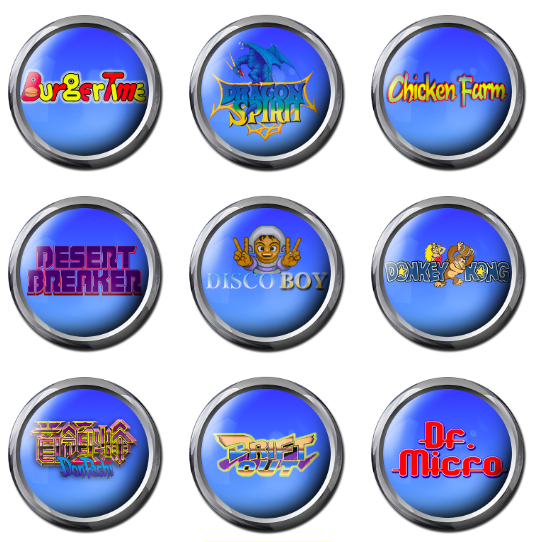
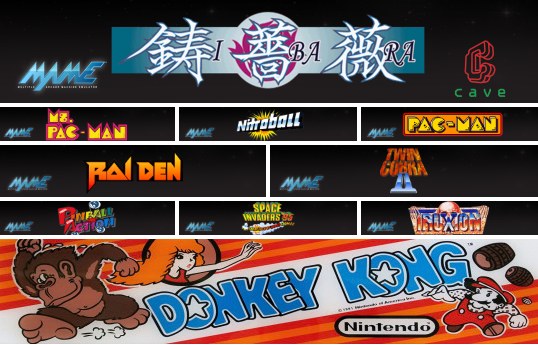
Here are someimages of my Mame wheel images:
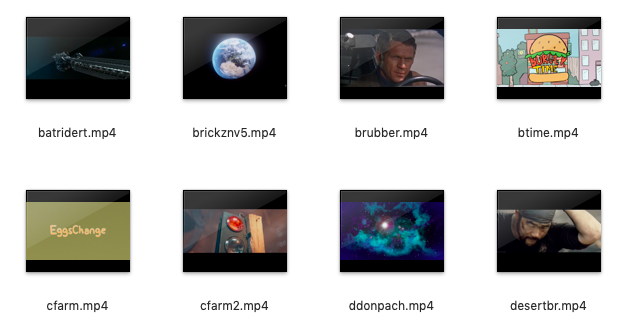
– I also needed custom DMD’s for my Mame games: You can find my Custom Mame DMDS in my mega.co.nz folder.
And of course I needed backglasses our Marquee but because of most
of the marquee images would be on the DMD I wanted to add Video’s.
Searched on youtube and (p)ornhub to find some useable video clips
Yes (p)ornhub apparently lots of TATE games are hot girls games 😀 So little warning for the videos not all are Safe for under 18 😉
Did a little editing on them but not enough to call it ready.
But i will share them and update them if i have time. You can find my Custom Mame videos in my mega.co.nz folder.
Install my images and videos in your default mame popvideo folder.
They are already named correct, if you use the same romset.
Didn’t use a rom organiser, so there can be errors.
See my game list at pastbin for the names I used.
Most of the homebrew on switch uses + to exit I modded FTPD to do that too.
My first button press was always + so I fixed that for my self.
If you want to use it your self you can grab a copy form the download link below.
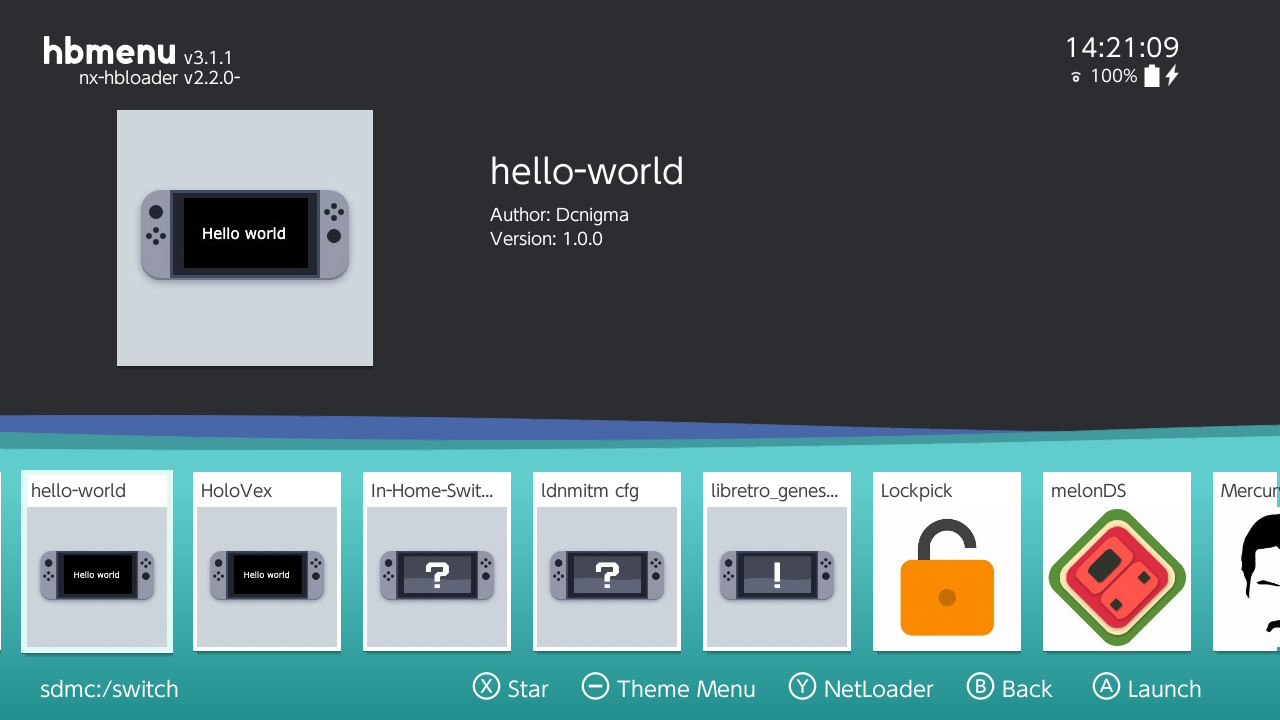
My first real useful homebrew app for the Nintendo Switch.
This is what happens when you watch 2h youtube tutorials of a 4h course. Youtube C++ Tutorial for Beginners.
Video clip showing it in action:
Uses:
- Install/update uLaunch.
- Remove uLaunch.
- Install extra Themes.
- In app update.
- Reboot to payload.
uLaunch Screenshot (icon):
. When uLaunch came out I was very excited to try it out, it looks very promising like the design.
Open source and I guess there will be loads of new features in the future.
But it's still in beta 0.1 so its not realy stable, not that I found breaking bugs.
So I wanted a easy way to remove it and re-install it without re-ftp or sdswap.
Started my journey in to Switch develepment just this month and I really like the progress I made.
Here are some screenshots:
Main Menu:
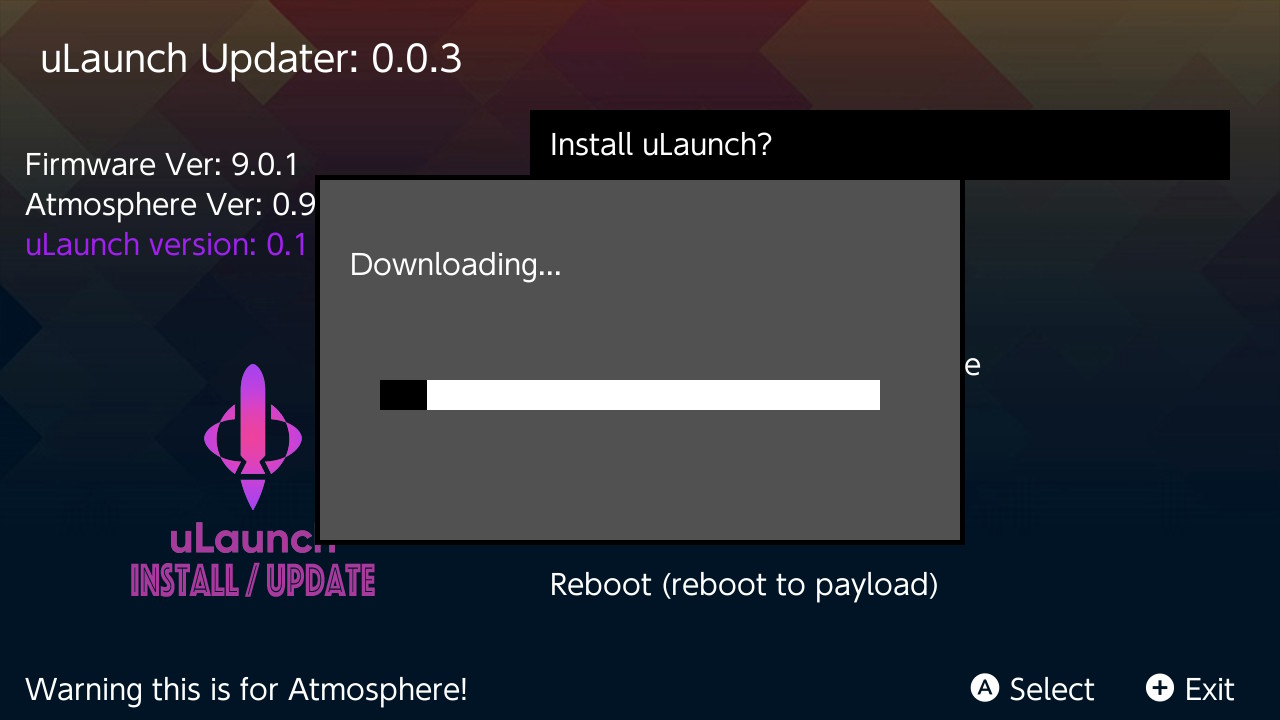
Download:
Nice progress menu.
Install complete!
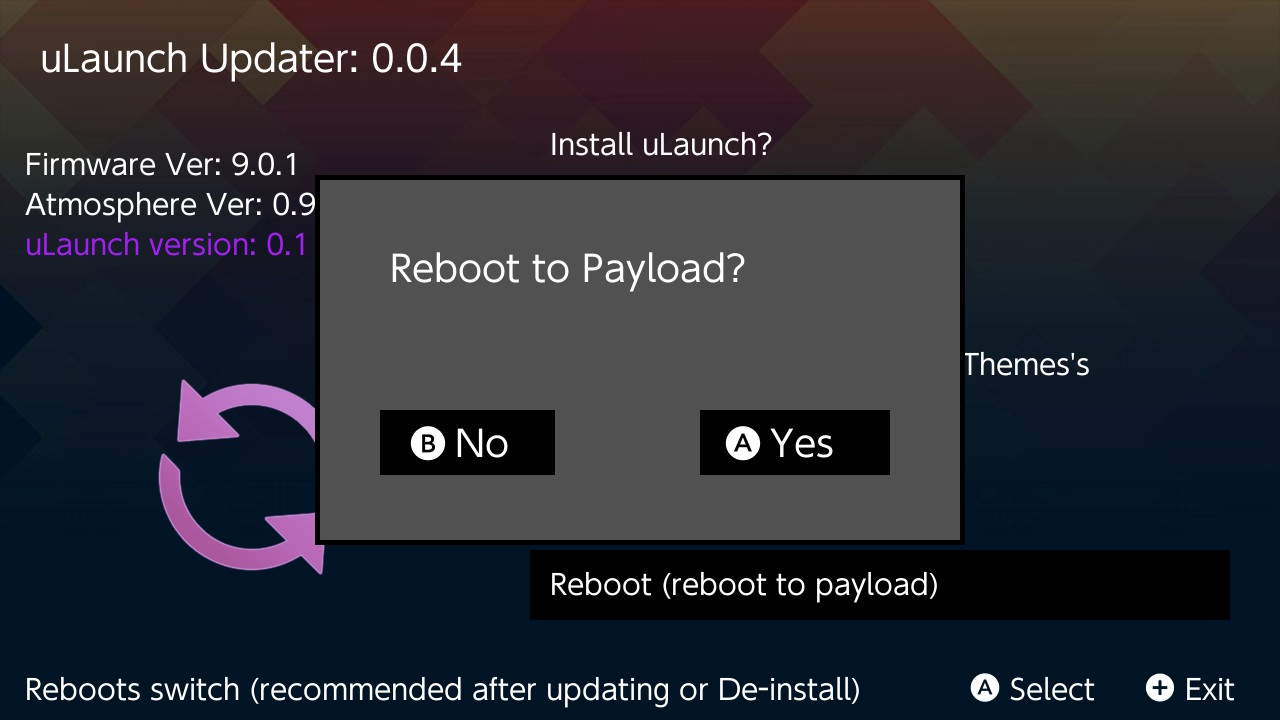
Like the screenshot says use Reboot Payload to do restart in to uLaunch.
De-Intsall!
De-Install complete:
This will only De-Install the Titles, not the users information at ”/uLaunch/” Themes will not be deleted.
Like the screenshot says use Reboot Payload to do restart in to uLaunch.
Install Extra Themes!
Themes will appeare directly after closing app in uLauch theme selector.
You need to restart uLaunch to apply the theme.
Use Reboot Payload to do so.
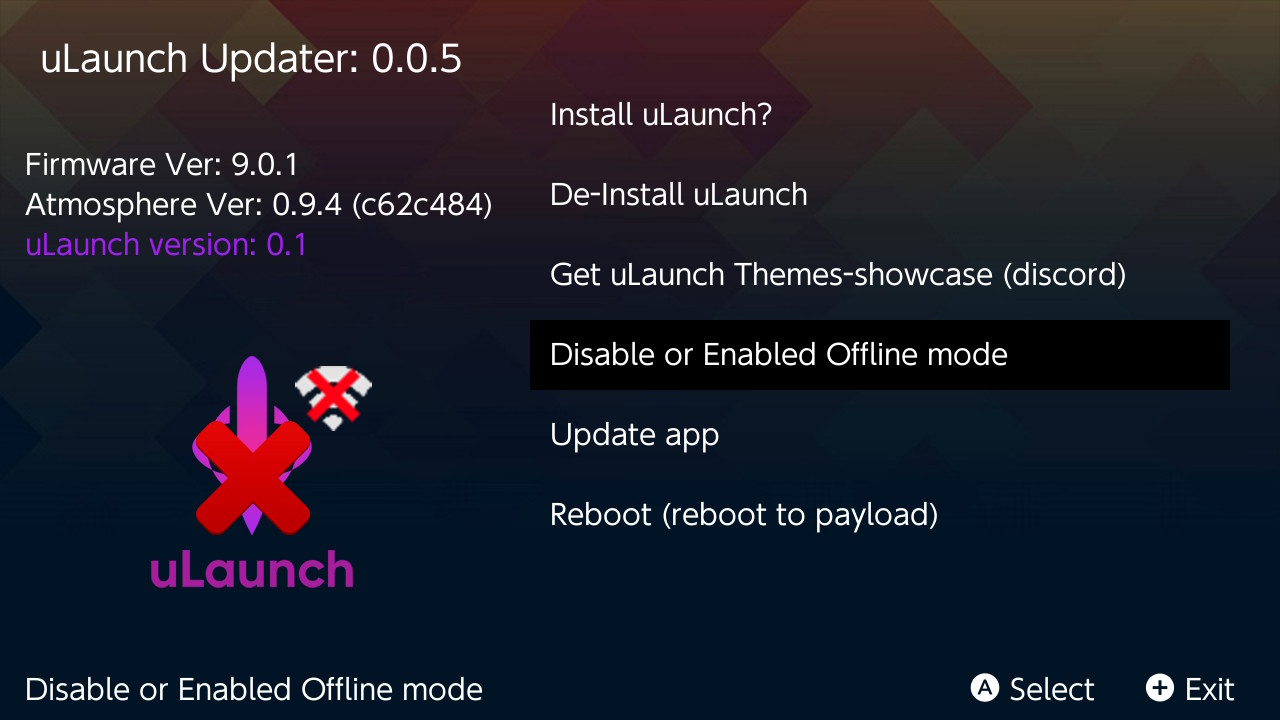
Disable or Enable uLaunch!
Disable or Enable uLaunch without deleting it. Title folders will be moved except for 0100000000001000 only the exefs.nsp file will be moved.
And as bonus Included all Themes that are in the Showcase.
In App Update!
Just restart after download and if there is a new version this one will be started.
Reboot to Payload!
Homebrew Menu launch icon corrupt.
Like you can see the Icon shows “!” because I used a icon.png and not icon.jpg.
In uLauch my png icon is showing correct but not in Homebrew Menu
Installation:
This is very simple just download the DC-uLaunch_Updater.nro
and create and place in your /switch/Ulaunch-update/ folder.
And then your done launch from HBmenu or uLaunch.
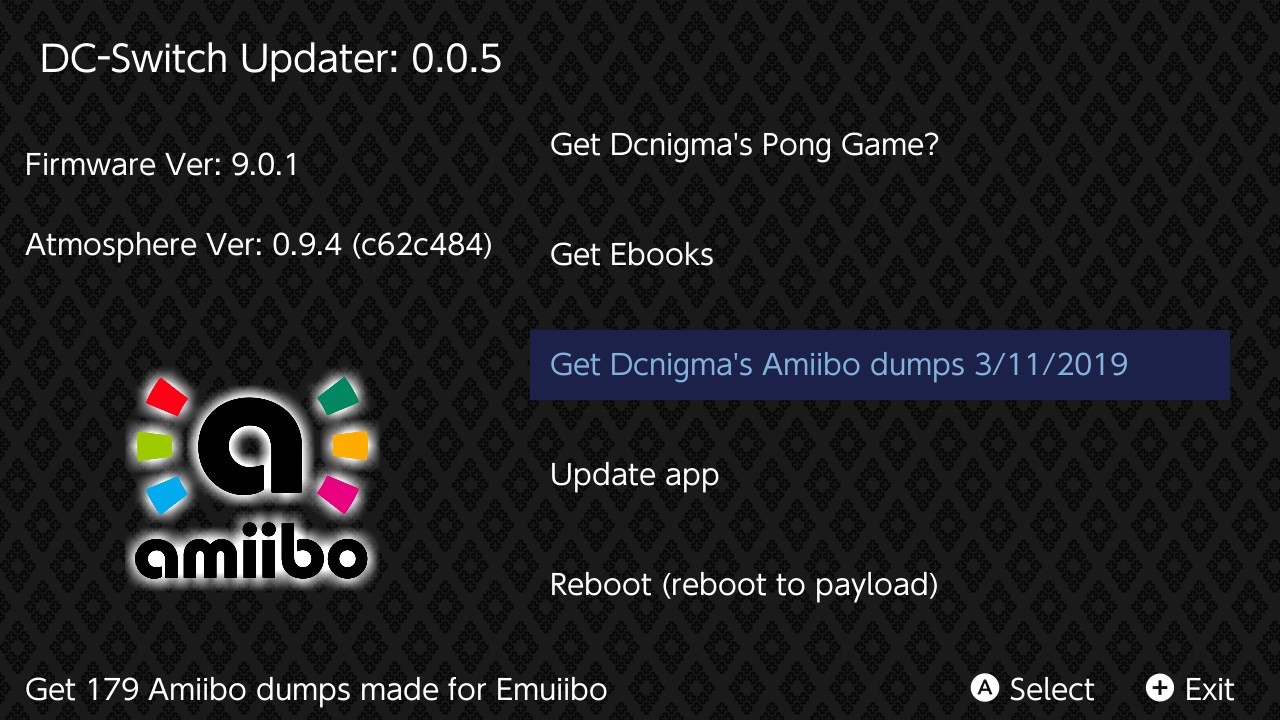
OK I couldn’t resist, I made another app.
Base on the Atmosphere Updater.
And this one looks more like a App:
Install
Download the the latest release from here.
If you want the source get it here.
Move the downloaded .nro onto you nintendo switch sd card
inside the folder /switch/DC-Switch/
That’s it!
Usage
The app currently has 5 main options.
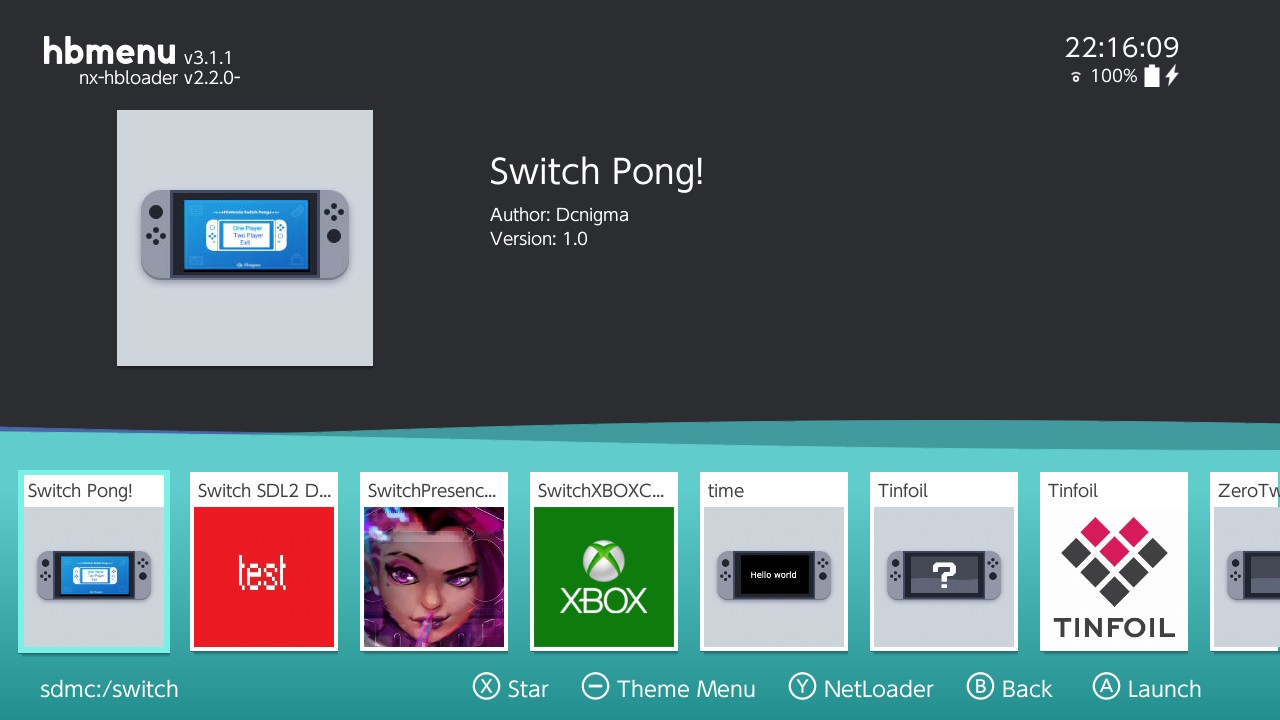
Get Dcnigma’s Pong Game:
Downloads the latest binary release of my modded pong game.
Get Ebooks:
Downloads the latest Ebook Pack.
For now this is a template file unpacks 3 dummyfiles: dcnigma.pub dcnigma.pdf dcnigma.cbr
Get Dcnigma’s Amiibo dump 3/11/2019:
Installs my latest converted Amiibo’s to use with Emuiibo mod
There are 179 Amiibo’s in this pack for now.
Update App:
Downloads the latest version of this app straight from github!
Deletes the previous old version.
Reboot (reboot to payload): Kept it in because its always handy to have 😀
Reboots the switch, loading the payload from /atmosphere/reboot_payload.bin.
Special Thanks!
totaljustice for the initial version so I could make this!
Today I played some more with the Switch Devkit
aka Devkitpro.
I din’t expect to write homebrew for my Switch this early but it happen quite fast.
Have set a goal for my self to make some homebrew for al my modded consoles.
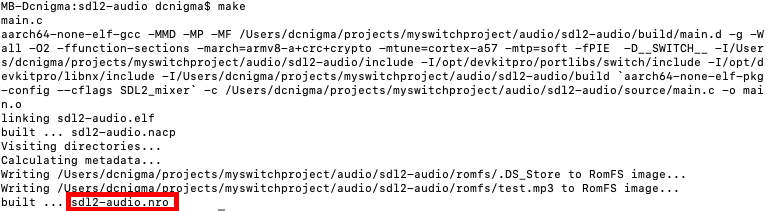
So I found my self installing DevKitPro on my OSX 10.14.6 Mac.
The installation was not that easy, but in the end I got the example files compiled.
Look at that nice build log:
What would borat say?
Just need to install everything by pacman -Sy ….
Check this pastbin to check what i have installed:
https://pastebin.com/Ncrb349n
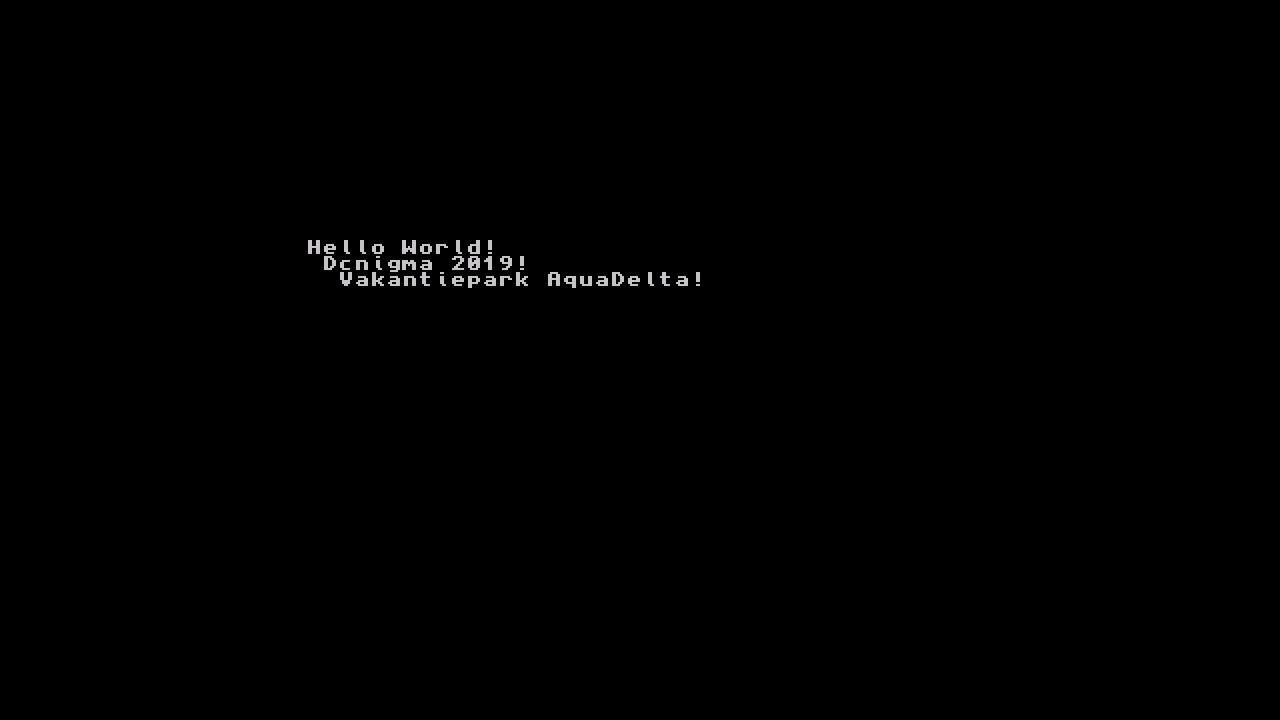
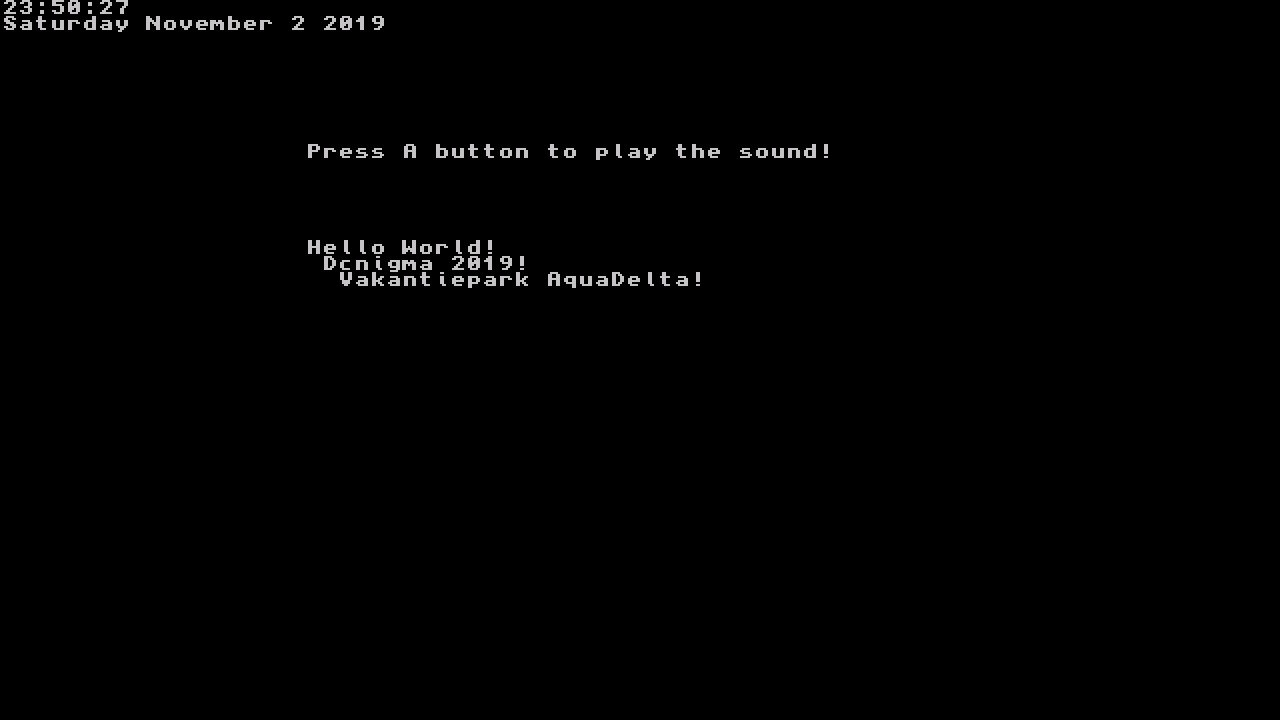
So after that, it was time for some “hello world” testing. is it not a beauty 😀
Real “Hello World” screenshot (made in Vakantie park Aqua Delta I was bored)
After a few hours of copy and past work.
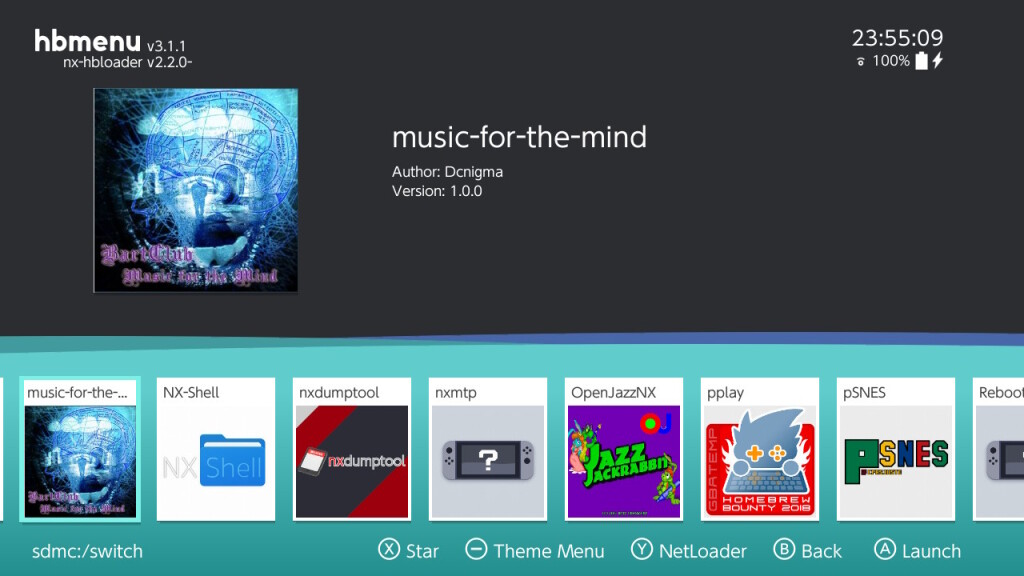
I made a hello world combining audio sdl and time example:
Used some of my ownmusicBartclub: music for the mind (freak sounds)
“Music for the Mind aka Helloween”
Now after some more googling and searching and I found a few homebrew sources to compile.
But sadly there where some broken Makefiles and because
I just started my journey into Switch develpement these things made my progress halt.
But in the end i made a nice small demo in SDL 2 to get me started.
I wanted graphics in my demo so i guessed I needed to learn some SDL2
Made a Icon 😀 for it
Here is a 30 second preview captured by the Switch of the Demo:
Like i said it’s just a few examples thrown together.
Audio SDL2 and SDL2 PNG example (not include in switch example pack link below)
And my own music again Electragazan sounds a bit 8 bit (a bit) 🙂
Binary Download build version for your Switch.
(Place .nro in new folder on you SD:/Switch/ folder)
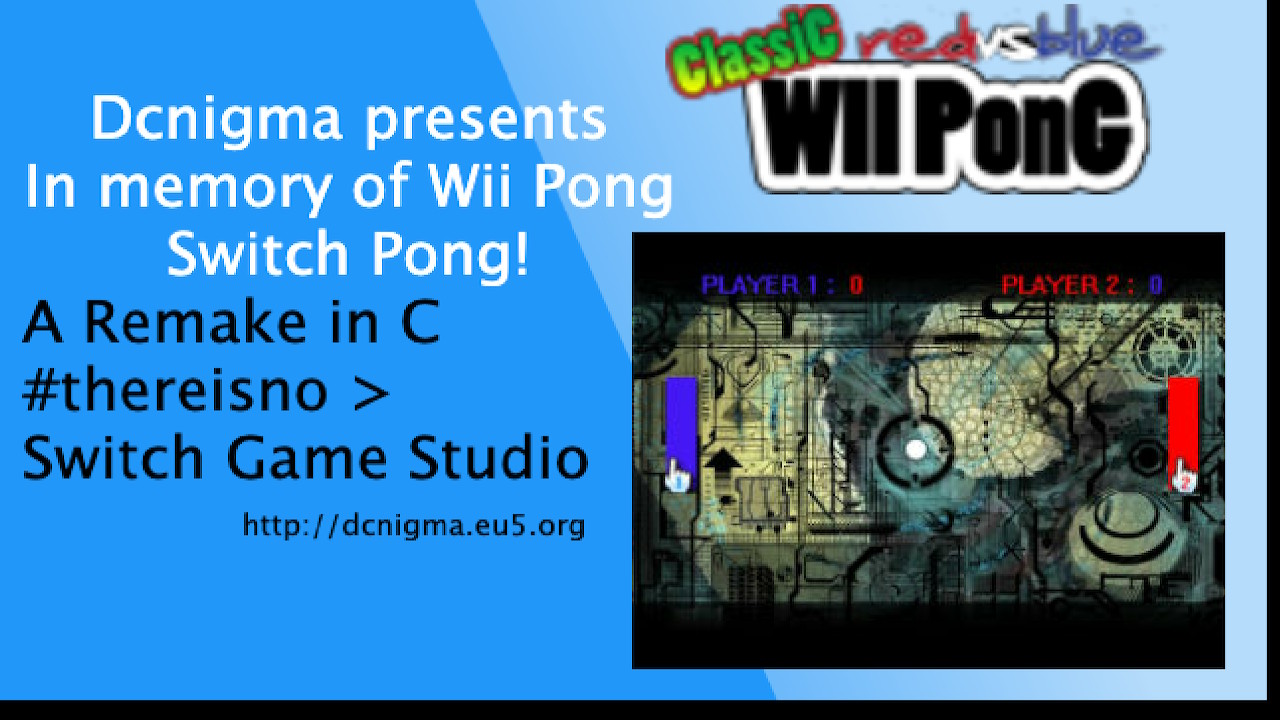
This is the final release.
Now has scores for player 1 and 2.
2 Player support.
New Splash screen.
If you find bugs create a new issue and ill try to fix them.
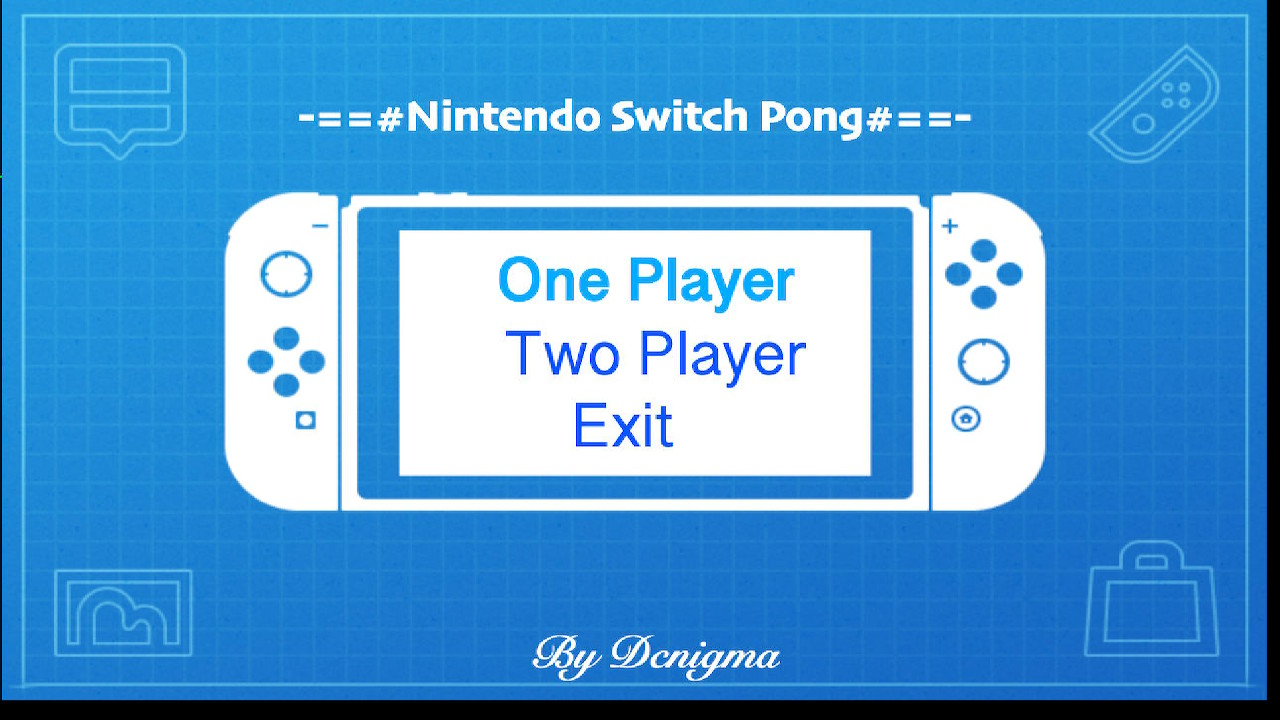
So remade in memory of my old a new version for the Nintendo Switch. (more info on Wii Pong Game)
Switch Pong!
Just A Splash screen 😀 #needsasplashscreen
Need to dig up the original graphics to make a true remake,
but this is the first demo game I made for my switch.
Only one game type best of 10
maybe I will add more in the future when i revisid this.
I made this tutorial because there are some issues for pal users even Kazade could get it working 😀 His tutorial “Quote Kazade’s”
But for PAL, it gets even more complicated. Generally PAL modems are classed as Model B modems – they require a line voltage. However, I found that not many PAL users had had much luck getting connected, and when I tried, it didn’t work for me either, even with a line voltage inducer!
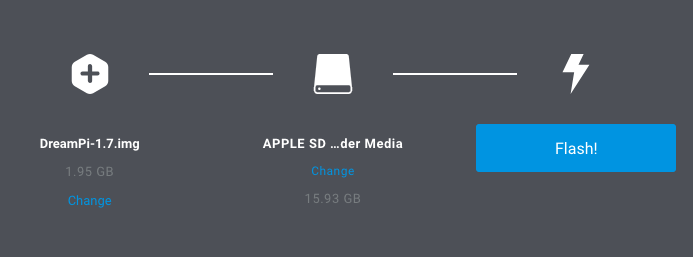
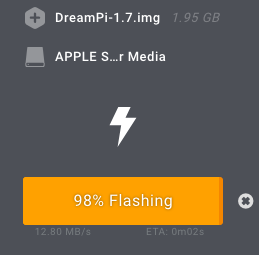
Here is a quick Tutorial to flash DreamPi on OSX
Things needed:
Get (DreamPi 1.7 Image) from the Kazade’s page: Or Download here!
Extract .7z using unarchiver or any extractor that can extract 7Z
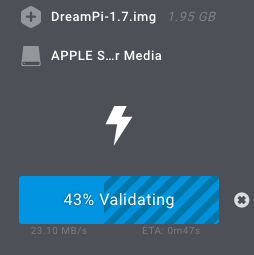
Open Etcher: Load DreamPi-1.7.img If you inserted your SD check if it selected and press flash!: Wait until Flashed and Validating are done!
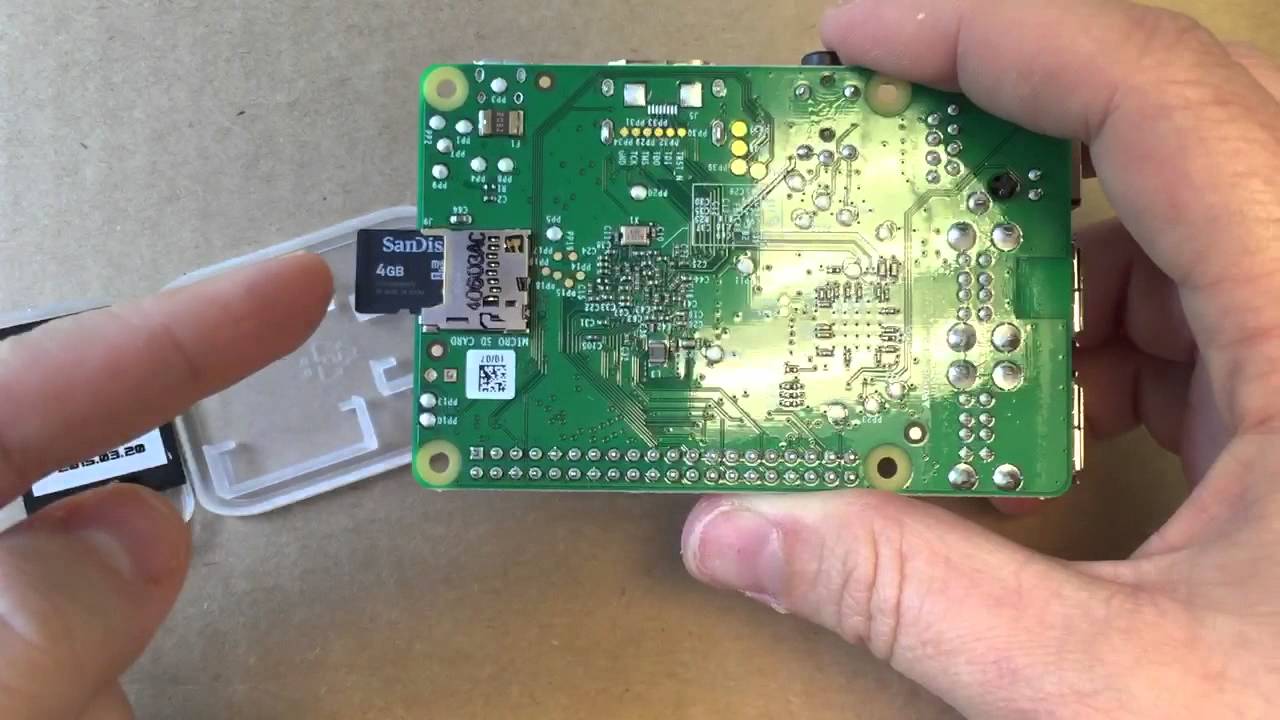
After write and check insert into Raspberry PI and give your PI power. (Don’t connect the modem!!)
DreamPi will start up on boot.
This is all you need todo if you want to boot in you Pi you can do it like this:
Not my picture
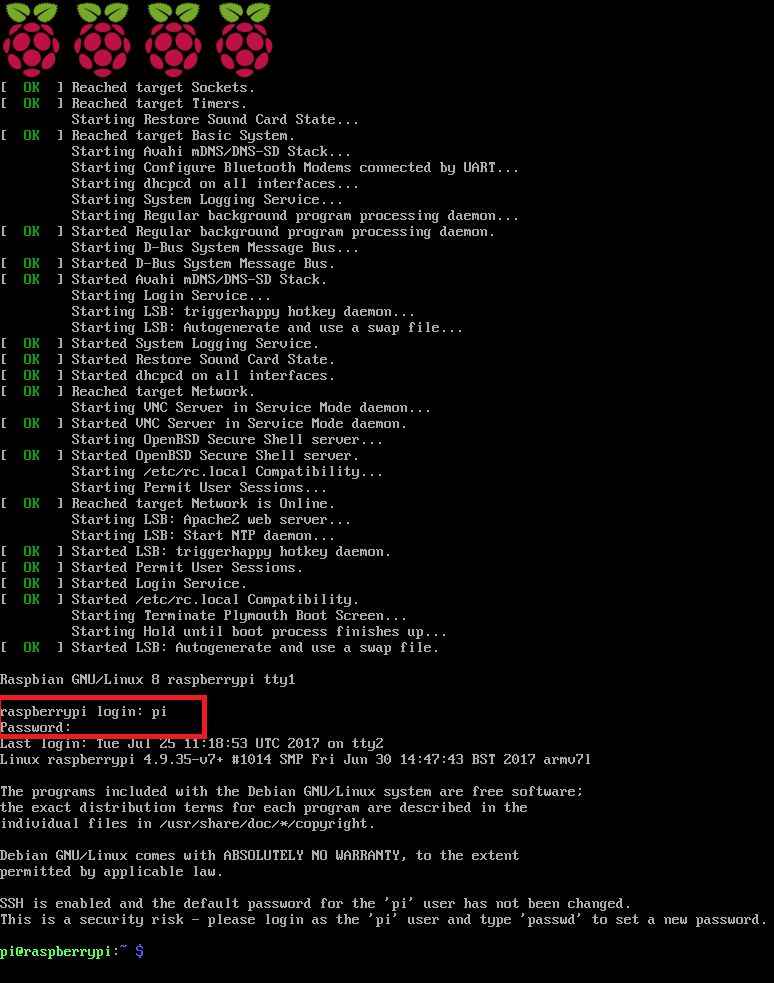
Once you booted your will be prompt a Login screen.
Not my picture
Login: pi
Password: raspberry
you can change the password: passwd
Extra info for Pal users:
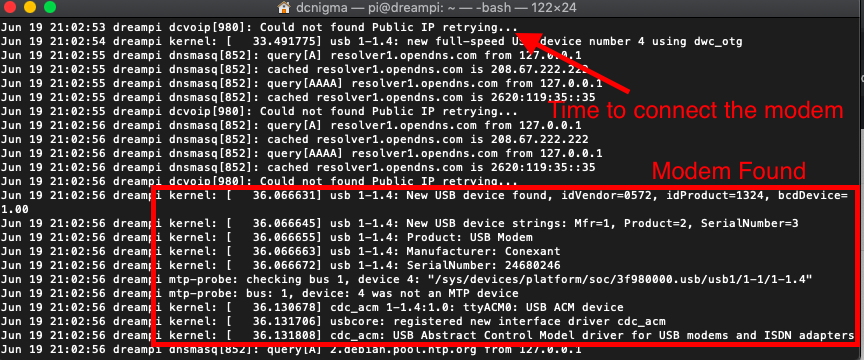
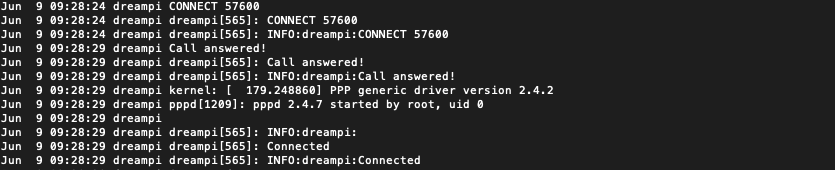
I found that there is a strict boot sequence I need to follow.
If I do every thing in sequence it works every time.
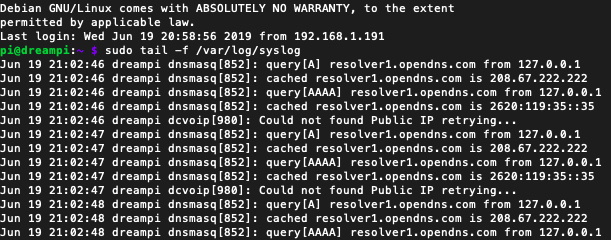
I recommend to login SSH or via HDMI composted what ever monitor the log after boot!
using this command:
sudo tail -f /var/log/syslog
This is how you can follow the activity of your DreamPi: At this point the Pi is resolving domains. Good point to connect the modem: Reason for not connecting modem not at boot is because modem would not get found in DreamPI script.
If you wait until boot it works every time.
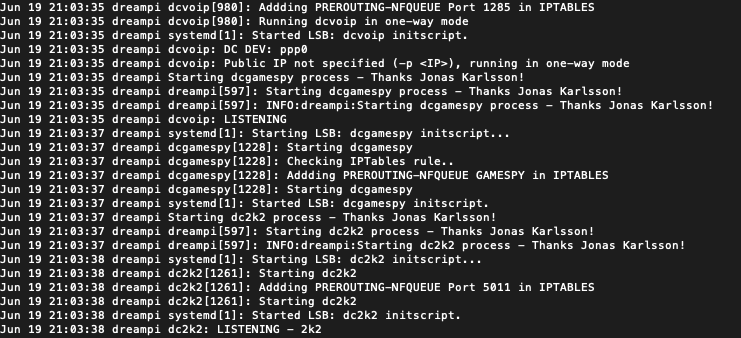
Now you wait until you see that DreamPi is ready for a connect from your Dreamcast:
At this point Dreampi is starting up:
Here is it starting Up your modem. Keep on waiting….
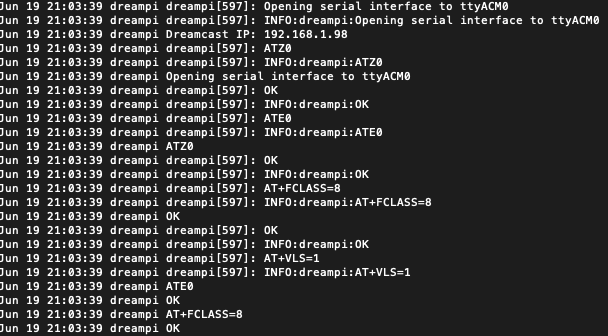
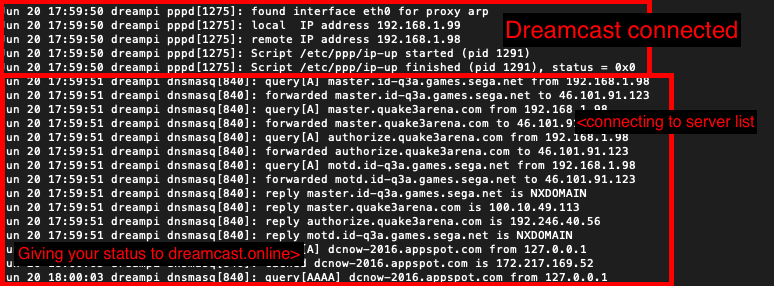
Here you can find your Dreamcast IP : default 192.168.x.98 if free (replace x with your mine 1)
And the OK gives you the signal to connect the Line Inducer for the extra 18V. Other wise you will get Line buzzy error
At this point your done on your Pi takes like 2 – 5 min I guess at the most.
After that I found out I could reconnect change games etc without any problems.
Leaving it connect for longer than a day I never got this to work. I have a feeling DreamPi crashes at one point.
Need to consult te logs for that….
OK lets continue with the tutorial.
Open the ports for your dreamcast so login to your router.
The easy way out is just open your Dreamcast ip 192.168.x.98 in your router using DMZ: Otherwise you need to port forward all ports needed for the different games
[spoiler title=’Portforwards’ style=’default’ collapse_link=’true’]Alien Front Online: UDP 7980 ChuChu Rocket!: UDP 9789 NBA/NFL/NCAA 2K Series: UDP 5502 | UDP 5503 | UDP 5656 | TCP 5011 | TCP 6666 The Next Tetris: Online Edition: TCP/UDP 3512 Ooga Booga: UDP 6001 PBA Tour Bowling 2001: TCP/UDP 2300-2400 | UDP 6500 | TCP/UDP 47624 | UDP 13139 Planet Ring: UDP 7648 | UDP 1285 | UDP 1028 Starlancer: TCP/UPD 2300-2400 | UDP 6500 | TCP/UDP 47624 World Series Baseball 2K2: UDP 37171 | UDP 13713 Worms World Party: TCP 17219 [/spoiler]
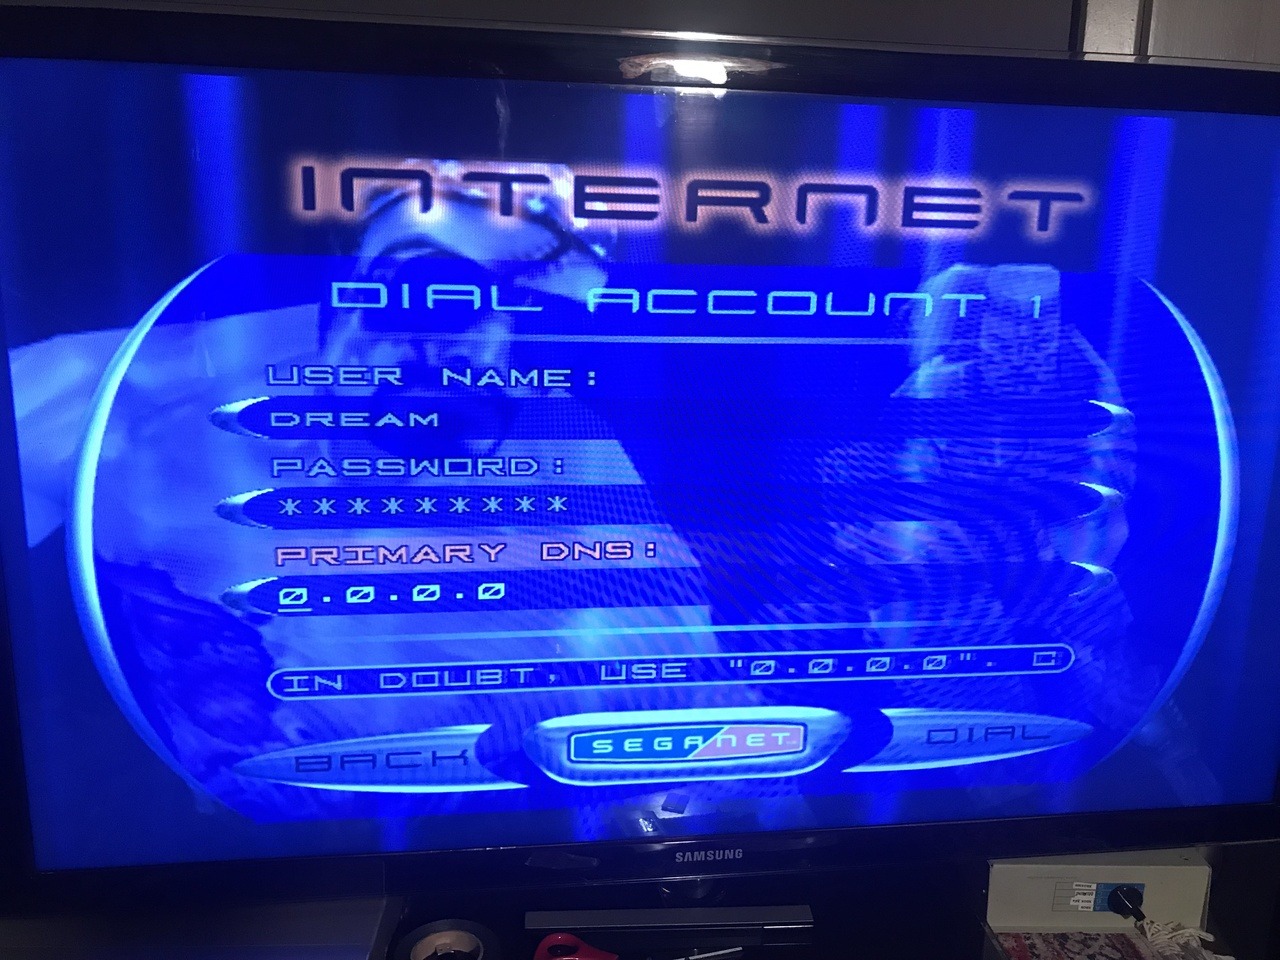
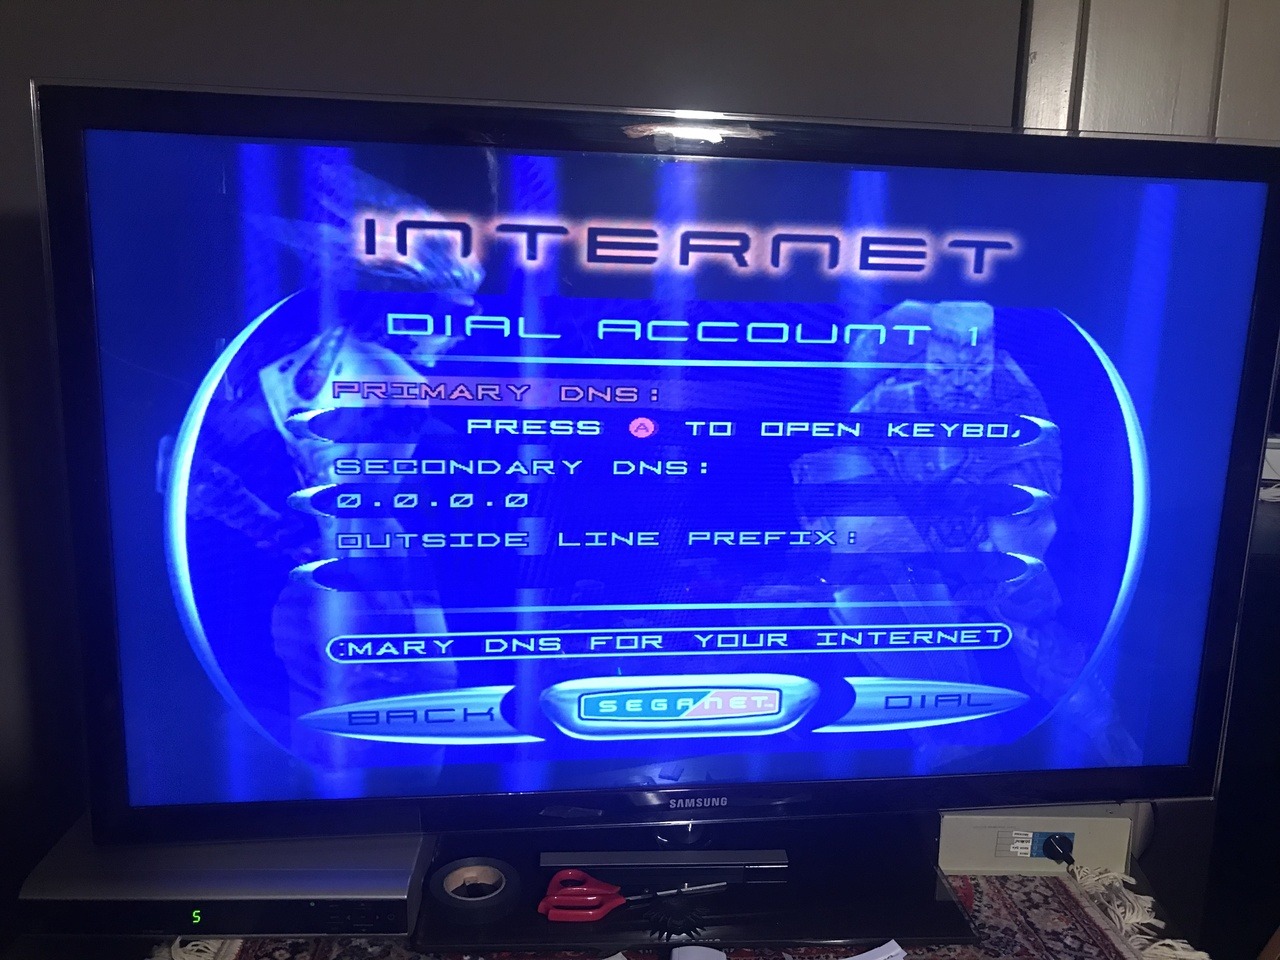
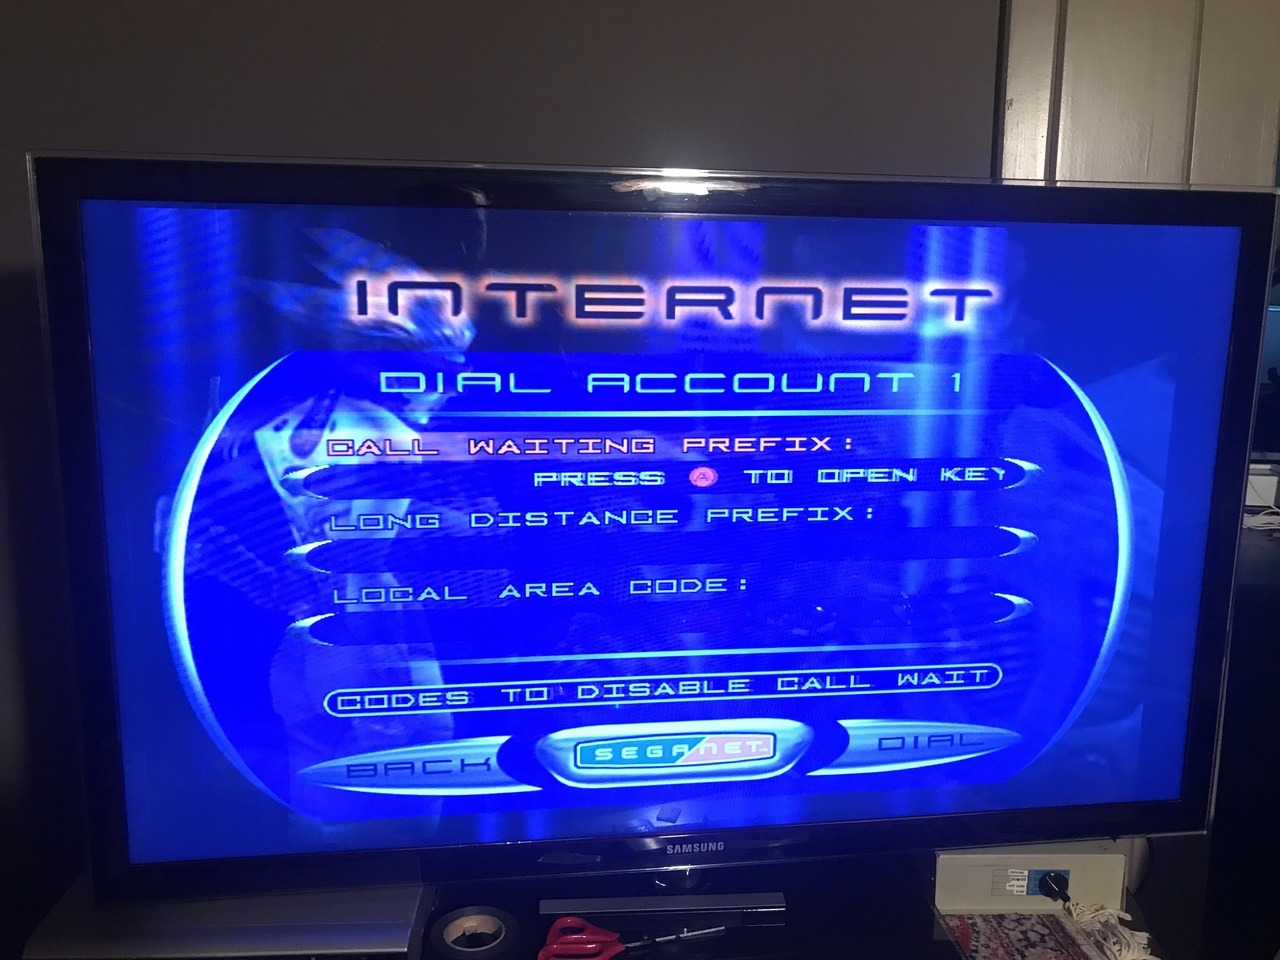
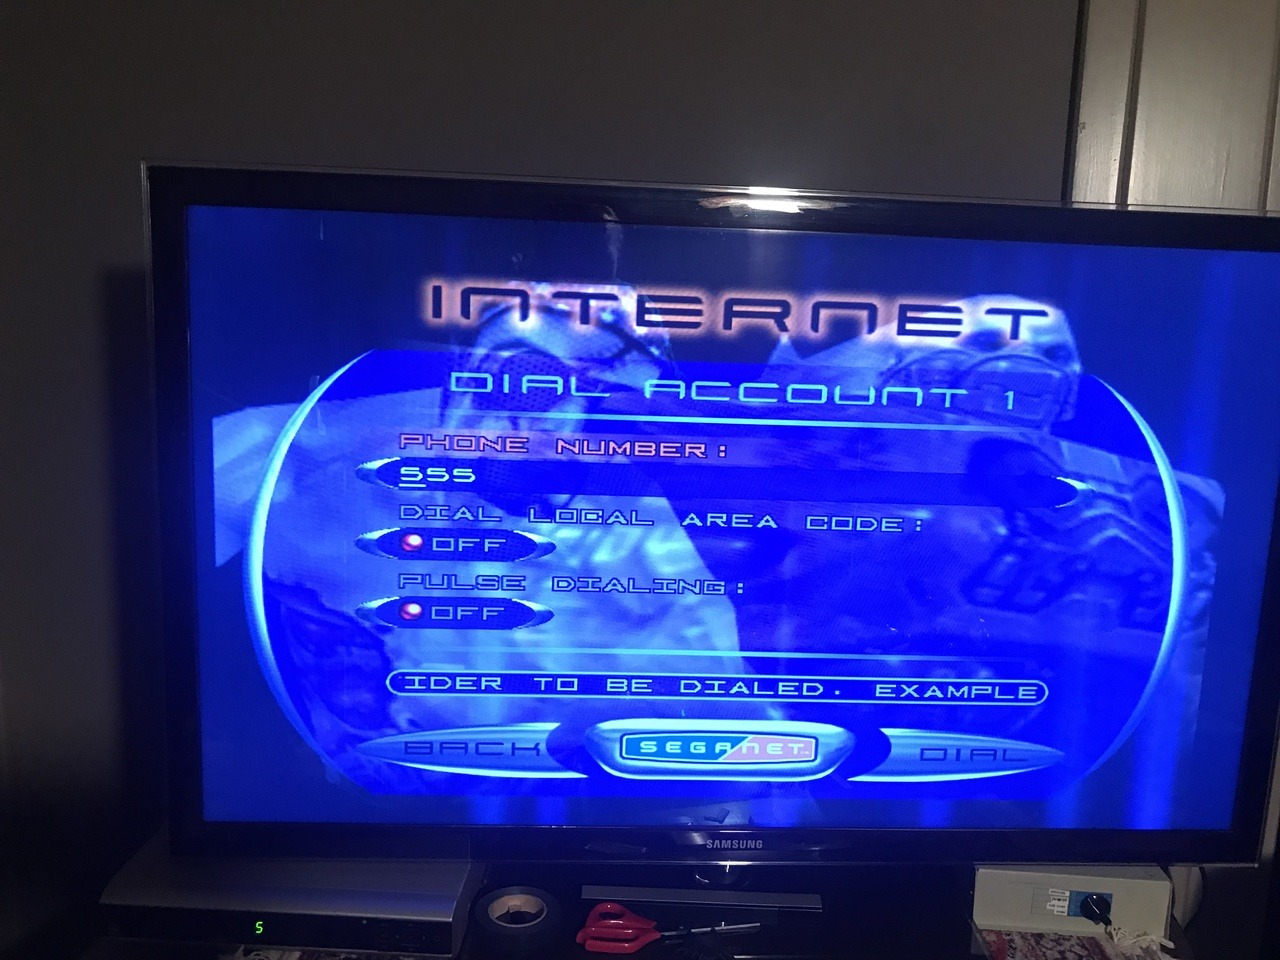
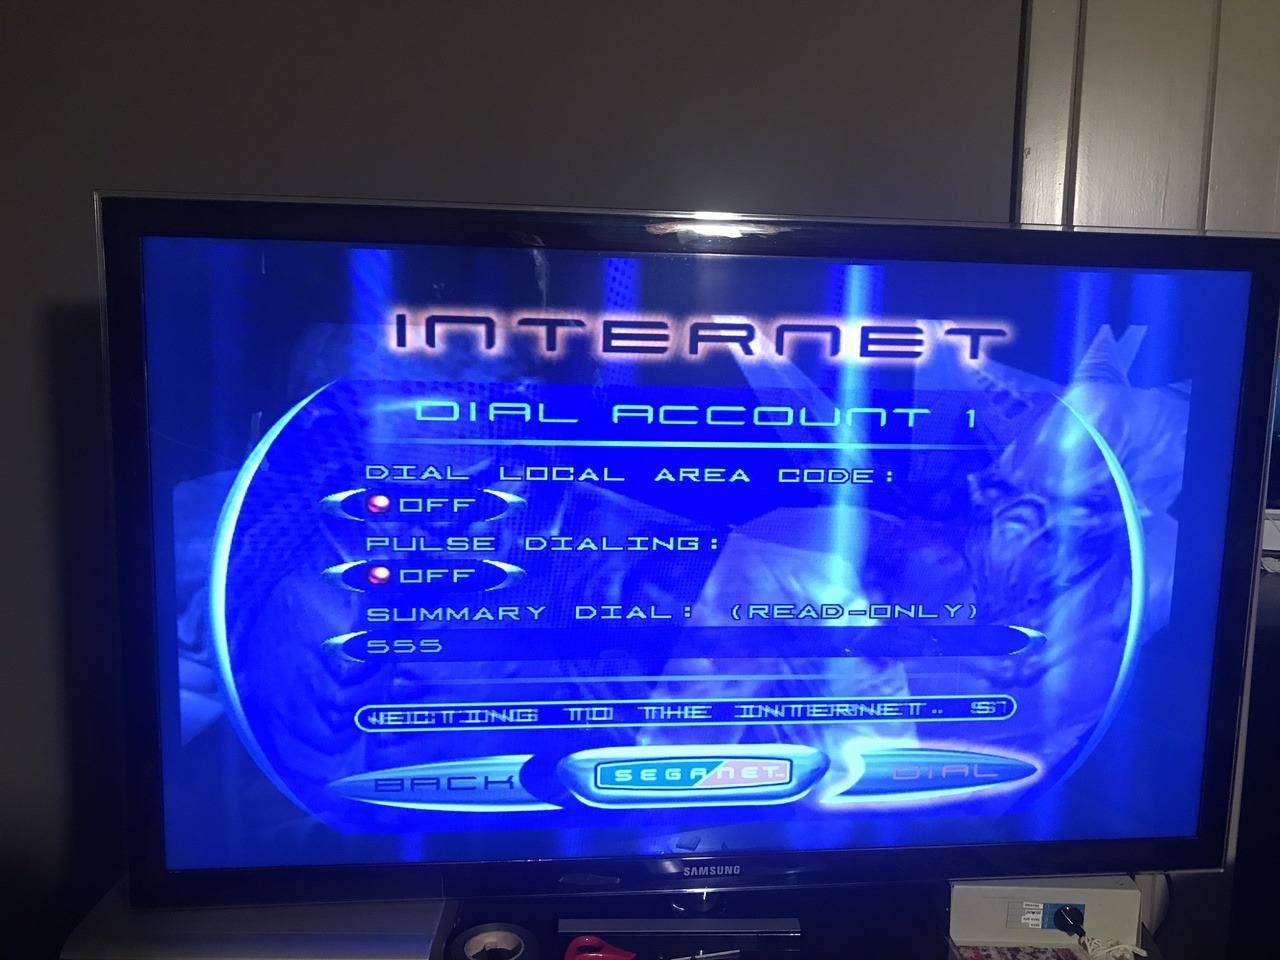
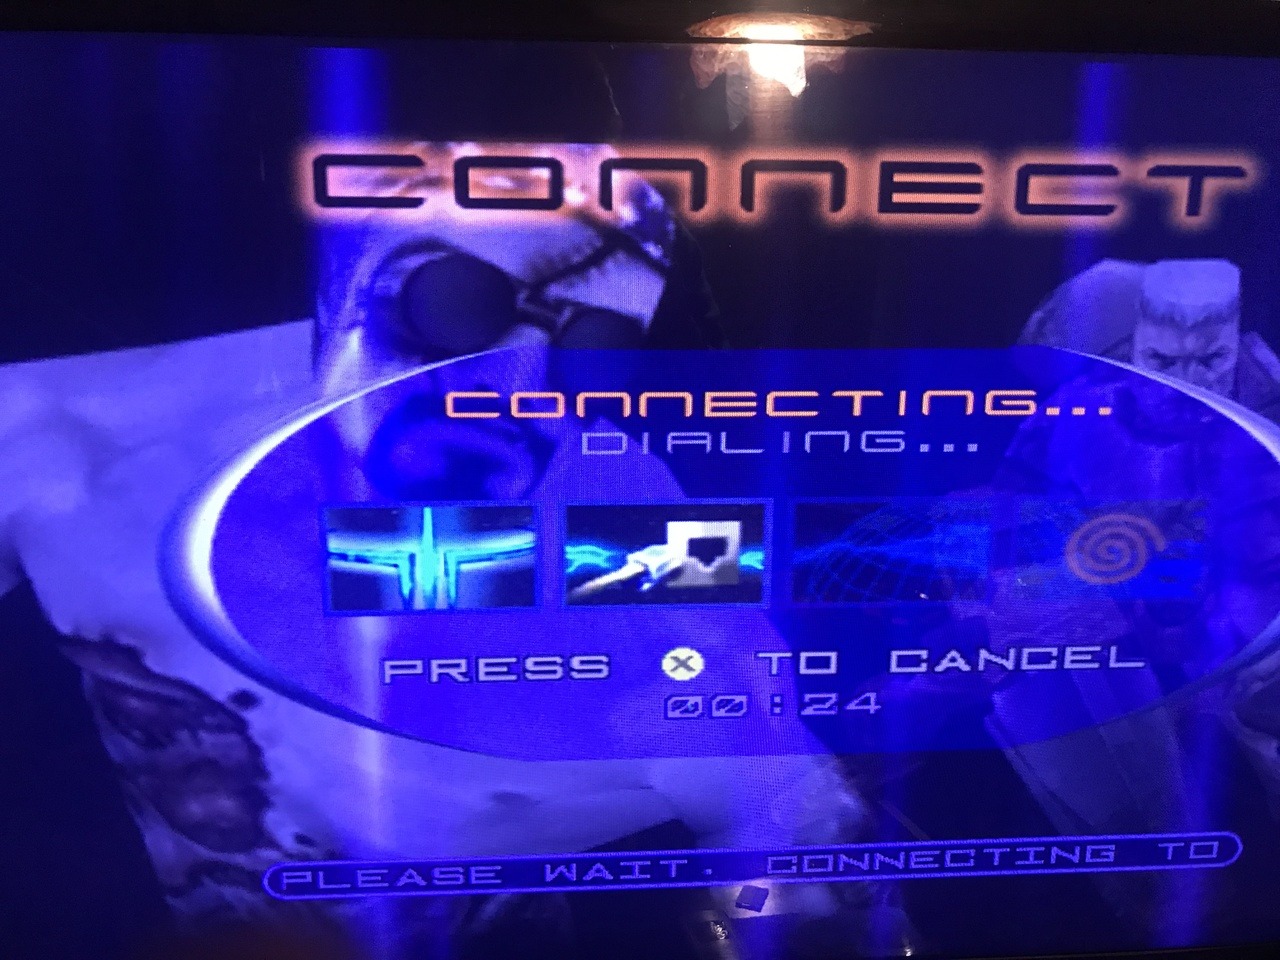
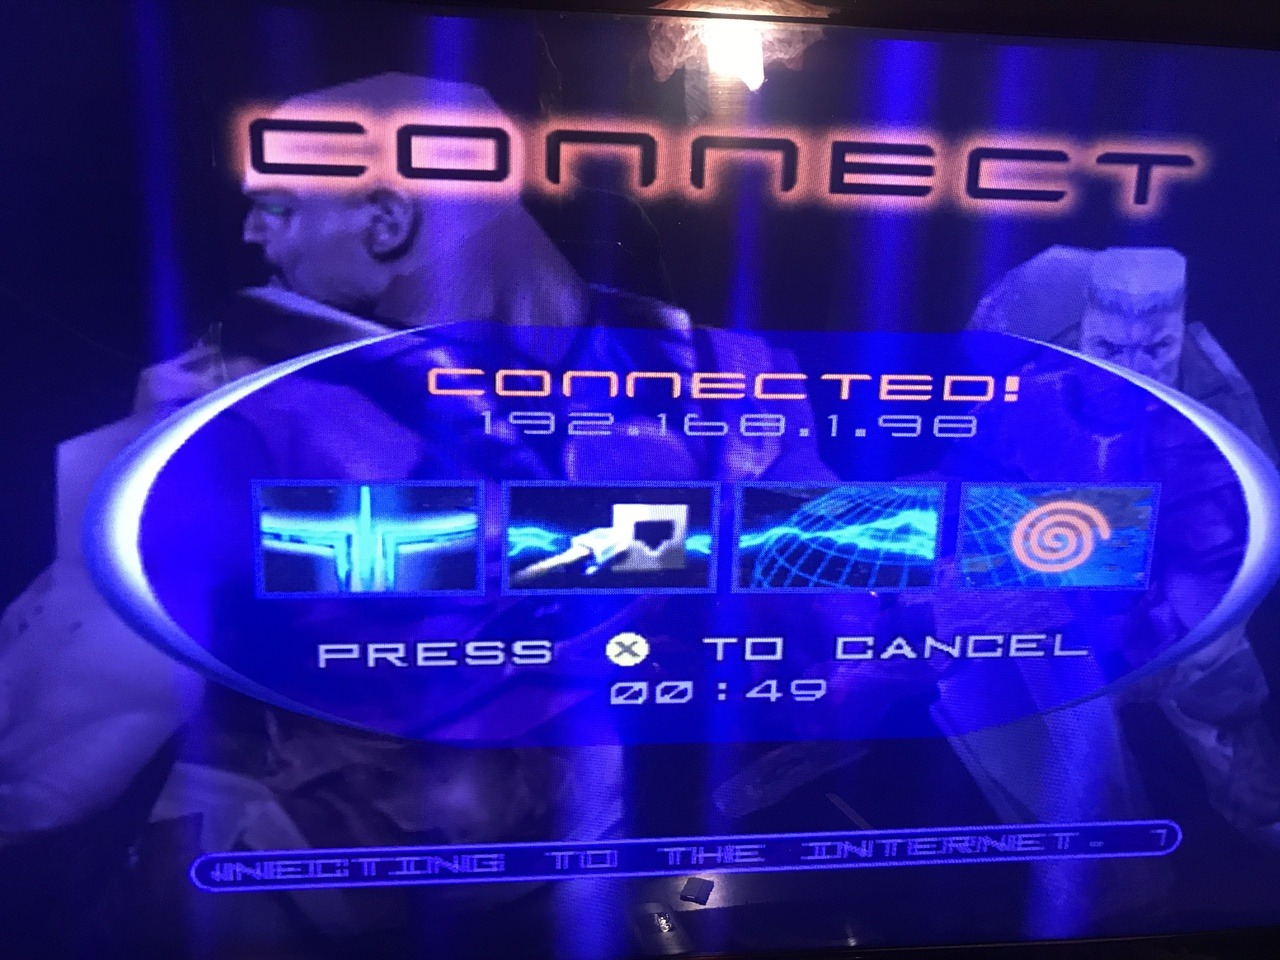
After this your done boot up your dreamcast and Quake 3 or Web browser to config your modem:
I used Quake this is my setup:
But..
The requirement to dial that specific number was removed pre version 1.0 and now it will answer any number that’s dialed. DreamPi doesn’t require a specific username or password either. But you need to fill it in so go crazy!
Just a log entry when i connect to Quake 3 servers.
Dra600n of AirWalk Studios released his make of Fix it Felix jr. on genesis to the public a couple months ago.
It works on the Mega Everdrive. However some times some of the sprites are missing and you have to reset the game to make them show. Download link to the Rom
It works perfect on RetroPie.
Cheat Codes:
[Marathon Mode]: Down Right A C Up Left A
[Blood Code]: A B A C A B B
[Extra Time]: A C C Right Up A Left
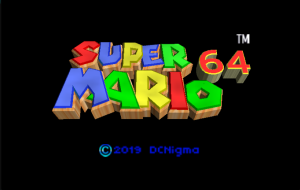
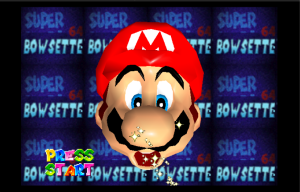
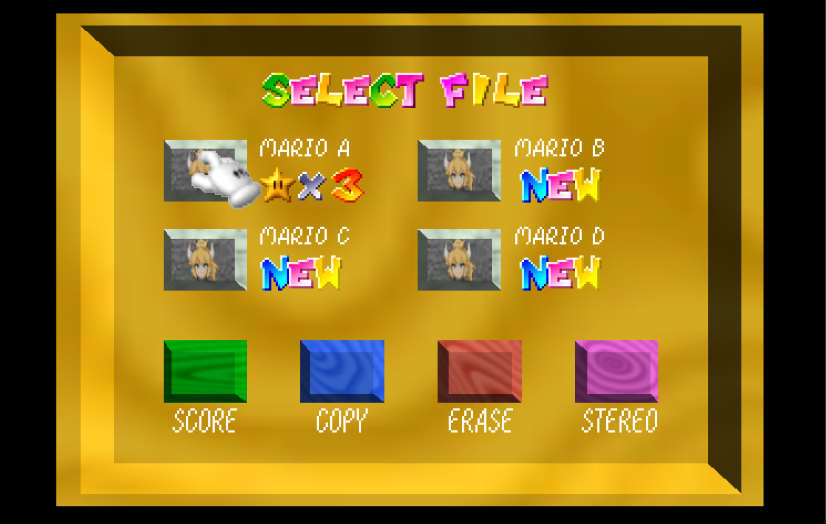
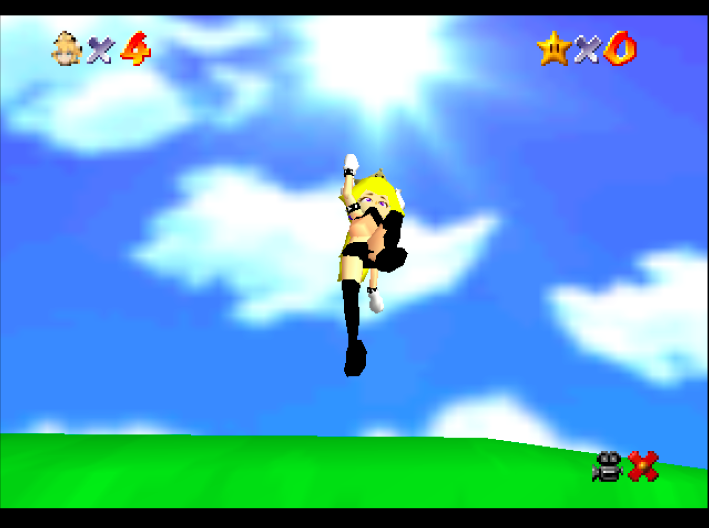
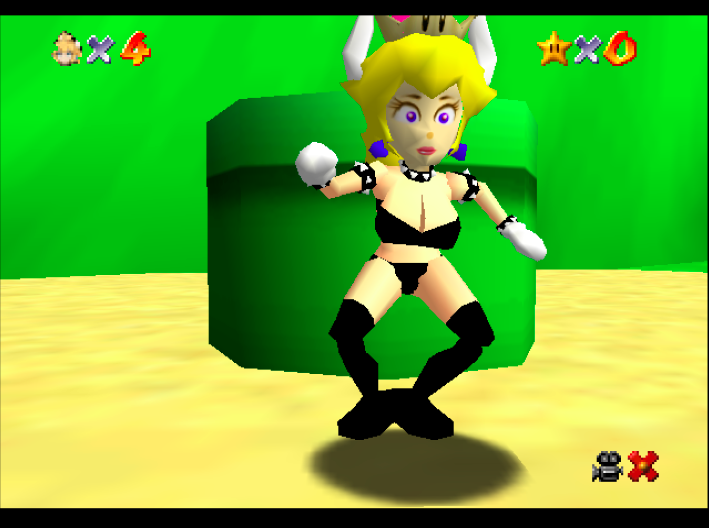
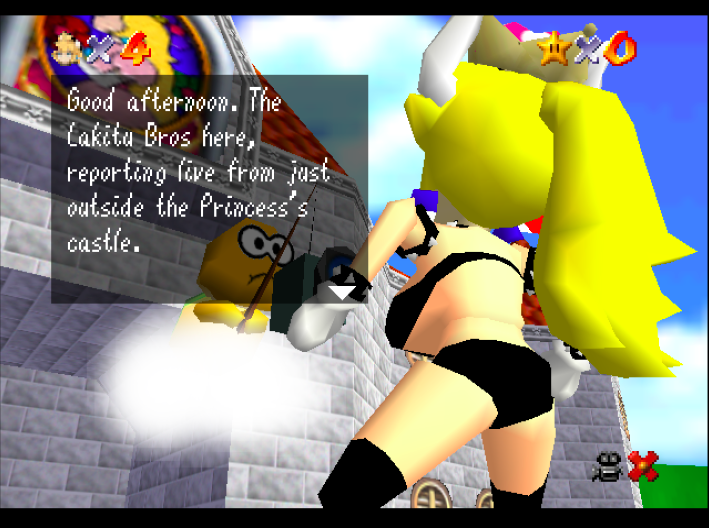
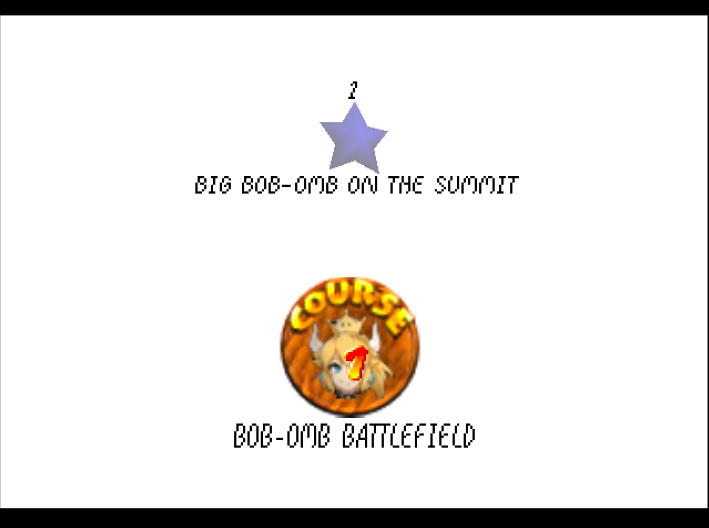
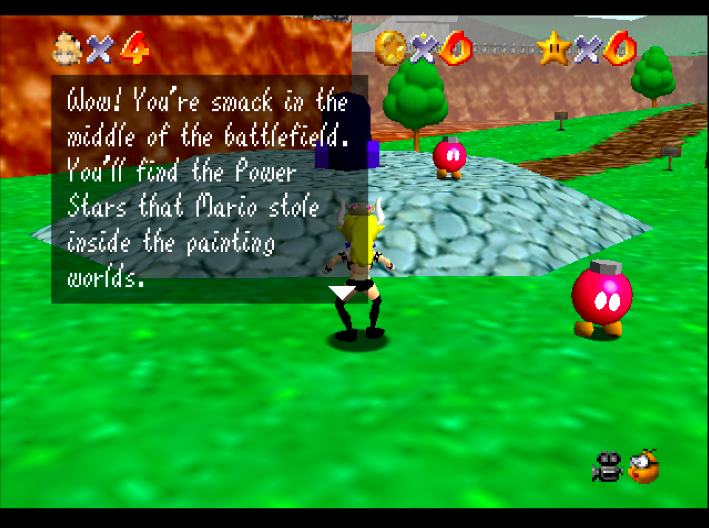
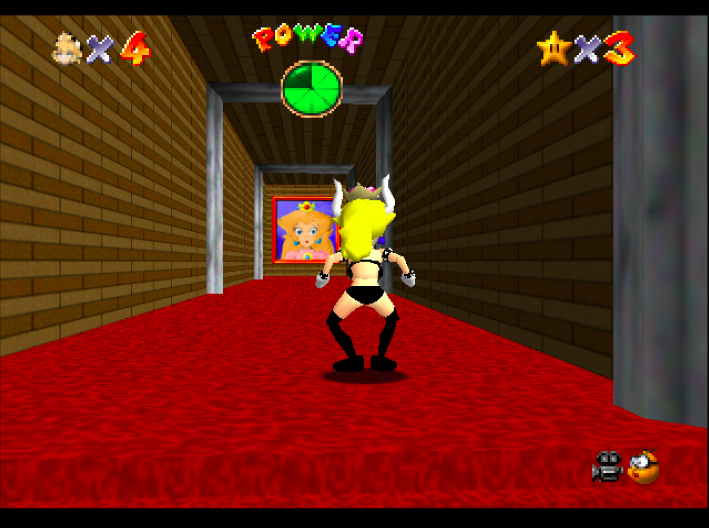
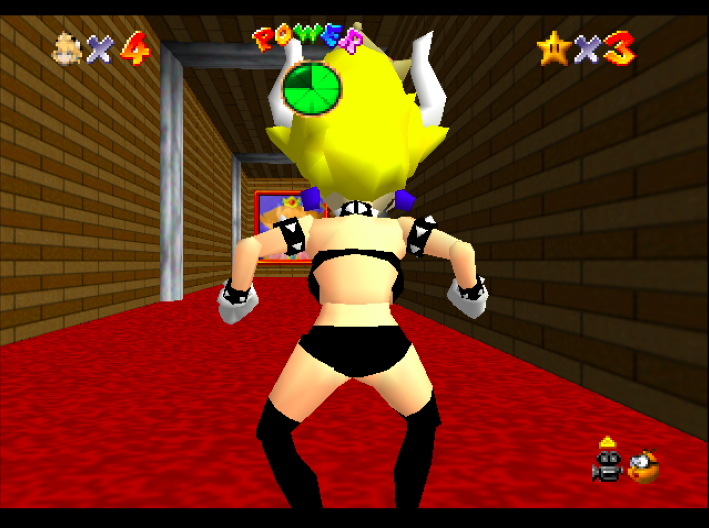
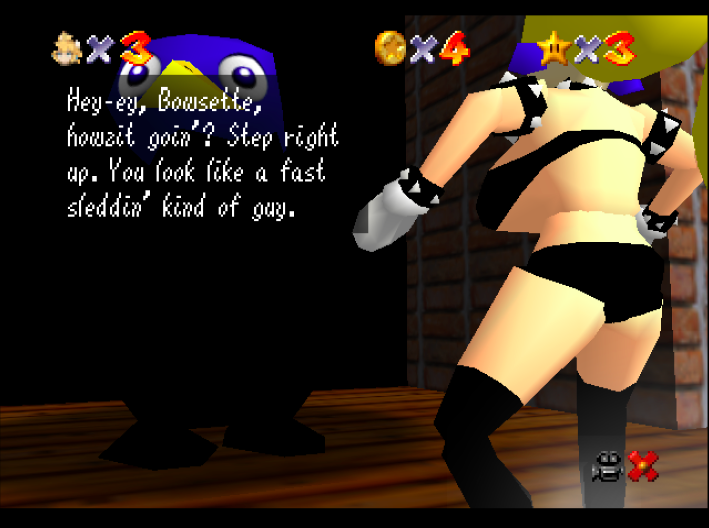
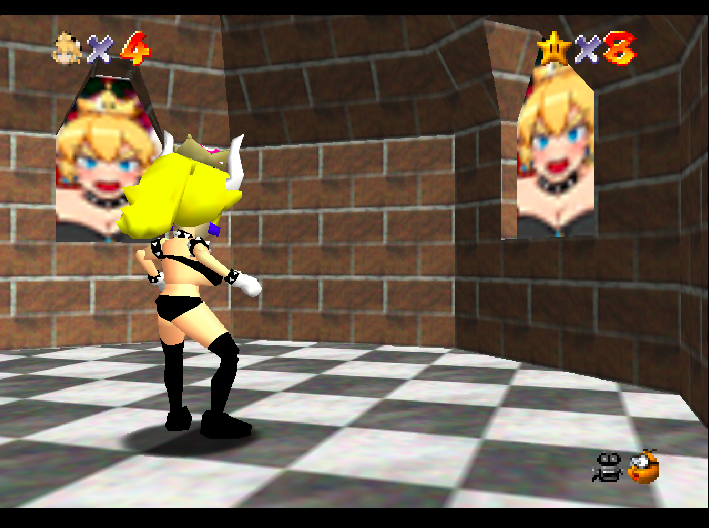
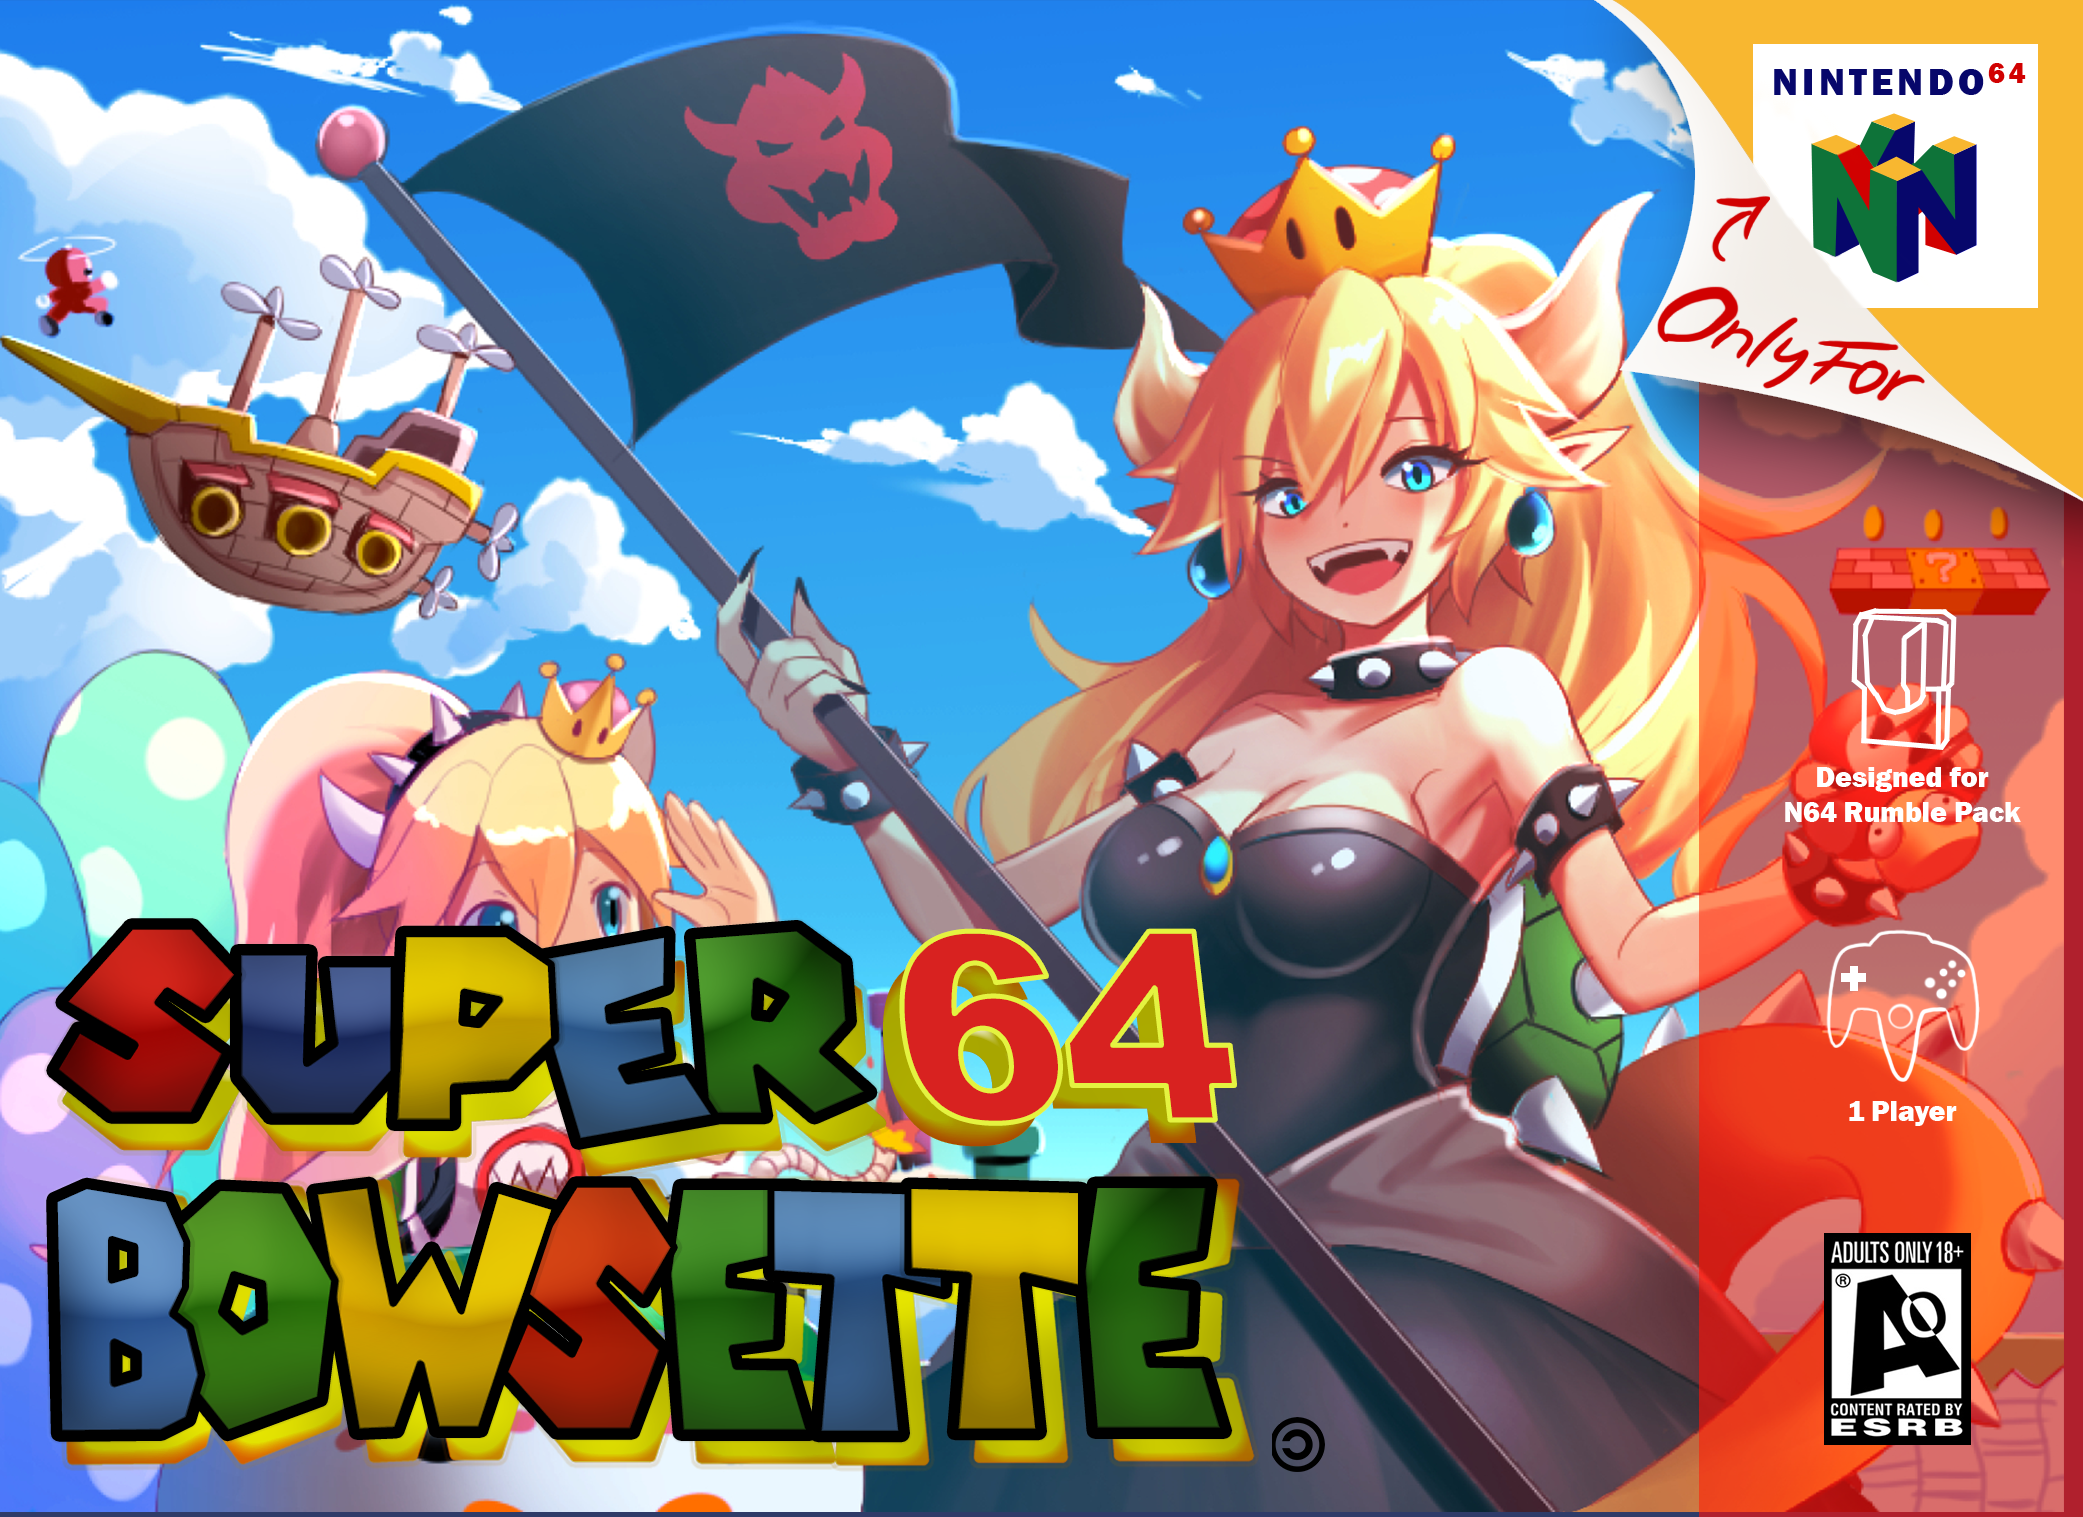
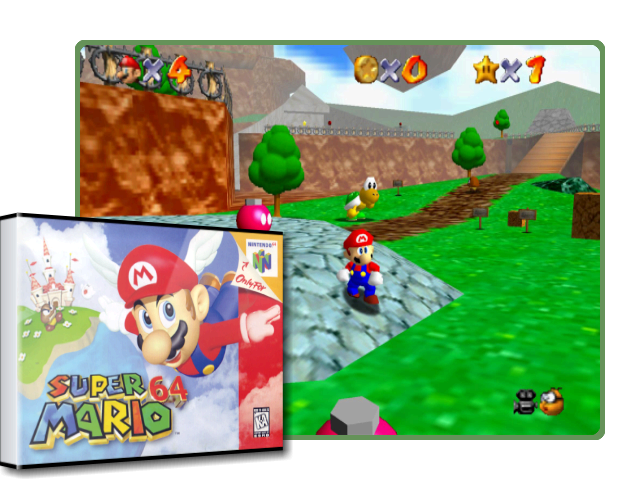
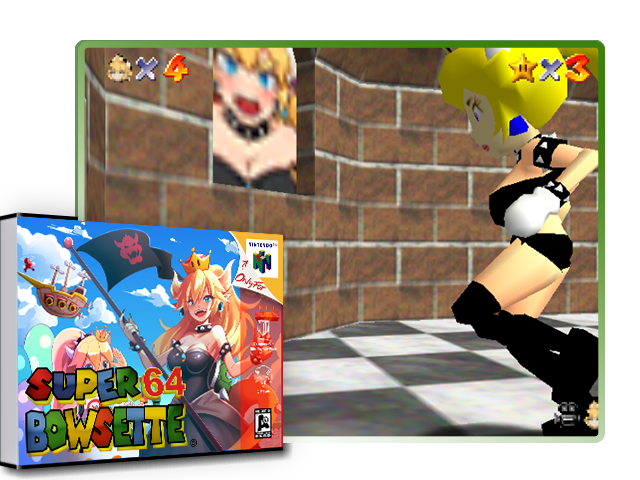
I Did some Rom Modding.. (again) 😀
Found this Rom made by Kaze Emanuar (Download)
Like the concept of it, but it was laking some extra textures..
So I added some more 2 make it more Bowsette like…
Still work in progress no release plannend for now.
So there is now Download link for now.
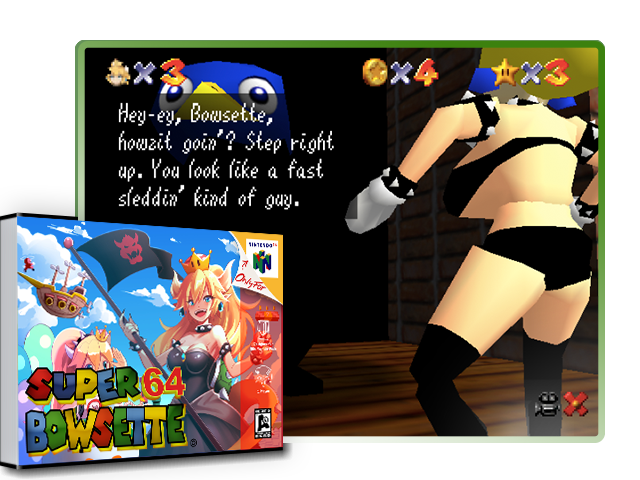
Here are some screenshot of the textures, I changed so far:
Some in game screenshots:
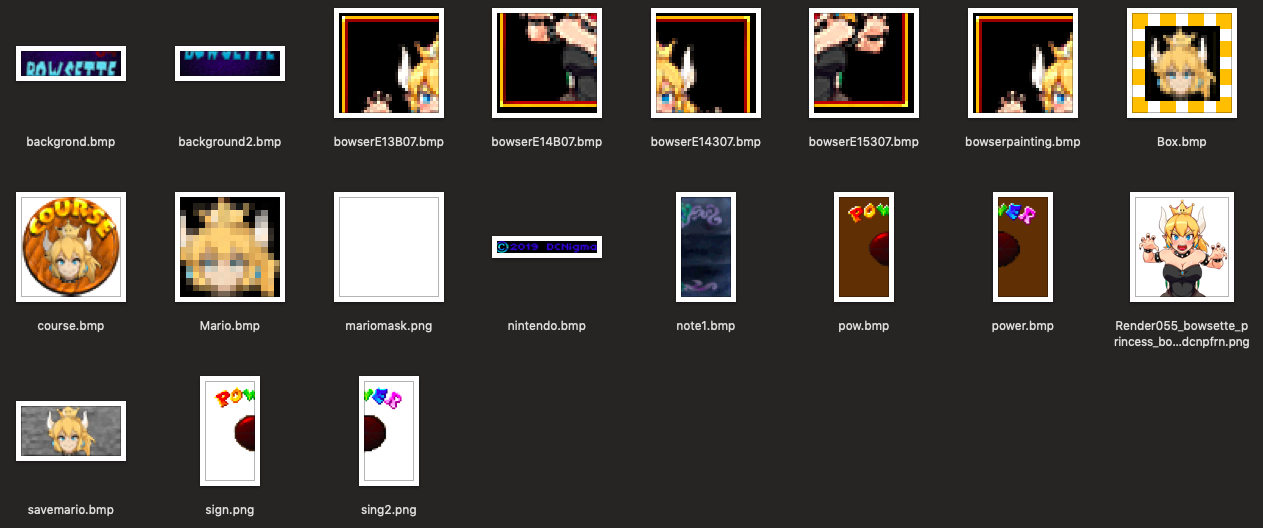
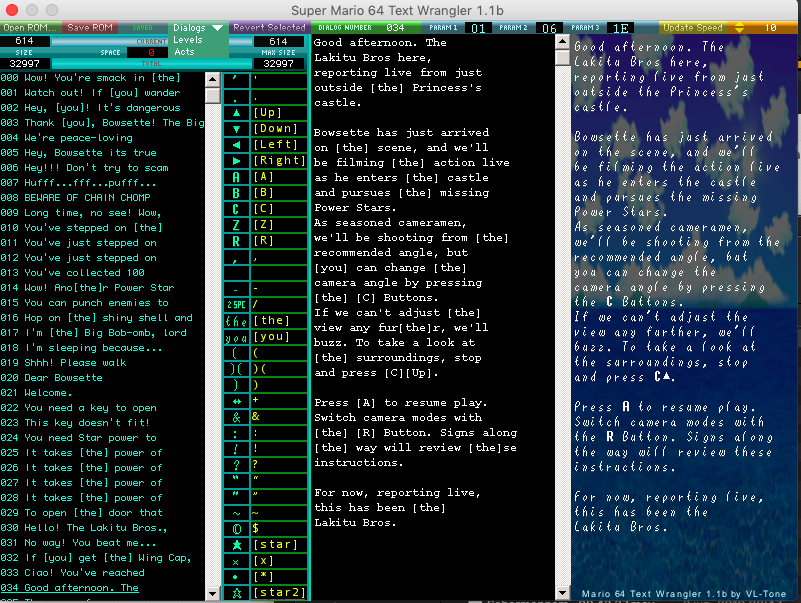
I use N64Rip to change the in game graphics: Good link for information on those textures, you will need a Hex Calculator to count the hex values together.
Did also some text editing changed Mario in to Bowsette.
Just started N64 Rom modding so still checking out the tools and most of them don’t work on OSX. (10.14.5)
Found a few that run well under playonmac.
Got bored and made a nice box art for it:
Credits for the nice background Pixiltales..
Needed for my Retropie 😀


 my
my 


