


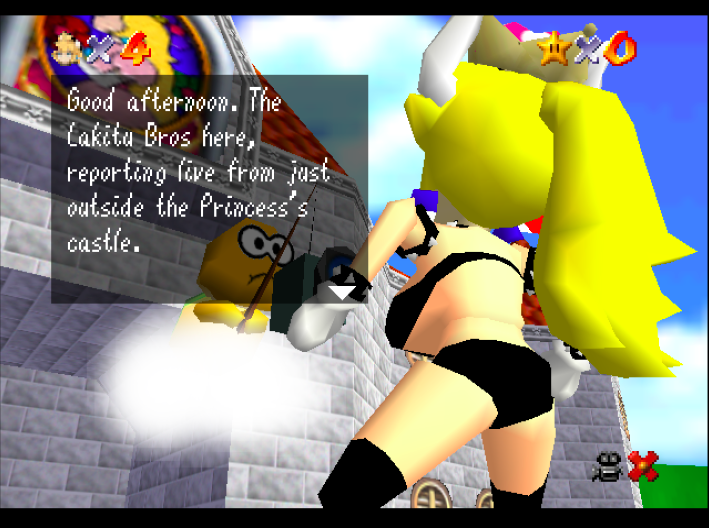


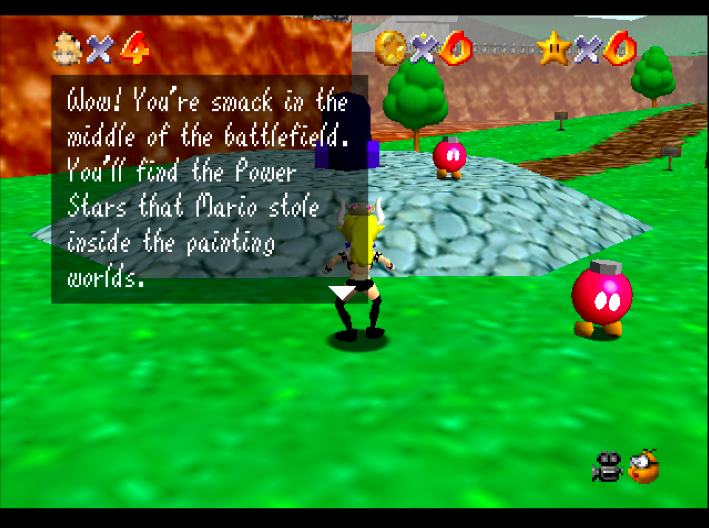
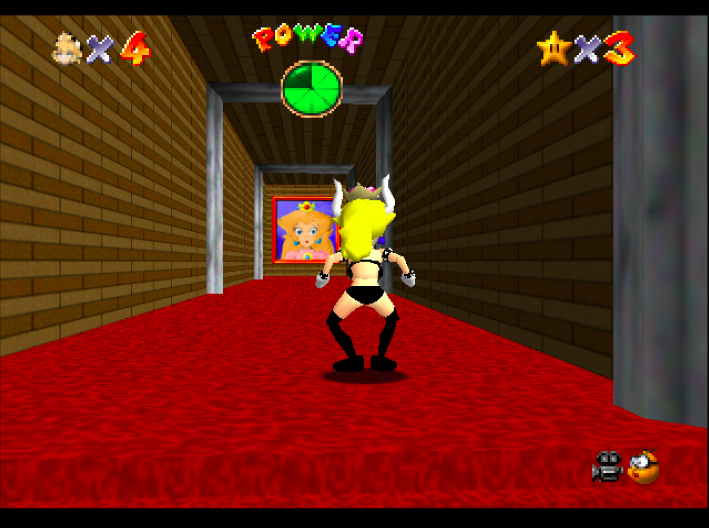


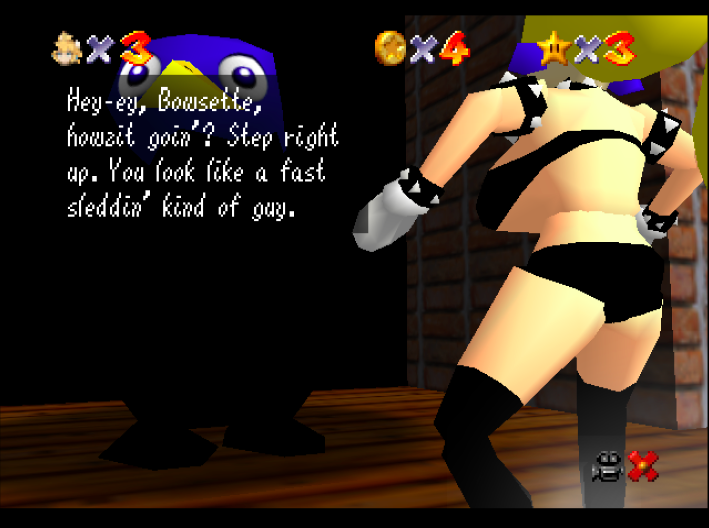


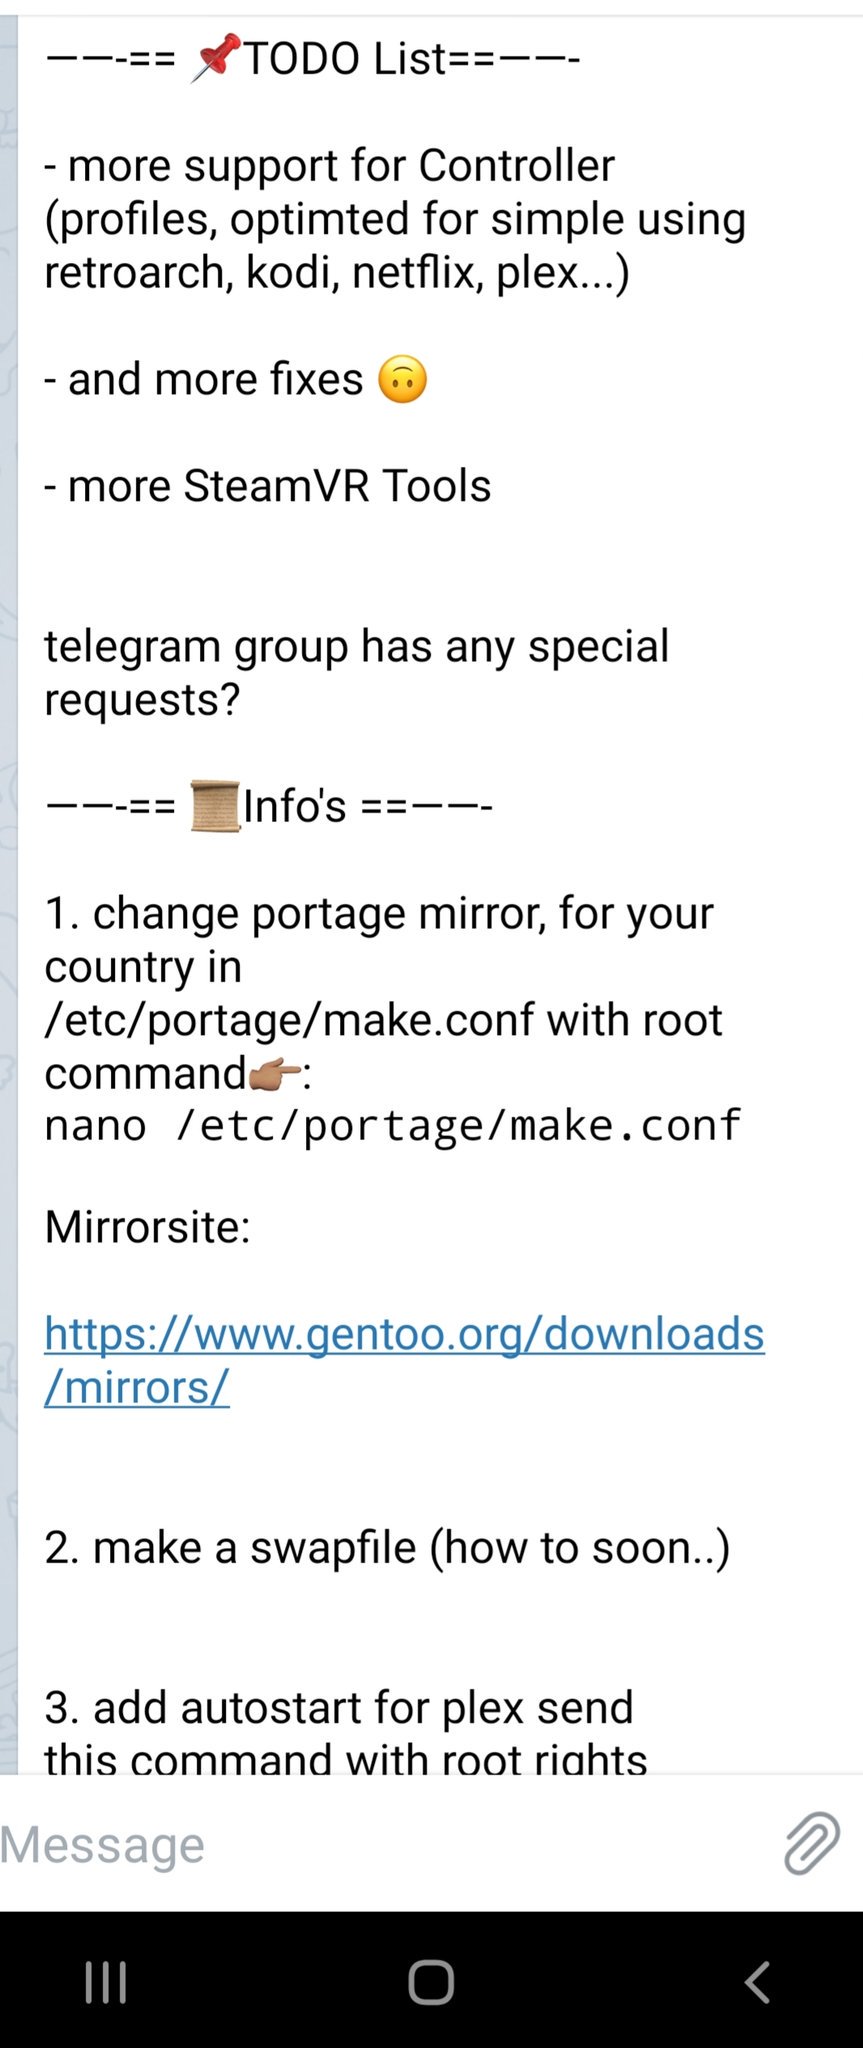
I Did some Rom Modding.. (again) 😀
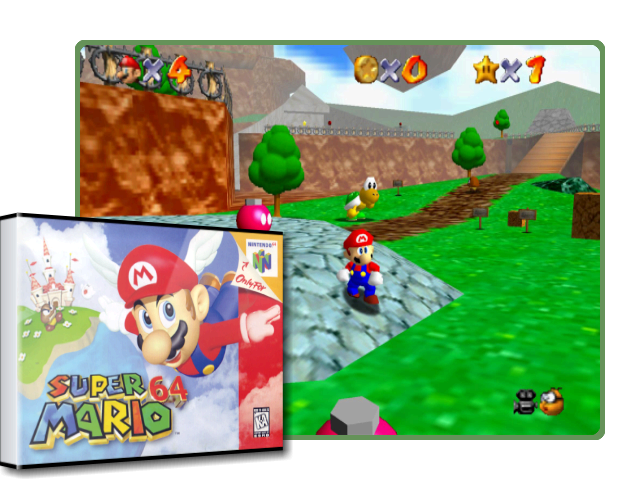
Found this Rom made by Kaze Emanuar (Download)
Like the concept of it, but it was laking some extra textures..
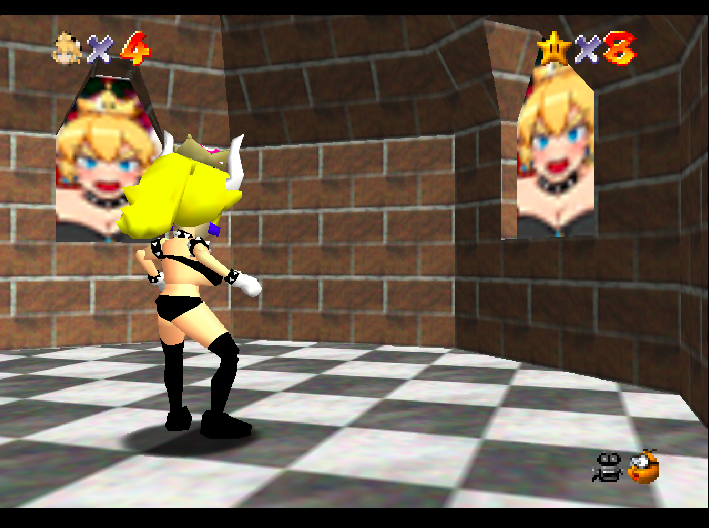
So I added some more 2 make it more Bowsette like…
Still work in progress no release plannend for now.
So there is now Download link for now.
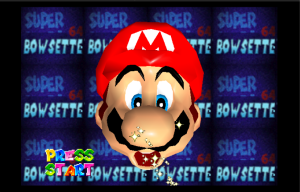
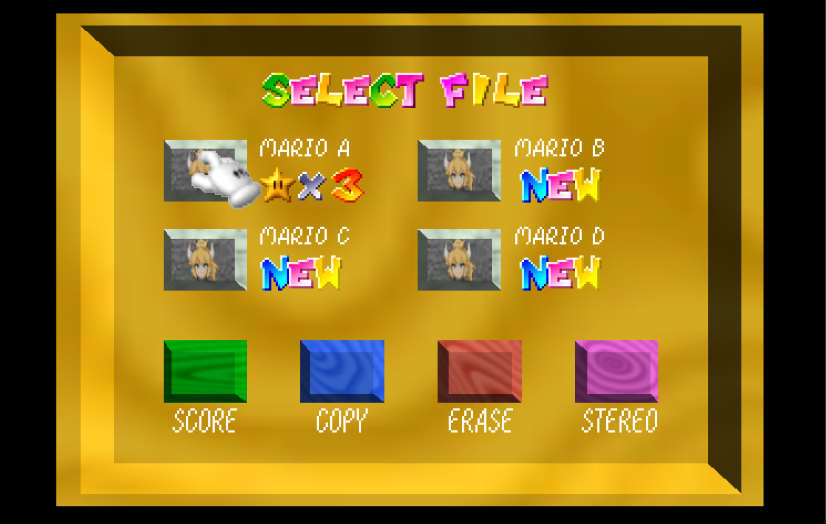
Here are some screenshot of the textures, I changed so far:
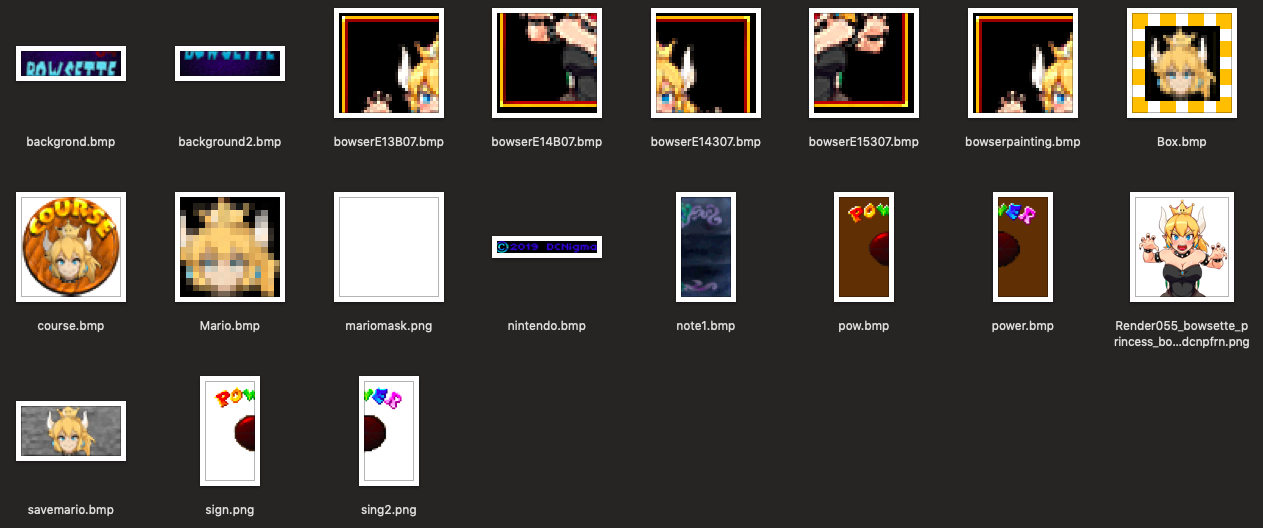
I use N64Rip to change the in game graphics:
 Good link for information on those textures, you will need a Hex Calculator to count the hex values together.

Did also some text editing changed Mario in to Bowsette.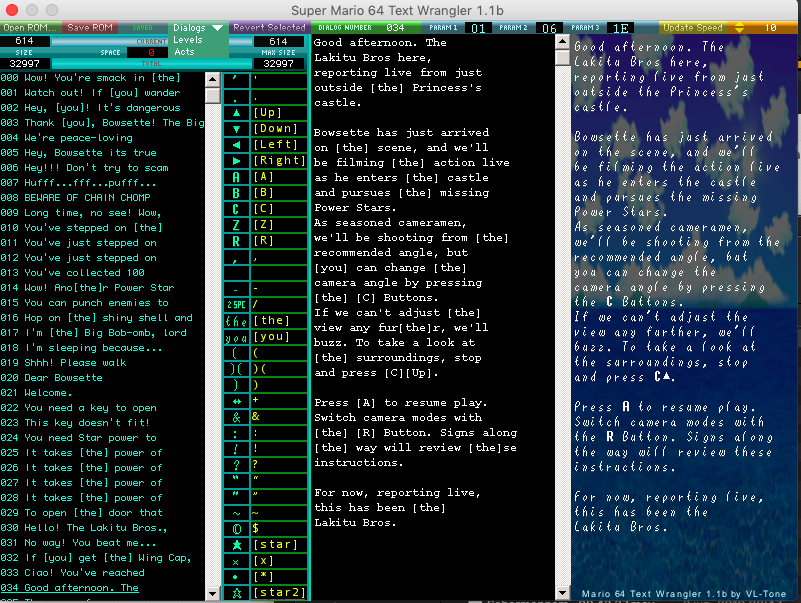
Just started N64 Rom modding so still checking out the tools and most of them don’t work on OSX. (10.14.5)
Found a few that run well under playonmac.
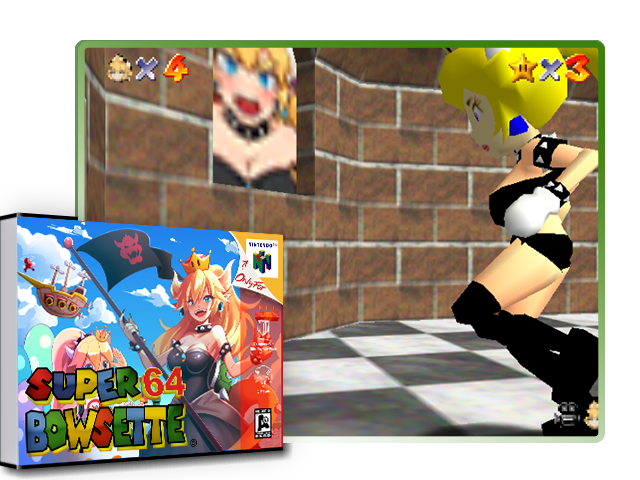
Got bored and made a nice box art for it:

Credits for the nice background Pixiltales..
Needed for my Retropie 😀

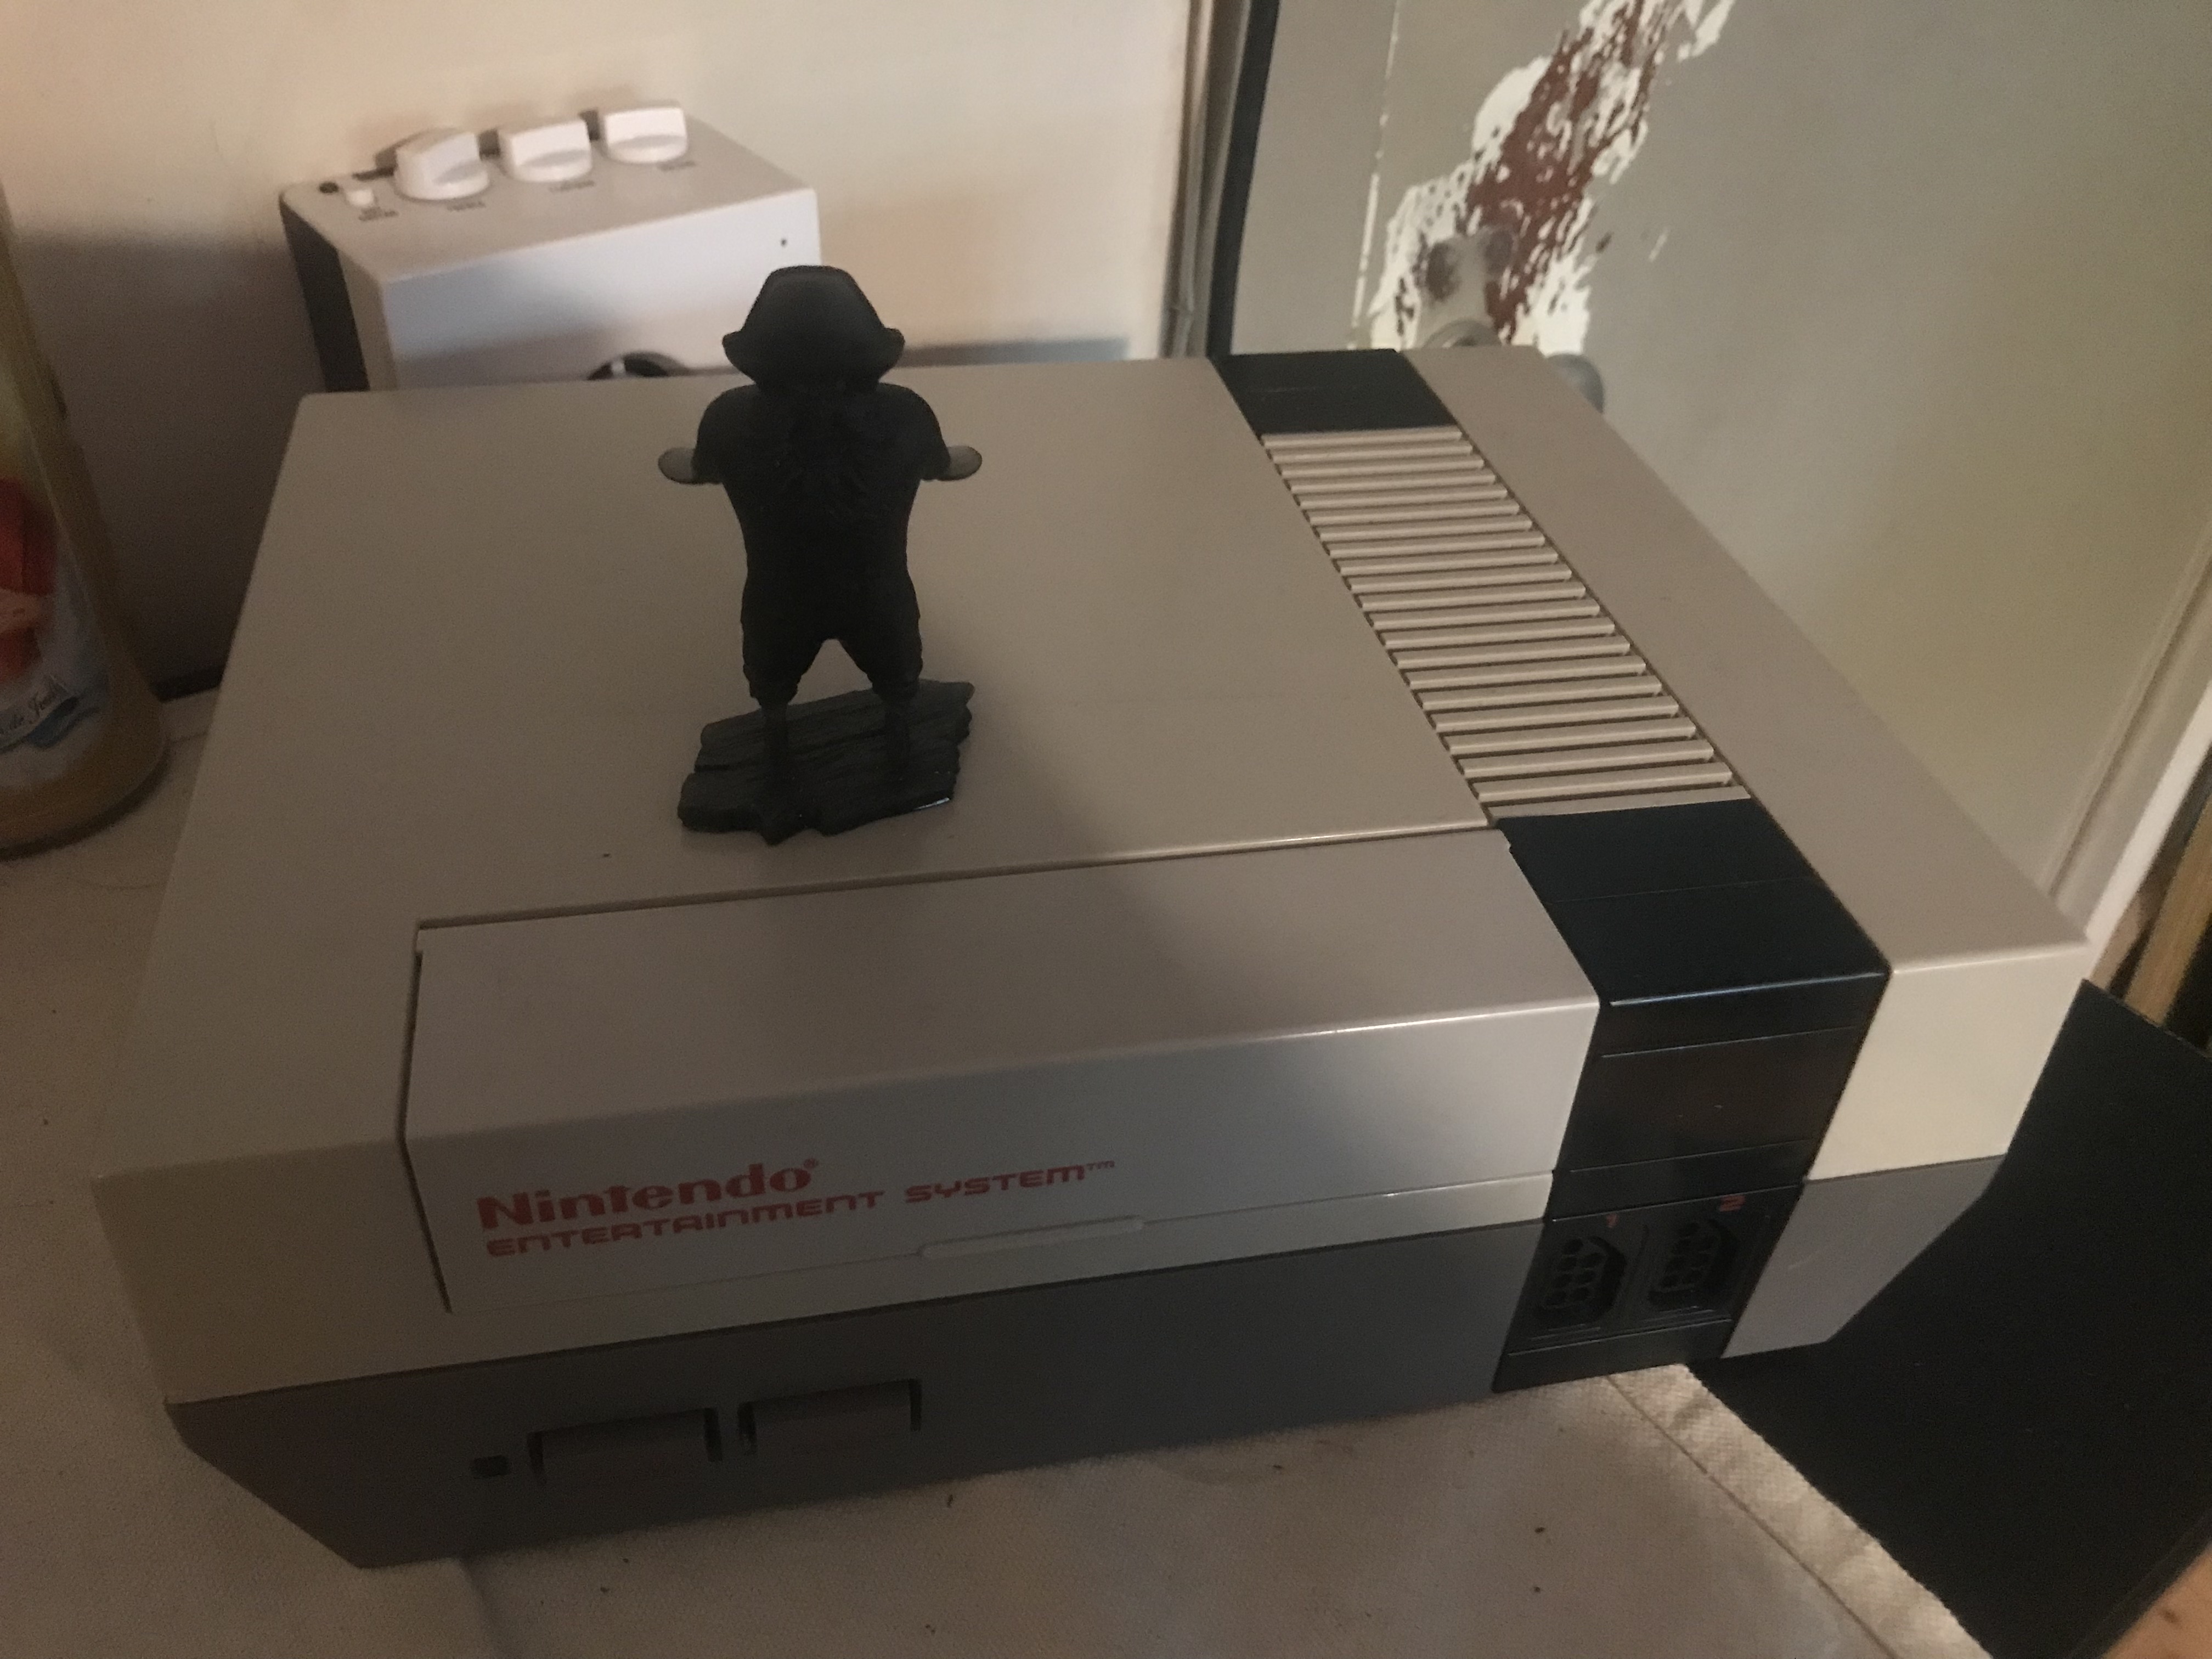
New weekend project that I made:
Last year I a got a NES case of a co-worker, I did’t know what to do with it, until now…

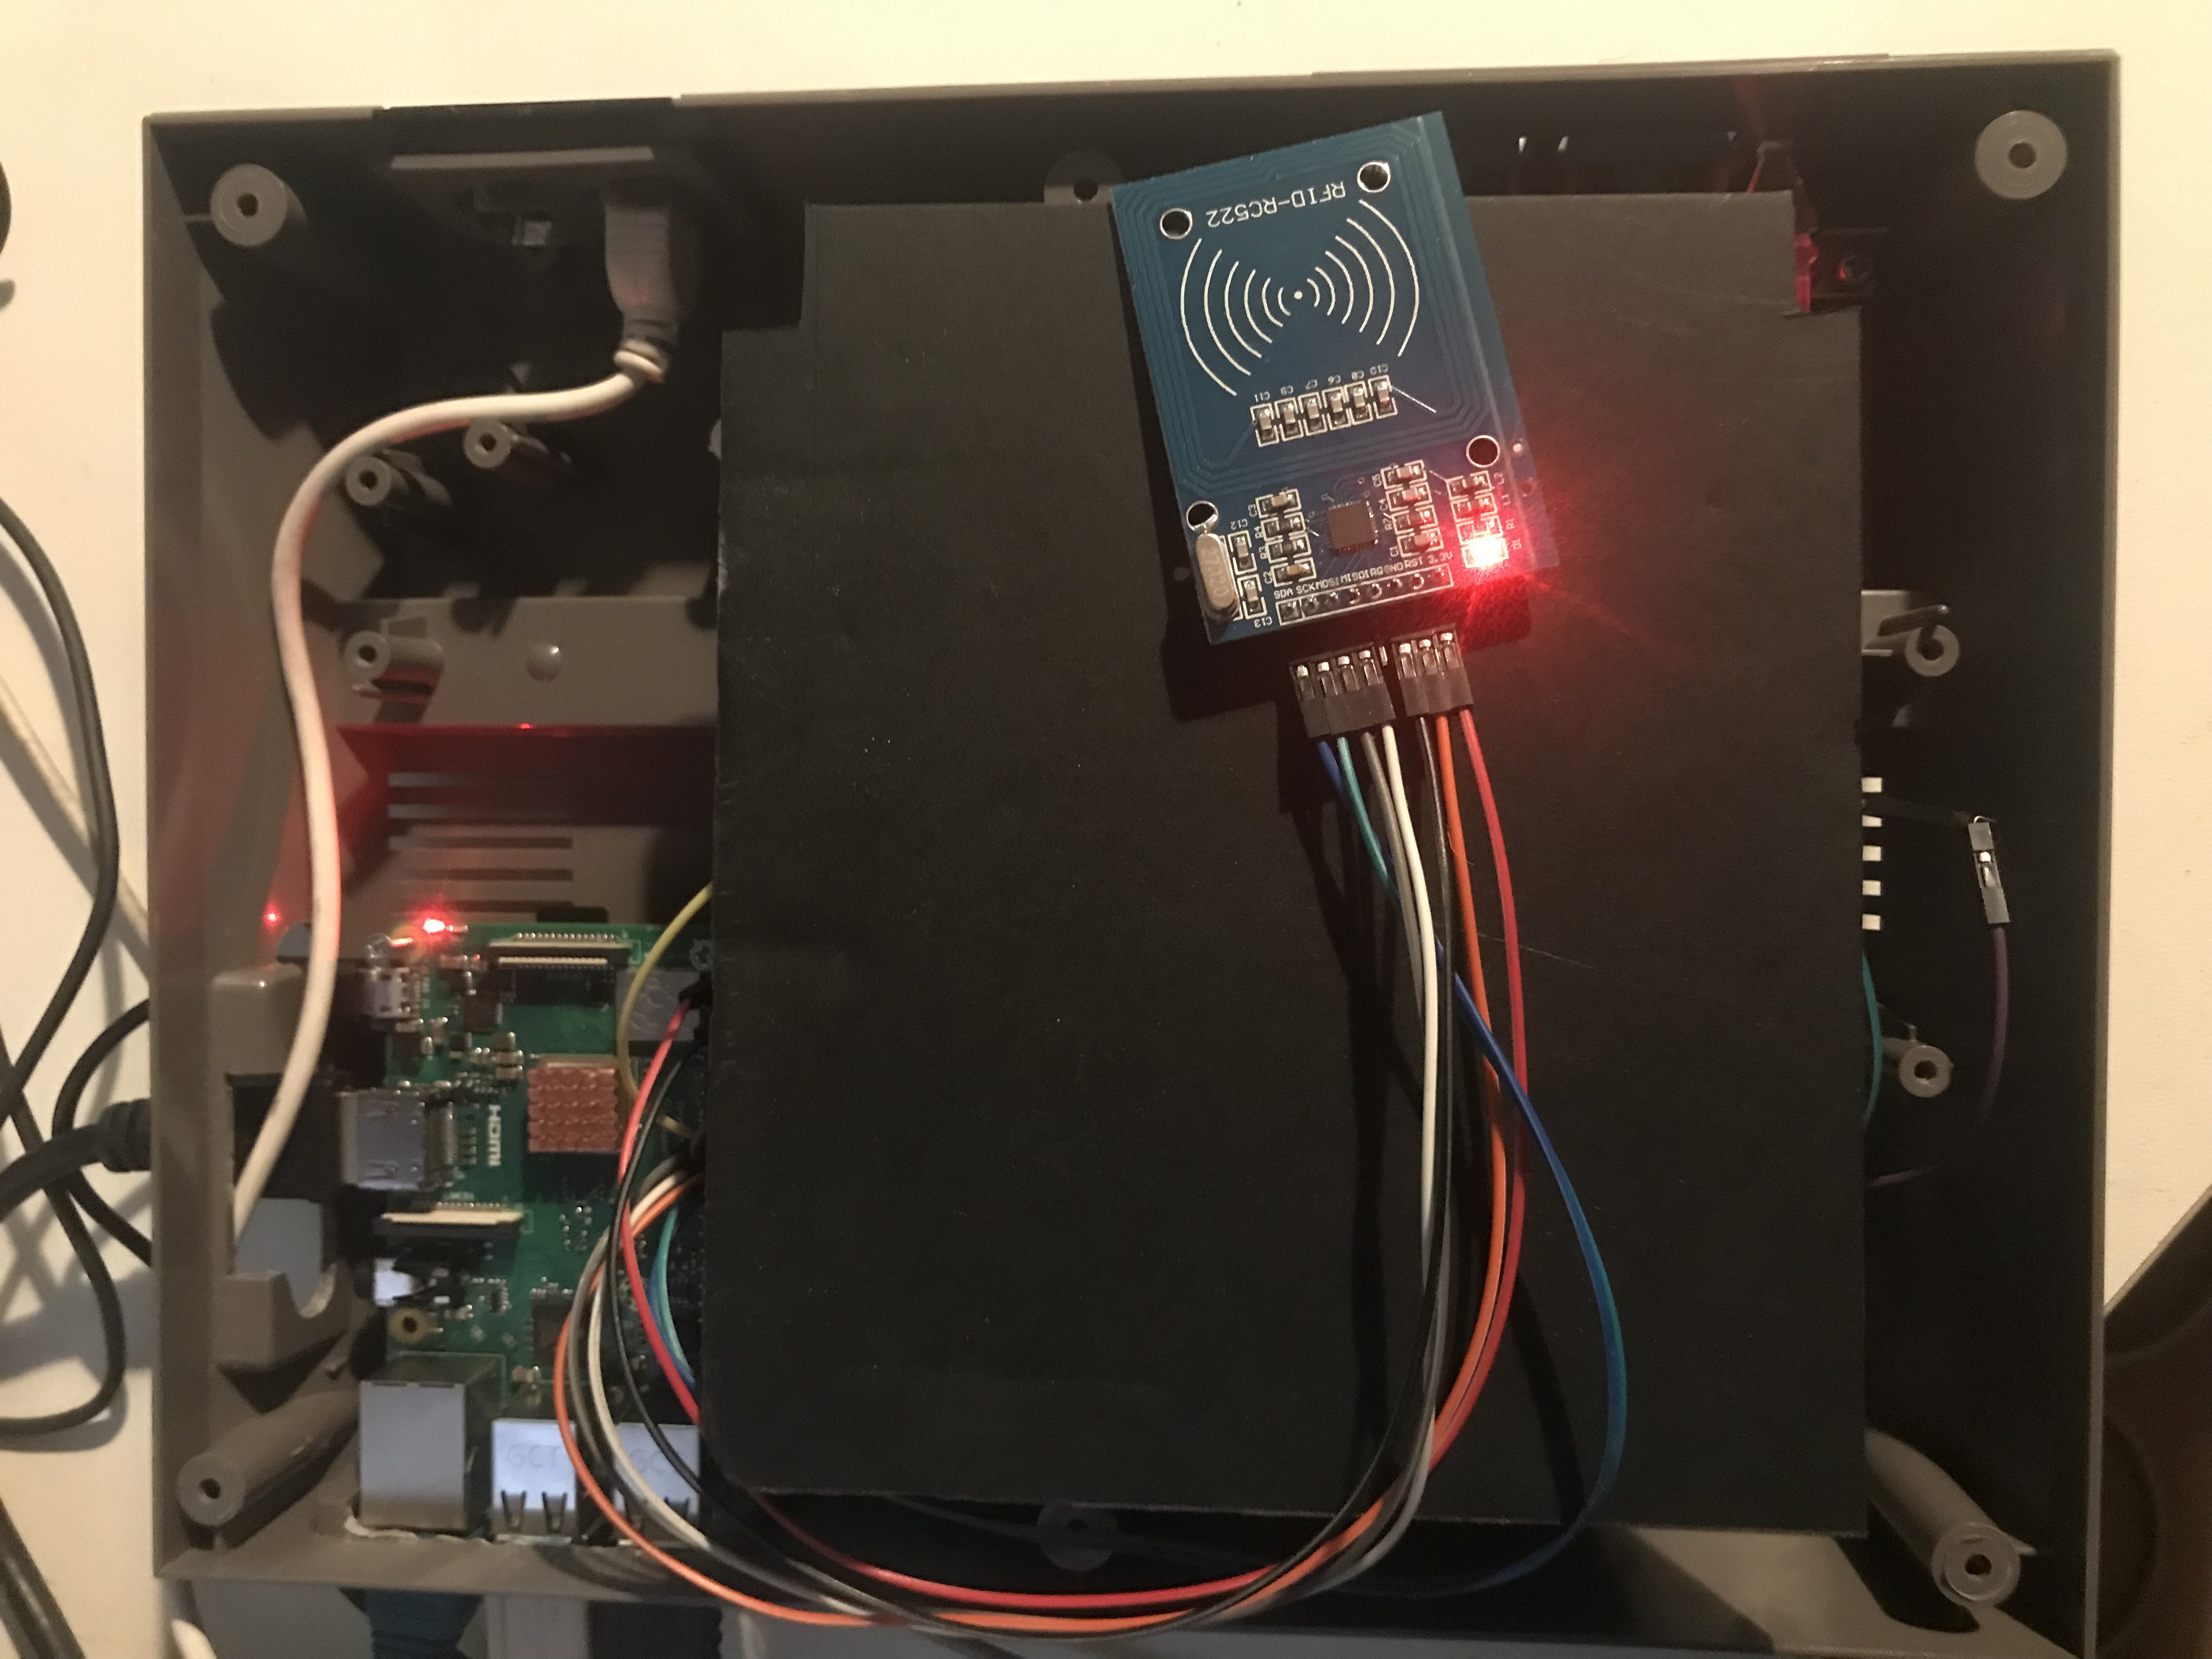
Empty case, only the top and bottom and the buttons. perfect for a Raspberry pi project….
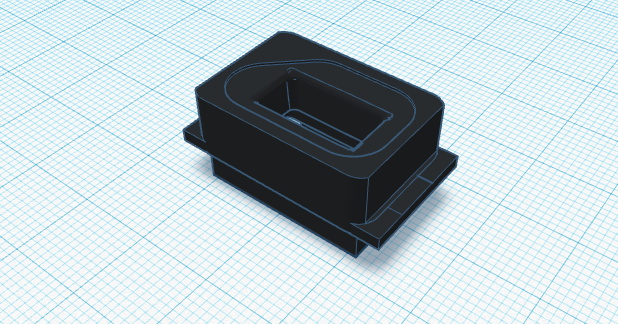
The last weekend I started printing heavy on my Anycubric Photon.
And it felt if i was making Amiibo’s

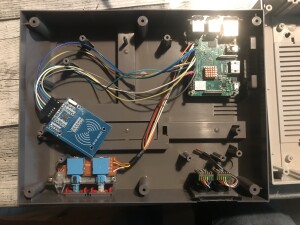
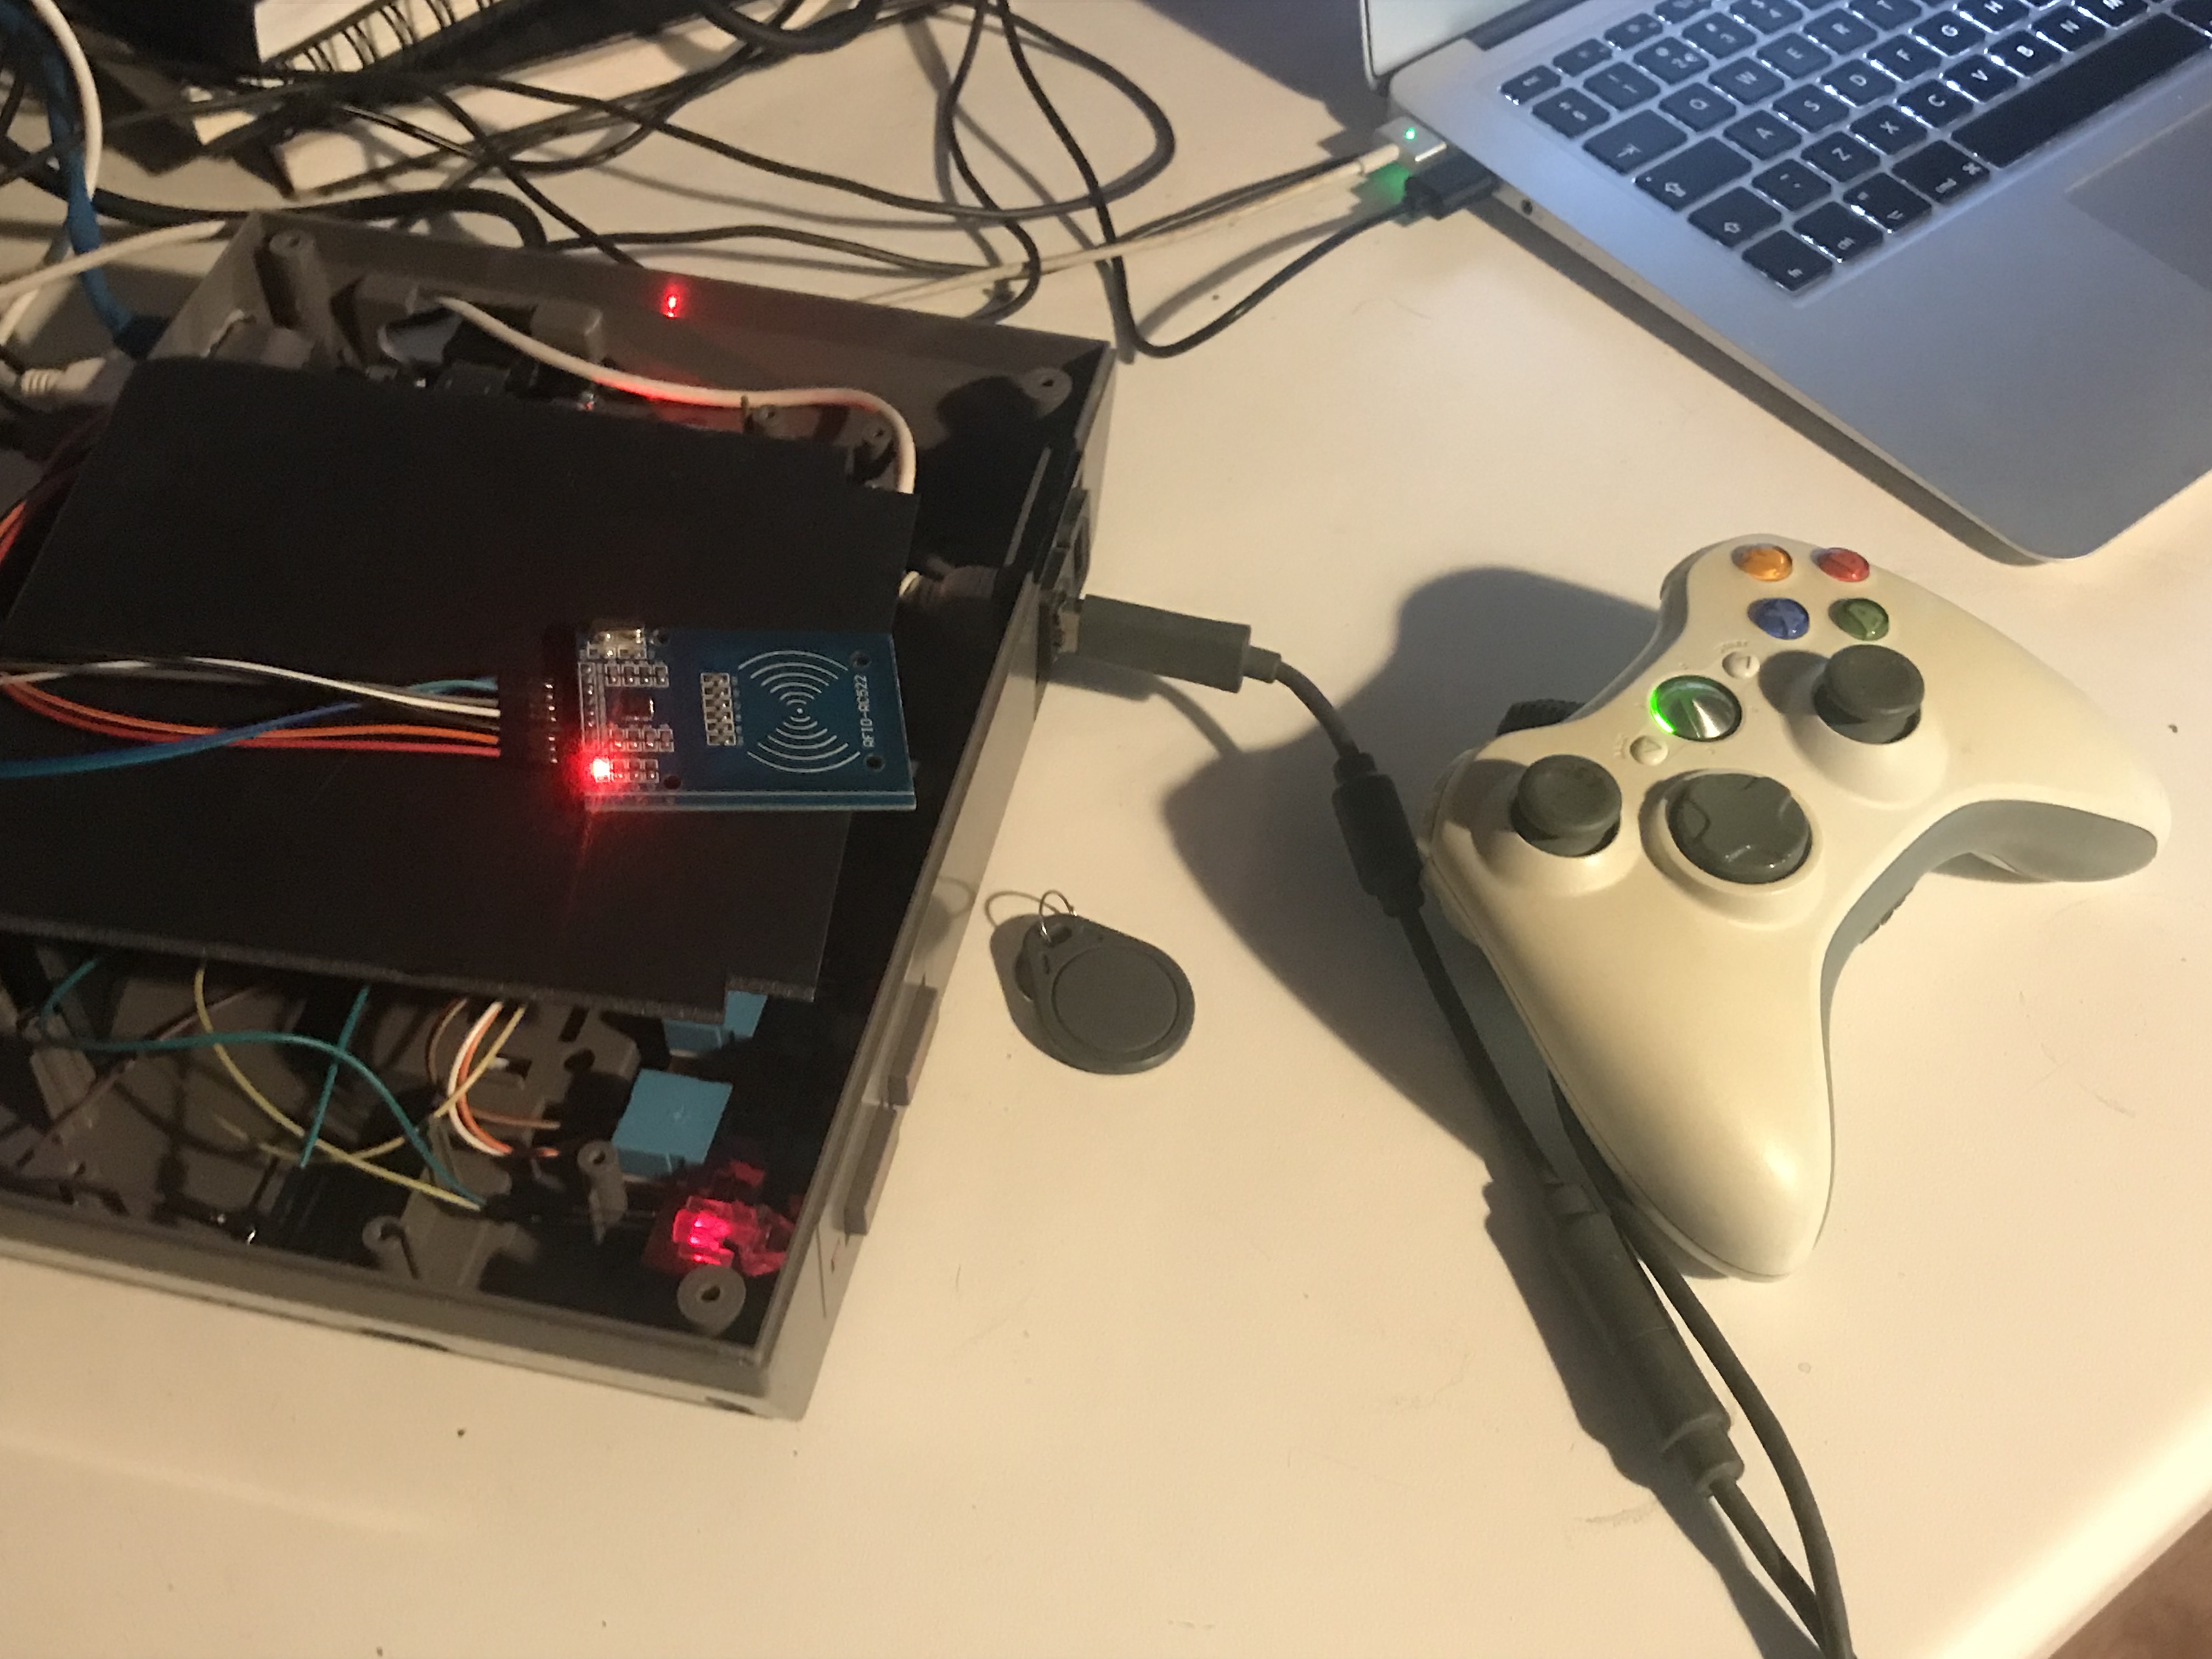
After seeing the second picture above I got inspired to make a new RetroPie console.
Needed to be RFID and controller…
Left the NES case and the semi setup Right a working setup only no working code at that point.
Even the RFID would’t read the cards because of the SPI-PY its sort of broken.
How to connect?
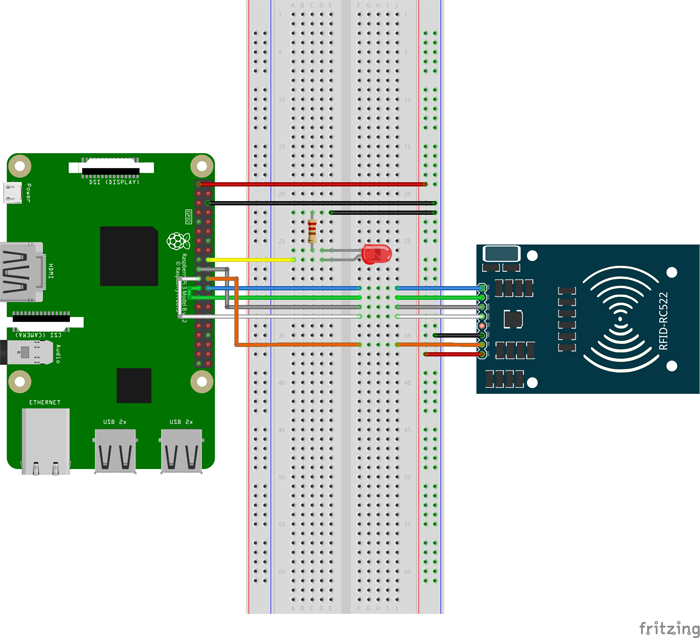
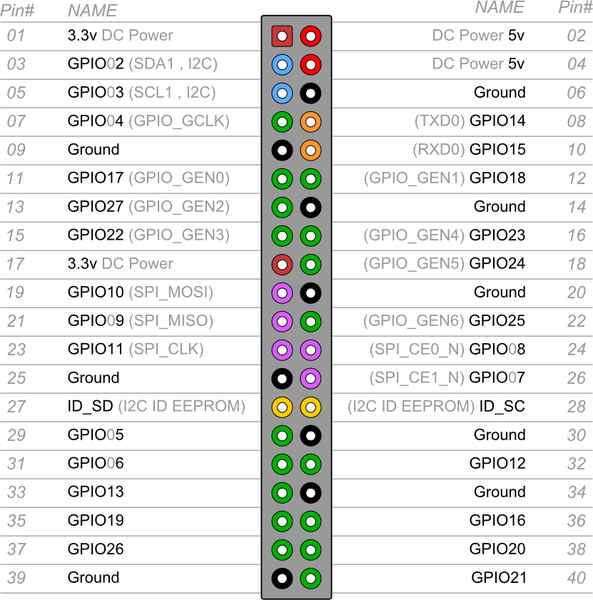
First install SPI-PY (git clone https://github.com/lthiery/SPI-Py.git) then rolle back:
git clone https://github.com/lthiery/SPI-Py.git

git checkout 8cce26b9ee6e69eb041e9d5665944b88688fca68

sudo python setup.py install
If you do that! Then and only then, you can get the RFID-RC533 working under latest Jessy or RetroPie latest build.
Then you can install the MFRC522 Library and start reading some card data.
To get it working the way I wanted was a pain in the @ss. There is some info on runcommand:
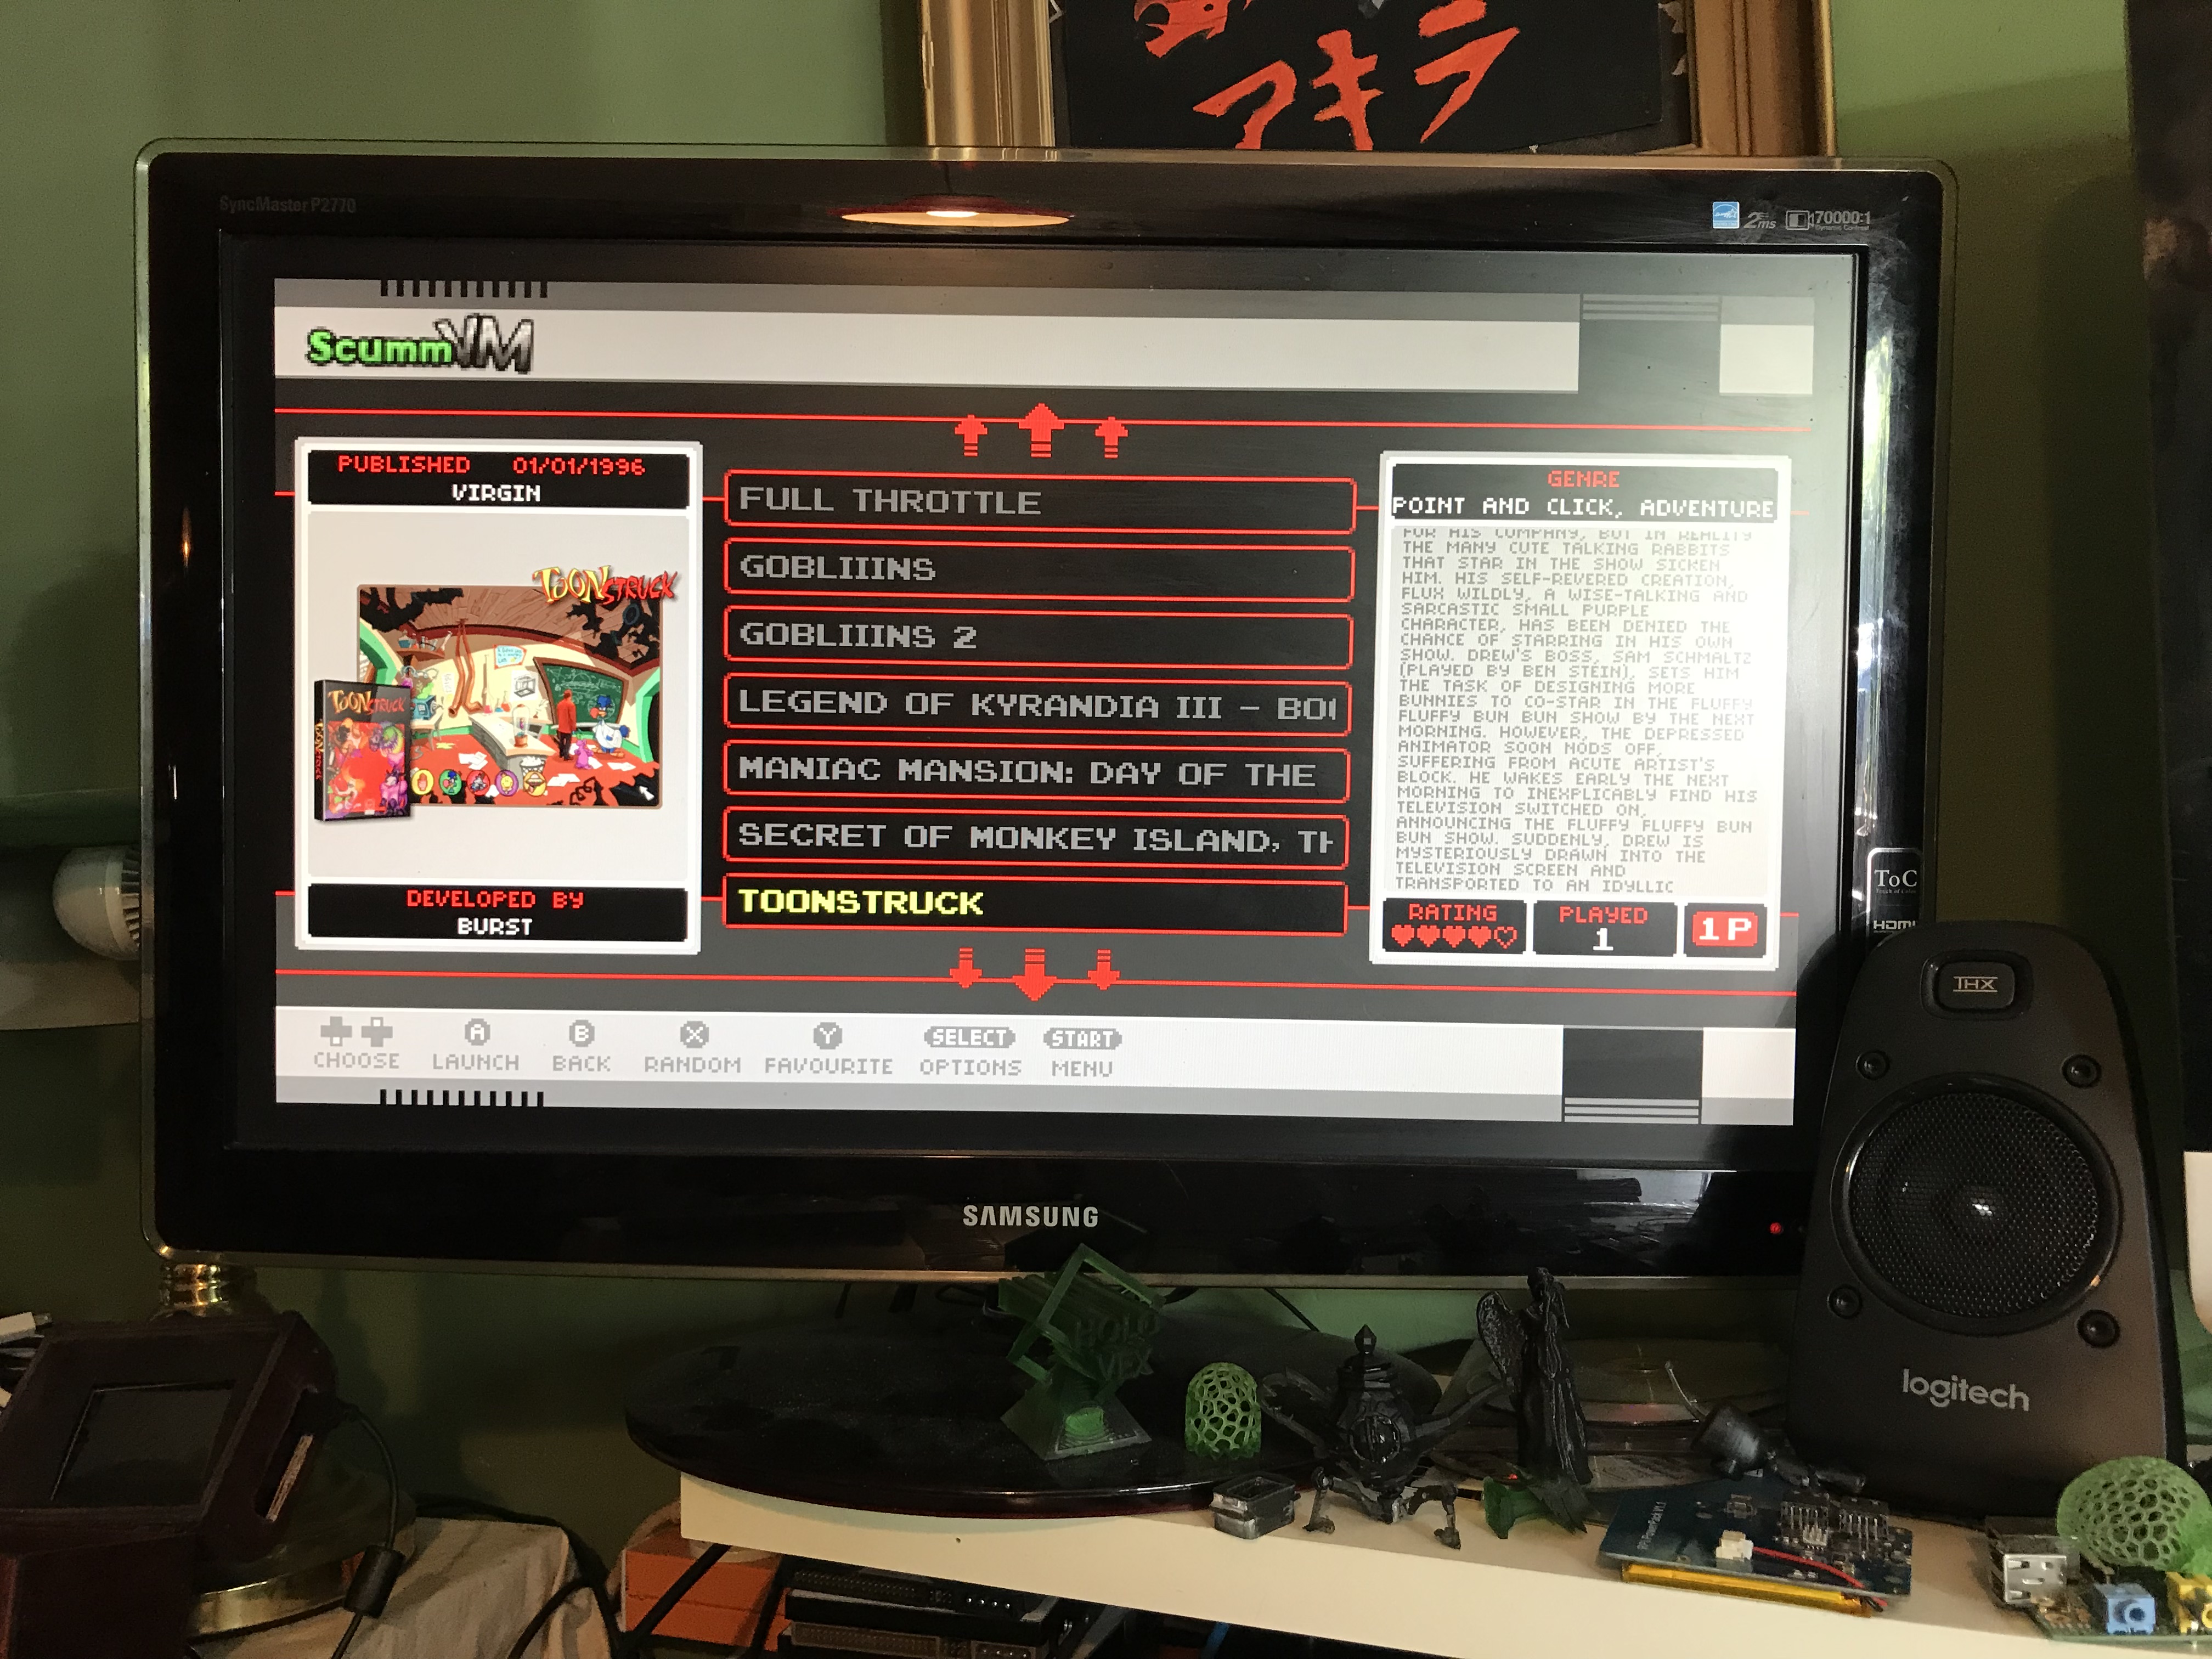
/opt/retropie/supplementary/runcommand/runcommand.sh','0', '_SYS_', 'gb', '/home/pi/RetroPie/roms/gb/Tetris (JUE) (V1.0) [!].gb'But no info on Scummvm and i wanted to launch Monkey Island 1 SE talkie version I made back in the day.
When the Talkie Mod came out.. Been looking for a console that could play those 2 new Talkie versions.
And ScummVM is vers 2.0 on Raspberry so it would work.
Here is a Video showing off how it works and change between Monkey Island and EmulationStation.
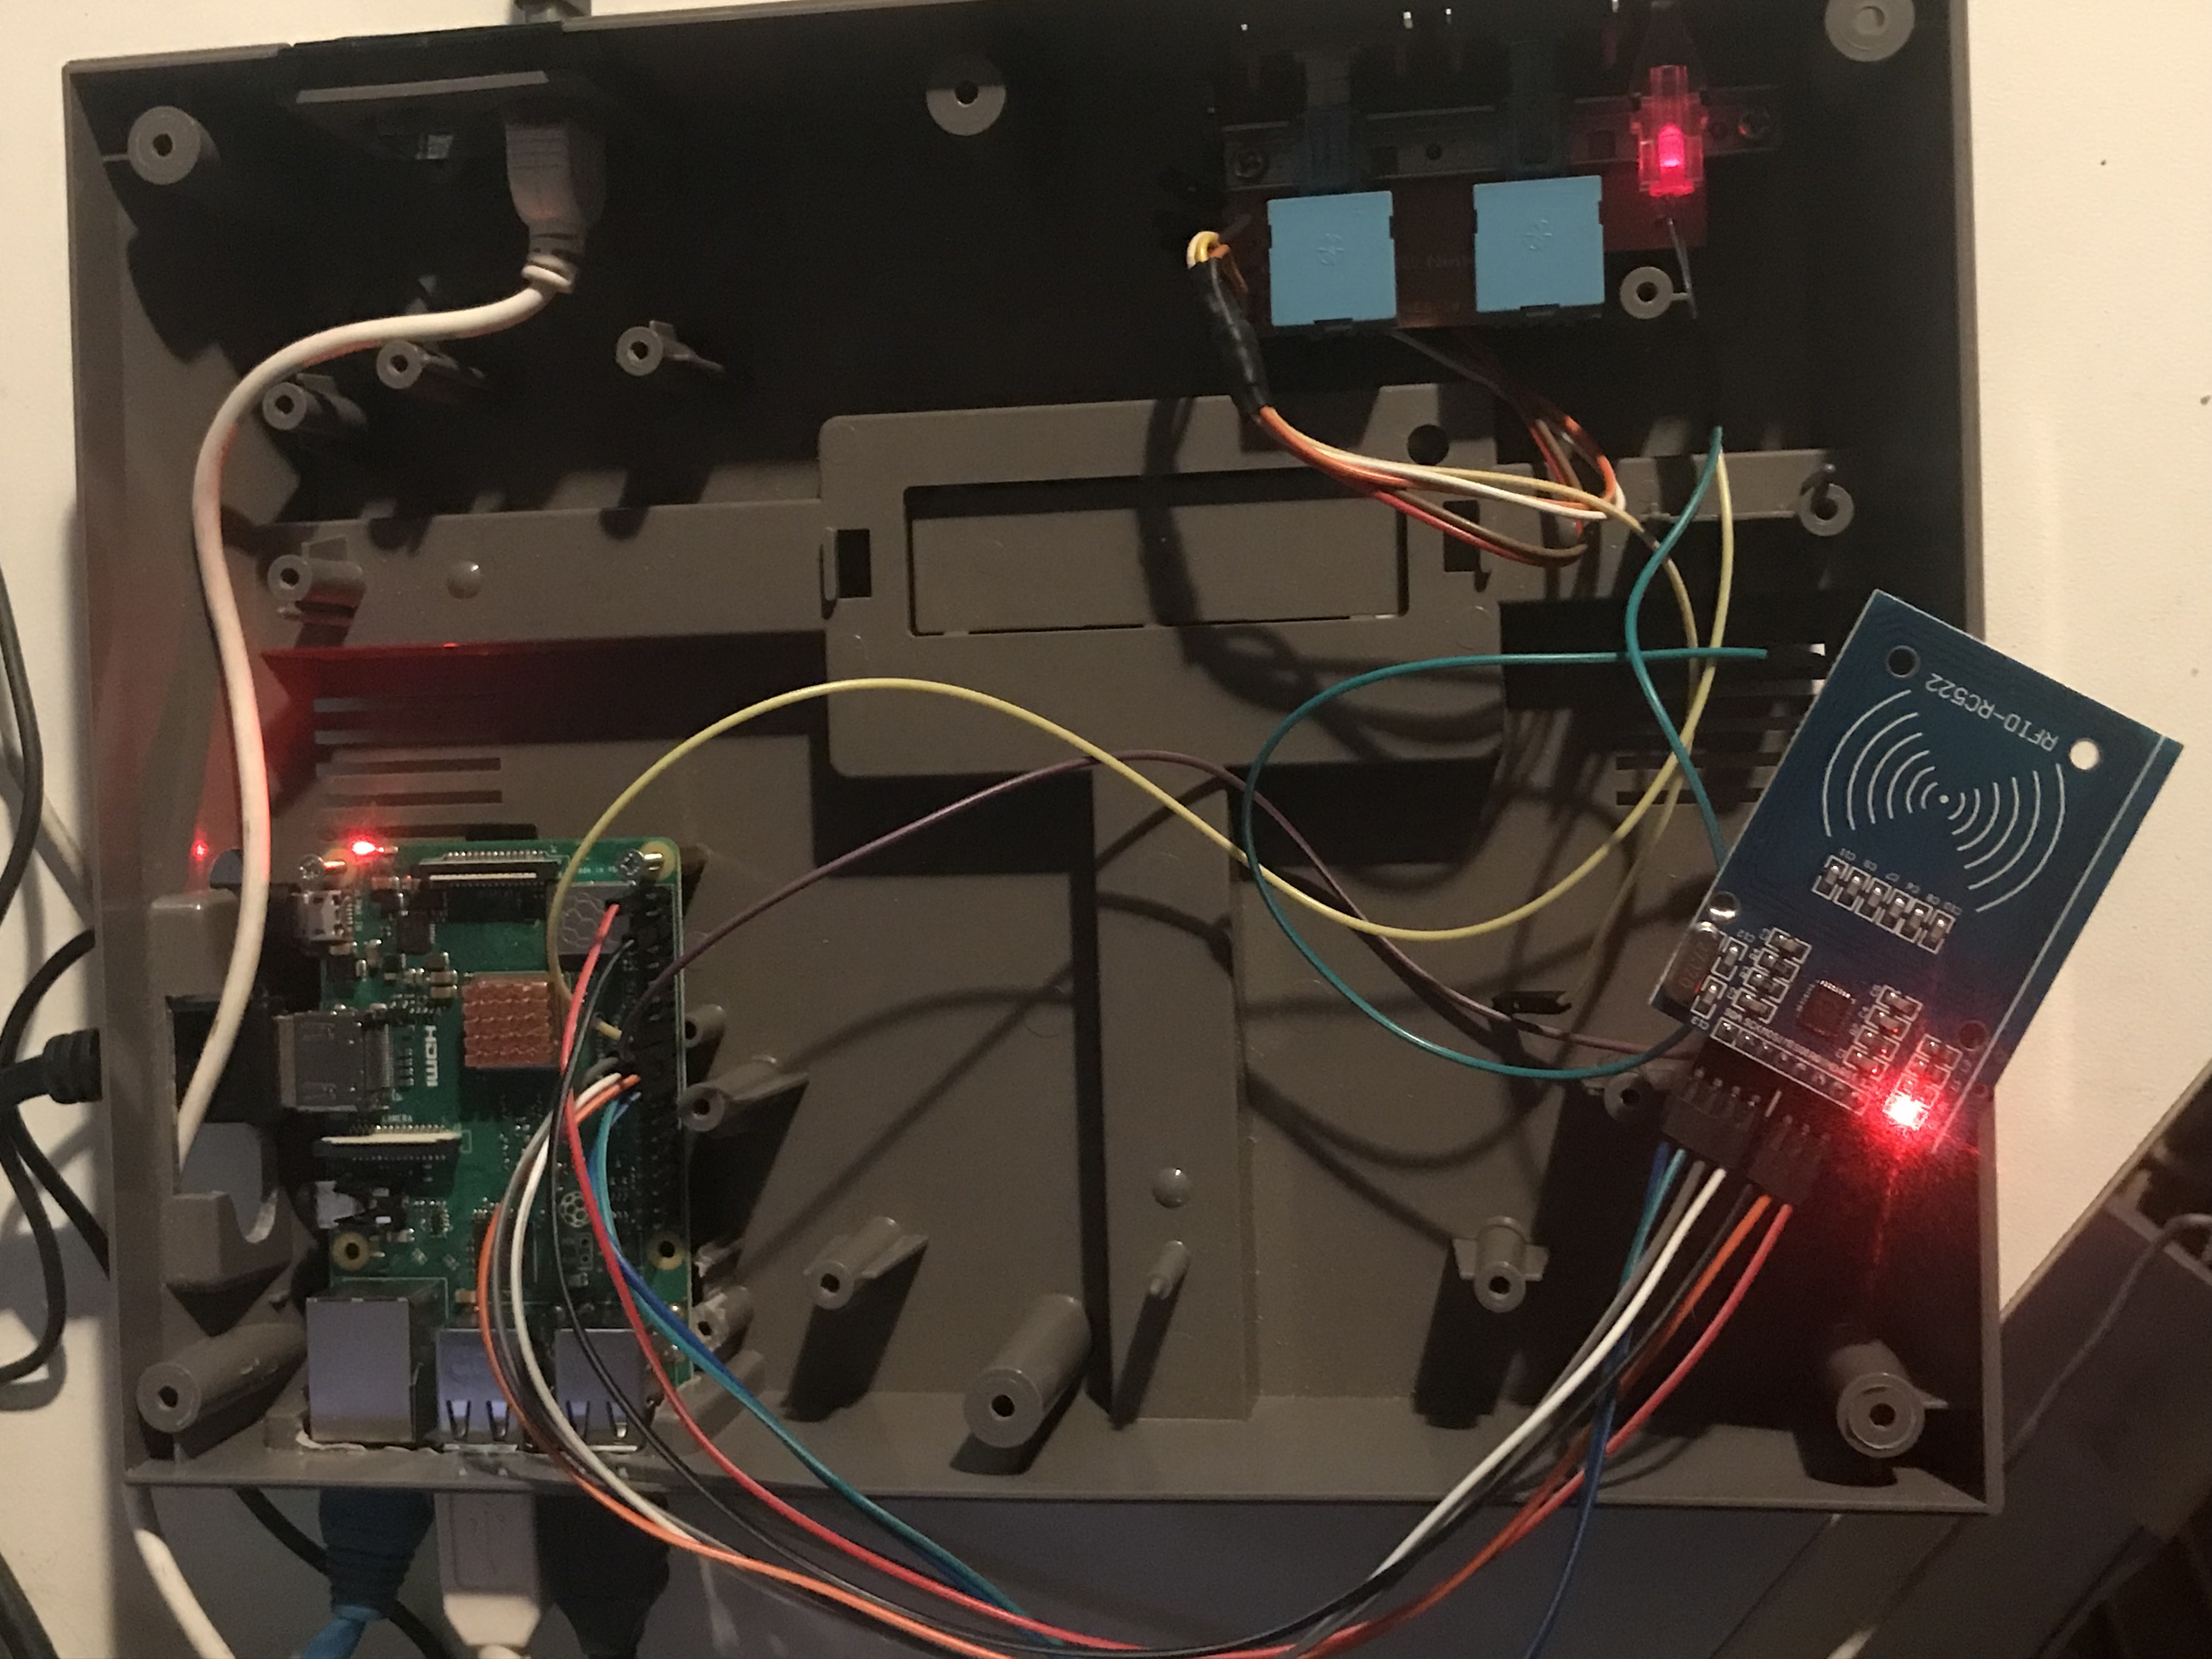
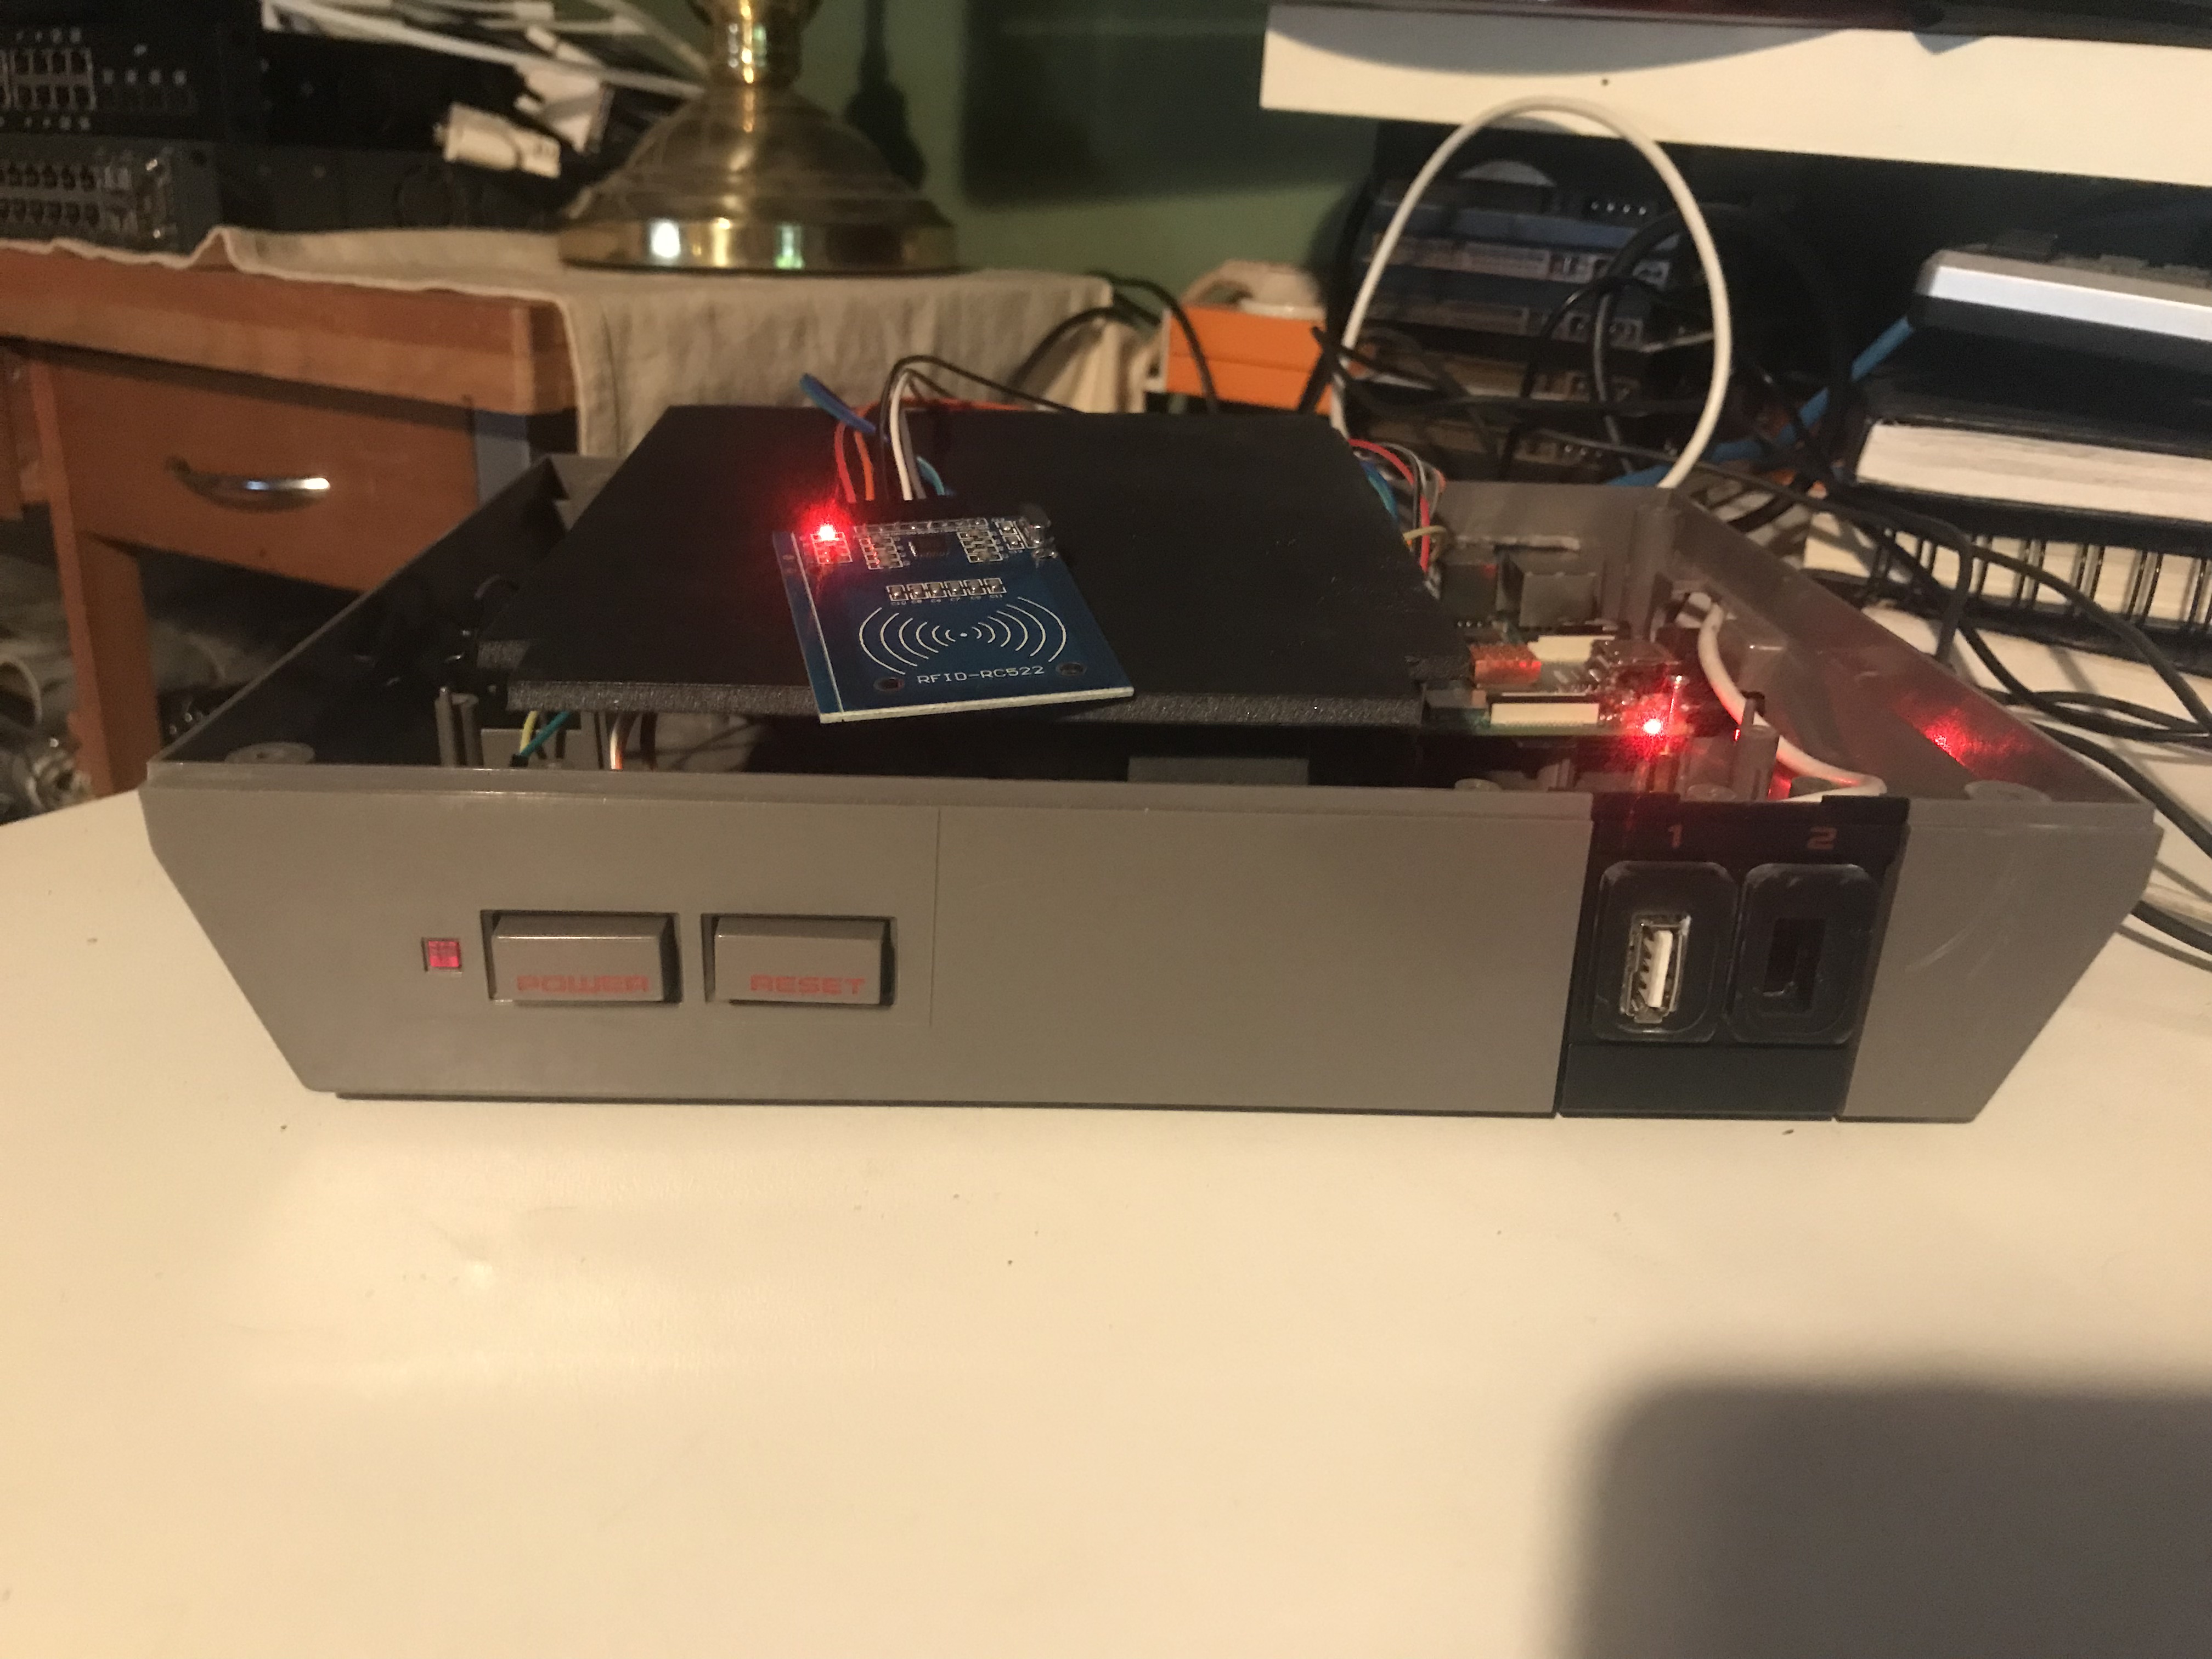
More detailed view of how it works: Look at the LED LOL
Some close up photo’s

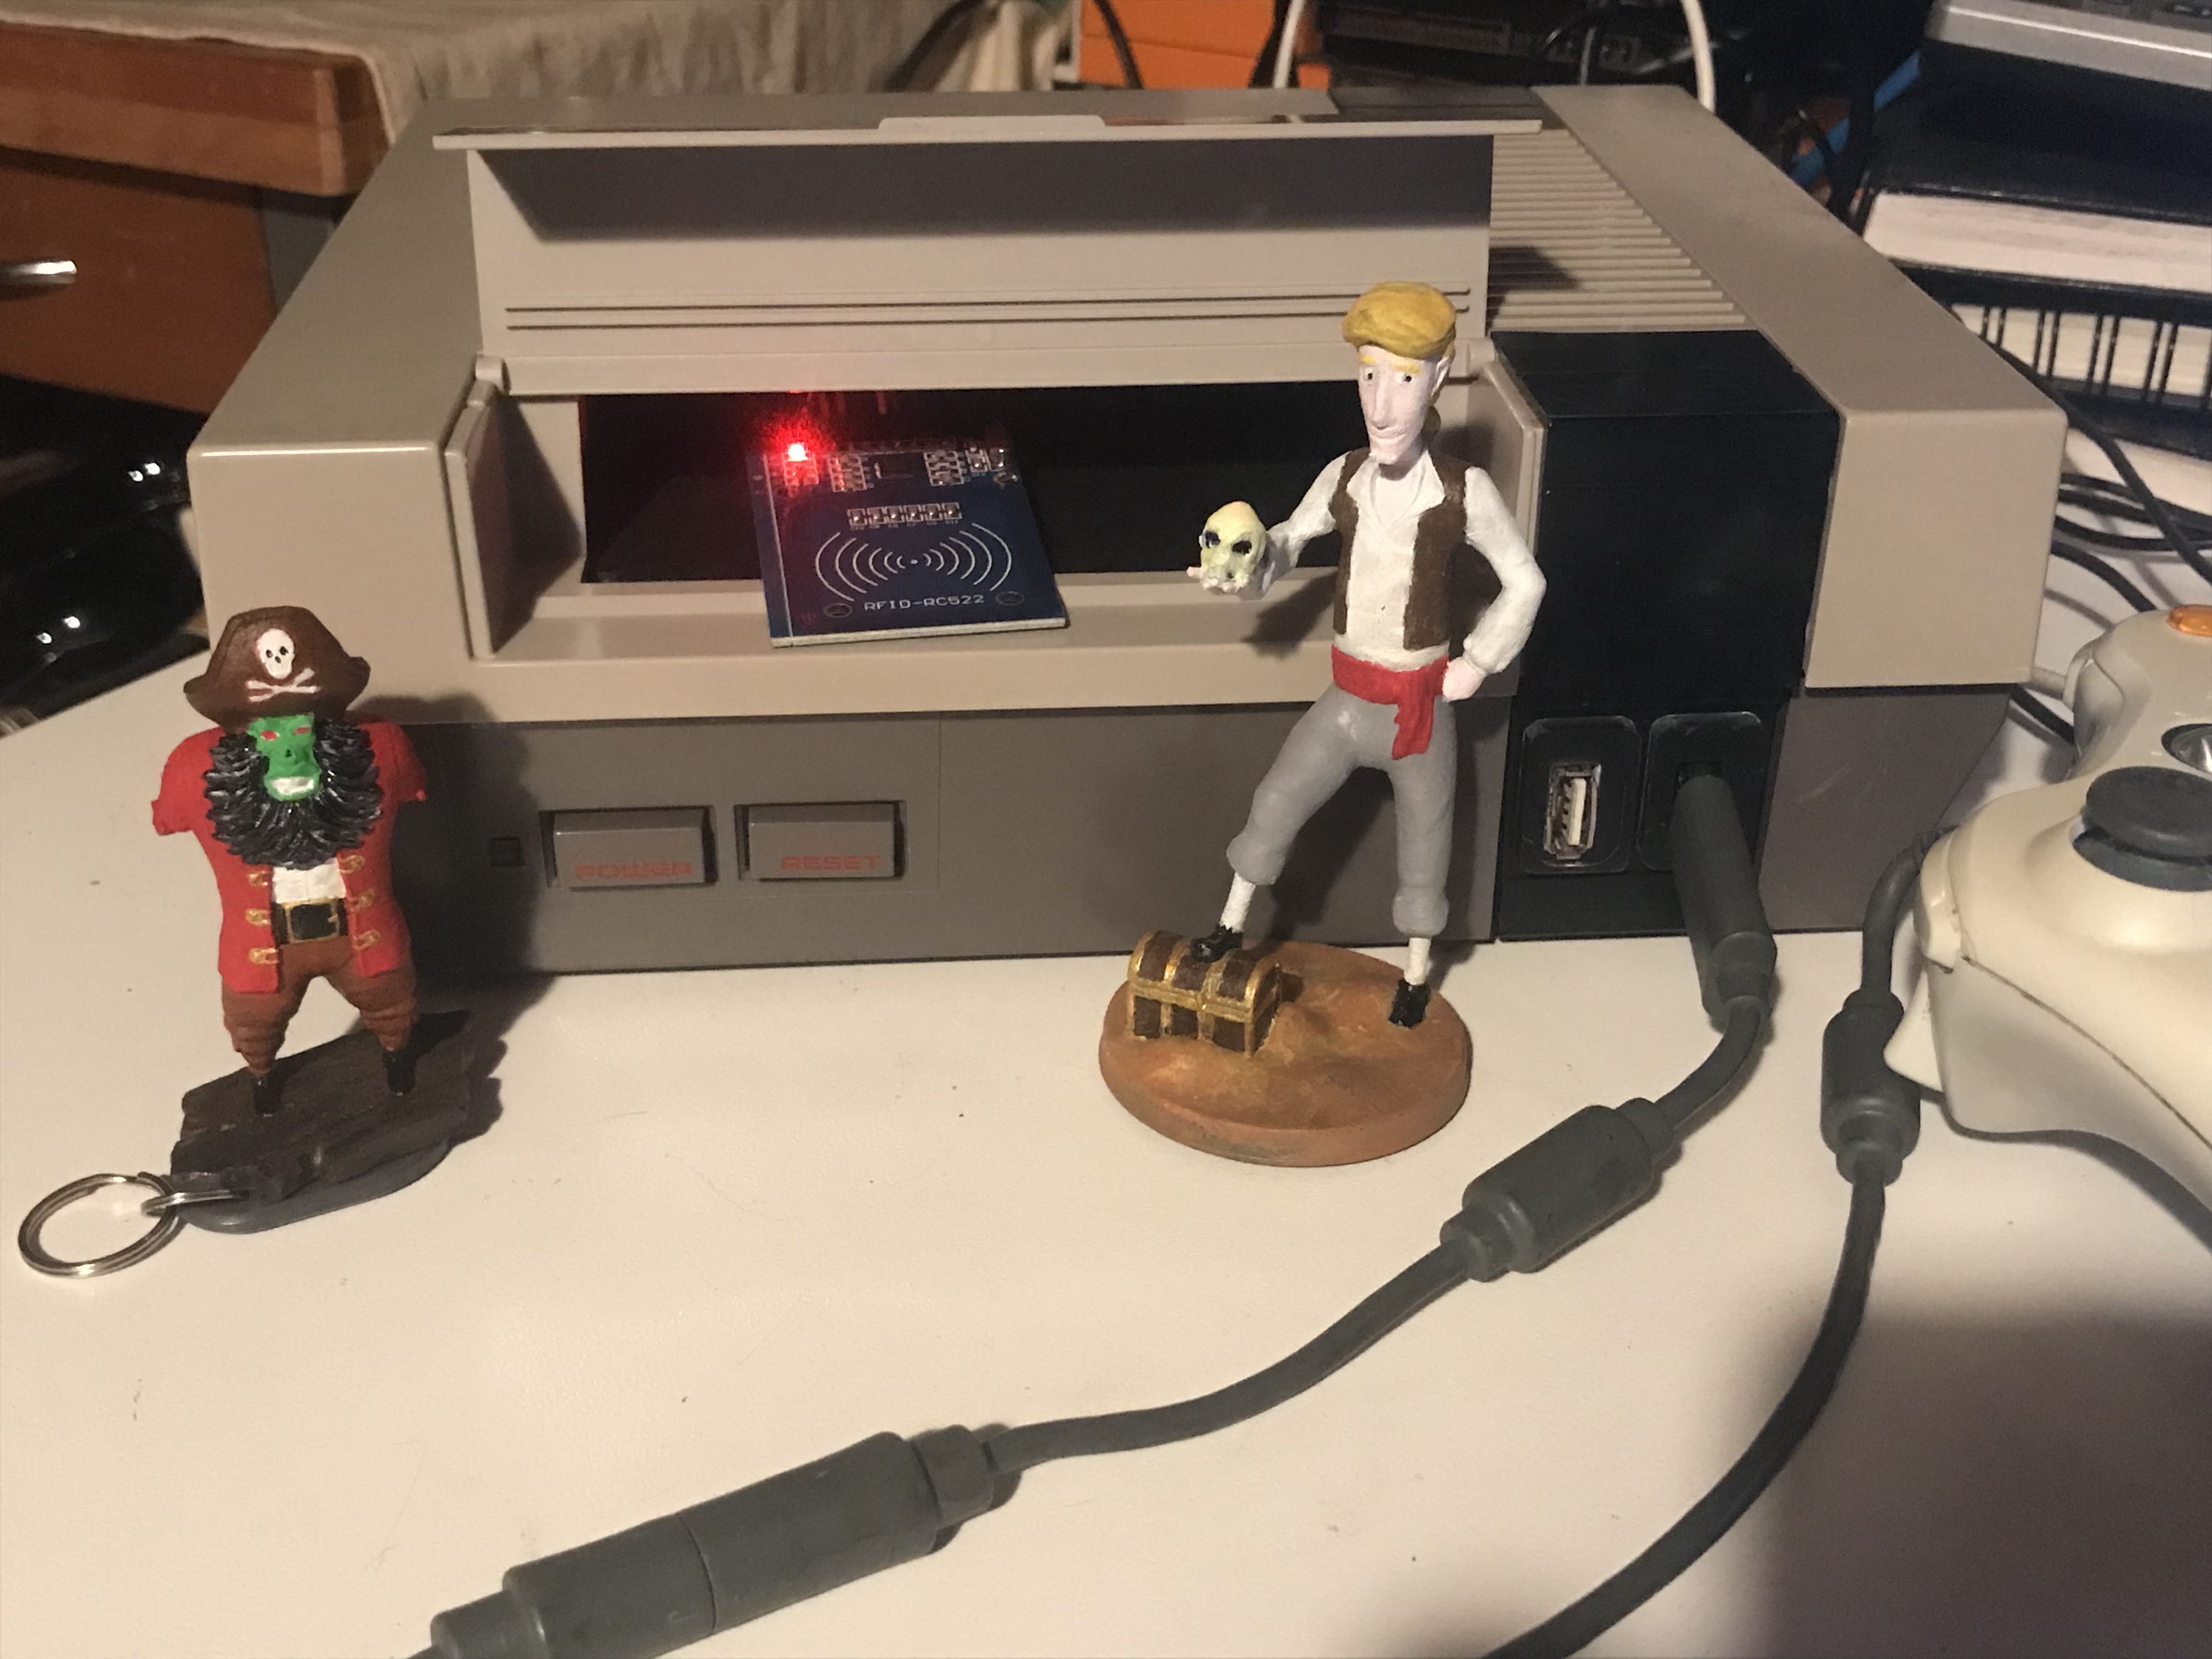
A almost done, want to mount the RFID on top. I want to keep the opening to load maybe custom NES cartridges.
Made also new printed USB controller ports:
How to Script it?
I made 2 bash scripts and 1 pyton script (reworked its the RFID reader):
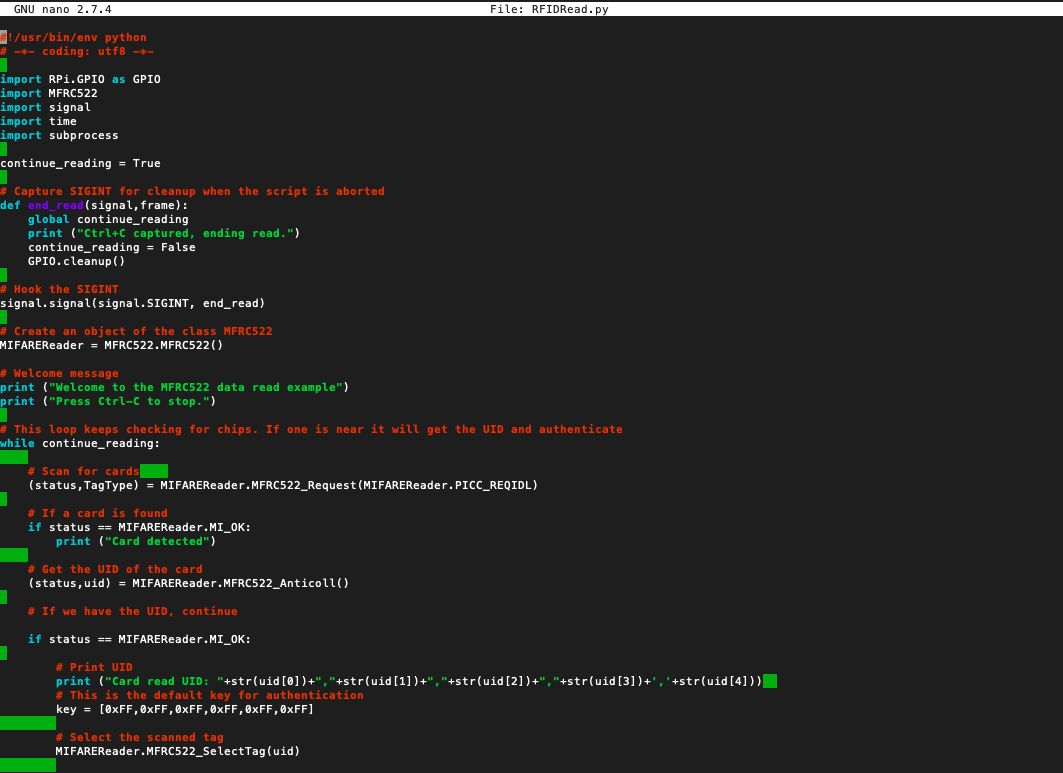
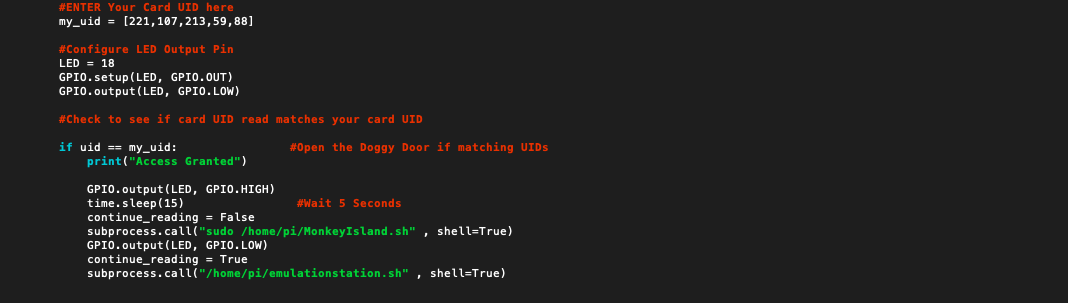
The Time.sleep(15) needs to be removed to boot the game quicker but left it in because want to try loading splach screen or something. The Led is to indicate if the game is stopt or not. Then it will boot EmulationStation again.
The python program stops but is been rebooted with EmulationStation.
The bash scripts:


And to make it boot at run you need to make this change:

And for the skin i used the NES-Mini theme.
But it was missing 2 themes, i used ScummVM and the Oric emulator on my Pi.
So i made them download link below:
ScummVM:
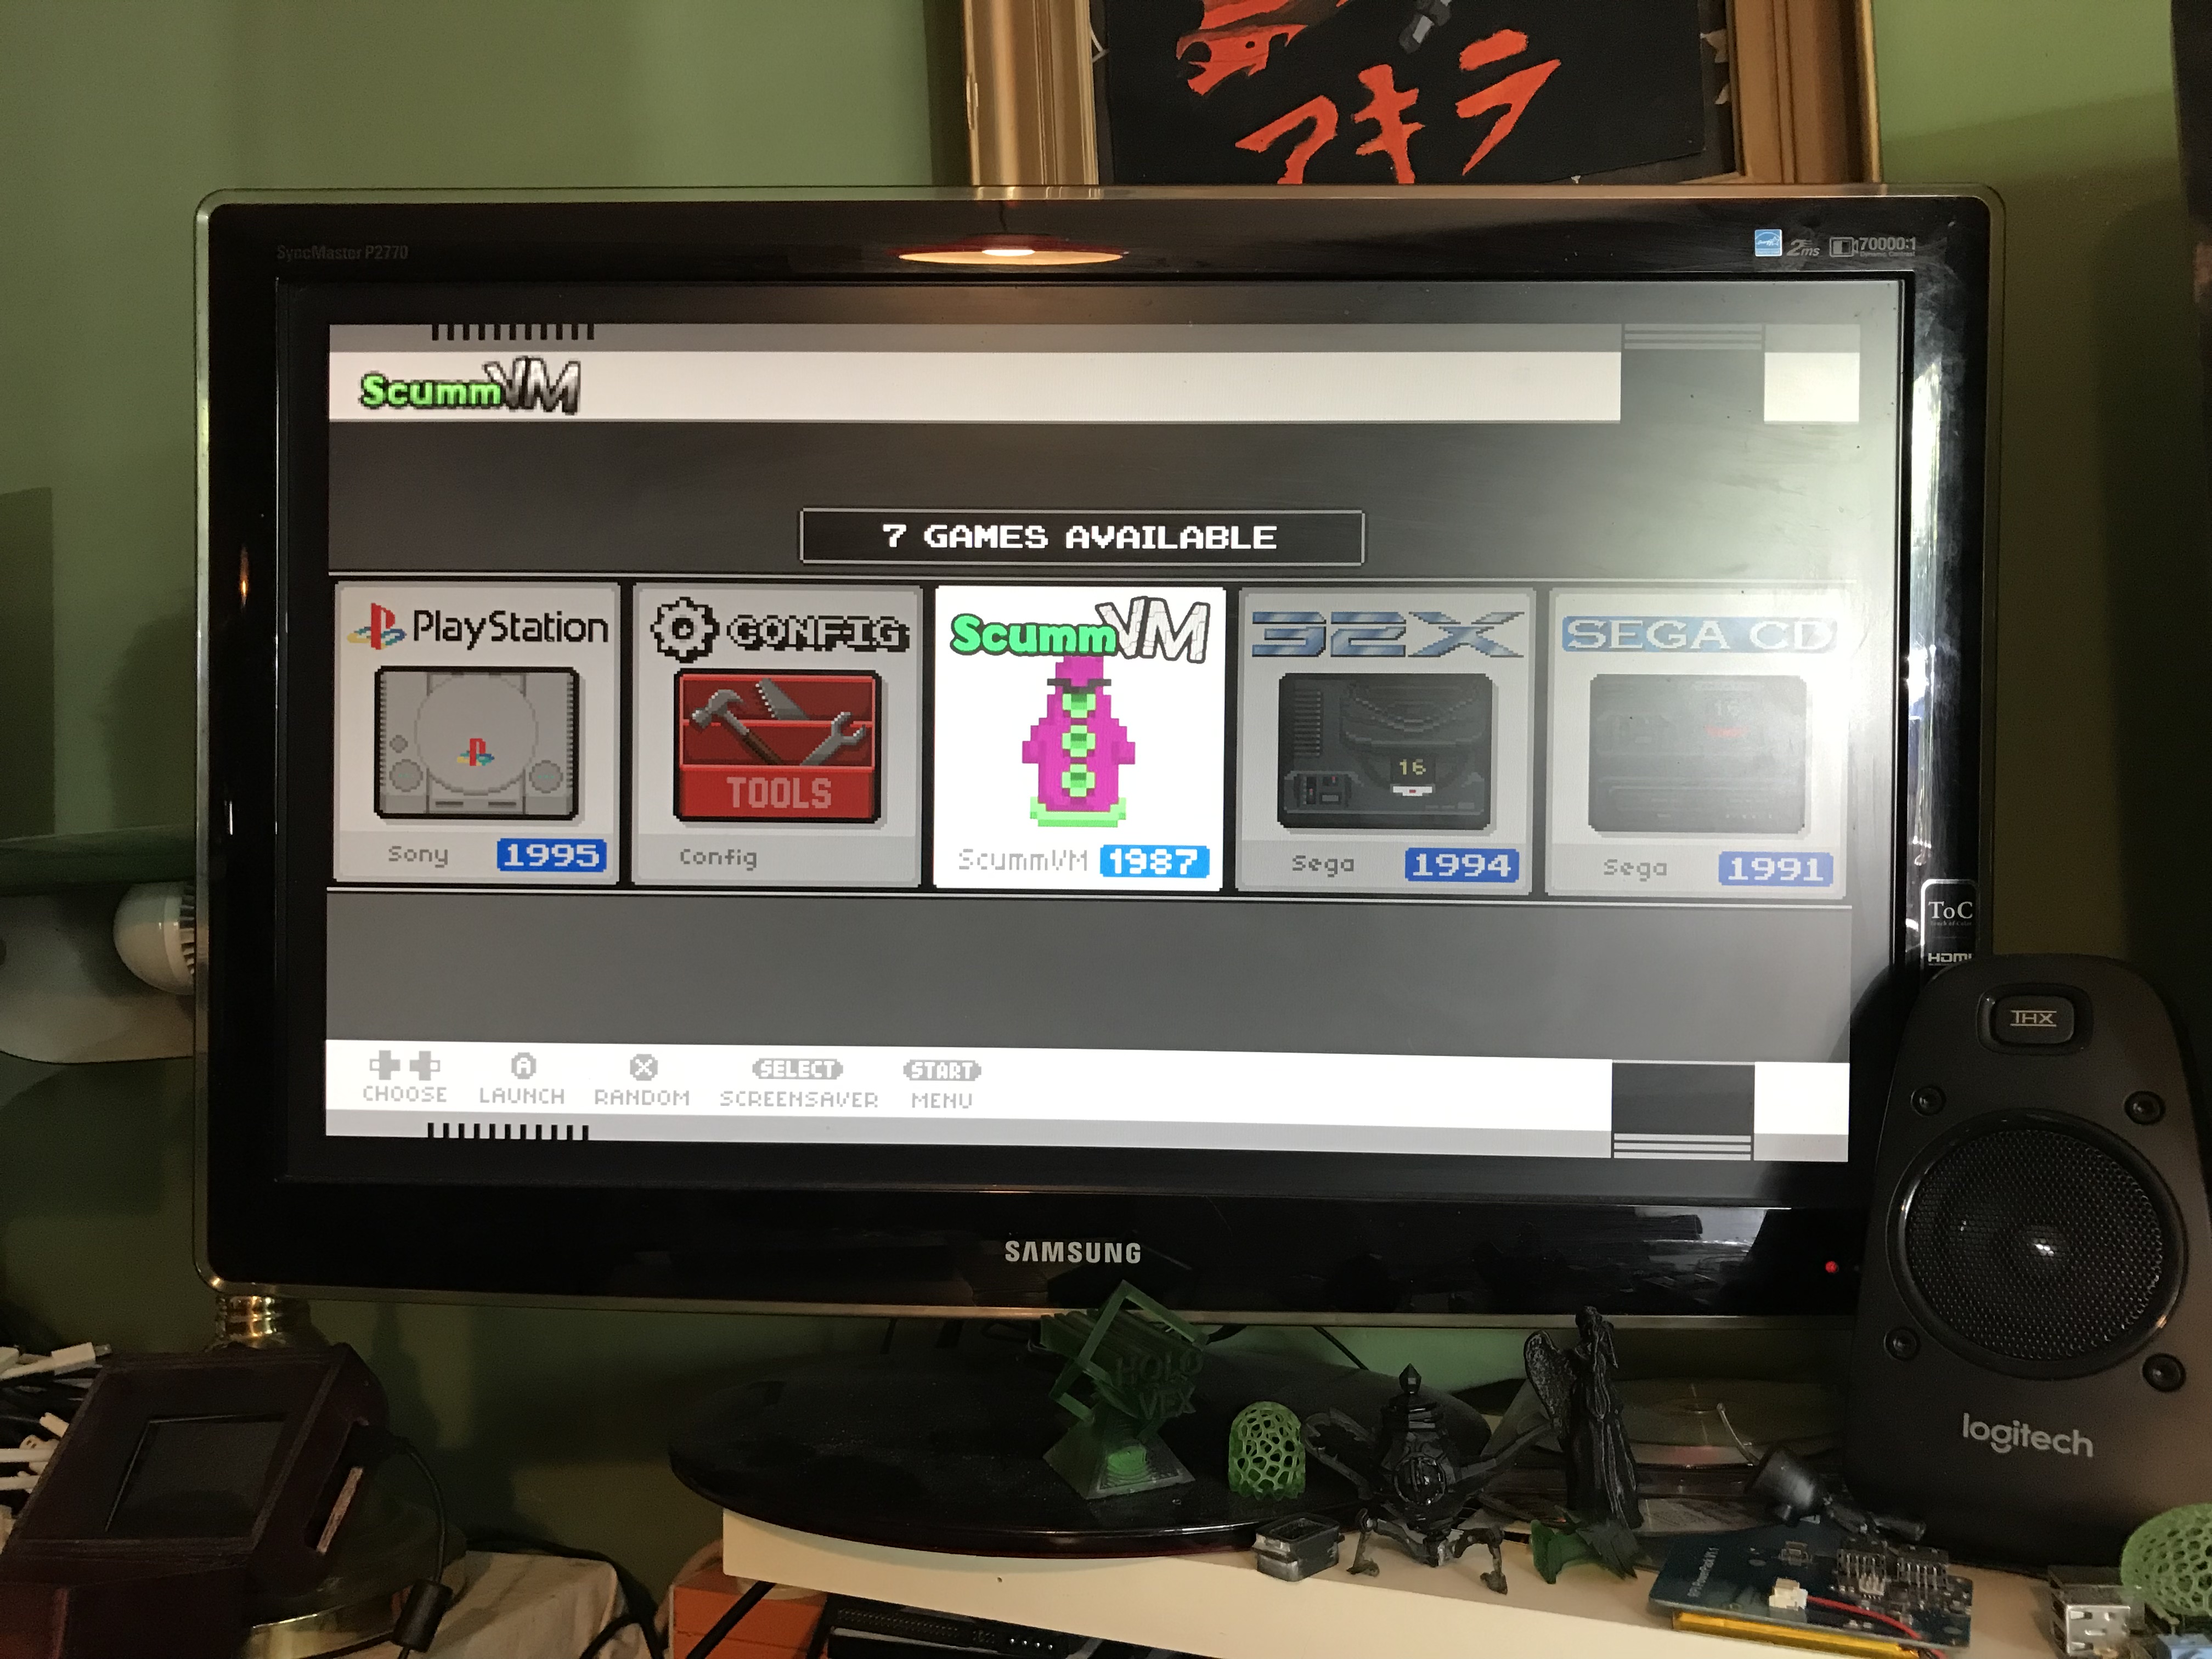
Download link: ScummVM.
Oric Atmos :
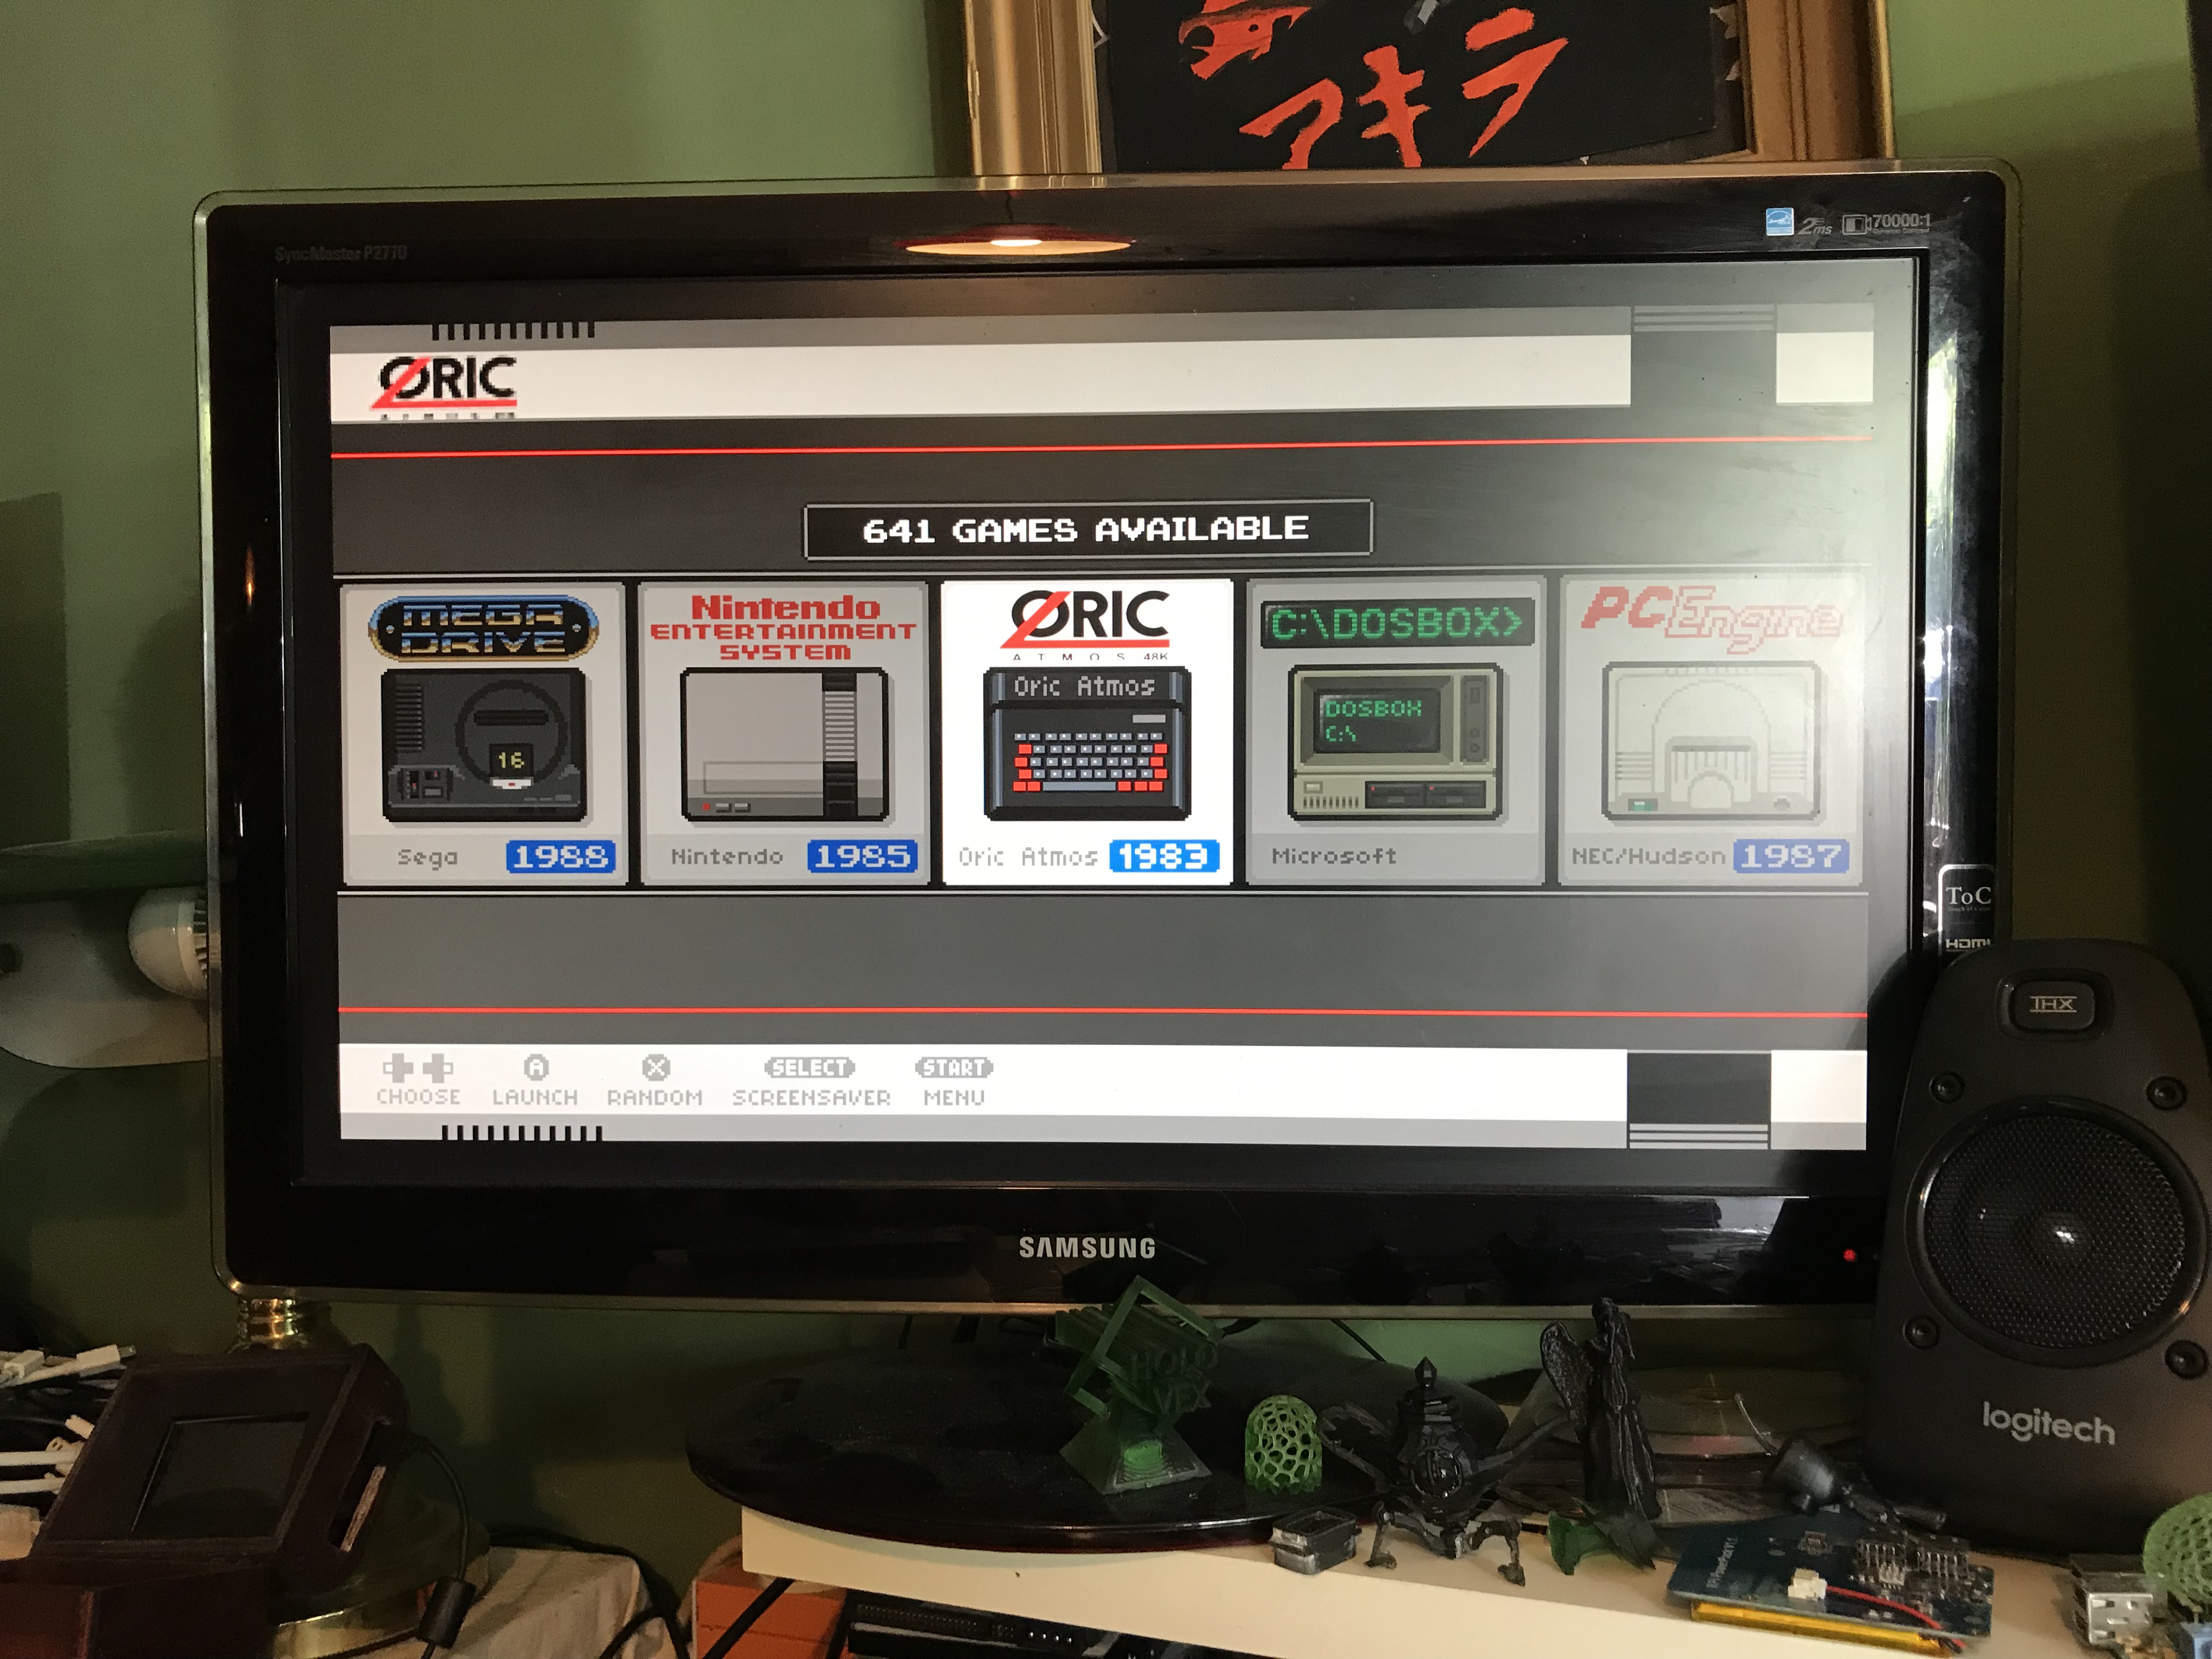
Download link: Oric Atoms.
The RFID fits perfect in the box that i made, now i can insert real NES cartridges 😀
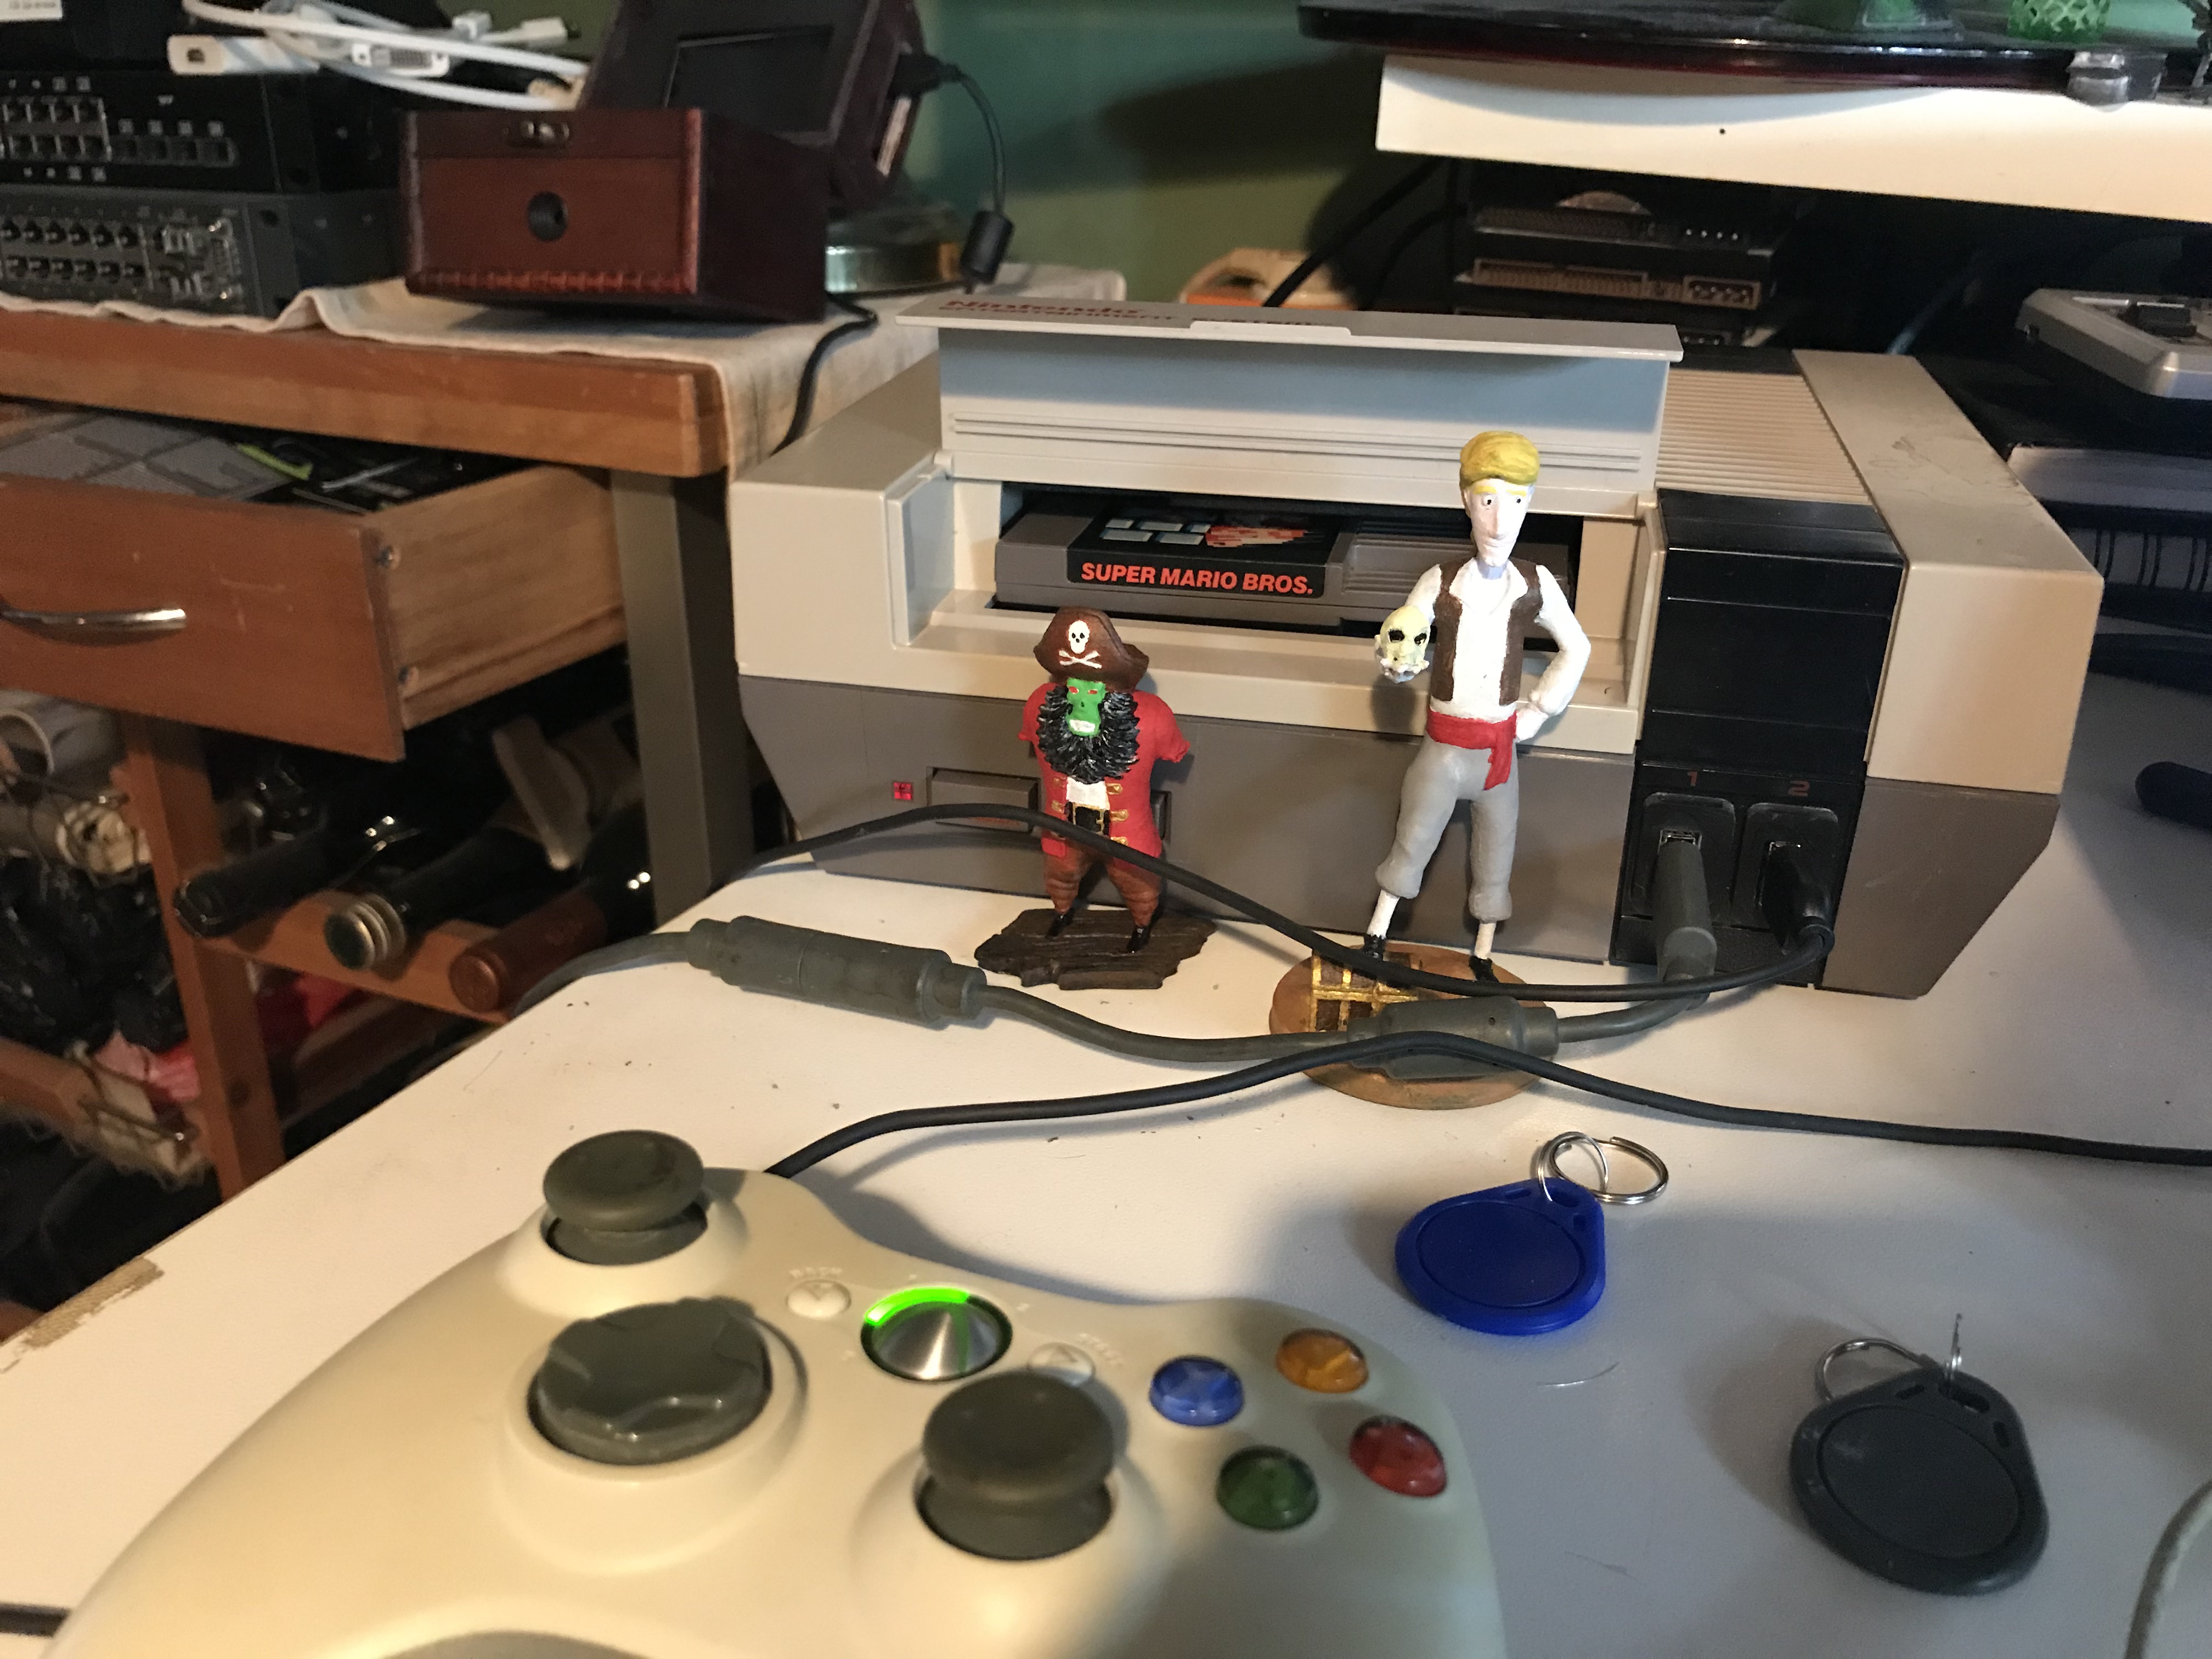
So if i buy empty nes cartridges i could insert a rfid tag and load that game
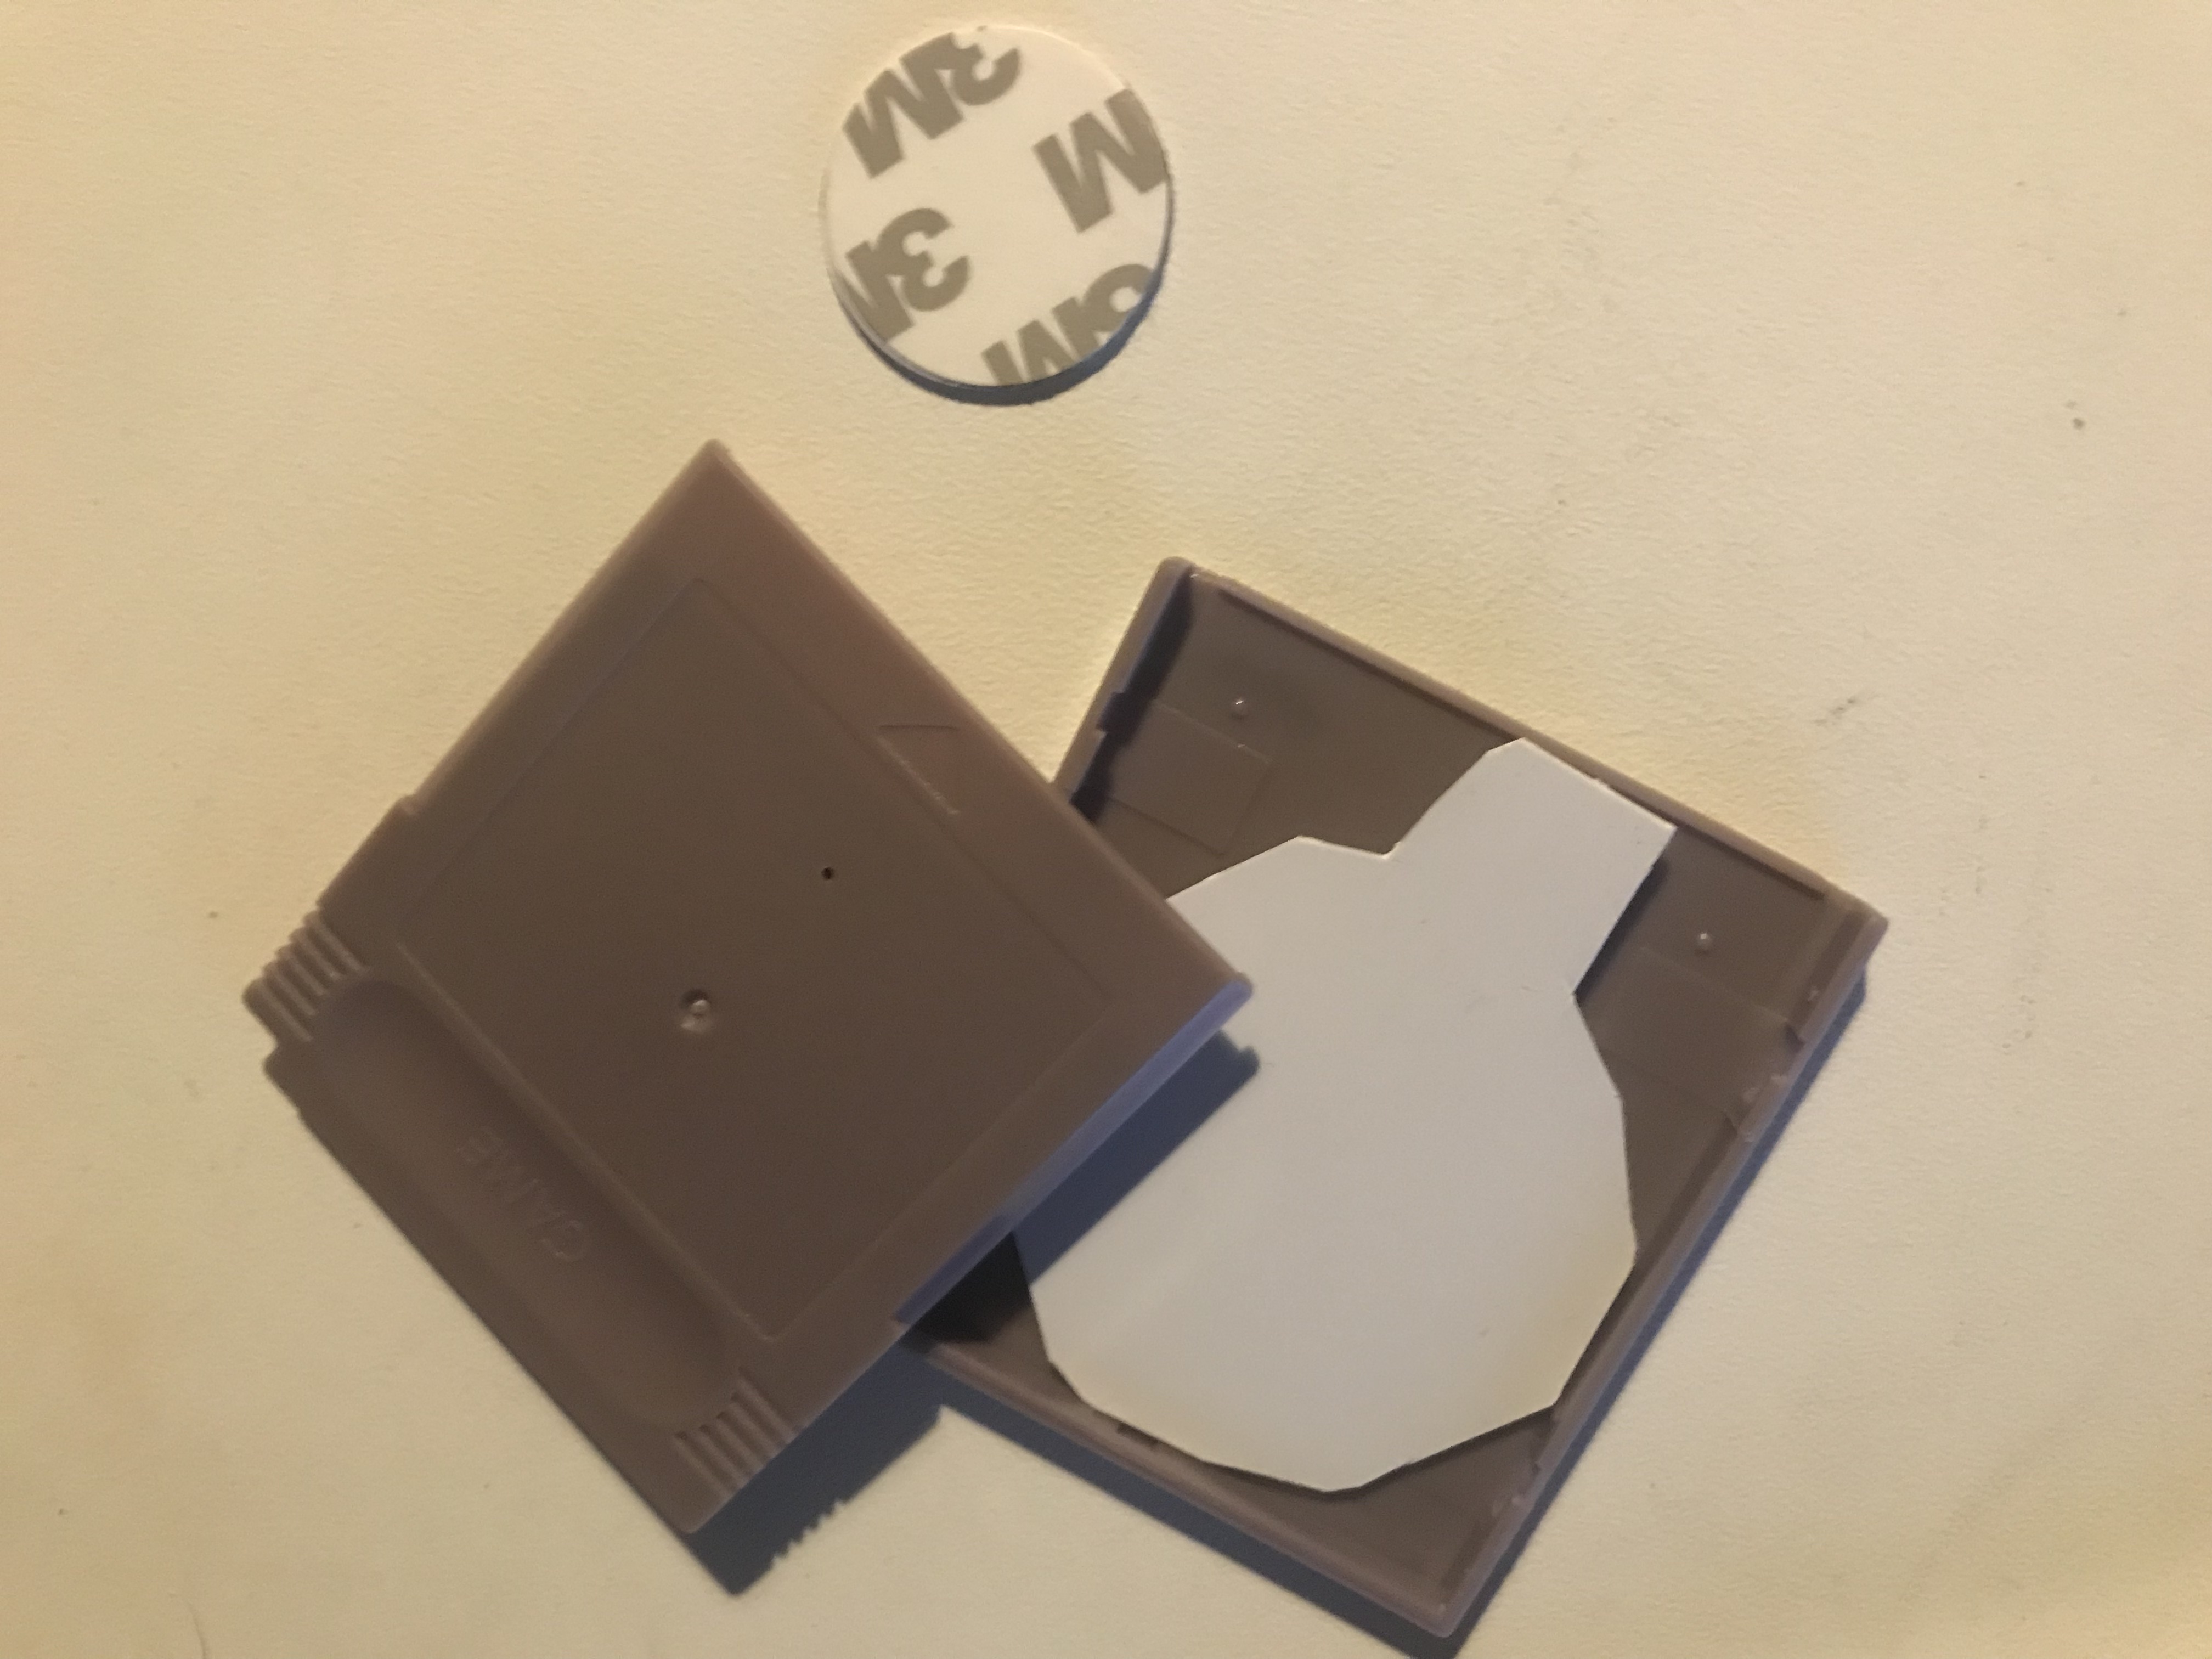
(cartridges and RFID tag)
Things to do:
Mount RFID on top case, make everything more durable.
Optimise the code, use some sort of database to use more UID’s and game titles.
Get more RFID tag’s, print more modes of old games… (open source Amiibo’s)
Sources needed to make this happen:
https://pimylifeup.com/raspberry-pi-rfid-rc522/
RC522 RFID lezer aansluiten op een Raspberry Pi en uitlezen met Python
https://github.com/mxgxw/MFRC522-python/issues/69
https://github.com/RetroPie/RetroPie-Setup/wiki/FAQ
https://retropie.org.uk/forum/topic/2211/questions-about-runcommand-sh/2
https://retropie.org.uk/forum/topic/8230/start-game-from-command-line
https://retropie.org.uk/forum/topic/18937/runcommand-usage-from-python-script-not-working
https://github.com/Aloshi/EmulationStation/issues/236
https://www.codingepiphany.com/2013/06/23/running-gog-com-scummvm-games-on-raspberry-pi/
https://retropie.org.uk/forum/topic/13482/using-runcommand-from-the-terminal/3|
https://retropie.org.uk/forum/topic/5307/command-line-command-works-but-doesn-t-work-if-i-put-it-into-a-script
Its a project weekend….
Now Work in Progress Pix:
The Idea: Touch screen and RFID for loading Different things on the screen.
Program a few RFID tags to open different web pages or programmes.
Maybe ad google speak or Magic Mirror, Webcam included…
Getting started in node:

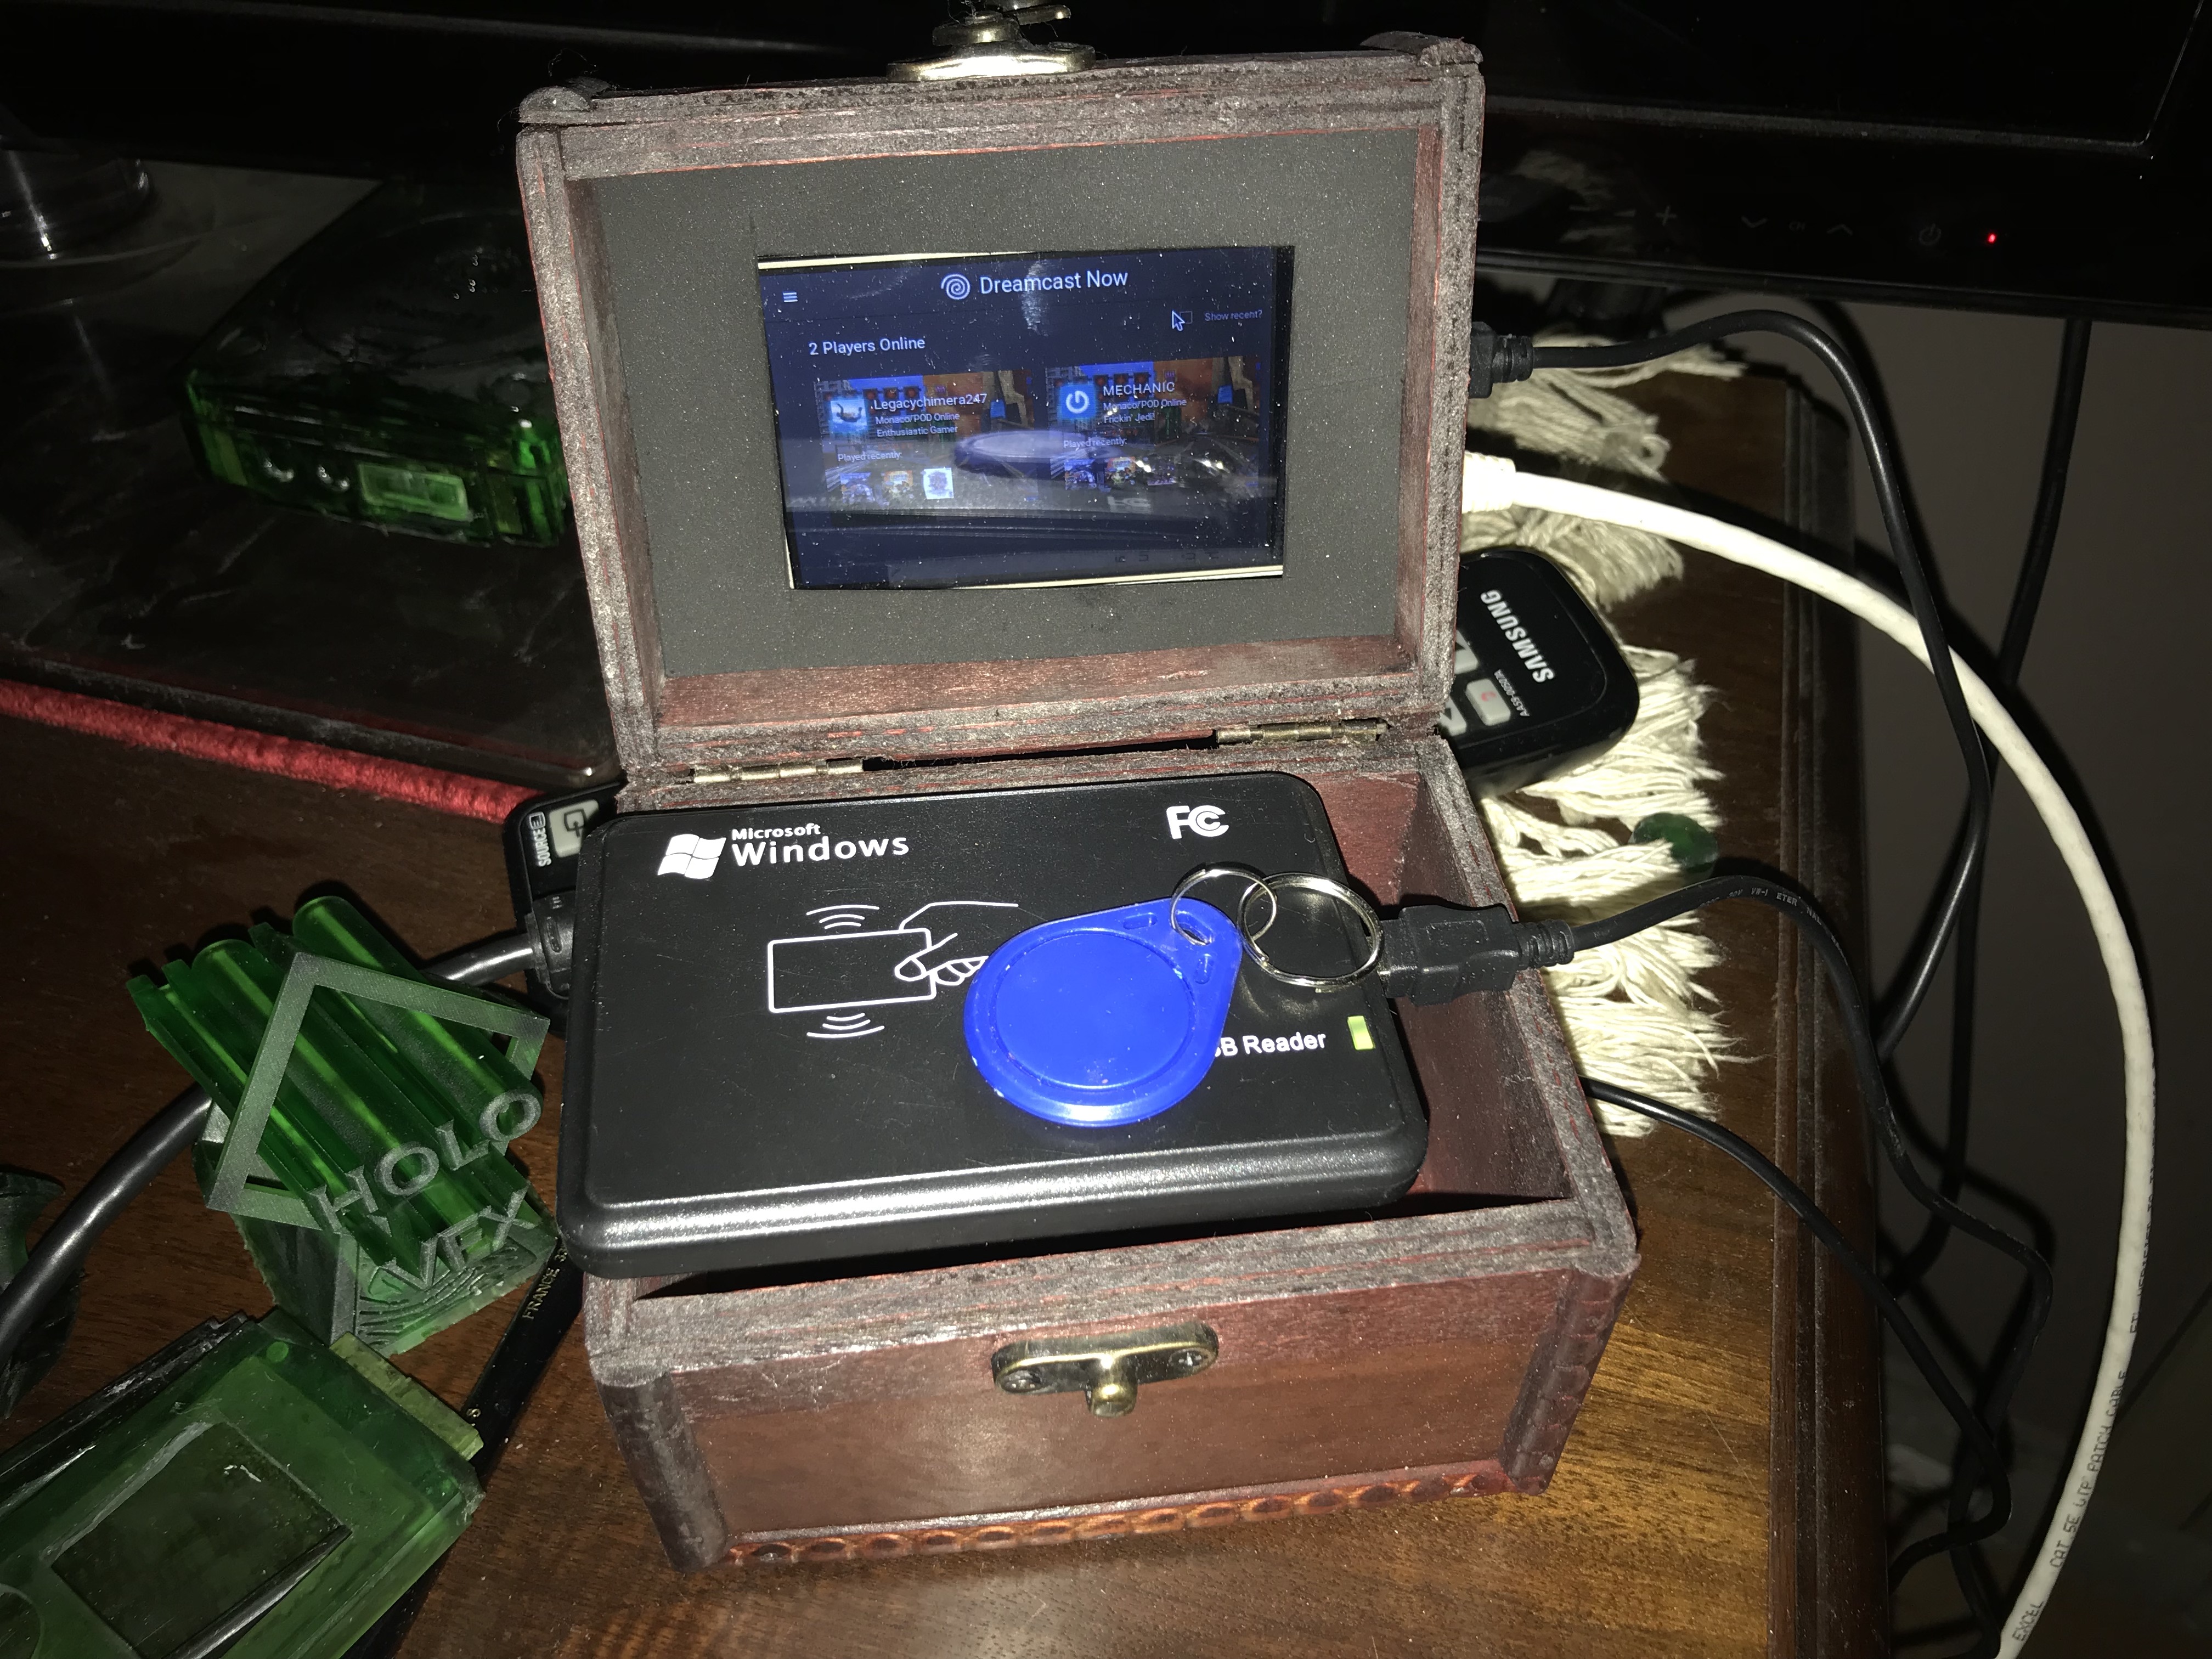
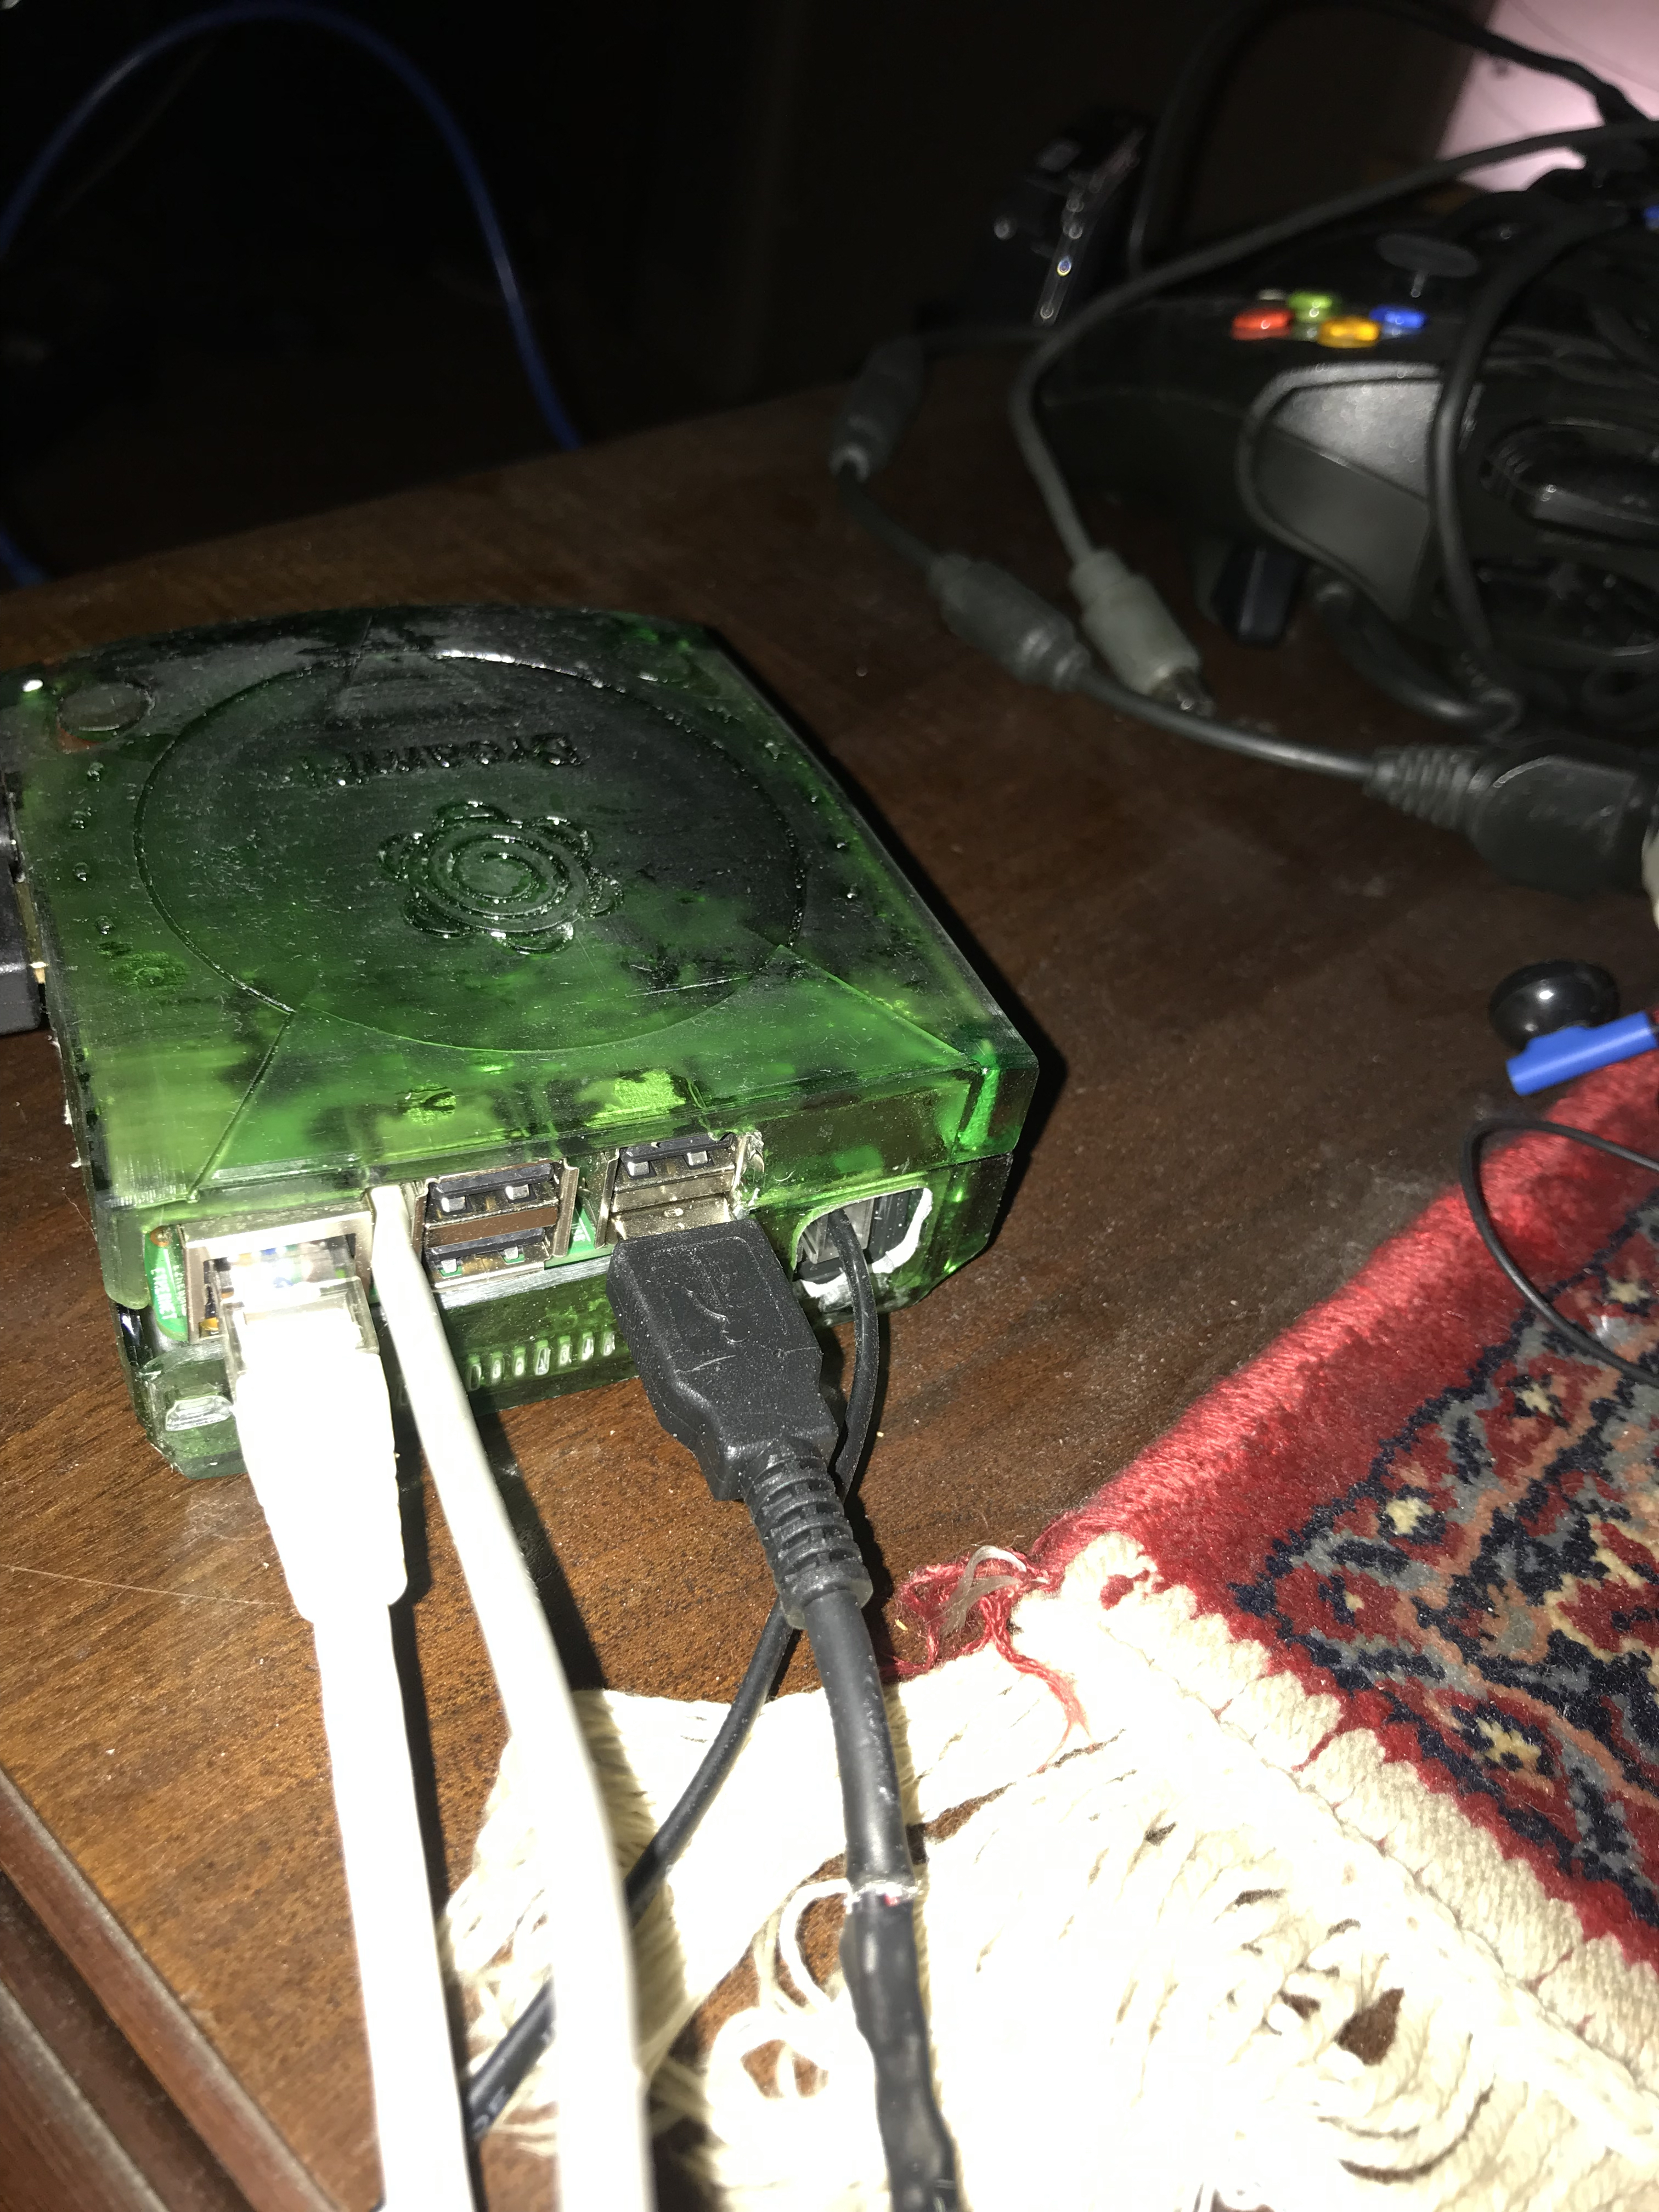
Few weeks ago I installed Dream Pi on one of my Raspberry Pi’s.
After that I could enjoy the Online interner of 1999 😀
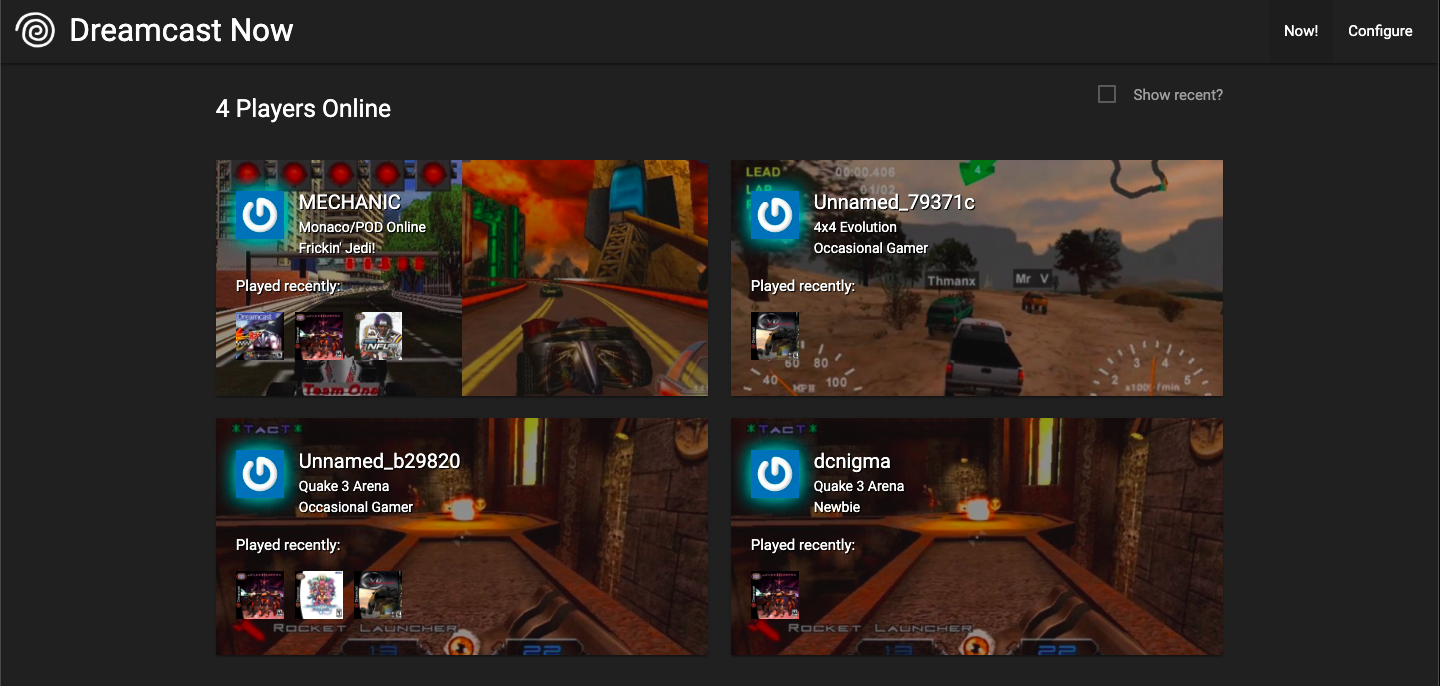
There is also a nice site that keeps track of how is online: dreamcast.online/now
But I din’t have a good case for it so it was laying around.
So I wanted to try for my first print on my new Anycubic Photon a Dreamcast Shell that I found on Thingiverse.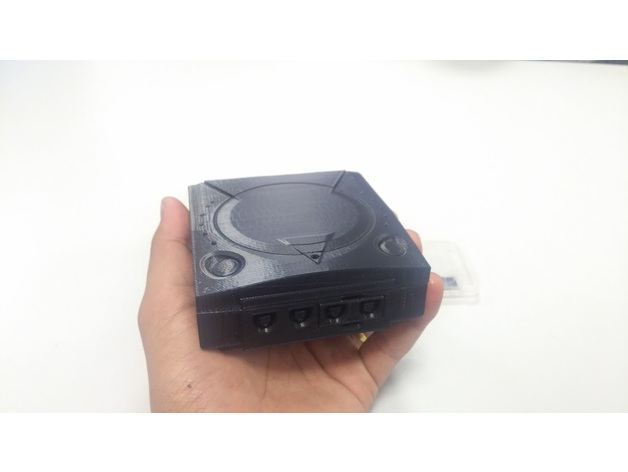 Just a Video of me trying to connect to DreamPi and Quake 3 DC servers
Quake is my go to game to test my connection…
First print ever on my Anycubic Photon… Not that good result 🙁
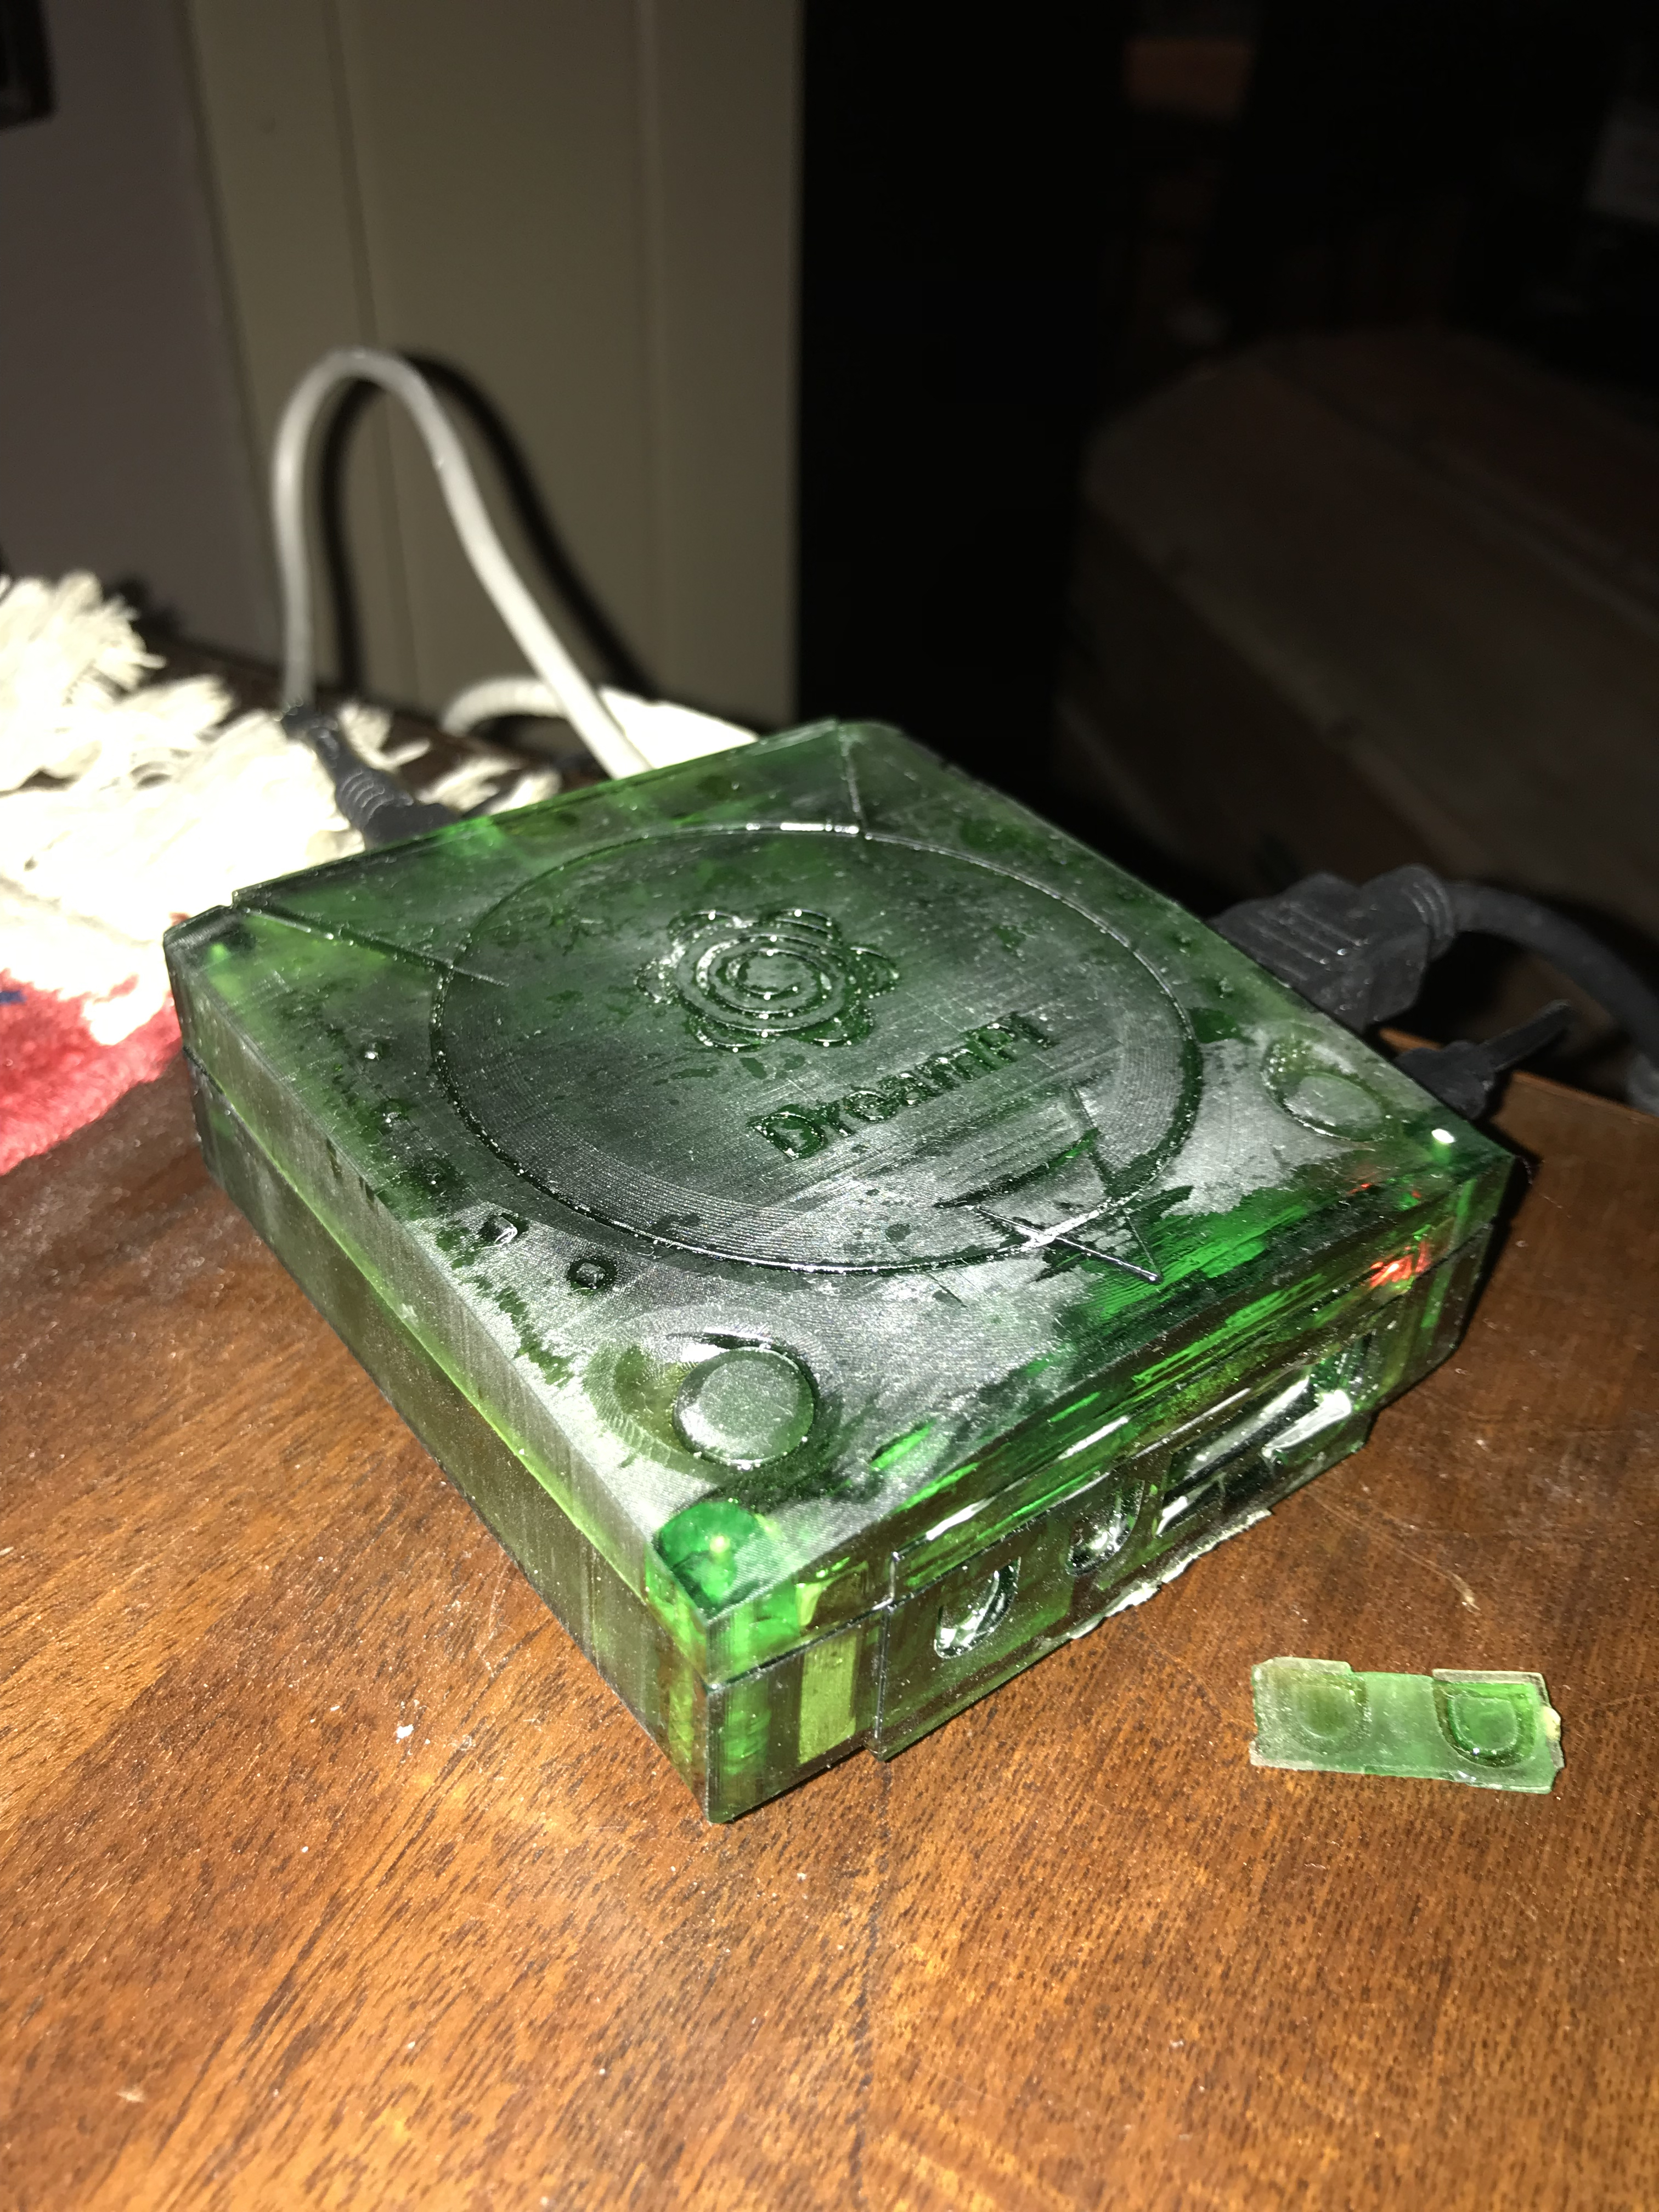
Did’t clean it correctly,
I did it in water after print and then let it there for a day, and then let it dry in the sun.
The water made it all defuses ooo well learned something i guess
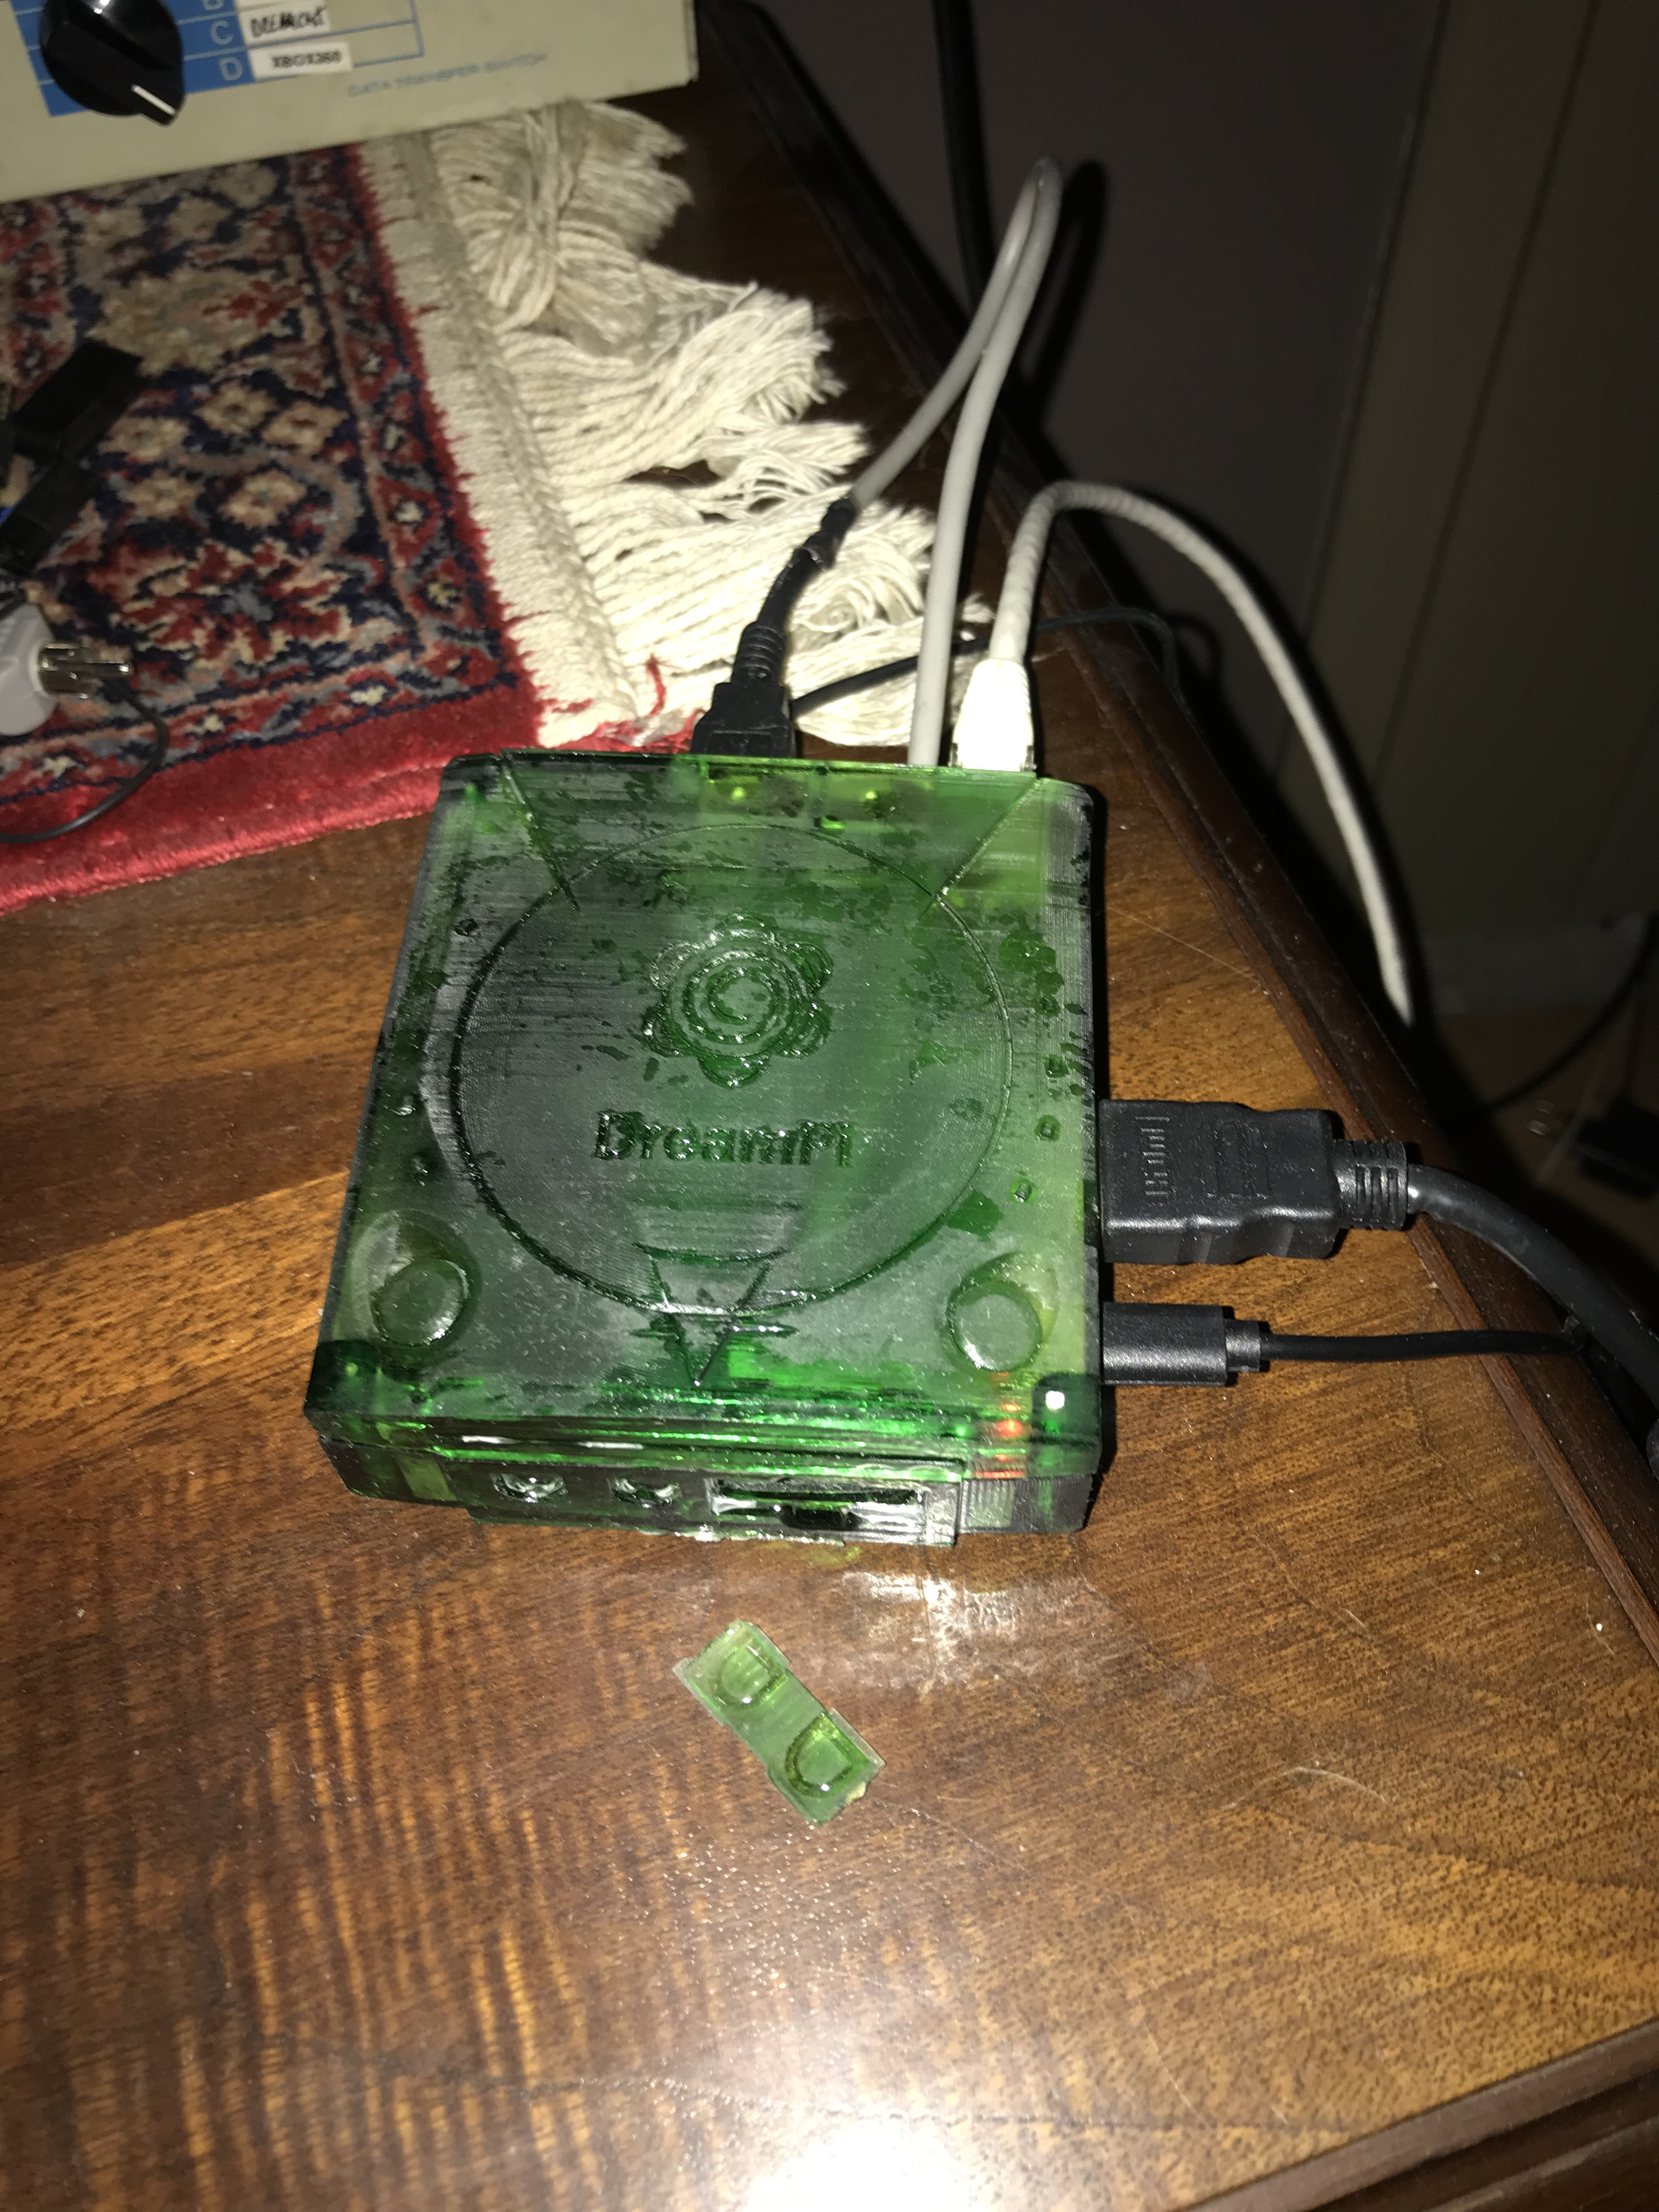
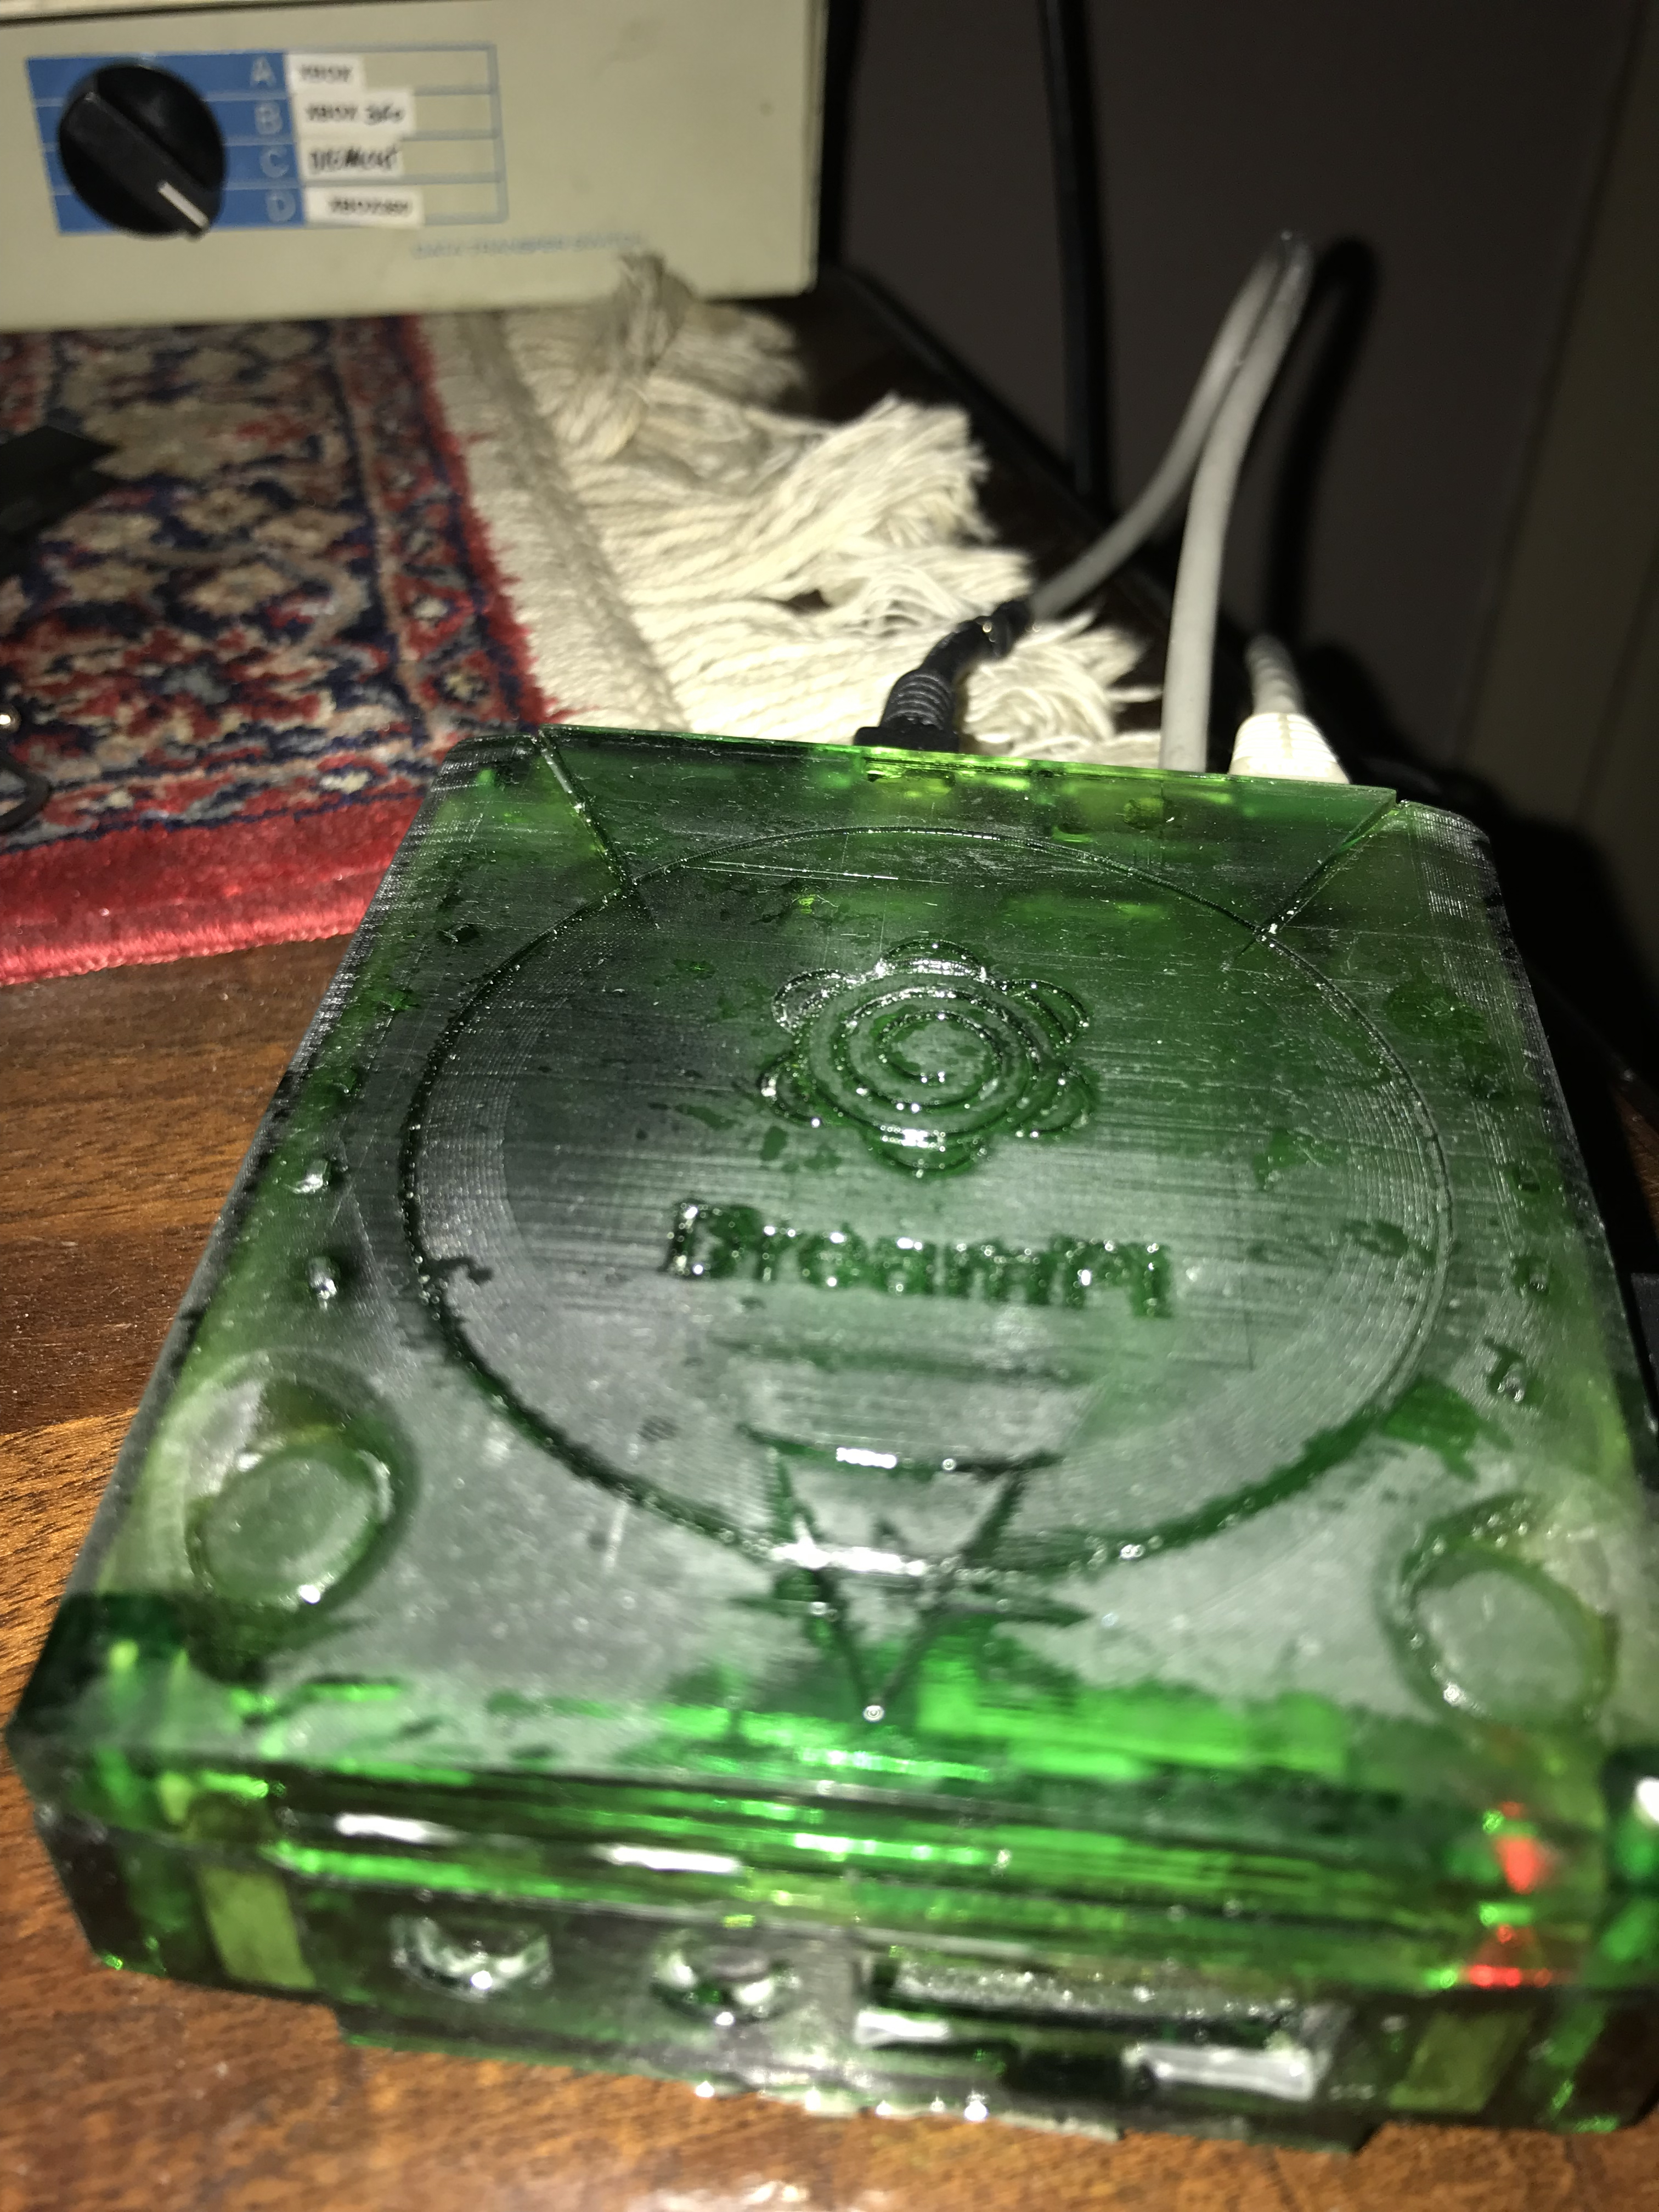 Maybe I can clean it a bit up, but for now the setup looks beter then it looked before.
There was room for the USB modem in the shell so i mod it in.
Only needed to extend the USB cable to make it work:
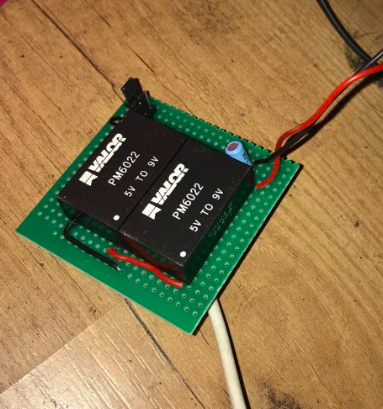
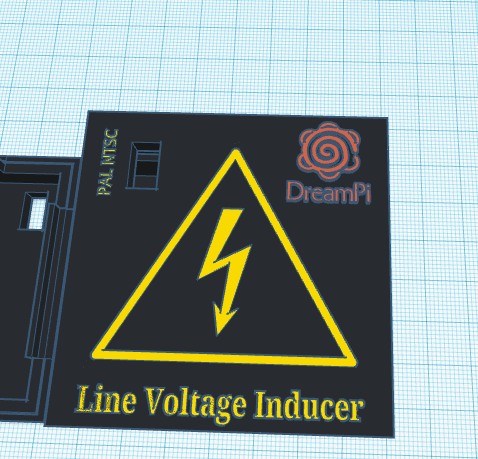
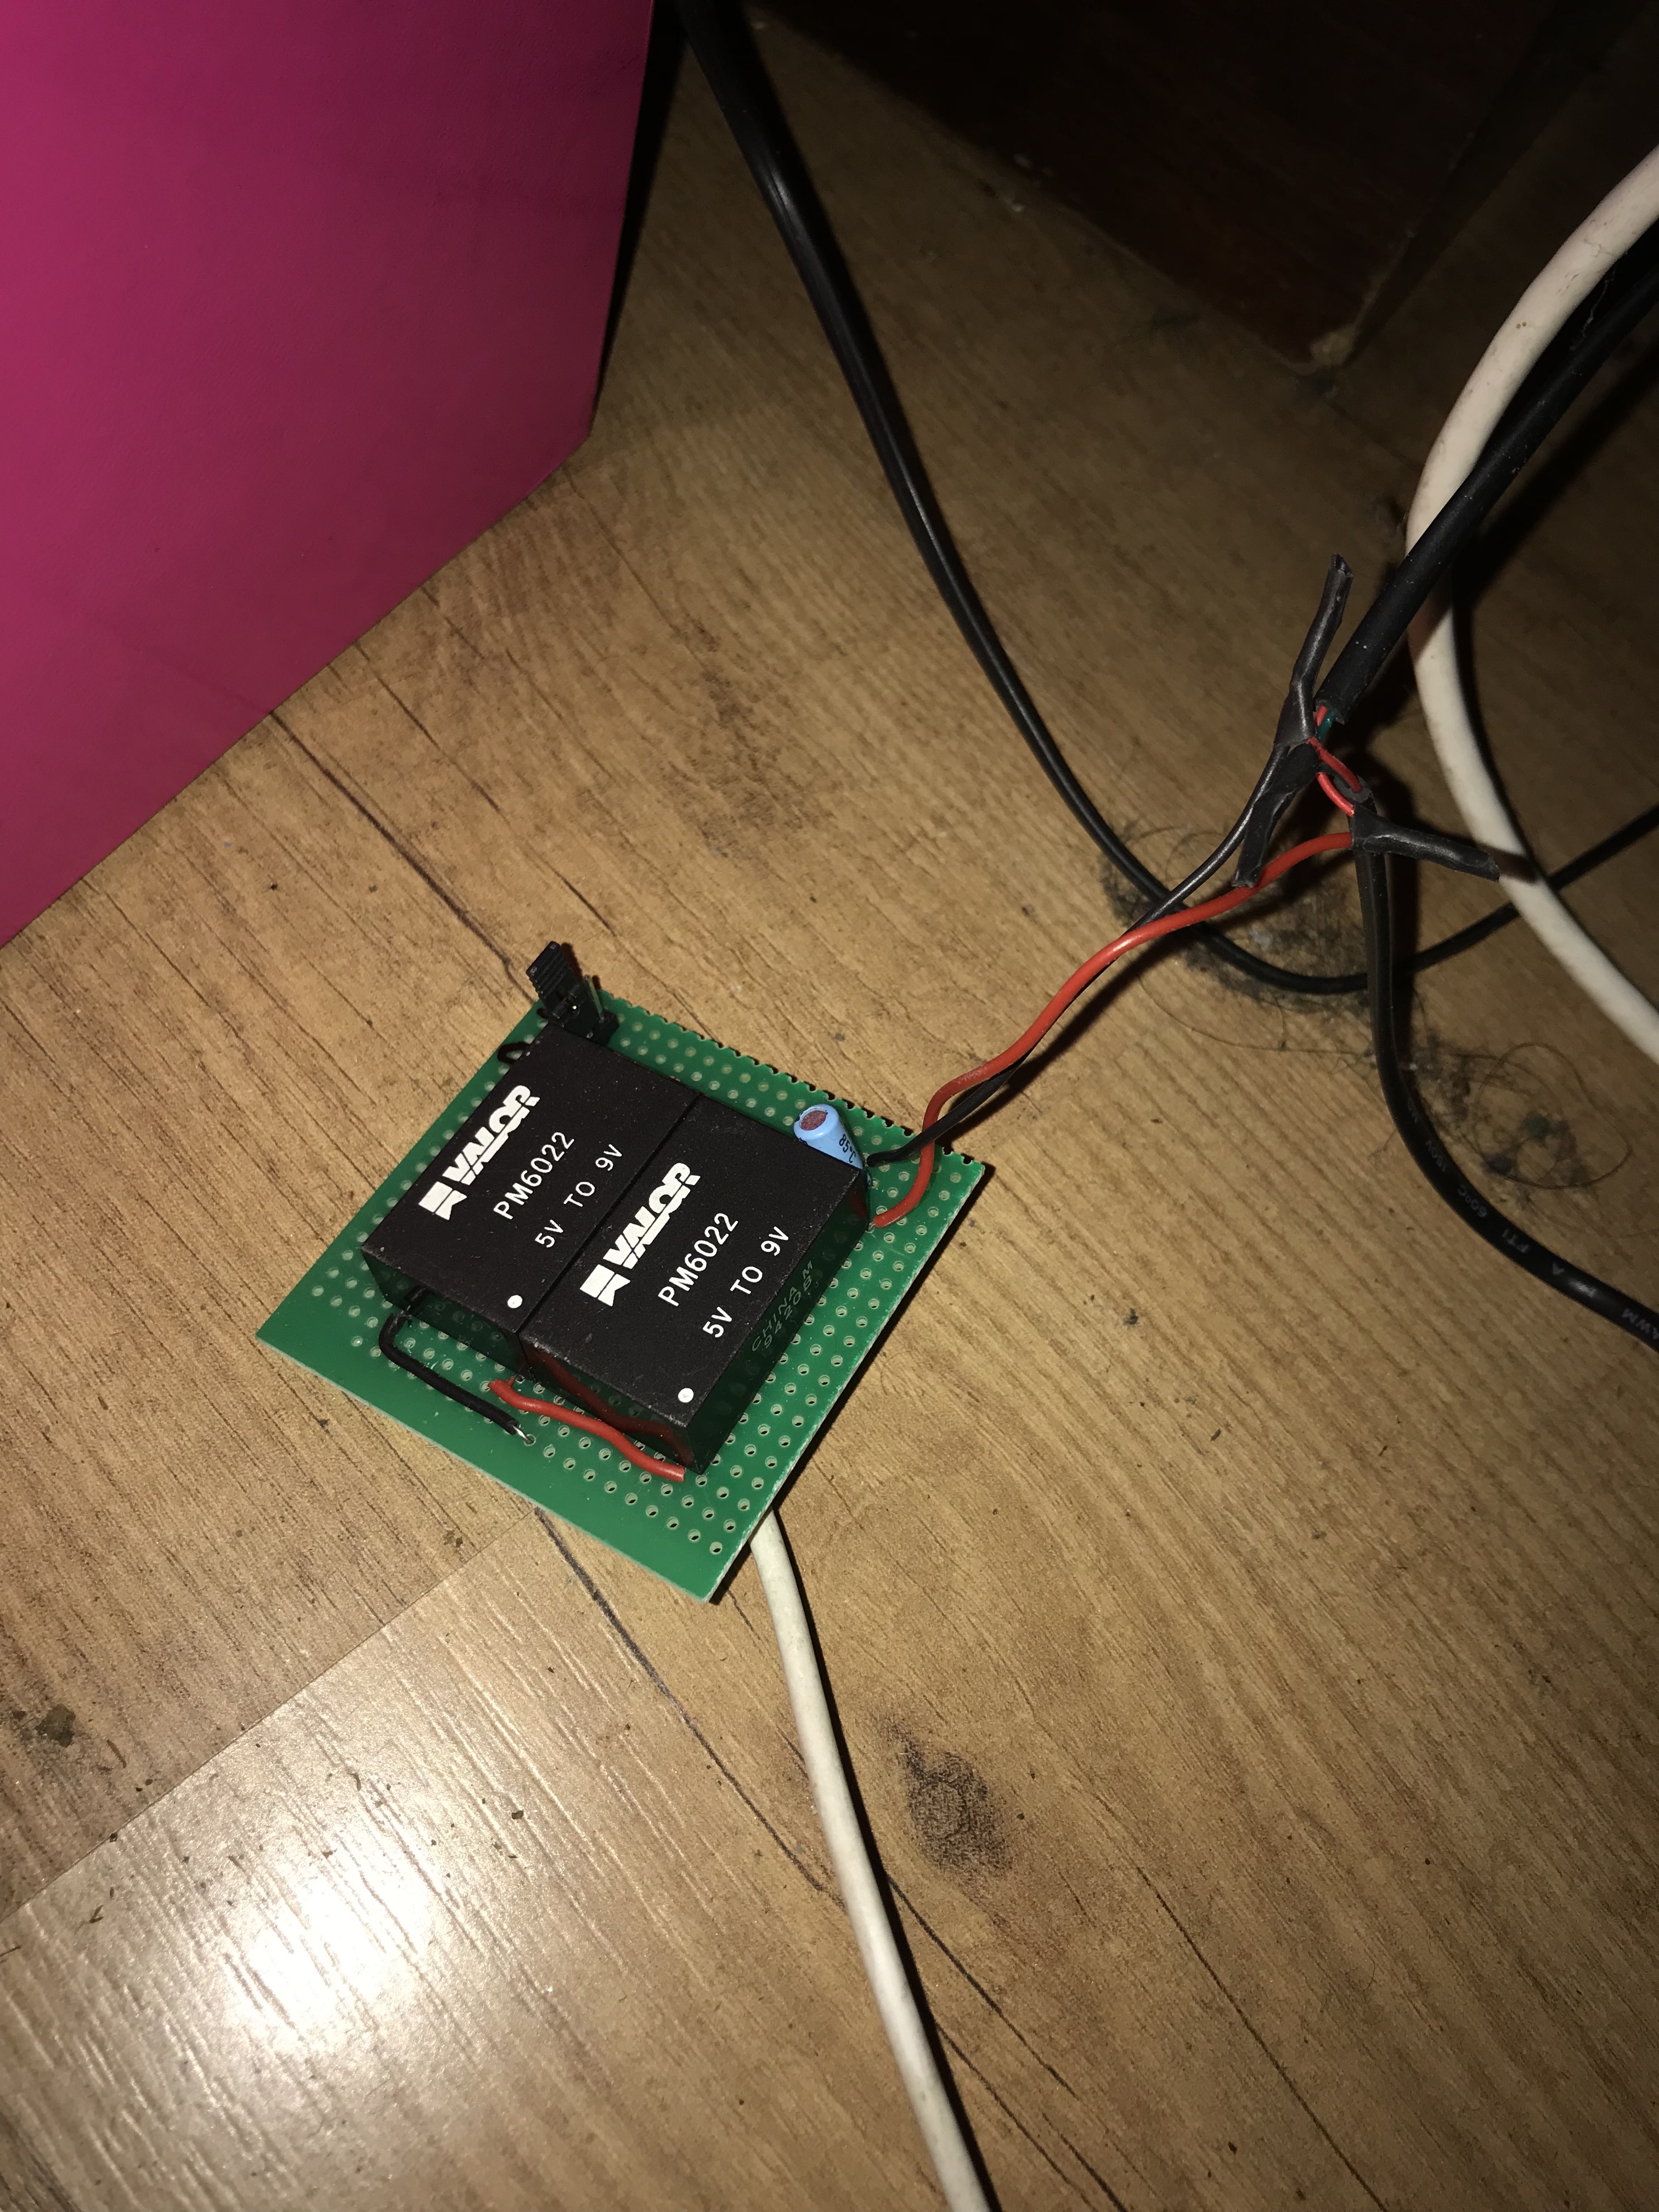
My Voltage Line inducer 2 x 9v because I live in PAL area!
Need to fix me a box or something for this thing…
Made a design
Will not print in color gonna use crayons to fill in the text and logo’s
Print pix soon…
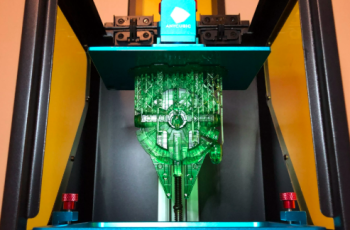
I recently got a Anycubic Photon.
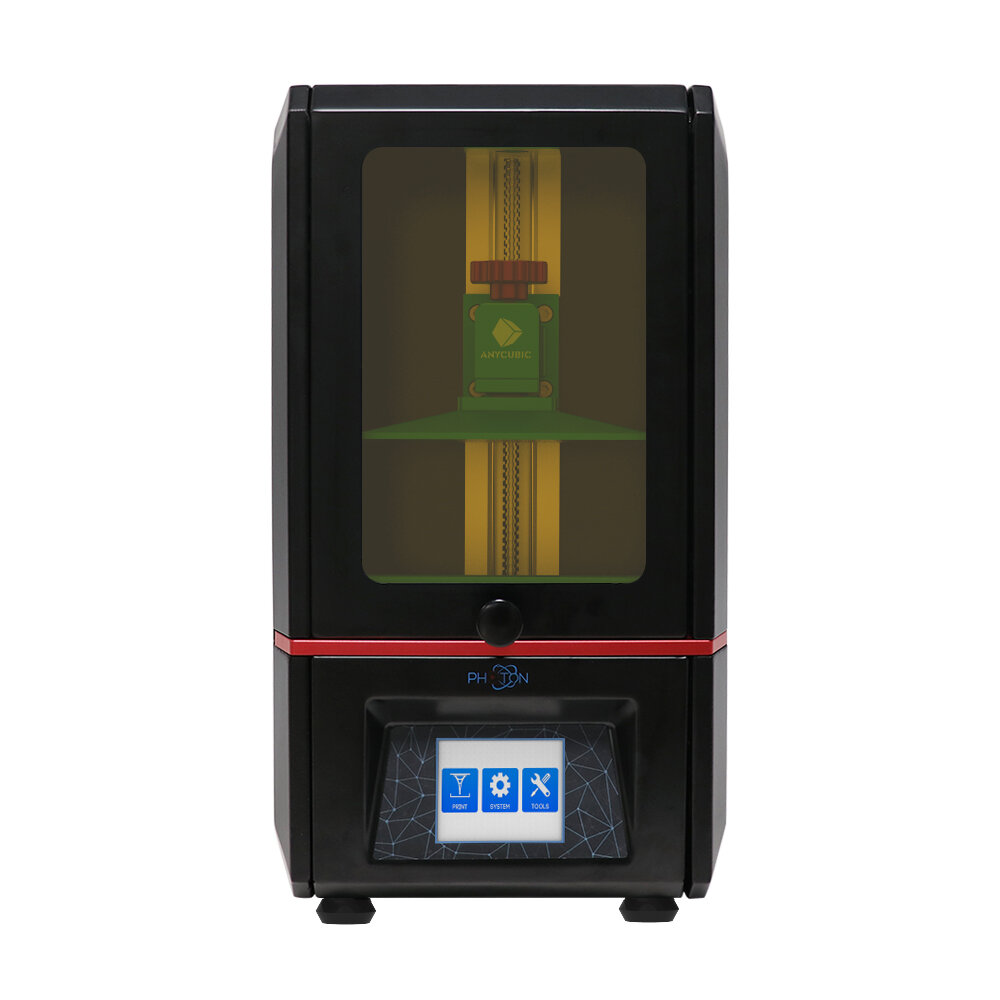
And you can’t change your infill so you need to use hollow models;
when you don’t want to use a lot of resin.

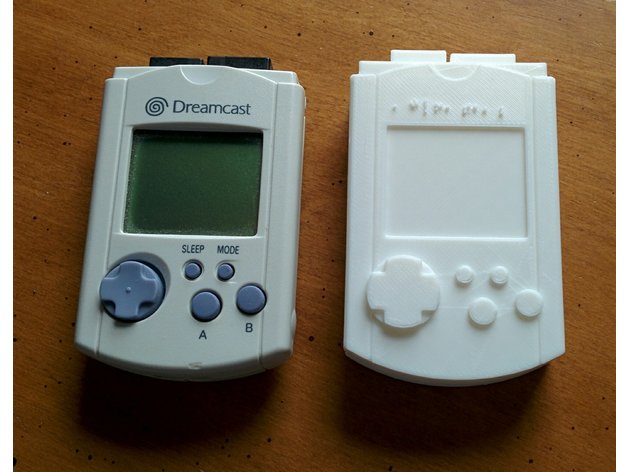
I found this vmu on Thingiverse by pcwzrd13:
Printed this for my self and looks good but want to try it on the Anycubic so i need to redesign it.
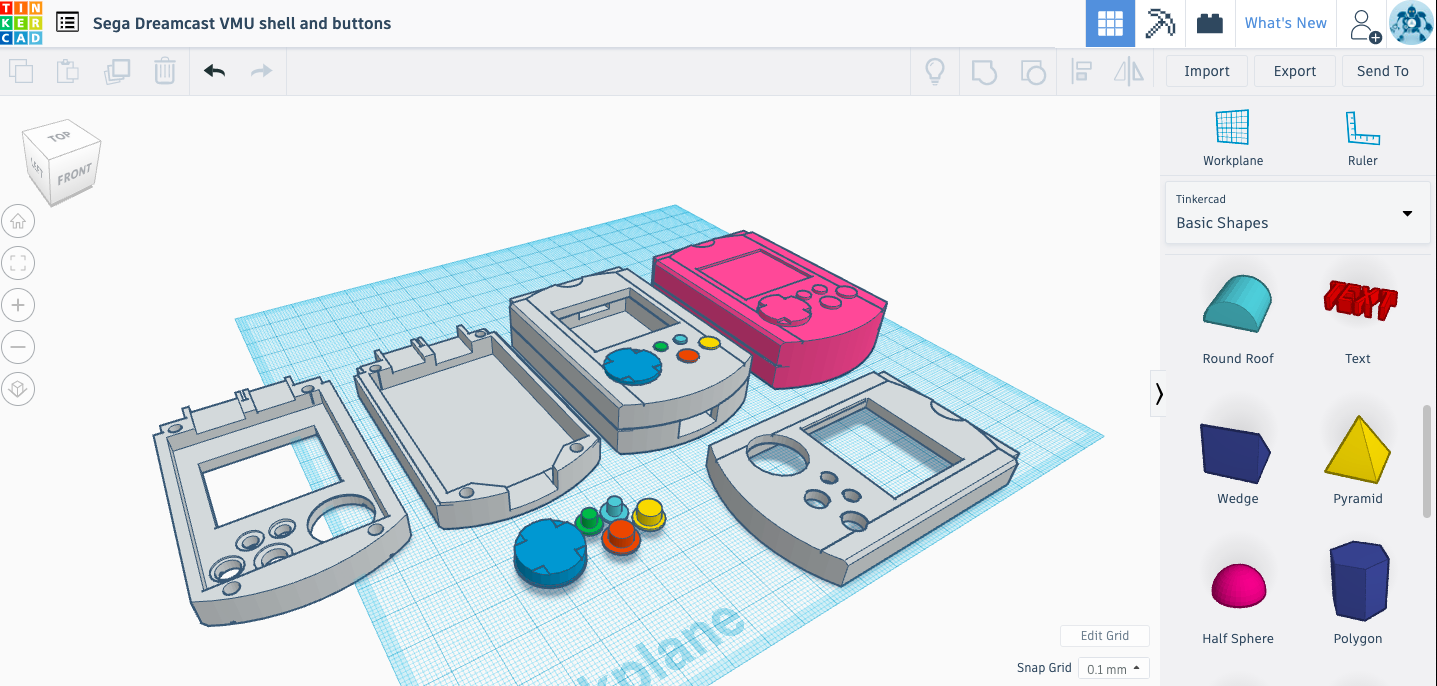
So I have been playing in ThinkerCad again result:
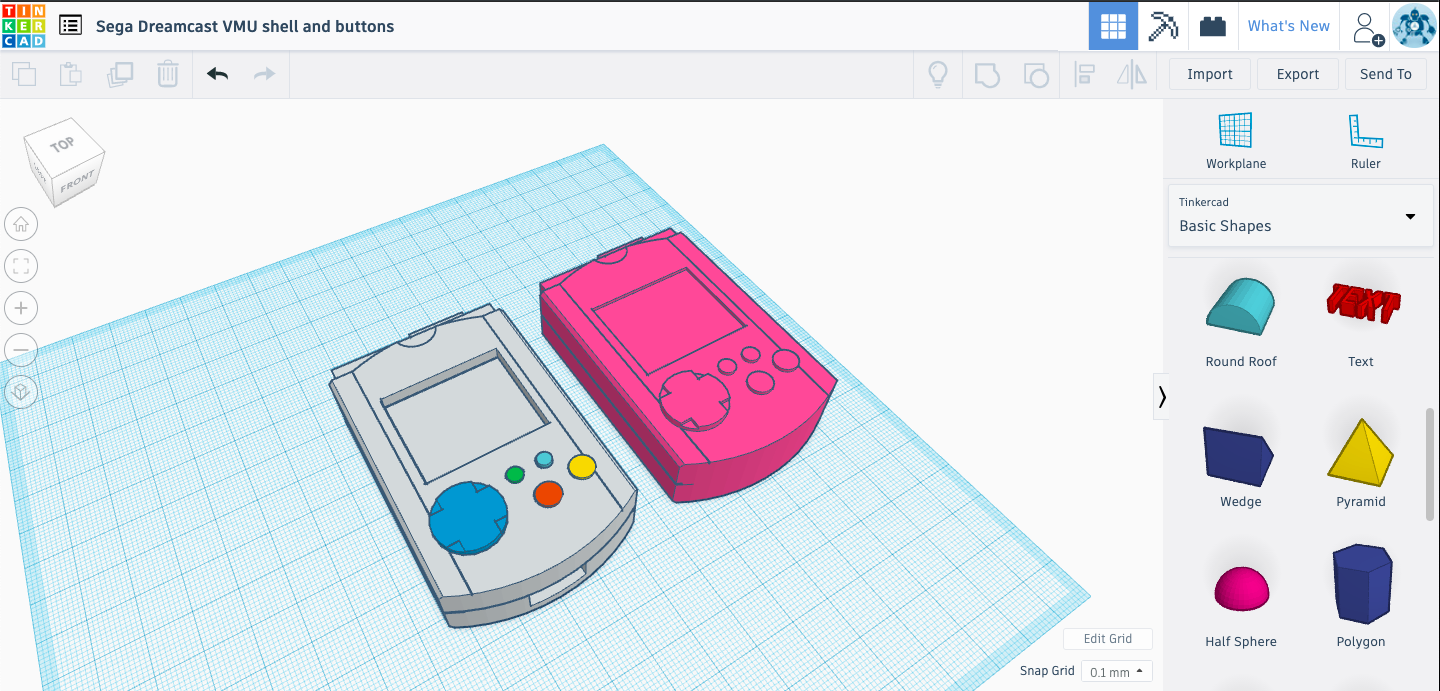
The VMU is now hollow and loose buttons 😀
Maybe I can fit a smartwatch in there have a cheap 10 euro watch laying around.
But lets print it first 😀
Today I dumped my hole content of my PS4. (FTP)
As curious as I am started looking in to some files using good old text editor.
boot_stats.txt and Vshlog.0.txt where very funny to see for my ps4 because
I never used my PS4 that much and boot_stats gives a nice report of that.
Location: System_Data\priv\vshlog\
VshLog.0.txt gives a more detailed over look on the boot times.
Boot_stats.txt
SUM_TOTAL 322
POWER_BUTTON 149
BOOTUP_AT_POWERON 12
BLUETOOTH 112
BG_DAILY_CHECK(EAP) 11
POWER_BUTTON(EAP) 8
EJECT_BUTTON 15
MAIN_SOC 12
DISC_LOADED 2
CEC 1
Very nice stats
First time I Rebooted my ps4 by VshLog.0.txt
Tue,15 Dec 2015 16:34:26 +0100 [SceSystemStateMgr] shutdown for reboot
Build shows up.
Tue,22 Dec 2015 04:52:26 +0100 [SceSystemStateMgr] Boot up (build#612804, EAP, BG_DAILY_CHECK)
Last entry of my vshlog:
Fri, 10 May 2019 07:36:22 +0200 [SceSystemStateMgr] Boot up (build#1007501, POWER_BUTTON)
I find it strange there is no real information on the file structure of the ps4.
Maybe i remember it wrong but the wiki on ps3 got a lot of more info on that then ps4..
Found a short list on PsdevWiki but they only show the Partitions on the ps4 side.
And the decrypted folders:

Only on for the removable media they cover the file structure a bit.
been exploring the file structure of the PS4 and there are a lot interesting things to look at.
The title_workaround.xml file got my attention…. but no info about this file.
\\System\priv\workaround_ctl_ro\
there is also a title_workaround.env and there is also a little bit of info on this for ps4.
- Z80: this .env files are known from cca 3.55? imho
- no idea what is new in 4.70 because i don’t have code/dumps for that firmware, but each fw brings something new
psdevwiki Env File the title_workaround.env is encrypted
System_Data\priv\workaround_ctl\
The PS4 requests a number of .env files from Sony servers, they use some form of encryption so I am uncertain as to what they contain.
Apparently the ps4 holds a lot of these .env files.
So its not only a PsN feature and something tells me these contain some keys and of course SCEI DNAS Root 01
also the suspend_blacklist_ps4 suspend_ng_list.xml looks interesting…
to continue
Links to check:
https://blog.madnation.net/
https://www.psdevwiki.com
https://davidstancu.me/hacking/2016/12/30/ps4-mitm.html

Recently I jailbroken my PS4 and now we gonna run Linux on it.
Lets start
INSTALLATION
The installation is identical to the previous version, DO NOT use other bzimage, initramfs or linux loader! Take only those linked on this page!
ATTENTION: the USB device that you will use for the installation will be completely formatted, all the data will be deleted!
IMPORTANT: for the moment the payload of the linux loader provided here is valid only for those on fw 5.05. Time permitting we will add those for the other fw.
Requirements
The distro does not require you to enter a username and password but you will need it if you would like to obtain root permissions:
username: psxita
password: changeit
CHANGE VRAM SIZE
The default payload you find on the https : //psxita.it/linux-loader page sets the Vram to 2GB, if you want to set it to 3GB use this payload to start linux: https : //psxita.it/linux-loader-vram3 , if instead you want to set it to 1GB: https : //psxita.it/linux-loader-vram1
You can use the payload you prefer at any time but during the psxitarch installation NEVER use the vram3 payload.
NOTE: RAM and VRAM are a single block, so the more vrams assigned, the lower the RAM. Do your accounts.
KNOWN ISSUES AND POSSIBLE SOLUTIONS
Acknowledgments
We want to thank the people who have and continue to contribute to the development of Linux on PS4 (hoping not to forget anyone)
Valentinbreiz , shuffle2 , flatz , CelesteBlue
The testers, who put up with us all these days, thanks for the patience guys;)
Shim , antonwantstosleep , glitch, Astromatik, Anekcahap
And all the guys on the discrete channel Official Playstation 4 Scene
THANK YOU!!
Information:
How to install linux and run Steam on Playstation 4
IMPORTANT!!
The USB device that you will use will be completely formatted, all the data will be deleted !!
exec install-psxitarch.sh (the keyboard layout is set to the US, to write the dash you have to use the key‘exec start-psxitarch.shOn the login screen, enter your
username psxita
password changeit
Hi Guys and Girls,
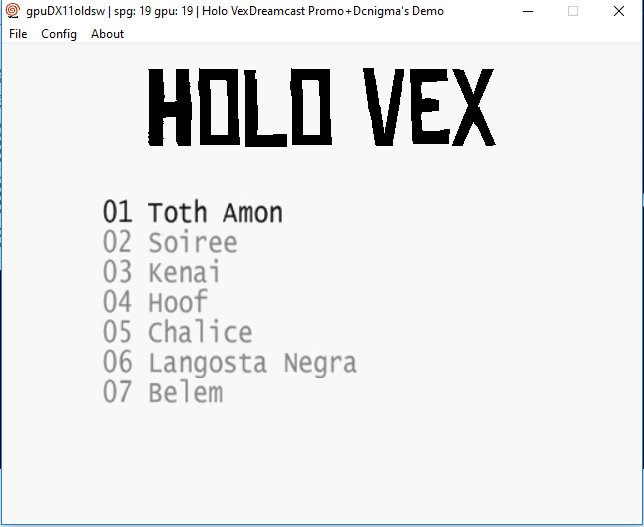
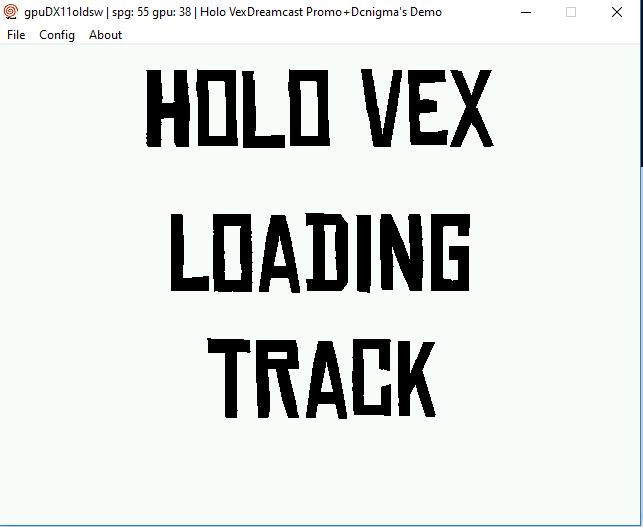
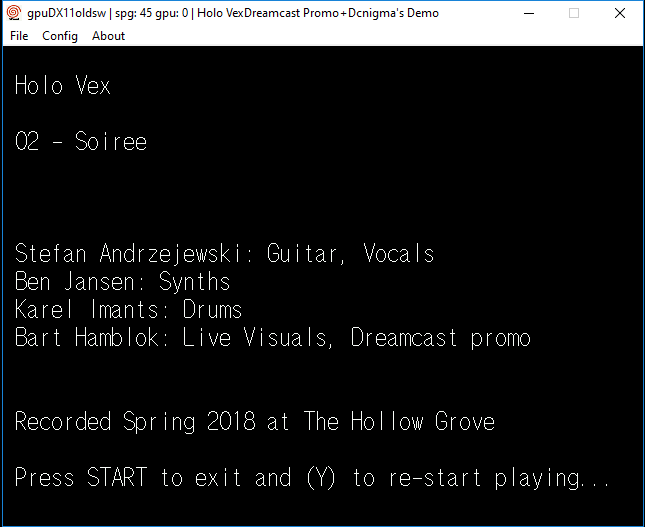
Today I did made my first steps into dreamcast development.
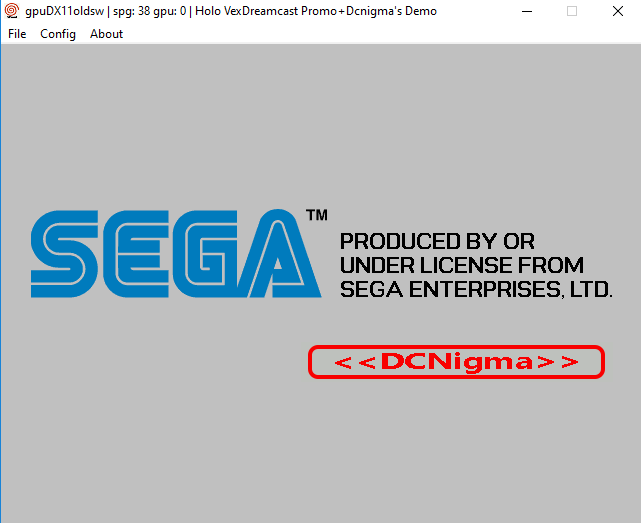
Most of my info i gotten from this page, very good dreamcast install info.
Here are some screenshot of all the tools i used creating my first demo:
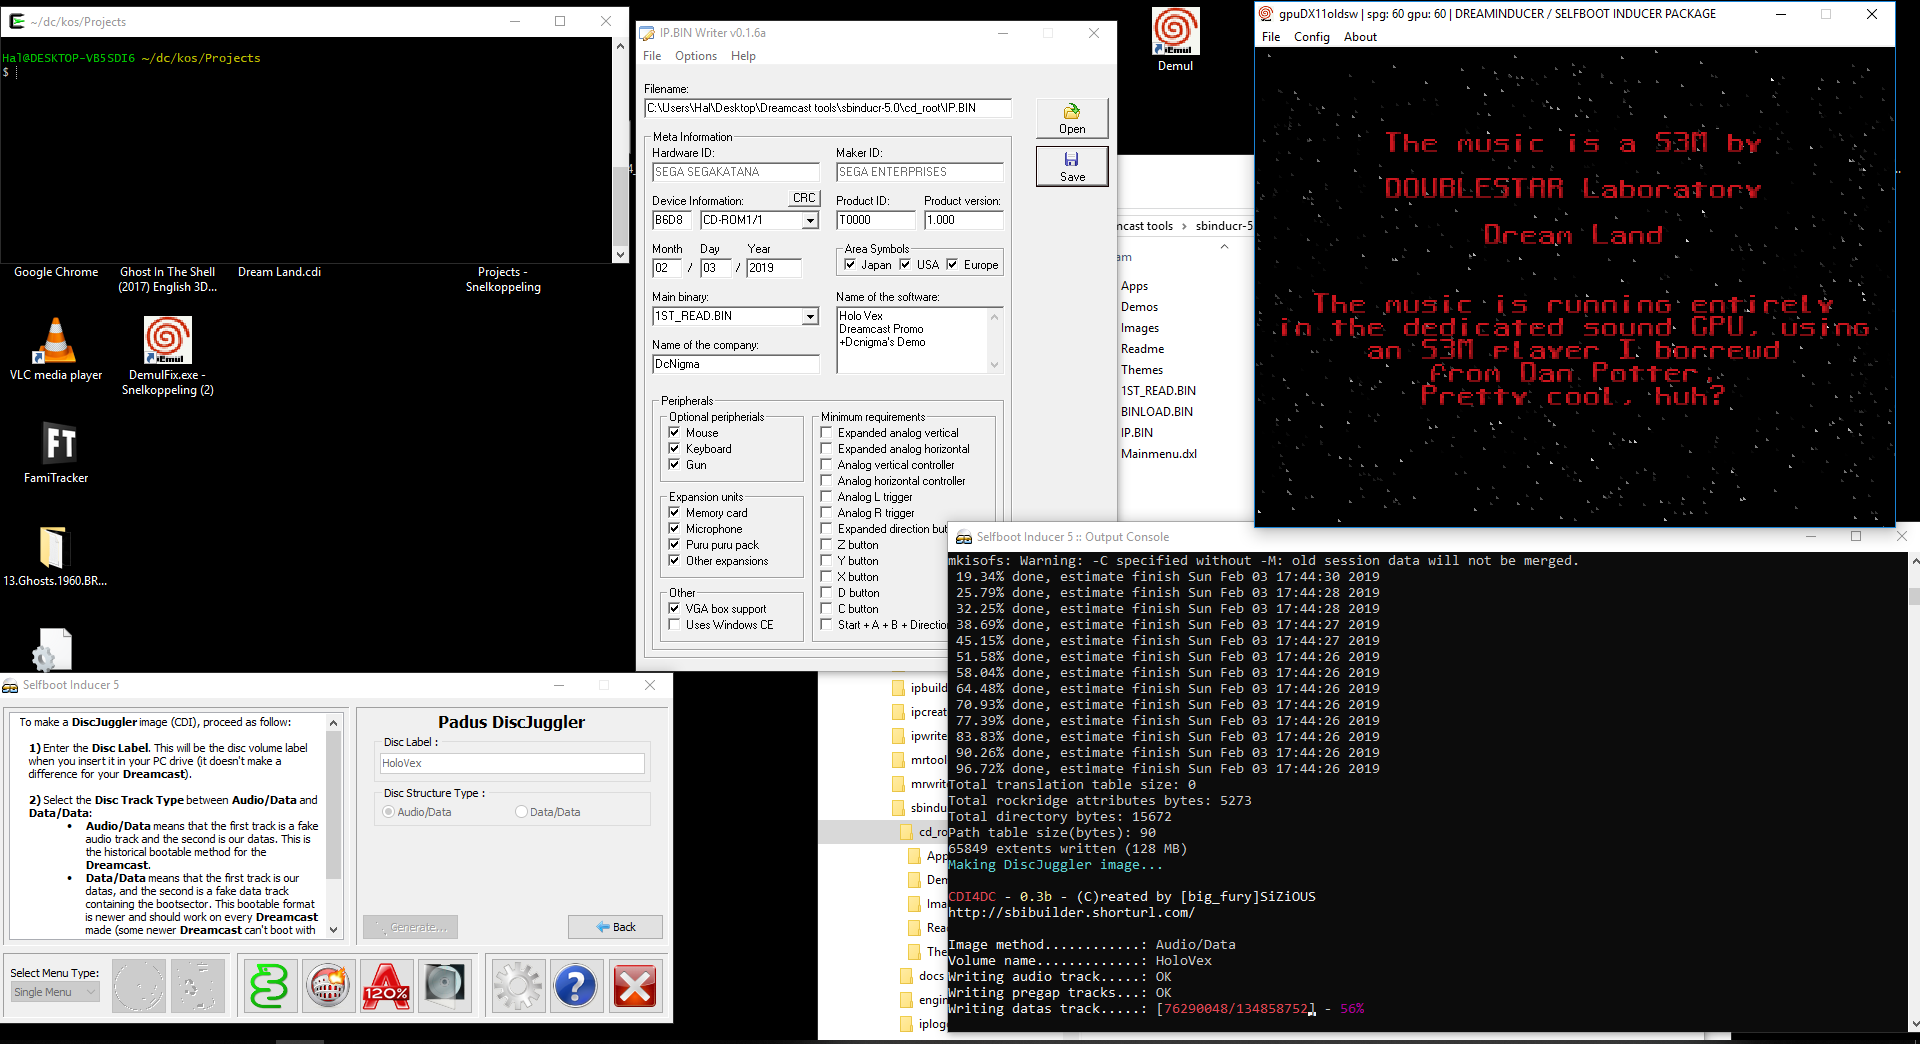
I made a demo menu for a promo disc of our band Holo Vex:

Downloads : coming soon.
Stay tune for part 2
This Dll will integrate Busy Light for 3CX More info about busy light => https://www.busylight.com/
Extract files and copy to C:\ProgramData\3CXPhone for Windows\PhoneApp When you have more Dll´s edit the “3CXWin8Phone.exe.config”
After the set up is done, you can launch 3CXPhone for Windows.
The plugin will start and the busy Light will start with a Green light.
(*Older video where in coming call is Red)
I have posted my source code at the 3cx forum and my github, so other people can collaborate to make a better plug-in.
3CX forum post: https://www.3cx.com/community/threads/busy-light-integration.48895/
Github: https://github.com/Dcnigma/Bizylight-3XC-integration
