INSTALLATION
The installation is identical to the previous version, DO NOT use other bzimage, initramfs or linux loader! Take only those linked on this page!
ATTENTION: the USB device that you will use for the installation will be completely formatted, all the data will be deleted!
IMPORTANT: for the moment the payload of the linux loader provided here is valid only for those on fw 5.05. Time permitting we will add those for the other fw.
Requirements
- A USB device of at least 12GB (better if 3.0 and better still if ssd)
- Keyboard.
- Mouse (if you don’t have a mouse you can connect dualshock 4 and use the touchpad as a mouse but it’s not the maximum of comfort).
- A USB hub.
- initramfs.cpio.gz: Download! md5: 7c38ca9c4eaff335ef52cef398ab1278
- bzImage md5: Download! md5: 20fe8941f2238b35822ea61939f2393d
- psxitarch.tar.xz Download! md5: 8058d928b9a3f9532d55535e166789f7
- Format the usb device in FAT32 (NOT EXFAT!), The usb device must have only one partition and the partition table must be mbr (MS-DOS (FAT32)), if the installer does not recognize the usb device use this program for format it: Download!
- If you have connected the PSVR disconnect it, also remove the processor unit (PU), keep only the PS4 connected to the TV.
- Go to the ps4 audio / video settings and set the resolution to 1080p.
- Go to the system settings and disable Enable HDMI connection and Enable HDCP
- Copy the bzImage, intramfs.cpio.gz and psxitarch.tar.xz files to the root of the usb device.
- Connect the usb device in the ps4.
- Connect mouse and keyboard
- Open the web browser and visit this page https : //psxita.it/linux-loader to start the linux loader payload (the page can be kept in the cache if you want), for those who want to use the bin can take it from here: Download ! md5: d5e698431b577bb83638a06cdc0eaf33
- After a few seconds the ps4 should reboot, wait until rescueshell appears
- Write exec install-psxitarch.sh to start installing psxitarch linux
- Wait, you should see a long list of files that are copied to the usb, at the end (after about 25/30 minutes) the distro should start automatically. If it doesn’t start, type exec start-psxitarch.sh
- Enjoy.
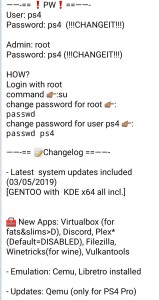
The distro does not require you to enter a username and password but you will need it if you would like to obtain root permissions:
username: psxita
password: changeit
CHANGE VRAM SIZE
The default payload you find on the https : //psxita.it/linux-loader page sets the Vram to 2GB, if you want to set it to 3GB use this payload to start linux: https : //psxita.it/linux-loader-vram3 , if instead you want to set it to 1GB: https : //psxita.it/linux-loader-vram1
You can use the payload you prefer at any time but during the psxitarch installation NEVER use the vram3 payload.
NOTE: RAM and VRAM are a single block, so the more vrams assigned, the lower the RAM. Do your accounts.
KNOWN ISSUES AND POSSIBLE SOLUTIONS
- The distro should be compatible with all ps4 models but some monitors and TVs with strange resolutions could give problems and not display anything on screen, if you have the chance try another tv.
- Graphics acceleration on ps4 pro is not yet fully exploited.
- The internal HD per hour is detected only on the CUH-10xxx and CUH-11xxx models.
- Vulkan RADV drivers are not stable yet (it will surely improve with time) in certain emulators / games they could give problems or perform worse than opengl, while in other better ones (see dolphin-emu).
- The wifi and the bluetooth could in some cases crash (disappear), in the case reboot the PS4, if it still does not work disable the network and launch linux using the cache. NOTE: despite the fix on some versions of ps4 the wifi and / or the bt may not work, unfortunately we have not yet found a valid solution for all consoles.
- In rare cases, USB devices (mouse, keyboard, …) may not be detected, in case the console is restarted
- It could happen that after installation some items in the menu are missing, to correct the problem go to “Jwm Config” and select “Refresh Menu”.
Acknowledgments
We want to thank the people who have and continue to contribute to the development of Linux on PS4 (hoping not to forget anyone)
Valentinbreiz , shuffle2 , flatz , CelesteBlue
The testers, who put up with us all these days, thanks for the patience guys;)
Shim , antonwantstosleep , glitch, Astromatik, Anekcahap
And all the guys on the discrete channel Official Playstation 4 Scene
THANK YOU!!

