May 4

PS4 And Linux.

Recently I jailbroken my PS4 and now we gonna run Linux on it.

Requirements

Lets start

INSTALLATION

The installation is identical to the previous version, DO NOT use other bzimage, initramfs or linux loader! Take only those linked on this page!

ATTENTION: the USB device that you will use for the installation will be completely formatted, all the data will be deleted!

IMPORTANT: for the moment the payload of the linux loader provided here is valid only for those on fw 5.05. Time permitting we will add those for the other fw.

Requirements

  • A USB device of at least 12GB (better if 3.0 and better still if ssd)
  • Keyboard.
  • Mouse (if you don’t have a mouse you can connect dualshock 4 and use the touchpad as a mouse but it’s not the maximum of comfort).
  • A USB hub.
  • initramfs.cpio.gz: Download! md5:  7c38ca9c4eaff335ef52cef398ab1278
  • bzImage md5: Download!  md5:  20fe8941f2238b35822ea61939f2393d
  • psxitarch.tar.xz Download! md5:  8058d928b9a3f9532d55535e166789f7
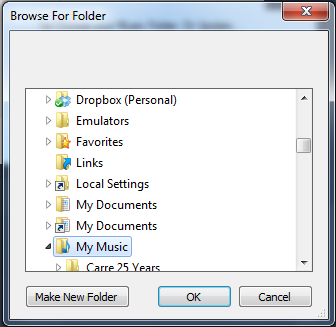
  1. Format the usb device in FAT32 (NOT EXFAT!), The usb device must have only one partition and the partition table must be mbr (MS-DOS (FAT32)), if the installer does not recognize the usb device use this program for format it: Download!
  2. If you have connected the PSVR disconnect it, also remove the processor unit (PU), keep only the PS4 connected to the TV.
  3. Go to the ps4 audio / video settings and set the resolution to 1080p.
  4. Go to the system settings and disable  Enable HDMI connection and  Enable HDCP
  5. Copy the bzImage, intramfs.cpio.gz and psxitarch.tar.xz files to the root of the usb device.
  6. Connect the usb device in the ps4.
  7. Connect mouse and keyboard
  8. Open the web browser and visit this page  https : //psxita.it/linux-loader to start the linux loader payload (the page can be kept in the cache if you want), for those who want to use the bin can take it from here: Download ! md5:  d5e698431b577bb83638a06cdc0eaf33
  9. After a few seconds the ps4 should reboot, wait until rescueshell appears
  10. Write  exec install-psxitarch.sh to start installing psxitarch linux
  11. Wait, you should see a long list of files that are copied to the usb, at the end (after about 25/30 minutes) the distro should start automatically. If it doesn’t start, type  exec start-psxitarch.sh
  12. Enjoy.

The distro does not require you to enter a username and password but you will need it if you would like to obtain root permissions:

username:  psxita
password:  changeit

CHANGE VRAM SIZE

The default payload you find on the https : //psxita.it/linux-loader page  sets the Vram to 2GB, if you want to set it to 3GB use this payload to start linux:  https : //psxita.it/linux-loader-vram3 , if instead you want to set it to 1GB:  https : //psxita.it/linux-loader-vram1
You can use the payload you prefer at any time but during the psxitarch installation NEVER use the vram3 payload.

NOTE: RAM and VRAM are a single block, so the more vrams assigned, the lower the RAM. Do your accounts.

KNOWN ISSUES AND POSSIBLE SOLUTIONS

  • The distro should be compatible with all ps4 models but some monitors and TVs with strange resolutions could give problems and not display anything on screen, if you have the chance try another tv.
  • Graphics acceleration on ps4 pro is not yet fully exploited.
  • The internal HD per hour is detected only on the CUH-10xxx and CUH-11xxx models.
  • Vulkan RADV drivers are not stable yet (it will surely improve with time) in certain emulators / games they could give problems or perform worse than opengl, while in other better ones (see dolphin-emu).
  • The wifi and the bluetooth could in some cases crash (disappear), in the case reboot the PS4, if it still does not work disable the network and launch linux using the cache. NOTE: despite the fix on some versions of ps4 the wifi and / or the bt may not work, unfortunately we have not yet found a valid solution for all consoles.
  • In rare cases, USB devices (mouse, keyboard, …) may not be detected, in case the console is restarted
  • It could happen that after installation some items in the menu are missing, to correct the problem go to “Jwm Config” and select “Refresh Menu”.

Acknowledgments

We want to thank the people who have and continue to contribute to the development of Linux on PS4 (hoping not to forget anyone)
Valentinbreiz , shuffle2 , flatz , CelesteBlue

The testers, who put up with us all these days, thanks for the patience guys;)
Shim , antonwantstosleep , glitch, Astromatik, Anekcahap

And all the guys on the discrete channel Official Playstation 4 Scene

THANK YOU!!

Information:
How to install linux and run Steam on Playstation 4


PSXItarch Information:

IMPORTANT!!
The USB device that you will use will be completely formatted, all the data will be deleted !!

  • Copy the initramfs, the bzImage, and the psxitarch.tar.xz file to the root of the USB device
  • Connect the USB device to the PS4, if you have connected other USB devices disconnect them (you must have only one USB device connected)
  • Start the exploit
  • Start the payload
  • Wait a few seconds, the screen should go black and then the rescushell screen will appear
  • Connect the keyboard, write:  exec install-psxitarch.sh (the keyboard layout is set to the US, to write the dash you have to use the key
  • Wait until the distro is installed (you should see a long list of files that are copied to the USB), the installation time varies from USB to USB (if you are crazy enough to install the distro on USB 2.0 it should take about 25 minutes)
  • After the installation, the distro should start by itself and show you the login screen, if you do not start to write
    exec start-psxitarch.sh
    (from the next restart the distro should start alone, you will not have to write anything)

On the login screen, enter your

username psxita
password changeit

Gentoo Information:

D5tGFWzXkAAOeg7D5tGlpvW4AM3boYD5tG7gxXoAAcETN  D5tHKyZWwAE2dAv (1)

Category: Download, Linux, PS4 | Comments Off on PS4 And Linux.
September 24

Ps3 Mod by Ipod :-D

My first ps3 that i modded i used my ipod touch to unlock it.
it was fairly easy to do below you can find a guide to setup the exploit.


This picture shows the mod in progress.
(How to install PSfreedom on iPod touch 1G)Updated PL3 payload

What you will need:
An iPod Touch 1g running 3.1.2 with blackra1n
Vmware Player
Ubuntu 10.04
Openiboot
PS3freedom for ipod touch PL3
PS3freedom for iPhone 2g/3g PL3
Winscp
iFunbox
OpenSSH (Installed from Cydia on your iPod touch)Alright, so I start here assuming you have the above.
Please note that 3.1.2 iPods with redsn0w may or may not work.Install ubuntu on your vmware player and start it.
First we will install OpeniBoot, get it from the link.
First, make a folder in your home directory named openiboot, move the files from the download above into the openiboot folder.Now, open a terminal (under applications, accessories) and type “cd ~/openiboot” without the quotes. Next, type “sudo su” (for the rest of this section, do not type the commands with the quotes around them). Enter your password that you use to sign in to linux (don’t be afraid if you don’t see yourself typing anything, its a security feature).Now then, we get to installing openiboot. Plug your iPod touch in with recovery mode (shows up as connect to itunes on your iPod). In VMware, go to the VM tab, go to removable devices, and look for anything saying apple device or iPod. On that, click “Connect (Disconnect from Host)”.Now, in terminal type “./loadibec openiboot.img3”. You should see openiboot come up on your iPod Touch. On your iPod Touch, click the top left button once, so you highlight Console. Now, click your home button. On linux, in terminal, type “./oibc” quickly after doing that last step. You should see the text on your iPod come up in the linux terminal. When you see “Welcome to OpeniBoot” type “install” into the terminal.

You should it start to install, so wait a few minutes until it is completed. Congratulations, you have installed OpeniBoot and finished the first part of the tutorial!

Now then, to get the exploit installed installed ( Don’t need ubuntu from now on)

Take the 2 files from the .gz(extract using 7zip) you downloaded (android.img.gz, zimage) and put them in a place you will remember. Next, open up iFunbox(in windows) and navigate to root file system/private/ and copy those 2 files into the var folder (root file system/private/var).

Make sure that the 2 files are exactly the same size as the files on your computer, as this is an annoying part to screw up on. Now that that is done, open up winscp. But before you can do anything with that, go to your iPod Touch and find your IP address (Press the blue arrow in Wifi Settings).

Now, copy the IP address into the winscp “host name” box. Then put the name “root” as username, and the password “alpine” as the password. Now, before connecting, change the file protocol to scp. Then, press login. It should take a moment, then display your iPod Touch directories on the right side of the screen.

Navigate to private/var and check that all 2 files are there. Now, right click each file, select properties, and change the permissions to 777 (make sure the first 3 rows of boxes are selected).

Turn your iPod Touch off, and then on, and OpeniBoot should come up. Select Android, and it should boot.

The actual exploit.

Switch of ps3 and then switch it off and on at the back.
Have the iPod connected to the PS3 with no other USB devices.
Click on Android on your ipod
When you see the Loading Firmware line, hit your power+eject
Press power then eject quickly.
Should boot up with the 2 new icons

Category: Download, ipad/iphone, Linux, Mod´s, PS3 | Comments Off on Ps3 Mod by Ipod :-D
September 24

Beta tester for a PS3 tool

Back in the hay days of the ps3  Contacted me to test his new ps3 tool.
Its a all in one tool for ps3 in a nice GUI.

He contacted me because i have been checking different build versions of eboot.bin  files.
Results of scetool:

I shared a lot of info on forums like psx-scene.com ps3hax.com and i got his attention.
On twitter he asked me to beta test the final version of his tool.
I never beta tested a program my self and found it a great honor to do.
Over twitter i told him my results and he updated the bugs afterwards.
This was a great experions and found it very cool.
Below is the release info on psx-scene.com where you can download the tool your self.

Source: psx-scene.com

In a turn of events, PsDev has released his final edition of PS3Tools GUI Edition, v3.3.

He has also stated he plans on releasing the source code to his project at a later time, so others may continue the work he started. He has told me the reason he wishes to stop work on this project, is so that he can move on to develop other projects. Below you will find all 12 releases, all of which were released here at PSX-Scene first. Thanks PsDev!

It has been fun making this program, it has gone threw 12 awesome updates. I’m sad to stop working on it, but I’m happy to see what you guys can continue to make it into. I will release the source code, but not today, not in this thread. lets leave that for another time and focus on this release. This is also the most stable version, all features have been tested not only by me but other people too, (Dcnigma, Industerialcode) and all features work properly.


CHANGES:

  • scetool v0.28 added
  • New keys added to keyset
  • New script for EBOOT resigning
  • New file system layout
  • Removed do it button
  • Now everytime you select a option from one of the drop down menu it does that option right away
  • Removed SELF tool
  • Cleaner
  • Every option has its individual message box completion of operation

There is a new way that the file system works. There is a individual folder for all the tools (PUP Tools, scetool, Core_os Tool ect) And when you want to use the tool just place the file in the correct folder and use the GUI. This system is cleaner and allows me to not use as much code.

there is a script in the scetool folder called fix. This script is what can be edited to your standards for the EBOOT resigning. I did this so if you want to sign for 3.41 ect or change compression or anything just edit the script and run the GUI no need for new update, much more efficient

@echo off
FOR /F "tokens=1,2 delims= " %%A IN ('scetool.exe -i EBOOT.BIN') DO (
if [%%A]==[ContentID] set CID=%%B
)
scetool.exe --decrypt EBOOT.BIN EBOOT.ELF
rename EBOOT.BIN ORIGINAL_EBOOT.BIN > NUL
pause
scetool.exe --sce-type=SELF --compress-data=FALSE --skip-sections=TRUE --key-revision=0A --self-auth-id=1010000001000003 --self-add-shdrs=TRUE --self-vendor-id=01000002 --self-type=NPDRM --self-fw-version=0003005500000000 --np-license-type=FREE --np-content-id=%CID% --np-app-type=EXEC --np-real-fname=EBOOT.BIN --encrypt EBOOT.ELF EBOOT.BIN
pause
del /Q EBOOT.ELF > NUL
scetool -i EBOOT.BIN
pause

There is no more “Do It” button, since I change the way the files are modified I thought I will just make every option a button it self, si when you click the option you like from the drop down menu it will do the operation

Note* After click may take a sec for the operation to start be patient.
DOWNLOAD: PS3Tools Final


Category: Coding, Download, Homebrew, PS3, Software | Comments Off on Beta tester for a PS3 tool
September 20

Test card/screen Simulator!

My dad is a Ham Radio/TV amateur and he asked if i could write a better version of his version Test card/screen program that he found on the internet.

http://home.worldonline.nl/~peterdb/testcard/ Site is offline 

My version is almost a one 2 one copy of Peter his program the only different aspect is: custom screen options.

My dad complains that after he upgrade his video card he could get Peter’s version working correct.

So i looked at the application and told my dad that i could code that in one day and make it better.
I took this challenge because i written some code for custom screen options before.

My version got all basic functions that peter’s version got i left out the RGB options because otherwise i couldn’t make the dead line of one day 😀

If you select view set location Testbeeld you get another window and you can drag it to the desired screen/location…
after hitting the Set button the location is fixed.
If you hit the fullscreen button it will load the Test card/screen on that location.
Some more test card options:

Download: Dropbox download. Testscreen app

Source code : Github
Video demo:

Category: Coding, Design, DIY, Download, Programs | Comments Off on Test card/screen Simulator!
September 14

My Wii homebrew pong game

In 2010 i made a WiiPong game just to demonstrate that Wii Game Studio can have Multiplayer..

At that time Wii Game Studio was under heavy fire from developers. they said it was not really a good product…….

And that the creator can’t charge money for other peoples work…

It was a hole flame war, ok the creator
did’t credit any of the dev kit or other tools used for compiling Wii homebrew.
And it din’t came also include in the pack.. so at the time i found it no problem still not.
I found it easy to create simple games for my Wii without a extend knowledge of the WII Dev kit..

So for a graphic designer that wants to learn and create games for his wii its was a dream came true.

I payed for the gui and start making my first demo’s for my self..

Later on tehskeen.com wii game studio got such a bad name that i wanted to do something about it..

So i decided to make a game for it. to show that wii game studio can produce a good looking homebrew game and have multiplayer in a creative way..

Because Game studio only supported one wii controller you needed a good idea to map your controls for
two players on one controller..

so i thought to my self witch game use’s simple controls?

Pong!

wiipong

So my WiiPong version of Pong will use only 1 controller.
There is no cpu play because the goal of this project was to show that 2 player games
where possible in Wii game studio you just needed to be creative to work it out..

How to play?
Left and Right for player 1
Plus and Minus for player 2

Game Types:
– Best of 3
– Best of 5
– Best of 100

Download at:  wiiPong.rar incl tutorial for Wii Game studio

Category: Download, Homebrew, Wii | Comments Off on My Wii homebrew pong game
June 25

New Mp3 player for my Touchscreen Radio.

 Last week i tried DWjukebox on my Touchscreen Radio,
the read me file states that it will not work with a touchscreen or mouse above windows xp
 
So i lost all my touchscreen goodness if i use that program.
I did a search for alternative for it but could’t find any good that looked good enough for standalone player….
So i decided to code my own version in Visual Studio 2010 (VB)
It works very easy:
 First time you run the program you will need to setup the Database.
I do this by making a simple TXT file containing the location of the files.
First select the location of you mp3 files:
Example users/My Music
Then Press the button Prepare TXT and wait until the console screen closes it self and
you return to the first screen.
The program will use a predetermined folder for saving the TXT file.
if you click the Use Mp3 TXT file you will be pointed in to the right folder.
Just select the mp3list.txt and the contend of the txt file will be loaded in to the database.
You can check it and I suggest you do this the first time you Run the program.
When you don’t check the database the Jukebox player will not load the database.
But if you close (click the 25 cent button) and restart it will load the Jukebox and the database
directly. This is a little bug and is in reality very easy to fix only did’t do it for now.
Honestly its not that a big bug because it will only happen at first setup. After setup it will correct
the bug at loading.

Demo video, sorry for no original music from the video.
The source code and the project files are available on Github.
A compiled version can be Downloaded here: Touchscreenmp3Radio
April 28

Building a panic button!


Part 2
Part 2
Part 2
Part 2
Part 2
Part 2
Part 2
Part 2
Part 2
Building a panic button!Part 1
Here are some screenshots of my version 2 (download below):
This version got more features like the Dream cheeky Big red buttons software.
in the settings you can choose your SWF to play for the bomb movie or counter movie.
I used the orignal dream cheeky files 😉 (no longer available to the public 🙁 )
You can also add a website if you like.
Screenshot of the timer setup (i’m working) :
This screen will show up and will ask you to hit the button (left mouse button)
Screenshot of Punch up

its the same only it included a jackpot game i made:

Bonus software: Flappy Bird (no source code)
 Here is a demo of the game i found some code online and changed it to the left mouse button in stead of the spacebar.

Category: Coding, Design, DIY, Download, Mod´s, Soldering, Wood Work | Comments Off on Building a panic button!
April 5

Darth Maul Quake III Model.

Darth Maul

File Info: Darth Maul

Title: Darth Maul
Author: Nigma
Created: 1/16/2000
Updated: 6/4/2002
Downloads:
Also known as:Quake 3: Arena

Description: Darth Maul

Apprentice to the Sith Lord Darth Sidious is sent to Disrupt The mission of Queen Amidala and the Jedi

Unzip Maul.pk3 and put them in the baseq3 folder.================================================================
Model Name: Darth Maul
installation directory: baseq3\
Author: <—–[NIGMA]—–>
Skin Author: NIGMA
Email Address: bart_is@hotmail.com

Model description :Apprentice to the Sith Lord Darth Sidious is sent to Disrupt The mission of Queen Amidala and the Jedi

Other info : None

Additional Credits to :

================================================================
* Play Information *

New Sounds: no
CTF Skins: no

* Construction *
Editor used : 3DS Max 3, Adobe Photoshop, Skin Mapper.

* How to use this model *

Unzip maul.pk3 and put them in the baseq3 folder.

* Copyright / Permissions *
QUAKE(R) and QUAKE III Arena(R) are registered trademarks of id Software, Inc.

This model may be freely distributed in any form, UNALTERED. Which means, you can’t pull the readme file out of the zip, or add your own stuff to it and pass it along.